Page 147 of 244
A punctured tyre or a burnt-out bulb?
At times, a problem may interfere with our journey.
The pages on emergencies can help you to deal with critical
situations independently and with calm.
In an emergency we recommend that you call the freephone
number found in the Warranty Booklet.
You can also use the universal, national or international freephone
number to find your nearest Alfa Romeo Dealership.
IN AN EMERGENCY
HAZARD WARNING LIGHTS.......................146
CHANGING A BULB............................146
REPLACING FUSES . ...........................151
CHANGING A WHEEL ...........................157
TIRE REPAIR KIT . .............................160
RUN FLAT TYRES.............................163
JUMP STARTING..............................163
FUEL CUT-OFF SYSTEM . ........................165
AUTOMATIC TRANSMISSION GEAR LEVER UNLOCKING.....165
BROKEN-DOWN VEHICLE TOWING..................166
TOWING THE VEHICLE..........................166
Page 148 of 244

HAZARD WARNING LIGHTS
CONTROL
54)
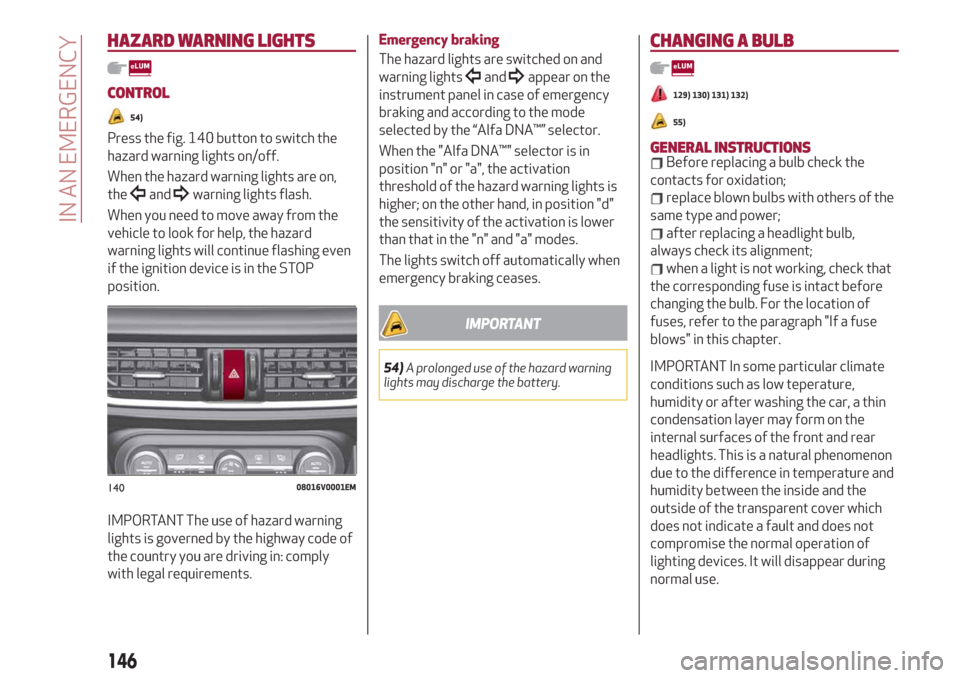
Press the fig. 140 button to switch the
hazard warning lights on/off.
When the hazard warning lights are on,
the
andwarning lights flash.
When you need to move away from the
vehicle to look for help, the hazard
warning lights will continue flashing even
if the ignition device is in the STOP
position.
IMPORTANT The use of hazard warning
lights is governed by the highway code of
the country you are driving in: comply
with legal requirements.
Emergency braking
The hazard lights are switched on and
warning lights
andappear on the
instrument panel in case of emergency
braking and according to the mode
selected by the “Alfa DNA™” selector.
When the "Alfa DNA™" selector is in
position "n" or "a", the activation
threshold of the hazard warning lights is
higher; on the other hand, in position "d"
the sensitivity of the activation is lower
than that in the "n" and "a" modes.
The lights switch off automatically when
emergency braking ceases.
IMPORTANT
54)A prolonged use of the hazard warning
lights may discharge the battery.
CHANGING A BULB
129) 130) 131) 132)
55)
GENERAL INSTRUCTIONSBefore replacing a bulb check the
contacts for oxidation;
replace blown bulbs with others of the
same type and power;
after replacing a headlight bulb,
always check its alignment;
when a light is not working, check that
the corresponding fuse is intact before
changing the bulb. For the location of
fuses, refer to the paragraph "If a fuse
blows" in this chapter.
IMPORTANT In some particular climate
conditions such as low teperature,
humidity or after washing the car, a thin
condensation layer may form on the
internal surfaces of the front and rear
headlights. This is a natural phenomenon
due to the difference in temperature and
humidity between the inside and the
outside of the transparent cover which
does not indicate a fault and does not
compromise the normal operation of
lighting devices. It will disappear during
normal use.
14008016V0001EM
146
IN AN EMERGENCY
Page 150 of 244
Light bulbs Type Power Figure reference
Main beam headlights, front side lights/daylight running lights
(DRL)(*)H15 55/15W D
Dipped beam headlights
(*)H7 55W D
Front direction indicators
(*)PY24W 24W B
Fog lights
(*)H11 55W E
Main beam/dipped beam headlights (Xenon gas discharge) D3S 35W F
Sun visor light 1.5CP 2.1W C
Glove compartment light W5W 4W A
Boot ceiling light W5W 5W A
Puddle lights (under door panel) W5W 5W A
(*) Only for basic version headlight with halogen main beam/dipped beam headlights
148
IN AN EMERGENCY
Page 151 of 244
REPLACING AN EXTERNAL BULB
Front light cluster with main
beam/dipped beam halogen headlights
Dipped beam headlights
To change the bulb of these lights,
proceed as follows:
working inside the engine
compartment fig. 141;
remove the cover fig. 142;
remove the bulb/connector assembly
from the headlight body fig. 143;
remove the bulb by sliding it off the
connector;
install the new bulb, making sure it is
correctly inserted in the connector;
then insert the bulb/connector
assembly in the housing on the headlight
body and make sure that it is locked
correctly;
remount the lid and cover, tightening
the fixing bolts.
Main beam headlights
To change the bulb of these lights,
proceed as follows:
working inside the engine
compartment fig. 144;
remove the cover fig. 145;
turn the bulb, bulb holder and
connector assembly anticlockwise and
then slide it off the headlight body
fig. 146;
14108026V0023EM
14208026V0002EM
14308026V0003EM
14408026V0023EM
14508026V0004EM
149
Page 152 of 244

remove the bulb by sliding it off the
bulb holder;
install the new bulb, making sure it is
correctly inserted in the bulb holder;
then insert the bulb, bulb holder and
connector assembly in the housing on the
headlight body and turn it clockwise,
making sure that it is locked correctly;
refit the protective cover.
Direction indicators
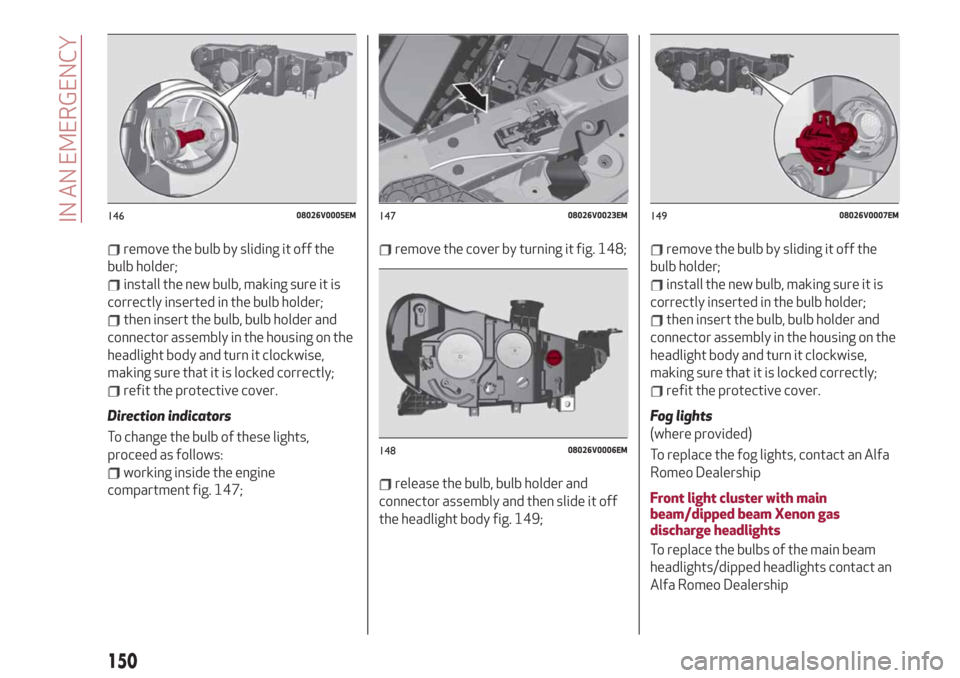
To change the bulb of these lights,
proceed as follows:
working inside the engine
compartment fig. 147;
remove the cover by turning it fig. 148;
release the bulb, bulb holder and
connector assembly and then slide it off
the headlight body fig. 149;
remove the bulb by sliding it off the
bulb holder;
install the new bulb, making sure it is
correctly inserted in the bulb holder;
then insert the bulb, bulb holder and
connector assembly in the housing on the
headlight body and turn it clockwise,
making sure that it is locked correctly;
refit the protective cover.
Fog lights
(where provided)
To replace the fog lights, contact an Alfa
Romeo Dealership
Front light cluster with main
beam/dipped beam Xenon gas
discharge headlights
To replace the bulbs of the main beam
headlights/dipped headlights contact an
Alfa Romeo Dealership
14608026V0005EM14708026V0023EM
14808026V0006EM
14908026V0007EM
150
IN AN EMERGENCY
Page 153 of 244

WARNING
129)Before replacing the bulb, wait for the
exhaust ducts to cool down: DANGER OF
SCALDING!
130)Modifications or repairs to the electric
system that are not carried out properly or
do not take the system technical
specifications into account can cause
malfunctions leading to the risk of fire.
131)Halogen bulbs contain pressurised gas,
in the case of breakage they may burst
causing glass fragments to be projected
outwards.
132)Only replace the light bulbs when the
engine is off and in a position that does not
interfere with traffic and lets you safely
replace them (see the description in the
“Replacement” paragraph). Also ensure that
the engine is cold, to prevent the risk of
burns.
IMPORTANT
55)Halogen bulbs must be handled holding
the metallic part only. Touching the
transparent part of the bulb with your
fingers may reduce the intensity of the
emitted light and even reduce the lifespan of
the bulb. In the event of accidental contact,
wipe the bulb with a cloth moistened with
alcohol and let the bulb dry.
REPLACING FUSES
INTRODUCTION
133) 134) 135) 136) 137)
56) 57)
Fuses protect the electrical system: they
intervene (blow) in the event of a failure
or improper action on the system.
Fuse extracting pliers
To replace a fuse, use the pliers hooked
to the boot fusebox cover fig. 150.
Grab the pliers from the upper tabs,
press them and extract the pliers pulling
upwards.
The pliers fig. 151 have two different
ends, specifically designed to remove the
different types of fuses present in the
vehicle:
1: MINI fuse;
2: J-CASE fuse.After use, refit the pliers in position,
proceeding as follows:
grasp the pliers from the upper tabs;
press the pliers in their housing,
pushing downwards, until they click into
place.
FUSE LOCATION
The fuses, which can be replaced by the
user, are grouped in two boxes below the
passenger side foot board and inside the
boot.
CONTROL UNIT UNDER PASSENGER
SIDE FOOTBOARD
To access the fuses, proceed as follows:
lift the upper end of the footboard 1
fig. 152 on the passenger side, pulling it
to release the 2 buttons;15008036V0053EM
15108036S0005EM
151
Page 156 of 244
FUNCTION FUSE AMPERE
Rear left electric window F47 25
Rear
right electric window F48 25
Heater rear window coil, cigar lighter F94 15
154
IN AN EMERGENCY
Page 158 of 244
FUNCTION FUSE AMPERE
Trailer light control unit power supply (+30) F1 20
T
railer light control unit power supply (+30) F2 15
Trailer socket (only EMEA) (+30) F3 10
Tow bar (+15) F4 10
156
IN AN EMERGENCY