Page 112 of 399
110
uuCustomized Features u
System Setup
*1: Default SettingSetup
Group Customizable Features Desc
ription Selectable Settings
Screen Settings Sync Display Brightness
Selects whether the screen brightness synchronizes
with the instruments panel brightness.
Off/On
*1
BrightnessChanges the brightness of the On Demand Multi-
Use DisplayTM.
—
Contrast Changes the contrast of the On Demand Multi-Use
Display
TM.
—
Black Level Changes the black level of the On Demand Multi-
Use Display
TM.
—
Beep Mutes a beep that sounds every time you touch
the screen.
Off/On
*1
KeyboardChanges the on-screen keyboard from the
alphabetical order to the qwerty type.
Alphabet/QWERTY*1
19 ACURA TLX NAVI-31TZ38400.book 110 ページ 2018年3月7日 水曜日 午後4時23分
Page 114 of 399
112
System Setup
On Demand Multi-Use DisplayTM
Changing the Screen Settings
Adjust the screen settings of the On Demand Multi-Use DisplayTM.
1. Select Audio Menu .
2. Select Screen Settings .
3. Use , or other icons to
adjust the setting.
u Use the / icons to turn
the page.
u Select to go back to the
previous screen.
The followings are adjustable screen settings:
• Sync Display Brightness: Selects whether the screen brightness synchronizes
with the instrument panel brightness.
• Brightness : Adjusts the screen’s brightness.
• Contrast : Adjusts the screen’s contrast.
• Black Level : Adjusts the screen’s black level.
• Beep : Turns on or off the beep that soun ds every time you touch the screen.
• Keyboard : Changes the on-screen keyboard from the alphabetical order to the
qwerty type.
19 ACURA TLX NAVI-31TZ38400.book 112 ページ 2018年3月7日 水曜日 午後4時23分
Page 127 of 399
125
uuEntering a Destination uPlace Category
Continued
Navigation
Place Category
H ENTER/MENU buttonuPlace Category
Select the category of a place (e.g., Bankin g, Lodging, Restaurant) stored in the map
database to search for the destination.
1.Rotate to select a category.
Press .
2. Rotate to select a
subcategory. Press .1Place Category
This option is convenient if you do not know the
exact name of a place or if you want to narrow down
the number of matches returned for places with a
common name.
Move to select History to access your recently
used place categories. Up to 30 categories can be
stored.
You can also delete your recently used place
categories. 2 Category History P. 47
Search POI Categories helps you to search the
subcategory. When you enter a keyword and select
OK , the list of appropriate subcategories is displayed.
19 ACURA TLX NAVI-31TZ38400.book 125 ページ 2018年3月7日 水曜日 午後4時23分
Page 129 of 399
127
uuEntering a Destination uLocal Search
Continued
Navigation
Local Search
H ENTER/MENU buttonuLocal Search
Select a place via Local Search database as the destination. 1.Rotate to select a category
(e.g., Community ). Press .
2. Rotate to select a
subcategory. Press .1Local Search
When you select Search by keyword , the list of
appropriate categor ies is displayed.
The screen in this section may differ from the actual
ones.
Local Search is a subscription service. For more
information, contact an Acura dealer or visit
owners.acura.com (U.S.) or www.acura.ca/owners/
acuralink (Canada).
19 ACURA TLX NAVI-31TZ38400.book 127 ページ 2018年3月7日 水曜日 午後4時23分
Page 195 of 399
193
uuPlaying FM/AM Radio uAudio Screen Control
Continued
Audio
■ Manual Input
To use the numbered keys:
1. Select Tune.
2. Input the frequency.
3. Select OK.
To use the frequency bar:
1. Touch the frequency indicator at the place you want to select.
2. Release from the frequency bar.
u Use the / to turn the radio frequency.
u Use the to search the selected ba nd up or down for a station with a
strong signal.
19 ACURA TLX NAVI-31TZ38400.book 193 ページ 2018年3月7日 水曜日 午後4時23分
Page 200 of 399
198
uuPlaying SiriusXM ® Radio uAudio Screen Control
Audio
■ Preset Memory
To store a station:
1. Tune to the selected channel.
2. Select Presets/Controls icon to set the Presets.
3. Select and hold a desired number you want to store the station.
To listen to a stored station, select the station number.
■ Manual Input
To use the numbered keys:
1. Select Tune.
2. Input the frequency.
3. Select OK.
To use the channel bar:
1. Touch the channel indicator at the place you want to select.
2. Release from the channel bar.
u Use the / icons to the previous or next channel.
u Select and hold to rapidly skip 10 channels at a time.
Channel Indicator Channel Bar
Channel Number
19 ACURA TLX NAVI-31TZ38400.book 198 ページ 2018年3月7日 水曜日 午後4時23分
Page 259 of 399

Continued257
uuPlaying Apple CarPlay ®/Android AutoTMu Android AutoTM
Audio
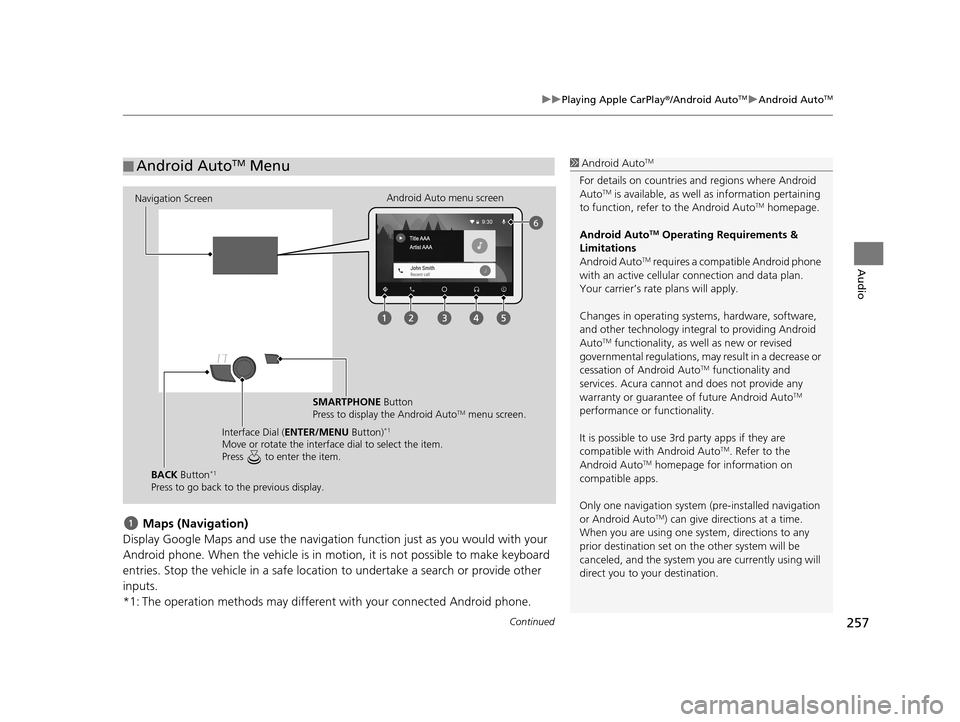
Maps (Navigation)
Display Google Maps and use the navigation function just as you would with your
Android phone. When the vehicle is in motion, it is not possible to make keyboard
entries. Stop the vehicle in a safe locati on to undertake a search or provide other
inputs.
*1: The operation methods may different with your connected Android phone.
■ Android AutoTM Menu1
Android AutoTM
For details on c ountries and regions where Android
AutoTM is available, as well as information pertaining
to function, refer to the Android AutoTM homepage.
Android Auto
TM Operating Requirements &
Limitations
Android Auto
TM requires a compatib le Android phone
with an active cellular connection and data plan.
Your carrier’s rate plans will apply.
Changes in operating systems, hardware, software,
and other technology integral to providing Android
Auto
TM functionality, as we ll as new or revised
governmental regulations, may result in a decrease or
cessation of Android Auto
TM functionality and
services. Acura cannot a nd does not provide any
warranty or guarantee of future Android Auto
TM
performance or functionality.
It is possible to use 3r d party apps if they are
compatible with Android Auto
TM. Refer to the
Android AutoTM homepage for information on
compatible apps.
Only one navigation system (pre-installed navigation
or Android Auto
TM) can give direct ions at a time.
When you are using one system, directions to any
prior destination set on th e other system will be
canceled, and the system you are currently using will
direct you to your destination.
Navigation Screen Android Auto menu screen
SMARTPHONE Button
Press to display the Android Auto
TM menu screen.
Interface Dial ( ENTER/MENU Button)
*1
Move or rotate the interface dial to select the item.
Press to enter the item.
BACK Button*1
Press to go back to the previous display.
19 ACURA TLX NAVI-31TZ38400.book 257 ページ 2018年3月7日 水曜日 午後4時23分
Page 270 of 399

uuBluetooth ® HandsFreeLink ®u Pairing a Phone
268
Bluetooth ® HandsFreeLink ®
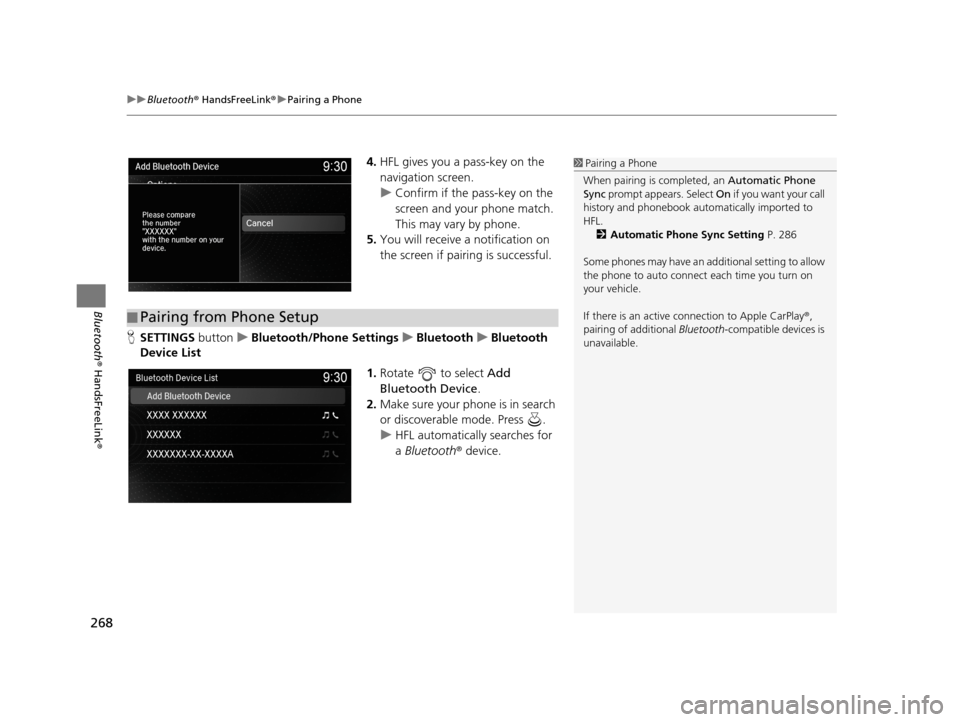
4.HFL gives you a pass-key on the
navigation screen.
u Confirm if the pass-key on the
screen and your phone match.
This may vary by phone.
5. You will receive a notification on
the screen if pairing is successful.
H SETTINGS buttonuBluetooth/Phone Settings uBluetooth uBluetooth
Device List
1.Rotate to select Add
Bluetooth Device .
2. Make sure your phone is in search
or discoverable mode. Press .
u HFL automatically searches for
a Bluetooth ® device.1Pairing a Phone
When pairing is completed, an Automatic Phone
Sync prompt appears. Select On if you want your call
history and phonebook au tomatically imported to
HFL. 2 Automatic Phone Sync Setting P. 286
Some phones may have an ad ditional setting to allow
the phone to auto connect each time you turn on
your vehicle.
If there is an active c onnection to Apple CarPlay®,
pairing of additional Bluetooth-compatible devices is
unavailable.
■ Pairing from Phone Setup
19 ACURA TLX NAVI-31TZ38400.book 268 ページ 2018年3月7日 水曜日 午後4時23分