2018 VOLVO XC60 T8 light
[x] Cancel search: lightPage 635 of 674

MAINTENANCE AND SERVICE
* Option/accessory.633
Cleaning exterior plastic, rubber andtrim components The vehicle should be washed as soon as it becomes dirty. This makes the vehicle easier toclean because dirt does not attach as strongly. Italso reduces the risk of scratches and keeps thevehicle looking new. Wash the vehicle in a carwash or garage with an oil separator. Use a carwashing detergent.
Exterior plastic, rubber and trim components
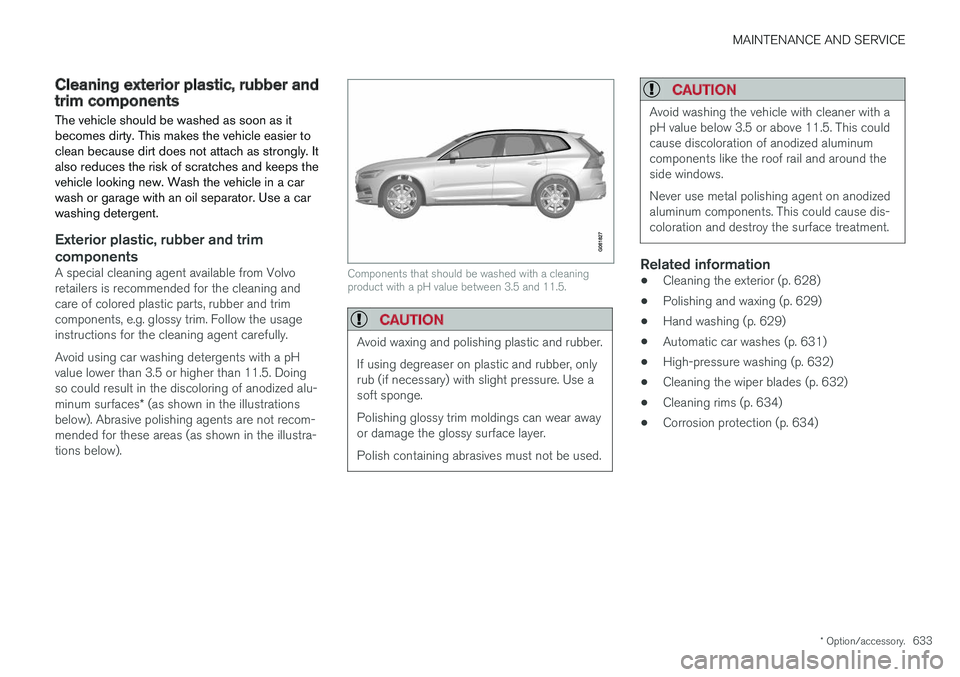
A special cleaning agent available from Volvo retailers is recommended for the cleaning andcare of colored plastic parts, rubber and trimcomponents, e.g. glossy trim. Follow the usageinstructions for the cleaning agent carefully. Avoid using car washing detergents with a pH value lower than 3.5 or higher than 11.5. Doingso could result in the discoloring of anodized alu- minum surfaces* (as shown in the illustrations
below). Abrasive polishing agents are not recom- mended for these areas (as shown in the illustra-tions below).Components that should be washed with a cleaning product with a pH value between 3.5 and 11.5.
CAUTION
Avoid waxing and polishing plastic and rubber. If using degreaser on plastic and rubber, only rub (if necessary) with slight pressure. Use asoft sponge. Polishing glossy trim moldings can wear away or damage the glossy surface layer. Polish containing abrasives must not be used.
CAUTION
Avoid washing the vehicle with cleaner with a pH value below 3.5 or above 11.5. This couldcause discoloration of anodized aluminumcomponents like the roof rail and around theside windows. Never use metal polishing agent on anodized aluminum components. This could cause dis-coloration and destroy the surface treatment.
Related information
• Cleaning the exterior (p. 628)
• Polishing and waxing (p. 629)
• Hand washing (p. 629)
• Automatic car washes (p. 631)
• High-pressure washing (p. 632)
• Cleaning the wiper blades (p. 632)
• Cleaning rims (p. 634)
• Corrosion protection (p. 634)
Page 638 of 674

||
MAINTENANCE AND SERVICE
6361. Place a strip of masking tape over the dam-
aged surface. Pull the tape off so that any loose flakes of paint adhere to it. If the damage goes down to the bare metal, you may need to use primer first. If the paintdamage is on a plastic surface, an adhesiveprimer should be used for better results.Spray the primer into the lid of the spray canand brush on thinly.
2. Light sanding with a very fine-grained sand- paper or similar may be required beforepainting (e.g. if there are uneven edges).Clean the area carefully and let it dry.
3. Thoroughly mix the primer and apply it with a small brush, toothpick or similar. When theprimer is dry, apply one or more coats ofpaint and then a clear coat, letting the paintdry between each application.
If there is a longer scratch, follow the same pro-cedure as above, but first mask off the surround-ing area to protect the undamaged paint. Touch-up pens and spray paints are available at Volvo retailers.
NOTE
If the stone chip has not gone down to the bare metal and an undamaged coat of paintremains, apply base coat and clear coatimmediately after cleaning the surface.
Related information
• Paintwork (p. 635)
• Color codes (p. 636)
Color codes
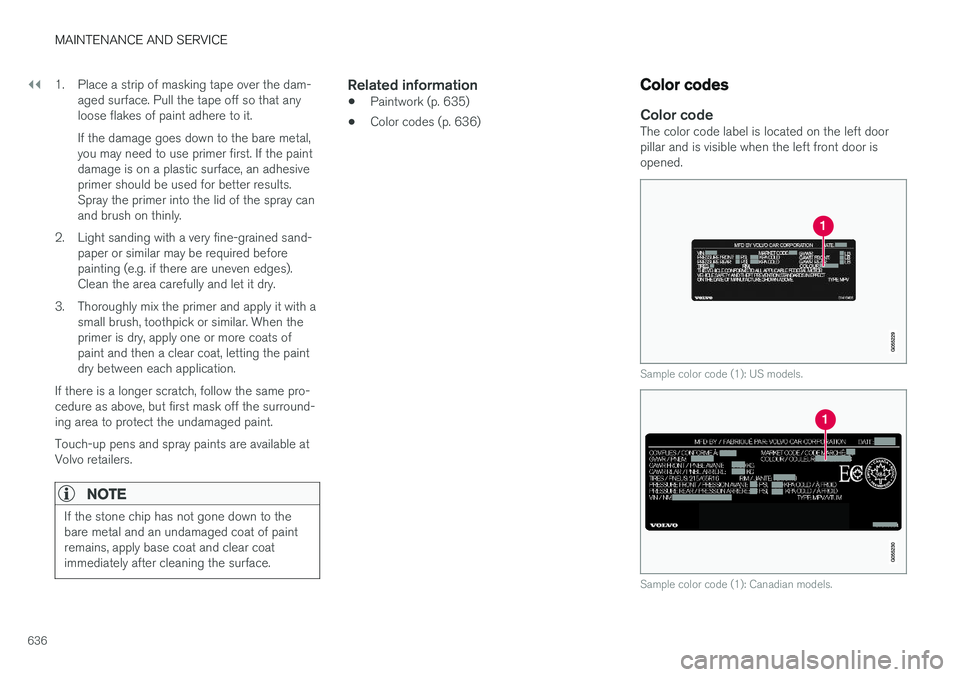
Color codeThe color code label is located on the left door pillar and is visible when the left front door isopened.
Sample color code (1): US models.
Sample color code (1): Canadian models.
Page 639 of 674

MAINTENANCE AND SERVICE
}}
637
It is important to use the right color.
Related information
•
Paintwork (p. 635)
• Touching up minor paint damage (p. 635)
Changing rear window wipers
The wiper blades help remove water from the windshield and rear window. Along with thewasher fluid, they clean the glass and helpimprove visibility while driving. The windshieldand rear window wiper blades can be replaced.
Changing rear window wipers
Lift the wiper arm from the window and pull the lower section of the blade to the right.
1. Grasp the center of the wiper blade and
lift it from the window to the stop position.
NOTE
When the wiper arm is halfway folded out, it will stop in a locking position that helps pre-vent the arm from falling back onto the rearwindow. The wiper arm must be pulled pastthe locking position stop in order to changethe wiper blade.
2. Grip the lower part of the blade and pull
to the right until the blade loosens from the arm.
3. Press the new wiper blade until it clicks into place. Check to make sure the blade issecurely in place.
4. Fold the wiper arm back toward the window.
CAUTION
Check the blades regularly. Neglected main- tenance shortens the life of the blades.
Related information
• Using the rain sensor (p. 173)
• Using the windshield and headlight washers (p. 175)
• Using automatic rear window wiping whenbacking up (p. 176)
Page 641 of 674

MAINTENANCE AND SERVICE
}}
* Option/accessory.639
NOTE
The wiper blades are different lengths. The blade on the driver's side is longer than theone on the passenger side.
Related information
•Using the rain sensor (p. 173)
• Using the windshield and headlight washers (p. 175)
• Using automatic rear window wiping whenbacking up (p. 176)
• Heated windshield washer nozzles
* (p. 173)
• Using the rain sensor's memory function(p. 174)
• Using the rear window wiper/washer(p. 176)
• Filling washer fluid (p. 640)
• Windshield wipers in the service position(p. 639)
• Changing rear window wipers (p. 637)
• Using the windshield wipers (p. 172)
Windshield wipers in the serviceposition
The windshield wiper blades must be in the serv- ice (vertical) position when performing certainoperations, e.g. replacing the blades.
Windshield wipers in the service position.
The windshield wipers must be in the service position when replacing, washing or lifting theblades (e.g. to scrape ice or snow from the wind-shield).
CAUTION
Before placing the wipers in service position, ensure that they have not frozen to the wind-shield.
Activating/deactivating service positionThe service position can be activated/deactivated when the vehicle is stationary and the windshieldwipers are switched off. Service position is acti-vated/deactivated via Function view in the centerdisplay:
Tap the
Wiper Service
Position button. The indicator
light in the button will illuminate when service position is acti-vated. The windshield wiperswill move to the vertical posi-tion when service position is
activated. To deactivate the service position, tap
Wiper Service Position once. The indicator light
in the button will go out when service position is deactivated.
Page 642 of 674

||
MAINTENANCE AND SERVICE
* Option/accessory.
640 The wiper blades will also move out of service position if:
• The windshield wipers are turned on.
• The windshield washers are turned on.
• The rain sensor is activated.
• The vehicle begins moving.
CAUTION
If the wiper arms in service position are raised from the windshield, they must be folded backagainst the windscreen before activating wip-ing, washing or rain sensor as well as beforedeparture. This is to prevent scratching thepaint on the hood.
Related information
• Using the rain sensor (p. 173)
• Using the windshield and headlight washers (p. 175)
• Using automatic rear window wiping whenbacking up (p. 176)
• Heated windshield washer nozzles
* (p. 173)
• Using the rain sensor's memory function(p. 174)
• Using the rear window wiper/washer(p. 176)
• Filling washer fluid (p. 640)
• Replacing windshield wiper blades (p. 638) •
Changing rear window wipers (p. 637)
• Using the windshield wipers (p. 172)
Filling washer fluid
Washer fluid is used to keep the headlights, windshield and rear window clean. Washer fluidcontaining anti-freeze should be used in verycold weather (below-freezing temperatures).
Fill washer fluid into the reservoir with the blue cover. The reservoir is used for the windshieldwasher, tailgate window washer and headlight washer *
NOTE
When there is approximately 1 liter (1 qt) of washer fluid remaining, the message Washer
fluid
Level low, refill and the symbol
will be displayed in the instrument panel.
Page 643 of 674

MAINTENANCE AND SERVICE
* Option/accessory.641
Recommended grade:
Washer fluid recom-
mended by Volvo, with frost protection during cold weather and temperatures below the freez-ing point.
CAUTION
Use Volvo's original washer fluid or an equiva- lent fluid with the recommended pH valuebetween 6 and 8, diluted as recommended,e.g. in a 1:1 solution with pH-neutral water.
CAUTION
Use washer fluid with anti-freeze when tem- peratures are below the freezing point to helpkeep the pump, reservoir and hoses fromfreezing.
Volume:
• Vehicles
with headlight washing: 5.3 liters
(5.6 qts).
• Vehicles
without headlight washing: 3.5 lit-
ers (3.7 qts).
Related information
• Using the rain sensor (p. 173)
• Using the windshield and headlight washers (p. 175)
• Using automatic rear window wiping whenbacking up (p. 176) •
Heated windshield washer nozzles
* (p. 173)
• Using the rain sensor's memory function(p. 174)
• Using the rear window wiper/washer(p. 176)
• Windshield wipers in the service position(p. 639)
• Replacing windshield wiper blades (p. 638)
• Changing rear window wipers (p. 637)
• Using the windshield wipers (p. 172)
Page 650 of 674

||
SPECIFICATIONS
648
Dimensionsmminches
L Width incl. rearview mirrors 2117 83.3
M Width incl. folded rear- view mirrors 1999 78.7
A
For curb weight + 1 person. Varies slightly depending on tire dimension, chassis alternative, etc.).
B Vehicles with 17/19-inch wheels.
C Vehicles with 20-inch wheels.
D Vehicles with 21-inch wheels.
E Vehicles with 22-inch wheels.
Related information
• Weights (p. 649)
Page 659 of 674

INDEX
657
1, 2, 3 ...
4WD 433
A
ABSanti-lock brakes 419
AC (Air conditioning) 220
ACC - Adaptive Cruise Control 285, 288, 289, 290, 291, 292, 294, 295, 296, 297, 299
Accessories and extra equipment 35 installation 36
Accessory installation warning 36
Active Bending Lights 155
Adapting driving characteristics 262, 435
Adaptive Cruise Control 285, 288, 289, 290, 291, 292, 294, 295, 296, 297, 299
change cruise control functionality 297
function 285
manage speed 289, 290
pass 294
radar sensor 316
set time interval 291, 292
troubleshooting 296
Adjusting the steering wheel 193
Airbag 52 activation/deactivation 56
driver's side 53
passenger side 53, 56
Air bag, see Airbag 52
Air conditioning 220Air conditioning, fluid volume and grade 654
Air distribution 201 air vents 201, 203
changing 202
defrosting 214
recirculation 213
table showing options 205
Air quality 198, 200 allergy and asthma 200
passenger compartment filter 201
Air recirculation 213
Alarm 258 deactivating 259
Allergy and asthma-inducing substances 200
All Wheel Drive, AWD 433
All Wheel Drive (AWD) 433
All Wheel Drive (four-wheel drive) 433
Android Auto 508, 510 Antenna location 247Apple CarPlay 505, 507
Approach lighting 157
Apps 477
Assistance at risk of collision 363, 364, 365, 366, 367, 368, 369, 371
Audio and media 476Audio system HD digital radio 487 SiriusXM ® Satellite radio 488, 489, 490
Auto-climate 212
Auto hold 426
Auto-hold brakes 426 activate and deactivate 426
after collision 427
Automatic car wash 631
Automatic high beam 153
Automatic locking 251
Automatic relocking 231, 244
Automatic Speed Limiter 272, 274, 275
Automatic transmission 429 kickdown 432
oil 653
Trailer 462
INDEX