2018 VOLVO V90 CROSS COUNTRY flat tire
[x] Cancel search: flat tirePage 552 of 662
||
WHEELS AND TIRES
55014. Immediately drive the vehicle at least 3 km
(2 miles) at a maximum speed of 80 km/h (50 mph) to allow the sealing compound toseal the tire, and then recheck the inflationpressure.
NOTE
During the tire's first revolution, some sealing compound may spray out of the puncturehole.
WARNING
Before driving away, make sure that no one is near the vehicle who could be sprayed withsealing compound. Make sure no one iswithin 2 meters(7 feet) of the vehicle.
15. Rechecking the inflation pressure Connect the hose to the tire's valve and screw the hose connector onto the valve asfar as possible. The compressor must beswitched off. 16. Check the inflation pressure on the air pres-
sure gauge.
• If the pressure is under 1.3 bar (19 psi),the tire is not sufficiently sealed. The vehi-cle should not be driven. Call roadsideassistance to have the vehicle towed.
• If the inflation pressure is higher than1.3 bar (19 psi), the tire must be inflatedto the inflation pressure specified on thetire pressure decal on the driver's sidedoor pillar (1 bar = 100 kPa = 14.5 psi). Ifthe inflation pressure is too high, use theair release valve to release air.
NOTE
Replace the sealing compound bottle and hose after use. Volvo recommends havingthese replaced by an authorized Volvo work-shop.
WARNING
Check inflation pressure regularly.
Volvo recommends driving to the nearest author- ized Volvo workshop to have the tire replaced/repaired. Inform the workshop that the tire con-tains sealing compound.
WARNING
After using the tire sealing system, the vehicle should not be driven farther than approxi-mately 200 km (120 miles).
NOTE
The compressor is an electric device. Follow local regulations for disposal.
Related information
• Recommended tire pressure (p. 533)
• Tire sealing system (p. 546)
• Inflate tires with the compressor included in the tire sealing system (p. 551)
Page 553 of 662
WHEELS AND TIRES
551
Inflate tires with the compressorincluded in the tire sealing system The vehicle's original tires can be inflated using the compressor in the tire sealing system.
1. The compressor must be switched off. Makesure that the switch is in the 0 (Off) position
and take out the electrical cable and the hose.
2. Unscrew the tire's valve cap and screw the hose's valve connector as far as possibleonto the valve. Be sure the air release valve on the com- pressor's hose is completely closed.
3. Connect the electrical cable to the nearest 12 V outlet and start the vehicle.
WARNING
Inhaling exhaust fumes could lead to serious injury. Never leave the engine running in anenclosed space or a space without sufficientventilation.
WARNING
Never leave children unattended in the vehicle while the engine is running.
4. Start the compressor by moving the switch to the I (On) position.
CAUTION
Risk of overheating. The compressor should not be running for longer than 10 minutes ata time.
5. Inflate the tire to the pressure specified on
the tire pressure decal on the driver's side door pillar. If the inflation pressure is toohigh, use the air release valve to release air.
6. Switch off the compressor. Remove the hose and the electrical cable.
7. Screw the valve cap back onto the tire.
NOTE
• After inflating a tire, always replace the valve cap to help prevent valve damagecaused by gravel, dirt, etc.
• Use plastic valve caps only. Metal capscould corrode and become difficult toremove.
NOTE
The compressor is an electric device. Follow local regulations for disposal.
Related information
• Recommended tire pressure (p. 533)
• Using the tire sealing system (p. 547)
• Tire sealing system (p. 546)
Page 563 of 662
LOADING, STORAGE AND PASSENGER COMPARTMENT
}}
* Option/accessory.561
Cargo compartment The vehicle has a flexible cargo compartment that makes it possible to carry and secure largeobjects.
The cargo capacity of the vehicle can be consid- erably increased by folding down the rear seatbackrests. Use the load anchoring eyelets or gro-cery bag holders to help secure objects in place, and the retractable cargo compartment cover * to
help conceal objects in the cargo compartment. The towing eyelet and tire sealing system, or the temporary spare tire *, are located under the
cargo compartment floor.
Related information
• Loading recommendations (p. 561)
• Grocery bag holders (p. 562)
• Load anchoring eyelets (p. 563)
• Installing and removing the cargo compart-ment cover
* (p. 564)
Loading recommendations
There are a number of things to consider when carrying loads in or on the vehicle.
Load-carrying capacity is determined by the vehi- cle's curb weight. The total weight of all passen-gers and any installed accessories reduces thevehicle's load-carrying capacity by the corres-ponding amount.
WARNING
The vehicle's driving characteristics change depending on the weight and position of theload.
Loading in the trunk and cargo compartment
• Position objects so they are pressing against the rear seat backrests.
• Distribute the load evenly.
• Heavy objects should be positioned as lowas possible. Avoid placing heavy objects onfolded-down seat backrests.
• Cover sharp corners with a soft cloth or simi-lar to help prevent damage to the upholstery.
• Use the load anchoring eyelets and tension-ing straps or similar to secure all objects.
WARNING
In a head-on collision at a speed of 50 km/h (30 mph), an unsecured object weighing 20kg (44 pounds) can reach a projectile weightequivalent to 1000 kg (2200 pounds).
WARNING
If objects are loaded higher than the upper edge of the side windows, leave a 10 cm (4in.) space between the objects and the win-dow. Objects placed closer to this couldimpede the function of the inflatable curtainconcealed inside the headlining.
WARNING
Always secure the load. Otherwise, it may shift during heavy braking and injure people in thevehicle. Cover sharp edges and sharp corners with something soft. Turn off the engine and apply the parking brake when loading/unloading long objects.Otherwise, it is possible for the load to reachthe gear lever or gear selector and move it toa drive position – which could cause the vehi-cle to begin rolling.
Page 578 of 662
||
MAINTENANCE AND SERVICE
* Option/accessory.
576
Canceling software download
–Tap the checkbox in the activity indicator that replaced the Install button when the down-
load began.
Note that only a download can be cancelled. An installation cannot be cancelled once it hasbegun.
Deactivating the background search for software update
Automatic background searching for softwareupdates is activated as the default factory setting,but the function can be deactivated. 1. Tap
Settings in the center display's Top
view.
2. Tap
SystemDownload Center.
3. Tap to deselect
Auto Software Update.
Related information
• Download Center (p. 575)
• Internet-connected vehicle
* (p. 503)
• Navigating in the center display's views (p. 117)
Vehicle status
The vehicle's general status can be displayed in the center display along with the option to schedule service 3
.
The Car status app is started
from the center display's App view and has four tabs:
•Messages - status messages
•
Status - engine oil level check
•
TPMS - tire inflation pressure check
•
Appointments - appointment information
and vehicle information 3
.
Related information
• Handling messages saved from the instru- ment panel (p. 109)
• Checking and filling engine oil (p. 584)
• Tire pressure monitoring system
* (p. 533)
• Scheduling service and repairs (p. 576)
• Sending vehicle information to the workshop(p. 578)
• Navigating in the center display's views(p. 117)
Scheduling service and repairs4
This service offers a convenient way to schedule service and workshop appoints directly from thevehicle.
When it is time for service, and in certain cases if the vehicle requires repairs, a message will bedisplayed in the instrument panel and at the topof the center display. The time for service isdetermined by how much time has elapsed, thenumber of hours the engine has run, or the dis-tance driven since the last service.
To use the service
• Create a Volvo ID and register the Volvo IDto the vehicle.
• To select a Volvo retailer you would like tocontact, go to www.volvocars.com and log in.
• To send and receive appointment informa-tion, the vehicle must be connected to the Internet 5
.
Book serviceWhen you schedule service from your vehicle, theinformation is sent via your Internet connection 5
.
Submit an appointment request whenever you need service or when a message regarding theneed for service or repairs has been displayed in
3 Certain markets only.
4 Certain markets only.
5 There may be a charge for transmitting data over the Internet, depending on your service plan.
Page 581 of 662
MAINTENANCE AND SERVICE
}}
* Option/accessory.579
Hoisting the vehicle When hoisting the vehicle, it is important to ensure the jack/vehicle hoist is correctlyengaged in the designated attachment pointsunder the vehicle.
For vehicles with self-leveling *, pneumatic sus-
pension (if installed) must be turned off before the vehicle is lifted. Turning off the function in thecenter display.
WARNING
If the vehicle is lifted on a garage jack, the jack must be placed under one of the four lift-ing points. Make sure that the vehicle is cor-rectly positioned on the jack and that it can-not slide off. Make sure the jack plate has arubber pad to help keep the vehicle stableand prevent damage. Always use axle standsor similar.
NOTE
Volvo recommends only using the jack intended for your specific vehicle model. If ajack other than that recommended by Volvo isused, follow the instructions included with theequipment. The vehicle's ordinary jack is only intended to be used in temporary situations for short peri-ods of time, such as when changing wheels inthe event of a flat tire. If the vehicle needs tobe lifted more frequently, or for a longerperiod of time than for a wheel change, agarage jack or hoist is recommended. Alwaysfollow the instructions for use provided withthe equipment.
Page 635 of 662
SPECIFICATIONS
}}
633
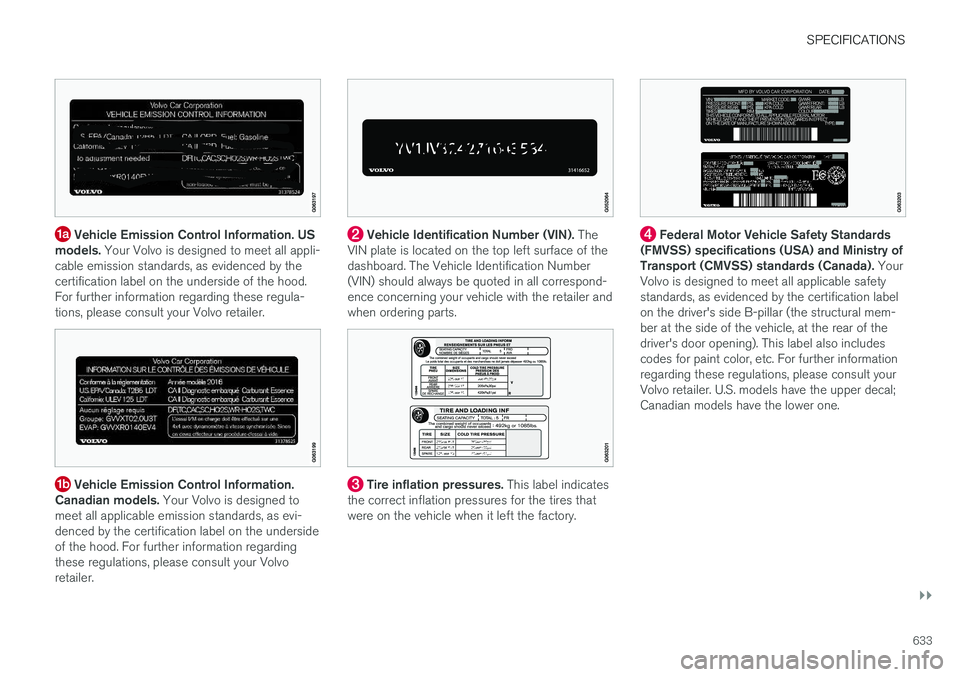
Vehicle Emission Control Information. US
models. Your Volvo is designed to meet all appli-
cable emission standards, as evidenced by the certification label on the underside of the hood.For further information regarding these regula-tions, please consult your Volvo retailer.
Vehicle Emission Control Information.
Canadian models. Your Volvo is designed to
meet all applicable emission standards, as evi- denced by the certification label on the undersideof the hood. For further information regardingthese regulations, please consult your Volvoretailer.
Vehicle Identification Number (VIN). The
VIN plate is located on the top left surface of the dashboard. The Vehicle Identification Number(VIN) should always be quoted in all correspond-ence concerning your vehicle with the retailer andwhen ordering parts.
Tire inflation pressures. This label indicates
the correct inflation pressures for the tires that were on the vehicle when it left the factory.
Federal Motor Vehicle Safety Standards
(FMVSS) specifications (USA) and Ministry of Transport (CMVSS) standards (Canada). Your
Volvo is designed to meet all applicable safetystandards, as evidenced by the certification labelon the driver's side B-pillar (the structural mem-ber at the side of the vehicle, at the rear of thedriver's door opening). This label also includescodes for paint color, etc. For further informationregarding these regulations, please consult yourVolvo retailer. U.S. models have the upper decal;Canadian models have the lower one.
Page 651 of 662
INDEX
649
filter 583
grade and volume 640
Engine shutdown 402
Engine specifications 639Engine temperature high 440
Environment 27Error messages Adaptive Cruise Control 303
see Messages and symbols 303, 318
Error messages in BLIS 346 Ethanol content max. 10% by volume 437
Exterior dimensions 635
F
Federal Clean Air Act 572
Ferry transport 428
Flat tire 546
Flooded road 435
Fluids, volumes 629, 642
Fluids and oils 641, 642 Fog lights front 161
rear 162
Four-C 428 Front seatblower 225
climate 214
heating 216, 217
temperature 227
ventilation 218
Front seat manual 188
Front seats, power 189 adjusting passenger seat from driver's
seat 195
adjusting seat 189
Lumbar support 194
massage 192, 193
memory function 190, 191
multifunction control 192, 193, 194
Side bolsters 194
FSC, environmental labeling 23
Fuel 437 Travel Link service 479
Fuel filling 436
Fuel gauge 89
Fuel requirements 437, 438 Fuel tank volume 642
Fuse box 600Fuses below the glove compartment 605
general 600
in engine compartment 602
in the cargo compartment 608
replacing 601
G
Gasoline grade 437 Gaugefuel gauge 89
Gear indicator 418Gear selector positions automatic transmission 414
Glass laminated/reinforced 170
Glove compartment 559 Gracenote ®
485
Grocery bag holders 562
Gross vehicle weight 637
GSI - Gear shift indicator 418
Guide lines for Park Assist Camera 382
Page 652 of 662

INDEX
650
H
Handbrake 407, 408
Hand wash 618Hard diskspace 512
Hazard warning flashers 164
HDC 431
HD radio 468
Head restraint 198
Head-up display 144 activate and deactivate 146
cleaning 613
replacing windshield 582
settings 146
Heated washer nozzles 181 Heating Seats 216, 217
steering wheel 219, 220
windows 223, 224
high beams 158, 159
High engine temperature 440
Hill Descent Control 431, 432 activate with function button 432
Hill Start Assist 412 Hill Start Assist (HSA) 412
Hoisting the vehicle 579
HomeLink ® 452
programming 453
use 454
HomeLink ® remote control
programmable 452
Home safe lighting 164
Honk 199
Hood, opening 581
Horn 199
I
IAQS (Interior Air Quality System) 206
IC (Inflatable Curtain) 60
ID, Volvo 26
Identification number 38
Ignition mode 403, 404
Immobilizer 246 Electronic immobilizer 246
Indicator symbols 95
Individual drive mode 419
Infant seats 67
Inflatable curtain 60
Inflatable Curtain 60
Inflating tires 551
Inflation pressure adjusting 532
Checking 531
recommended 533
Inflation pressure monitoring 533 action 537
Status 536
Inflation pressure table 643
Information display 84, 88
Infotainment (Audio and media) 460
Instrument cluster 84 settings 88
Instrument illumination 167
Instrument lighting 167 Instrument panel App menu 104, 105
messages 106
Instruments and controls 82 Instruments overview left-hand drive vehicle 82
Integrated booster cushion 75 folding down 78
folding up 77
IntelliSafe driver support 28
Interior Air Quality System 206
Intermittent wiping 180