2018 VOLVO V90 CROSS COUNTRY clock
[x] Cancel search: clockPage 165 of 662
LIGHTING
* Option/accessory.163
Press the button for On/Off. The
symbol in
the instrument panel illuminates when the rear fog light is on. The rear fog light turns off automatically when:
• the start knob is turned clockwise to turn off the ignition or when the lighting ring is turned to the
position.
• the lighting ring is in the
position and
the front fog lights are turned off.
NOTE
Regulations concerning rear fog light use vary from country to country.
Related information
• Lighting panel and controls (p. 154)
• Front fog lights/cornering illumination
*
(p. 161)
• Ignition modes (p. 403)
• Replacing the rear fog light bulb (p. 593)
Brake lights The brake lights are automatically illuminated when braking.
The brake lights illuminate when the brake pedal is depressed. They also illuminate when thebrakes are automatically applied by one of thedriver support systems.
Related information
•
Emergency brake lights (p. 163)
• Brake functions (p. 404)
Emergency brake lights
The emergency brake lights are activated to warn following vehicles of hard braking. This function causes an additional taillight on each side of the vehicle to illuminate.
The emergency brake lights are activated in the event of hard braking or if the ABS system isactivated and the vehicle is traveling at a highspeed. After the driver decelerates to a low speed and then releases the brake, the brake lights resumetheir normal brightness.
Related information
• Brake lights (p. 163)
• Brakes (p. 405)
• Hazard warning flashers (p. 164)
Page 242 of 662
||
KEY, LOCKS AND ALARM
240
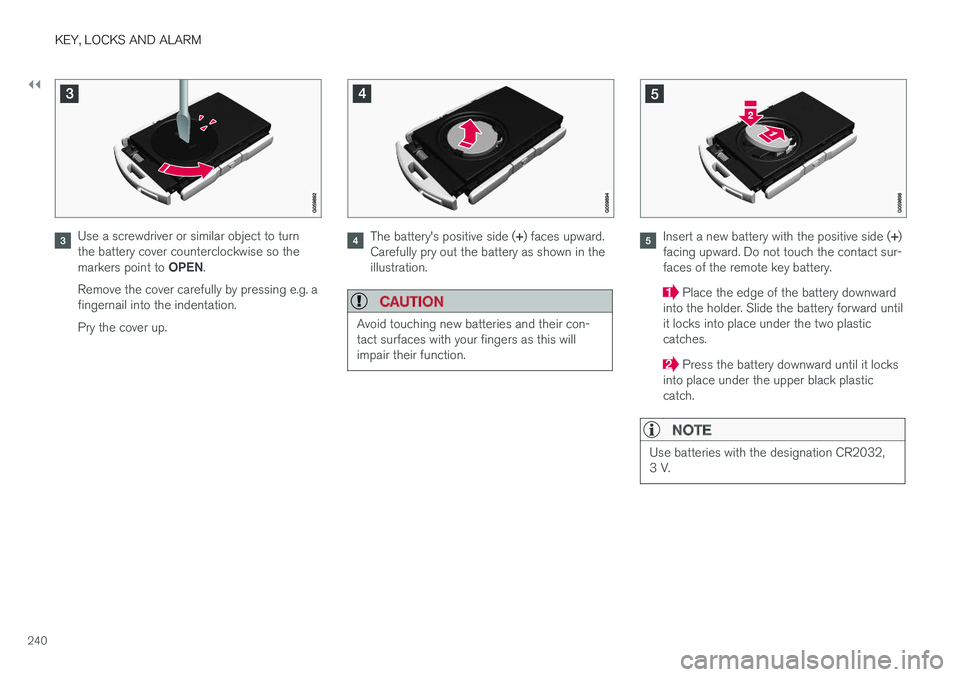
Use a screwdriver or similar object to turn the battery cover counterclockwise so the markers point to OPEN.
Remove the cover carefully by pressing e.g. a fingernail into the indentation. Pry the cover up.The battery's positive side ( +) faces upward.
Carefully pry out the battery as shown in the illustration.
CAUTION
Avoid touching new batteries and their con- tact surfaces with your fingers as this willimpair their function.
Insert a new battery with the positive side ( +)
facing upward. Do not touch the contact sur- faces of the remote key battery.
Place the edge of the battery downward
into the holder. Slide the battery forward until it locks into place under the two plasticcatches.
Press the battery downward until it locks
into place under the upper black plastic catch.
NOTE
Use batteries with the designation CR2032, 3 V.
Page 243 of 662
KEY, LOCKS AND ALARM
241
NOTE
Volvo recommends that batteries used in the remote control key satisfy UN Manual of Testand Criteria, Part III, sub-section 38.3. Thefactory installed batteries and batteriesreplaced by an authorized Volvo workshopsatisfy the above criterion.
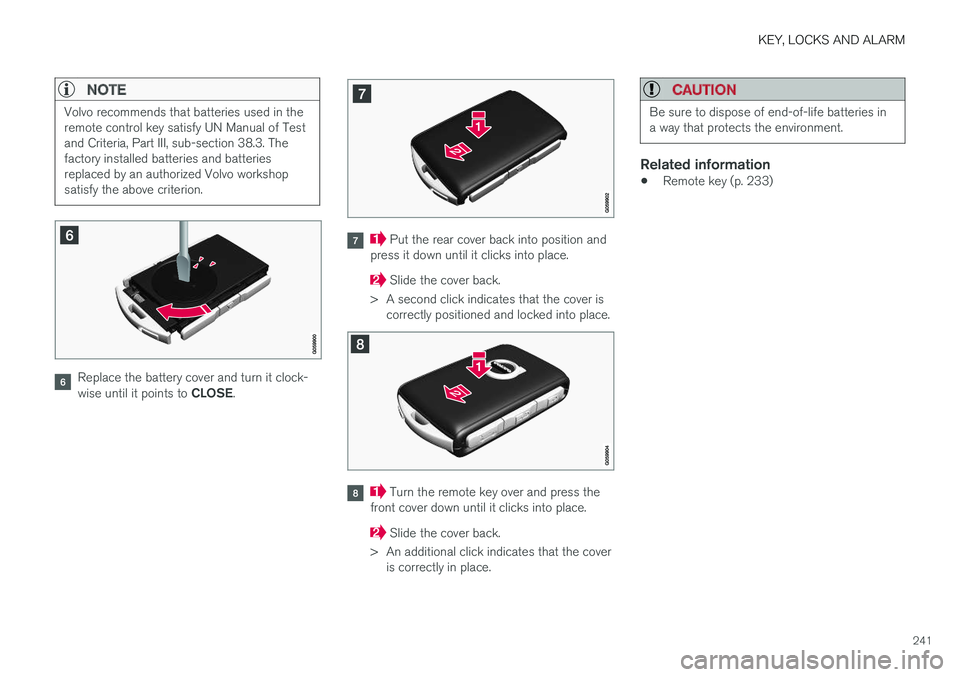
Replace the battery cover and turn it clock- wise until it points to CLOSE.
Put the rear cover back into position and
press it down until it clicks into place.
Slide the cover back.
> A second click indicates that the cover is correctly positioned and locked into place.
Turn the remote key over and press the
front cover down until it clicks into place.
Slide the cover back.
> An additional click indicates that the cover is correctly in place.
CAUTION
Be sure to dispose of end-of-life batteries in a way that protects the environment.
Related information
• Remote key (p. 233)
Page 247 of 662
KEY, LOCKS AND ALARM
}}
245
Locking and unlocking withdetachable key blade
The detachable key blade can be used to unlock the vehicle from the outside, e.g. if the battery inthe remote key is discharged.
Unlocking
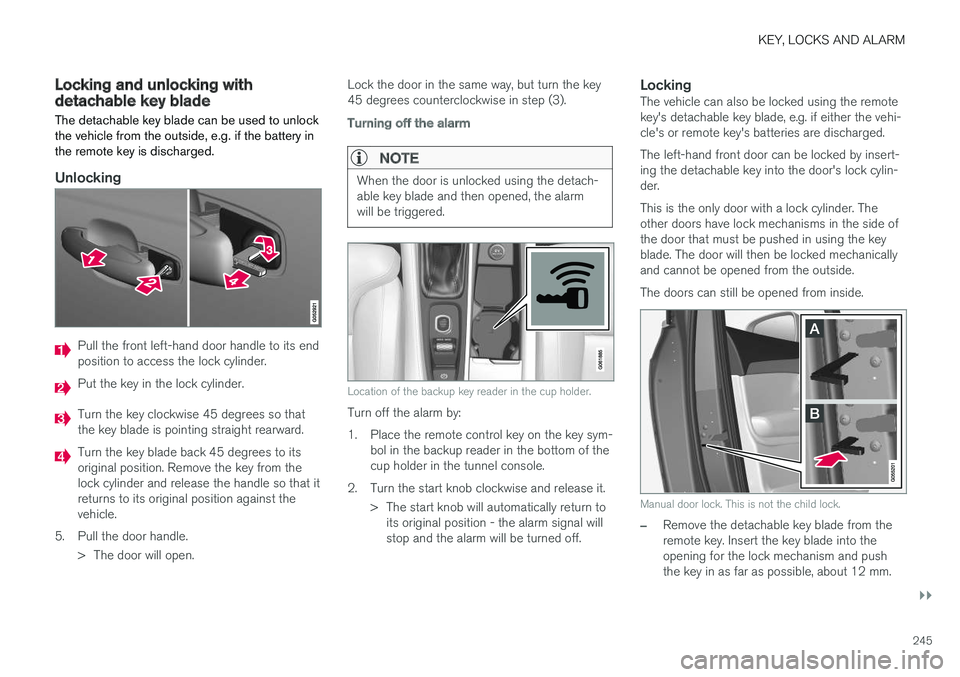
Pull the front left-hand door handle to its end position to access the lock cylinder.
Put the key in the lock cylinder.
Turn the key clockwise 45 degrees so that the key blade is pointing straight rearward.
Turn the key blade back 45 degrees to its original position. Remove the key from thelock cylinder and release the handle so that itreturns to its original position against thevehicle.
5. Pull the door handle. > The door will open. Lock the door in the same way, but turn the key45 degrees counterclockwise in step (3).
Turning off the alarm
NOTE
When the door is unlocked using the detach- able key blade and then opened, the alarmwill be triggered.
Location of the backup key reader in the cup holder.
Turn off the alarm by:
1. Place the remote control key on the key sym-
bol in the backup reader in the bottom of the cup holder in the tunnel console.
2. Turn the start knob clockwise and release it. > The start knob will automatically return toits original position - the alarm signal willstop and the alarm will be turned off.
LockingThe vehicle can also be locked using the remotekey's detachable key blade, e.g. if either the vehi-cle's or remote key's batteries are discharged. The left-hand front door can be locked by insert- ing the detachable key into the door's lock cylin-der. This is the only door with a lock cylinder. The other doors have lock mechanisms in the side ofthe door that must be pushed in using the keyblade. The door will then be locked mechanicallyand cannot be opened from the outside. The doors can still be opened from inside.
Manual door lock. This is not the child lock.
–Remove the detachable key blade from the remote key. Insert the key blade into theopening for the lock mechanism and pushthe key in as far as possible, about 12 mm.
Page 264 of 662
||
KEY, LOCKS AND ALARM
262
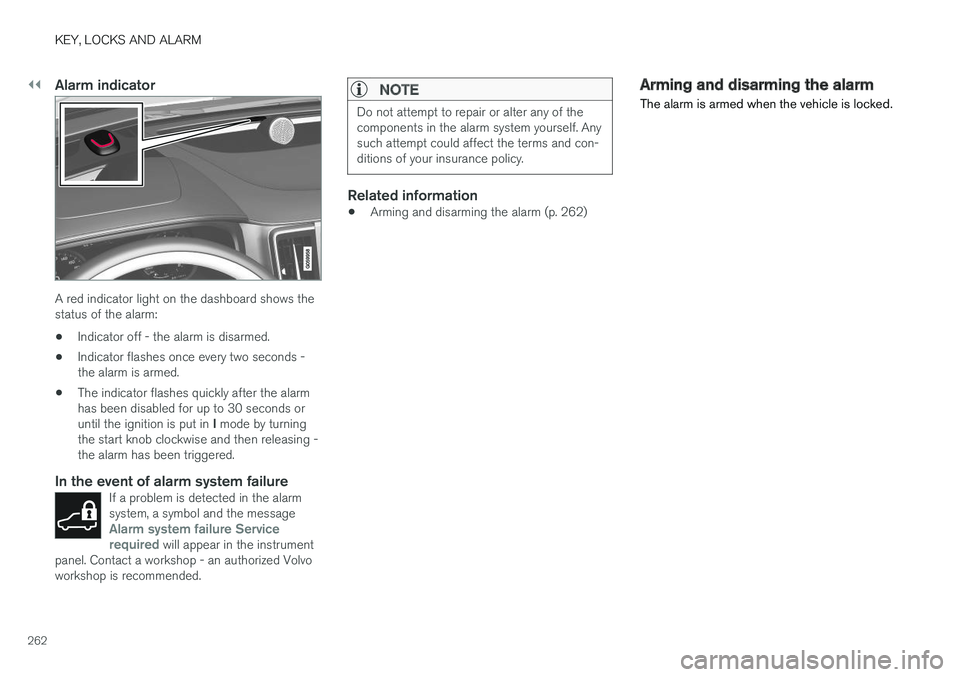
Alarm indicator
A red indicator light on the dashboard shows the status of the alarm:• Indicator off - the alarm is disarmed.
• Indicator flashes once every two seconds -the alarm is armed.
• The indicator flashes quickly after the alarmhas been disabled for up to 30 seconds or until the ignition is put in
I mode by turning
the start knob clockwise and then releasing - the alarm has been triggered.
In the event of alarm system failureIf a problem is detected in the alarmsystem, a symbol and the message
Alarm system failure Service
required will appear in the instrument
panel. Contact a workshop - an authorized Volvo workshop is recommended.
NOTE
Do not attempt to repair or alter any of the components in the alarm system yourself. Anysuch attempt could affect the terms and con-ditions of your insurance policy.
Related information
• Arming and disarming the alarm (p. 262)
Arming and disarming the alarm
The alarm is armed when the vehicle is locked.
Page 265 of 662
KEY, LOCKS AND ALARM
}}
* Option/accessory.263
Arming the alarmLock and arm the vehicle by:
• pressing the lock button on the remote key
•
touch the marked surface on the outside of the door handle or the rubberized pressure plate on the tailgate 20
.
If the vehicle is equipped with both keyless lock- ing/unlocking * and power tailgate *, the button
on the lower edge of the tailgate can also
be used to lock and arm the vehicle.
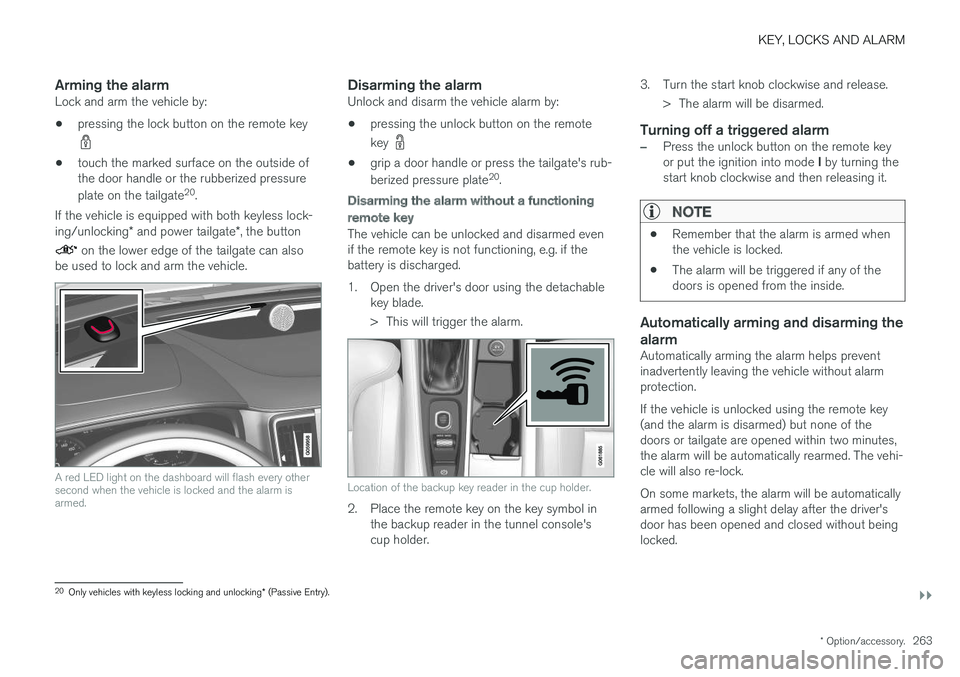
A red LED light on the dashboard will flash every other second when the vehicle is locked and the alarm isarmed.
Disarming the alarmUnlock and disarm the vehicle alarm by:
• pressing the unlock button on the remote key
•
grip a door handle or press the tailgate's rub- berized pressure plate 20
.
Disarming the alarm without a functioning
remote key
The vehicle can be unlocked and disarmed even if the remote key is not functioning, e.g. if thebattery is discharged.
1. Open the driver's door using the detachable
key blade.
> This will trigger the alarm.
Location of the backup key reader in the cup holder.
2. Place the remote key on the key symbol inthe backup reader in the tunnel console's cup holder. 3. Turn the start knob clockwise and release.
> The alarm will be disarmed.
Turning off a triggered alarm
–Press the unlock button on the remote key or put the ignition into mode I by turning the
start knob clockwise and then releasing it.
NOTE
• Remember that the alarm is armed when the vehicle is locked.
• The alarm will be triggered if any of thedoors is opened from the inside.
Automatically arming and disarming the alarm
Automatically arming the alarm helps prevent inadvertently leaving the vehicle without alarmprotection. If the vehicle is unlocked using the remote key (and the alarm is disarmed) but none of thedoors or tailgate are opened within two minutes,the alarm will be automatically rearmed. The vehi-cle will also re-lock. On some markets, the alarm will be automatically armed following a slight delay after the driver'sdoor has been opened and closed without beinglocked.
20
Only vehicles with keyless locking and unlocking * (Passive Entry).
Page 402 of 662
STARTING AND DRIVING
* Option/accessory.
400
Starting the vehicle
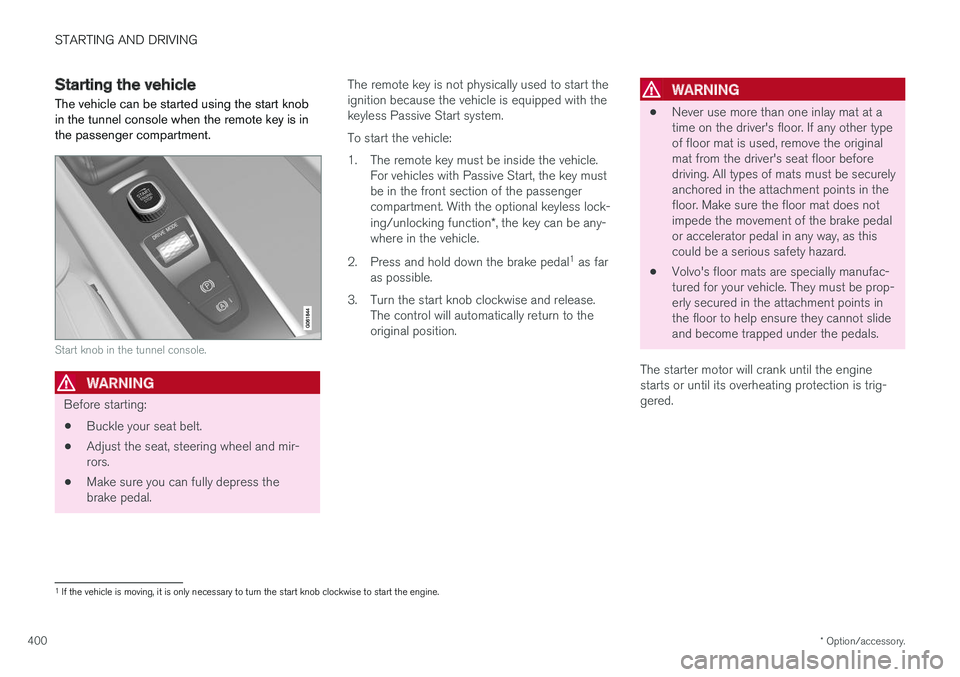
The vehicle can be started using the start knob in the tunnel console when the remote key is inthe passenger compartment.
Start knob in the tunnel console.
WARNING
Before starting:
• Buckle your seat belt.
• Adjust the seat, steering wheel and mir- rors.
• Make sure you can fully depress thebrake pedal. The remote key is not physically used to start theignition because the vehicle is equipped with thekeyless Passive Start system. To start the vehicle:
1. The remote key must be inside the vehicle.
For vehicles with Passive Start, the key must be in the front section of the passengercompartment. With the optional keyless lock- ing/unlocking function *, the key can be any-
where in the vehicle.
2. Press and hold down the brake pedal 1
as far
as possible.
3. Turn the start knob clockwise and release. The control will automatically return to the original position.
WARNING
• Never use more than one inlay mat at a time on the driver's floor. If any other typeof floor mat is used, remove the originalmat from the driver's seat floor beforedriving. All types of mats must be securelyanchored in the attachment points in thefloor. Make sure the floor mat does notimpede the movement of the brake pedalor accelerator pedal in any way, as thiscould be a serious safety hazard.
• Volvo's floor mats are specially manufac-tured for your vehicle. They must be prop-erly secured in the attachment points inthe floor to help ensure they cannot slideand become trapped under the pedals.
The starter motor will crank until the enginestarts or until its overheating protection is trig-gered.
1 If the vehicle is moving, it is only necessary to turn the start knob clockwise to start the engine.
Page 404 of 662
||
STARTING AND DRIVING
402
Related information
•Switching off the vehicle (p. 402)
• Ignition modes (p. 403)
• Adjusting the steering wheel (p. 200)
• Jump starting using another battery (p. 442)
• Selecting ignition mode (p. 404)
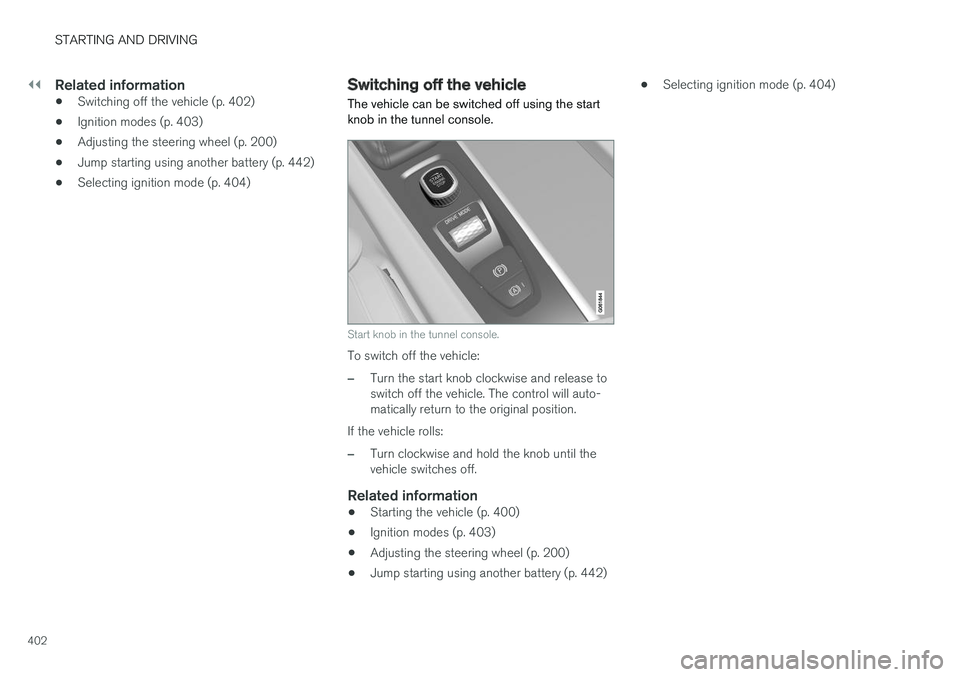
Switching off the vehicle The vehicle can be switched off using the start knob in the tunnel console.
Start knob in the tunnel console.
To switch off the vehicle:
–Turn the start knob clockwise and release to switch off the vehicle. The control will auto-matically return to the original position.
If the vehicle rolls:
–Turn clockwise and hold the knob until the vehicle switches off.
Related information
• Starting the vehicle (p. 400)
• Ignition modes (p. 403)
• Adjusting the steering wheel (p. 200)
• Jump starting using another battery (p. 442) •
Selecting ignition mode (p. 404)