Page 57 of 404

SAFETY
}}
55
WARNING
•A small child's head represents a consider- able part of its total weight and its neck isstill very weak. Volvo recommends thatchildren up to age 4 travel, properlyrestrained, facing rearward. In addition,Volvo recommends that children shouldride rearward facing, properly restrained, aslong as possible.
• Convertible child seats should be installedin the rear seat only.
• A rear-facing convertible seat should notbe positioned behind the driver's seatunless there is adequate space for safeinstallation.
2. Attach the seat belt to the convertible seat according to the manufacturer's instructions.
G022848
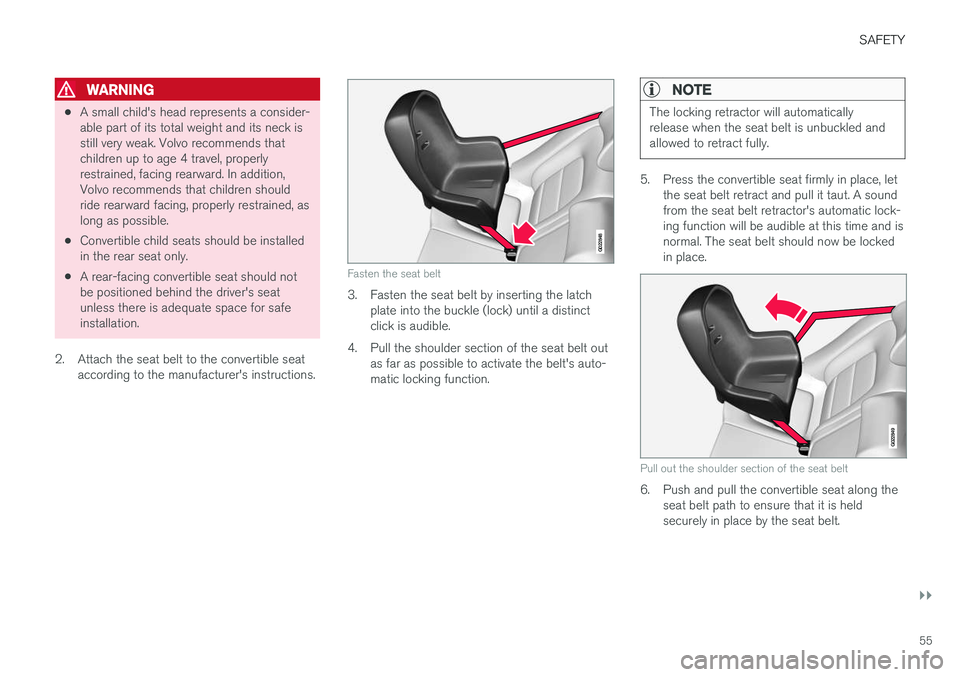
Fasten the seat belt
3. Fasten the seat belt by inserting the latchplate into the buckle (lock) until a distinct click is audible.
4. Pull the shoulder section of the seat belt out as far as possible to activate the belt's auto-matic locking function.
NOTE
The locking retractor will automatically release when the seat belt is unbuckled andallowed to retract fully.
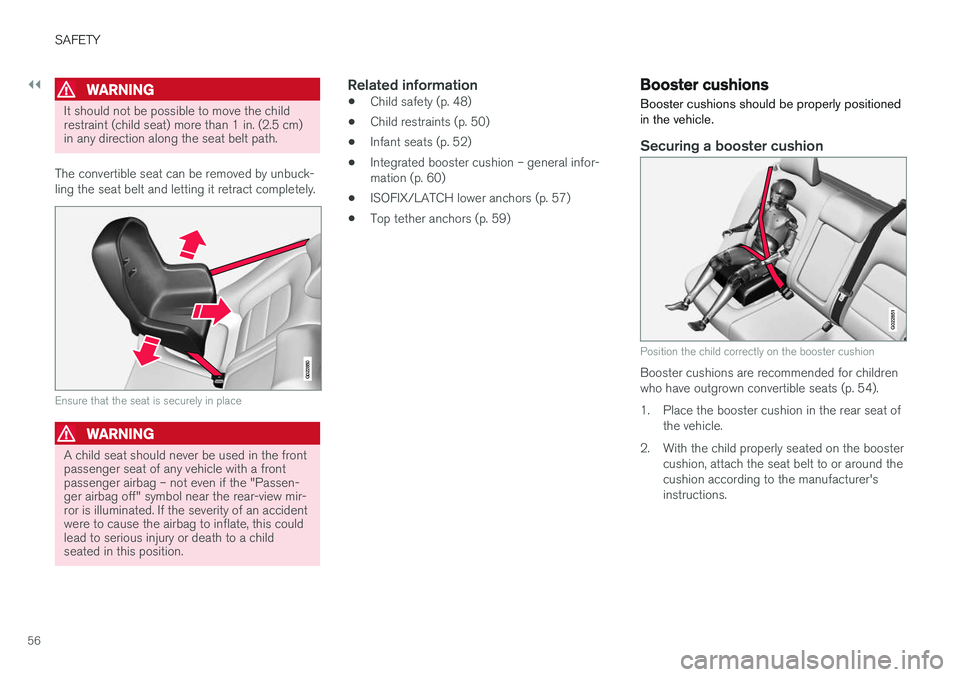
5. Press the convertible seat firmly in place, let the seat belt retract and pull it taut. A sound from the seat belt retractor's automatic lock-ing function will be audible at this time and isnormal. The seat belt should now be lockedin place.
G022849
Pull out the shoulder section of the seat belt
6. Push and pull the convertible seat along theseat belt path to ensure that it is held securely in place by the seat belt.
Page 58 of 404

||
SAFETY
56
WARNING
It should not be possible to move the child restraint (child seat) more than 1 in. (2.5 cm)in any direction along the seat belt path.
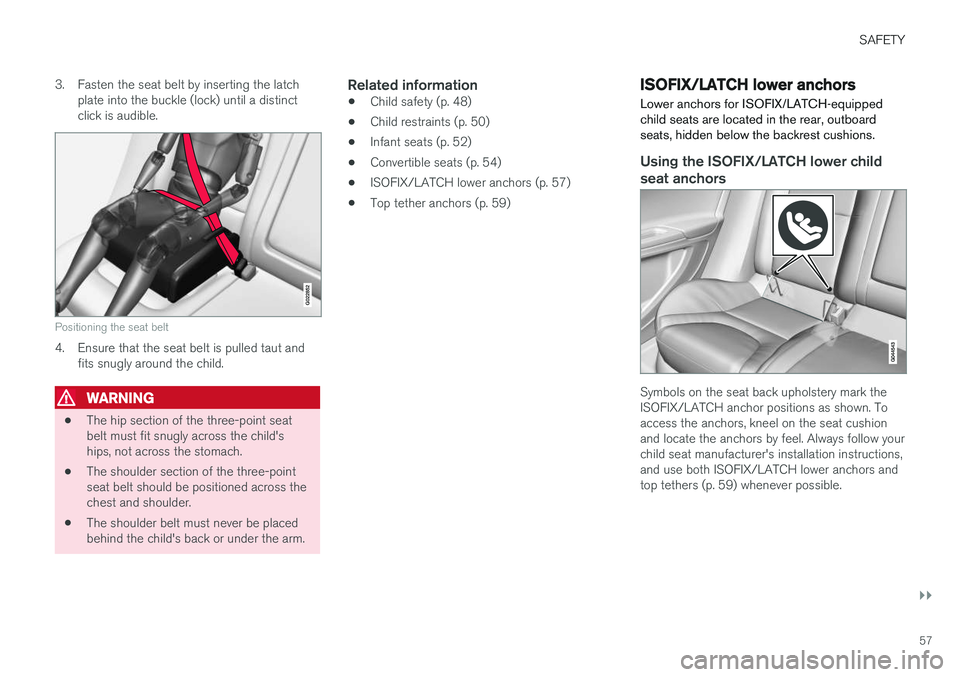
The convertible seat can be removed by unbuck- ling the seat belt and letting it retract completely.
G022850
Ensure that the seat is securely in place
WARNING
A child seat should never be used in the front passenger seat of any vehicle with a frontpassenger airbag – not even if the "Passen-ger airbag off" symbol near the rear-view mir-ror is illuminated. If the severity of an accidentwere to cause the airbag to inflate, this couldlead to serious injury or death to a childseated in this position.
Related information
• Child safety (p. 48)
• Child restraints (p. 50)
• Infant seats (p. 52)
• Integrated booster cushion – general infor- mation (p. 60)
• ISOFIX/LATCH lower anchors (p. 57)
• Top tether anchors (p. 59)
Booster cushions
Booster cushions should be properly positioned in the vehicle.
Securing a booster cushion
G022851
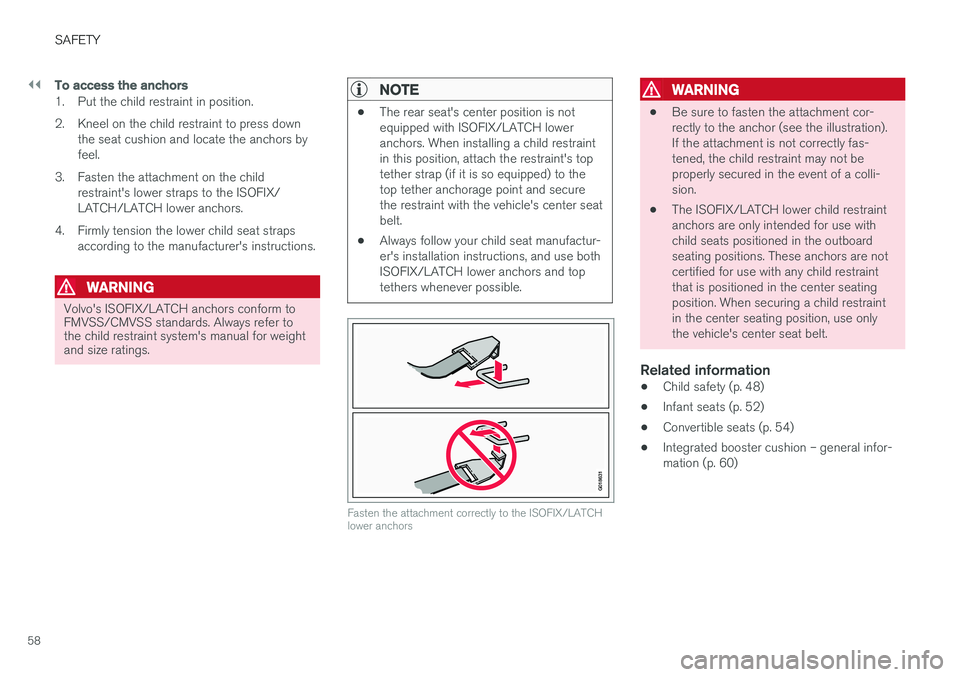
Position the child correctly on the booster cushion
Booster cushions are recommended for children who have outgrown convertible seats (p. 54).
1. Place the booster cushion in the rear seat of the vehicle.
2. With the child properly seated on the booster cushion, attach the seat belt to or around the cushion according to the manufacturer'sinstructions.
Page 59 of 404

SAFETY
}}
57
3. Fasten the seat belt by inserting the latch
plate into the buckle (lock) until a distinct click is audible.
G022852
Positioning the seat belt
4. Ensure that the seat belt is pulled taut and fits snugly around the child.
WARNING
• The hip section of the three-point seat belt must fit snugly across the child'ships, not across the stomach.
• The shoulder section of the three-pointseat belt should be positioned across thechest and shoulder.
• The shoulder belt must never be placedbehind the child's back or under the arm.
Related information
• Child safety (p. 48)
• Child restraints (p. 50)
• Infant seats (p. 52)
• Convertible seats (p. 54)
• ISOFIX/LATCH lower anchors (p. 57)
• Top tether anchors (p. 59)
ISOFIX/LATCH lower anchors Lower anchors for ISOFIX/LATCH-equipped child seats are located in the rear, outboardseats, hidden below the backrest cushions.
Using the ISOFIX/LATCH lower child seat anchors
Symbols on the seat back upholstery mark the ISOFIX/LATCH anchor positions as shown. Toaccess the anchors, kneel on the seat cushionand locate the anchors by feel. Always follow yourchild seat manufacturer's installation instructions,and use both ISOFIX/LATCH lower anchors andtop tethers (p. 59) whenever possible.
Page 60 of 404

||
SAFETY
58
To access the anchors
1. Put the child restraint in position.
2. Kneel on the child restraint to press downthe seat cushion and locate the anchors by feel.
3. Fasten the attachment on the child restraint's lower straps to the ISOFIX/LATCH/LATCH lower anchors.
4. Firmly tension the lower child seat straps according to the manufacturer's instructions.
WARNING
Volvo's ISOFIX/LATCH anchors conform to FMVSS/CMVSS standards. Always refer tothe child restraint system's manual for weightand size ratings.
NOTE
• The rear seat's center position is not equipped with ISOFIX/LATCH loweranchors. When installing a child restraintin this position, attach the restraint's toptether strap (if it is so equipped) to thetop tether anchorage point and securethe restraint with the vehicle's center seatbelt.
• Always follow your child seat manufactur-er's installation instructions, and use bothISOFIX/LATCH lower anchors and toptethers whenever possible.
G018631
Fasten the attachment correctly to the ISOFIX/LATCH lower anchors
WARNING
•
Be sure to fasten the attachment cor- rectly to the anchor (see the illustration).If the attachment is not correctly fas-tened, the child restraint may not beproperly secured in the event of a colli-sion.
• The ISOFIX/LATCH lower child restraintanchors are only intended for use withchild seats positioned in the outboardseating positions. These anchors are notcertified for use with any child restraintthat is positioned in the center seatingposition. When securing a child restraintin the center seating position, use onlythe vehicle's center seat belt.
Related information
• Child safety (p. 48)
• Infant seats (p. 52)
• Convertible seats (p. 54)
• Integrated booster cushion – general infor-mation (p. 60)
Page 61 of 404

SAFETY
}}
59
Top tether anchorsYour Volvo is equipped with child restraint top tether anchorages in the rear seat. They arelocated on the rear side of the backrests.
Child restraint anchorages
Securing a child seat
1. Place the child restraint on the rear seat.
2. Route the top tether strap under the head restraint and attach it to the anchor.
3. Attach lower tether straps to the lower ISO- FIX/LATCH anchors. If the child restraint is not equipped with lower tether straps, or therestraint is used in the center seating posi-tion, follow instructions for securing a childrestraint using the Automatic LockingRetractor seat belt (see Child restraints(p. 50)).
4. Firmly tension all straps. Refer also to the child seat manufacturer'sinstructions for information on securing the childseat.
NOTE
On models equipped with the optional cargo compartment cover, this cover should beremoved before a child seat is attached to thechild restraint anchors.
WARNING
•
Always refer to the recommendations made by the child restraint manufacturer.
• Volvo recommends that the top tetheranchors be used when installing a for-ward-facing child restraint.
• Never route a top tether strap over thetop of the head restraint. The strapshould be routed beneath the headrestraint.
• Child restraint anchorages are designedto withstand only those loads imposed bycorrectly fitted child restraints. Under nocircumstances are they to be used foradult seat belts or harnesses. The ancho-rages are not able to withstand excessiveforces on them in the event of collision iffull harness seat belts or adult seat beltsare installed to them. An adult who uses abelt anchored in a child restraint anchor-age runs a great risk of suffering severeinjuries should a collision occur.
• Do not install rear speakers that requirethe removal of the top tether anchors orinterfere with the proper use of the toptether strap.
Related information
•Child safety (p. 48)
• Infant seats (p. 52)
Page 65 of 404
SAFETY
63
With the booster cushion in the stage 1 posi- tion, press the button (see the arrow in illus-tration 1).
Lift the front edge of the booster cushion and press it rearward toward the backrest tolock it in position.
WARNING
DEATH or SERIOUS INJURY can occur •Follow all instructions on this child restraint and in the vehicle
Page 66 of 404
SAFETY
64
Integrated booster cushion – stowing
The integrated booster cushion (p. 60) can be folded down completely (stowed) from either thestage 1 or stage 2 positions.NOTE
The booster cushion cannot be moved from the stage 2 (upper) position to the stage 1(lower) position. It must first be folded downcompletely to the stowed position, and thenadjusted to stage 1.
Pull the handle forward to release the booster cushion.
Press down on the center of the booster cushion to return it to the stowed position.
NOTE
The booster cushion must be in the stowed position before the rear seat backrests arefolded down.
CAUTION
Be sure there are no loose objects under the booster cushion before it is stowed.
WARNING
DEATH or SERIOUS INJURY can occur • Follow all instructions on this child restraint and in the vehicle
Page 72 of 404

||
INSTRUMENTS AND CONTROLS
* Option/accessory.
70
Function See
Controls for menus and messages, turn signals,high/low beams, tripcomputer(p. 79),(p. 99),(p. 92),(p. 118)
Paddles for manually shifting gears
*(p. 265)
Cruise control (p. 180)
Horn, airbag (p. 91),
(p. 35)
Main instrument panel (p. 71)
Infotainment system/ Bluetooth hands-freecontrolsSensus Info-tainment sup-plement
START/STOP ENGINE button
(p. 81)
Ignition slot (p. 81)
Display for infotainment system functions andmenus(p. 116), Sen-sus Infotain-ment supple-ment
Door handle -
Function
See
In-door control panels (power windows, mir-rors, central locking but-ton)(p. 105),(p. 106),(p. 166)
Hazard warning flashers (p. 98)
Controls for the info- tainment system andmenus
(p. 79),(p. 132), Sen-sus Infotain-ment supple-ment
Climate system controls (p. 132)
Gear selector (p. 263)
Not in use -
Wipers and washers (p. 102),
(p. 103)
Steering wheel adjust- ment(p. 91)
Hood opening control (p. 337)
Parking brake (p. 280)
Function
See
Power seat* adjustment
controls (p. 84)
Lighting panel, buttons for opening fuel fillerdoor and unlocking thetailgate(p. 92),(p. 289),(p. 168)
Related information
•
Information displays – ambient temperature sensor (p. 80)
• Information displays – trip odometer andclock (p. 81)