2018 VOLVO V60 CROSS COUNTRY wipers
[x] Cancel search: wipersPage 263 of 404

STARTING AND DRIVING
* Option/accessory.261
Engine Remote Start (ERS) * –
starting the engine
Remote key buttons used for remote engine start
Lock
Approach lighting
Starting the engineThe maximum range for ERS is approximately 100 ft (30 meters) if the view of the vehicle is unobstructed. The vehicle must also be
locked. To start the engine:
1. Press the lock button (1 ) briefly.
2. Immediately press the approach lighting but- ton (2) for approximately 2 seconds.
If the requirements for ERS have been met, the following will occur: 1. The turn signals will flash several times.
2. The engine will start.
3. The turn signals will illuminate for 3 seconds
to indicate that the engine has started.
After the engine has started, the vehicle remains locked but the alarm is disarmed.
Active functions
When the engine is started with ERS, the follow- ing functions are activated: • The climate control system
• The infotainment system.
• Approach lighting
Deactivated functions
When the engine is started with ERS, the follow- ing functions are deactivated: •
Headlights
• Parking lights
• License plate lights
• Windshield wipers
Related information
•
Engine Remote Start (ERS)
* – switching off
the engine (p. 261)
• Engine Remote Start (ERS)
* – introduction
(p. 260)
Engine Remote Start (ERS) * –
switching off the engine
Any of the following will switch off the engine if it has been started with ERS: • Pressing the lock button (1) or the unlock button (2) on the remote key
• Unlocking the vehicle
• Opening a door
• Depressing the accelerator or brake pedal
• Moving the gear selector from the
P position
• If there are less than approx. 2.5 gallons(10 liters) of fuel in the tank
• More than 15 minutes have elapsed.
If the engine has been started with ERS andswitches off, the turn signals will illuminate for3 seconds.
Message in the instrument panel display
If ERS is interrupted, a text message will be dis- played in the instrument panel.
Related information
• Engine Remote Start (ERS)
* – introduction
(p. 260)
• Engine Remote Start (ERS)
* – starting the
engine (p. 261)
Page 288 of 404

STARTING AND DRIVING
286
Driving in cold weather
Check your vehicle before the approach of cold weather.
The following advice is worth noting:
• Make sure that the engine coolant (p. 342) contains 50 percent antifreeze. Any othermixture will reduce freeze protection. Thisgives protection against freezing down to–31 °F (–35 °C). The use of "recycled" anti-freeze is not approved by Volvo. Differenttypes of antifreeze must not be mixed.
• Volvo recommends using only genuine Volvoantifreeze in your vehicle's radiator.
• Try to keep the fuel tank well filled – thishelps prevent the formation of condensationin the tank. In addition, in extremely coldweather conditions it is worthwhile to addfuel line de-icer before refueling.
• The viscosity of the engine oil is important.Oil with low viscosity (thinner oil) improvescold-weather starting as well as decreasingfuel consumption while the engine is warm-ing up. Full synthetic 0W-30 oil is recom-mended for driving in areas with sustainedlow temperatures.
• The load placed on the battery is greater dur-ing the winter since the windshield wipers,lighting, etc., are used more often. Moreover,the capacity of the battery decreases as thetemperature drops. In very cold weather, apoorly charged battery can freeze and be damaged. It is therefore advisable to checkthe state of charge more frequently andspray an anti-rust oil on the battery posts.
• Volvo recommends the use of snow tires onall four wheels for winter driving, see Snowtires/studded tires (p. 316).
• To prevent the washer fluid (p. 354)reservoirfrom freezing, add washer solvents contain-ing antifreeze. This is important since dirt isoften splashed on the windshield during win-ter driving, requiring the frequent use of thewashers and wipers. Volvo Washer Solventshould be diluted as follows: Down to 14 °F(–10 °C): 1 part washer solvent and 4 partswater Down to 5 °F (–15 °C): 1 part washersolvent and 3 parts water Down to 0 °F(–18 °C): 1 part washer solvent and 2 partswater Down to –18 °F (–28 °C): 1 partwasher solvent and 1 part water.
• Use Volvo Teflon Lock Spray in the locks.
• Avoid using de-icing sprays as they cancause damage to the locks.
Refueling – fuel requirements
Volvo recommends the use of detergent gaso- line to control engine deposits.
Deposit control gasoline (detergent
additives)
Detergent gasoline is effective in keeping injec- tors and intake valves clean. Consistent use ofdeposit control gasolines will help ensure gooddrivability and fuel economy. If you are not surewhether the gasoline contains deposit controladditives, check with the service station operator.
NOTE
Volvo does not recommend the use of exter- nal fuel injector cleaning systems.
Unleaded fuelEach Volvo has a three-way catalytic converter and must use only unleaded gasoline. U.S. andCanadian regulations require that pumps deliver-ing unleaded gasoline be labeled "UNLEADED".Only these pumps have nozzles which fit yourvehicle's filler inlet. It is unlawful to dispense lea-ded fuel into a vehicle labeled "unleaded gaso-line only". Leaded gasoline damages the three-way catalytic converter and the heated oxygensensor system. Repeated use of leaded gasolinewill lessen the effectiveness of the emission con-trol system (p. 290) and could result in loss ofemission warranty coverage. State and local vehi-
Page 335 of 404

MAINTENANCE AND SERVICING
333
Maintenance – owner maintenance
Periodic maintenance requirements and intervals are described in your vehicle's Warranty andService Records Information booklet. The following points can be carried out between the normally scheduled maintenance services.
Owner maintenance
Each time the car is refueled:
• Check the engine oil level.
• Clean the windshield, windshield wipers, headlights, and taillights.
Monthly:
• Check cold tire pressure in all tires. Inspect the tires for wear.
• Check that engine coolant and other fluidlevels are between the indicated "min" and"max" markings.
• Clean interior glass surfaces with a glasscleaner and soft paper towels.
• Wipe driver information displays with a softcloth.
• Visually inspect battery terminals for corro-sion. Corrosion may indicate a loose terminalconnector, or a battery near the end of itsuseful service life. Consult your Volvo retailerfor additional information.
As needed:
Wash the car, including the undercarriage, to reduce wear that can be caused by a buildup of dirt, and corrosion that can be caused by salt res-idues. Clean leaves and twigs from air intake vents at the base of the windshield, and from other placeswhere they may collect.
NOTE
Complete service information for qualified technicians is available online for purchase orsubscription at www.volvotechinfo.com.
Related information
•
Maintenance – opening/closing hood (p. 337)
• Engine compartment – overview (p. 338)
• Engine compartment – coolant (p. 342)
• Engine compartment – engine oil (p. 339)
• Engine compartment – power steering fluid(p. 343)
• Engine compartment – washer fluid (p. 354)
• Cleaning the interior (p. 371)
• Washing the vehicle (p. 369)
• Tire inflation – checking pressure (p. 309)
• Tires – tread wear indicator (p. 302)
Page 354 of 404

||
MAINTENANCE AND SERVICING
352To put the windshiield wipers in the service posi- tion: 1.
Insert the remote key into the ignition slot 3
and press the START/STOP ENGINE but-
ton briefly to put the ignition in mode I (see
Ignition modes (p. 82) for detailed informa- tion about the ignition modes).
2. Press the START/STOP ENGINE button
again briefly to switch the ignition off.
3. Within 3 seconds, move the right steering wheel lever up and hold it for at least 1 sec-ond.
> The wipers will then move to the vertical(service) position on the windshield.
The wipers can be returned to the normal posi- tion by pressing the START/STOP ENGINE but-
ton briefly to put the ignition in mode I (or by
starting the engine).
CAUTION
If the wiper arms have been folded out from the windshield while in the service position,fold them back against the windshield beforereturning the wipers to the normal position tohelp avoid scratching the paint on the hood.
Related information
• Engine compartment – washer fluid (p. 354)
Wiper blades – windshield The wiper blades should be replaced regularly for best effect. The windshield wiper blades must be in the verti- cal (service) position for replacement, washingor to lift them away from the windshield whene.g., removing ice or snow.
Replacing the windshield wiper blades
NOTE
The windshield wiper blades are different lengths. The blade on the driver
Page 355 of 404

MAINTENANCE AND SERVICING
353
With the wipers in the service position, fold out the wiper arm from the windshield. Pressthe button on the wiper blade attachmentand pull the wiper blade straight out, parallelwith the wiper arm.
Slide in the new wiper blade until it clicks into place.
Check that the blade is securely in place.
4. Press the wipers back against the wind- shield.
To return the wipers from the service position to the normal position, fold the wipers back against the windshield and press the START/STOP
ENGINE button briefly to put the ignition in mode
I (or start the engine).
CleaningKeeping the windshield and wiper blades clean helps improve visibility and prolongs the servicelife of the wiper blades. Clean the wiper bladeswith a stiff-bristle brush and lukewarm soap solu-tion or car washing detergent.
Related information
• Engine compartment – washer fluid (p. 354)
• Wiper blades – service position (p. 351)
Wiper blades – tailgate
The wiper blades should be replaced regularly for best effect.
Replacing the tailgate wiper blade
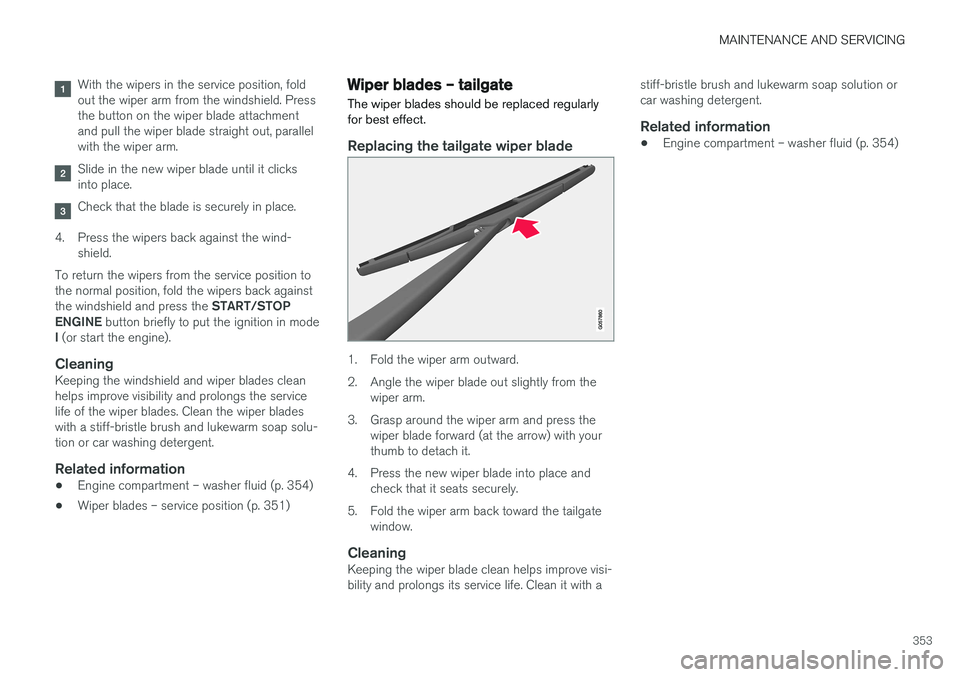
1. Fold the wiper arm outward.
2. Angle the wiper blade out slightly from the wiper arm.
3. Grasp around the wiper arm and press the wiper blade forward (at the arrow) with your thumb to detach it.
4. Press the new wiper blade into place and check that it seats securely.
5. Fold the wiper arm back toward the tailgate window.
CleaningKeeping the wiper blade clean helps improve visi-bility and prolongs its service life. Clean it with a stiff-bristle brush and lukewarm soap solution orcar washing detergent.
Related information
•
Engine compartment – washer fluid (p. 354)
Page 363 of 404

MAINTENANCE AND SERVICING
}}
* Option/accessory.361
Engine compartment, upper
Engine compartment, front
Engine compartment, lower
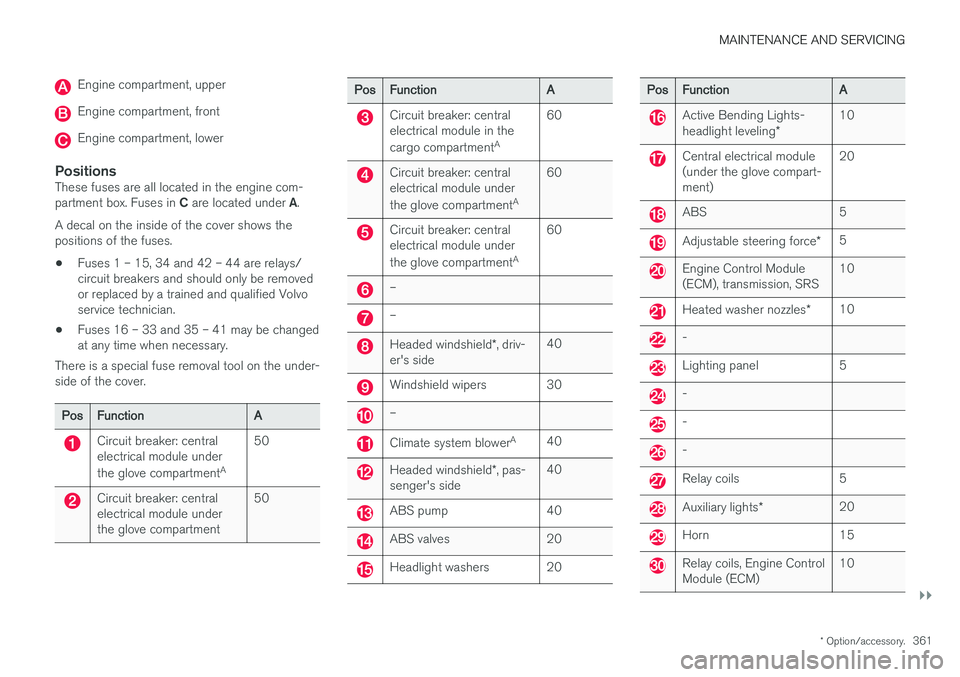
PositionsThese fuses are all located in the engine com- partment box. Fuses in C are located under A.
A decal on the inside of the cover shows the positions of the fuses. • Fuses 1 – 15, 34 and 42 – 44 are relays/ circuit breakers and should only be removedor replaced by a trained and qualified Volvoservice technician.
• Fuses 16 – 33 and 35 – 41 may be changedat any time when necessary.
There is a special fuse removal tool on the under-side of the cover.
Pos Function A
Circuit breaker: central electrical module under the glove compartmentA50
Circuit breaker: central electrical module underthe glove compartment 50
Pos
Function A
Circuit breaker: central electrical module in the cargo compartmentA60
Circuit breaker: central electrical module under the glove compartment
A60
Circuit breaker: central electrical module under the glove compartment
A60
–
–
Headed windshield
*, driv-
er's side 40
Windshield wipers 30
–
Climate system blower
A
40
Headed windshield *, pas-
senger's side 40
ABS pump 40
ABS valves 20
Headlight washers 20
Pos
Function A
Active Bending Lights- headlight leveling*10
Central electrical module (under the glove compart-ment) 20
ABS 5
Adjustable steering force
*5
Engine Control Module (ECM), transmission, SRS 10
Heated washer nozzles
*10
-
Lighting panel 5
-
-
-
Relay coils 5
Auxiliary lights
* 20
Horn 15
Relay coils, Engine Control Module (ECM) 10
Page 372 of 404

||
MAINTENANCE AND SERVICING
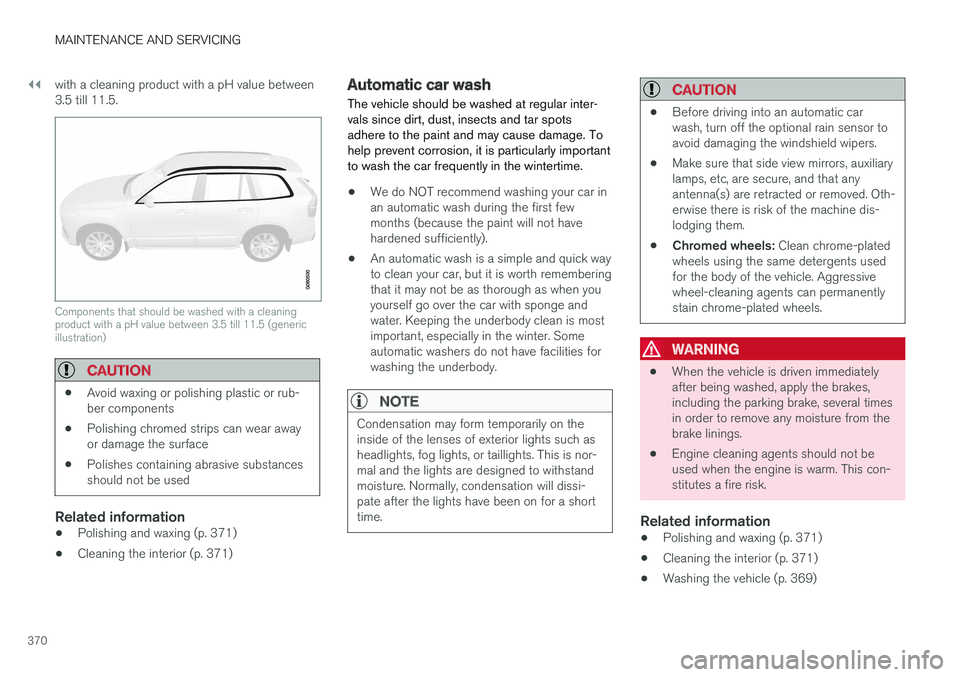
370with a cleaning product with a pH value between 3.5 till 11.5.
Components that should be washed with a cleaning product with a pH value between 3.5 till 11.5 (genericillustration)
CAUTION
•
Avoid waxing or polishing plastic or rub- ber components
• Polishing chromed strips can wear awayor damage the surface
• Polishes containing abrasive substancesshould not be used
Related information
• Polishing and waxing (p. 371)
• Cleaning the interior (p. 371)
Automatic car wash
The vehicle should be washed at regular inter- vals since dirt, dust, insects and tar spotsadhere to the paint and may cause damage. Tohelp prevent corrosion, it is particularly importantto wash the car frequently in the wintertime.
• We do NOT recommend washing your car in an automatic wash during the first fewmonths (because the paint will not havehardened sufficiently).
• An automatic wash is a simple and quick wayto clean your car, but it is worth rememberingthat it may not be as thorough as when youyourself go over the car with sponge andwater. Keeping the underbody clean is mostimportant, especially in the winter. Someautomatic washers do not have facilities forwashing the underbody.
NOTE
Condensation may form temporarily on the inside of the lenses of exterior lights such asheadlights, fog lights, or taillights. This is nor-mal and the lights are designed to withstandmoisture. Normally, condensation will dissi-pate after the lights have been on for a shorttime.
CAUTION
•
Before driving into an automatic car wash, turn off the optional rain sensor toavoid damaging the windshield wipers.
• Make sure that side view mirrors, auxiliarylamps, etc, are secure, and that anyantenna(s) are retracted or removed. Oth-erwise there is risk of the machine dis-lodging them.
• Chromed wheels:
Clean chrome-plated
wheels using the same detergents usedfor the body of the vehicle. Aggressivewheel-cleaning agents can permanentlystain chrome-plated wheels.
WARNING
• When the vehicle is driven immediately after being washed, apply the brakes,including the parking brake, several timesin order to remove any moisture from thebrake linings.
• Engine cleaning agents should not beused when the engine is warm. This con-stitutes a fire risk.
Related information
•
Polishing and waxing (p. 371)
• Cleaning the interior (p. 371)
• Washing the vehicle (p. 369)
Page 401 of 404

INDEX
399
Storage spaces 142
Studded tires 315, 316
Sunroof (moonroof) 110, 111
Sun shade 105
Supplemental restraint system 33
warning light 77
Symbols, overview 388
T
Tailgate locking/unlocking 168
opening manually 169
wiper/washer 104
Tailgate wipers 353 Temperature sensor ambient 80
Temporary spare tire 306
Three-way catalytic converter 290
Tire designations 310
Tire inflation pressure 387
Tire Monitor 317, 318, 319
Tire Pressure Monitoring System 320, 323 indicator light 76
Tires 300 age 301
changing from summer to winter 303
glossary of terms 313
improving economy 302
inflation pressure 308, 309
inflation pressure table 387
rotation 300
snow 315, 316
spare 306
specifications 310
speed ratings 310
storing 301
studded 315, 316
tire pressure monitoring system 320
tire sealing system 324
tread wear indicator 302
uniform tire quality grading 314
Tire sealing system 324 Top tether anchors (child restraint sys- tems) 59
Touching up paint 373
Towing a trailer 292, 294
Towing the vehicle 295, 296
Traction control 174, 175
Trailer towing 292, 294Transmission general description 263, 265
Hill Start Assist 263oil 385
shiftlock override 267
Tread wear indicator 302
Trip computer 118
Trip odometers 81
Trips, long distance 285
Tunnel detection 95
Turn signals 99 changing bulbs 348
indicator lights 76
Two-stage booster cushion 60, 62, 64
U
Uniform Tire Quality Grading 314
Unlocking the tailgate 168
Unlocking the vehicle 155, 165, 166, 168
V
Vanity mirror 145 changing bulbs 350
Vehicle Event Data 19
Vehicle information 21