2018 VOLVO V60 CROSS COUNTRY ECU
[x] Cancel search: ECUPage 58 of 404

||
SAFETY
56
WARNING
It should not be possible to move the child restraint (child seat) more than 1 in. (2.5 cm)in any direction along the seat belt path.
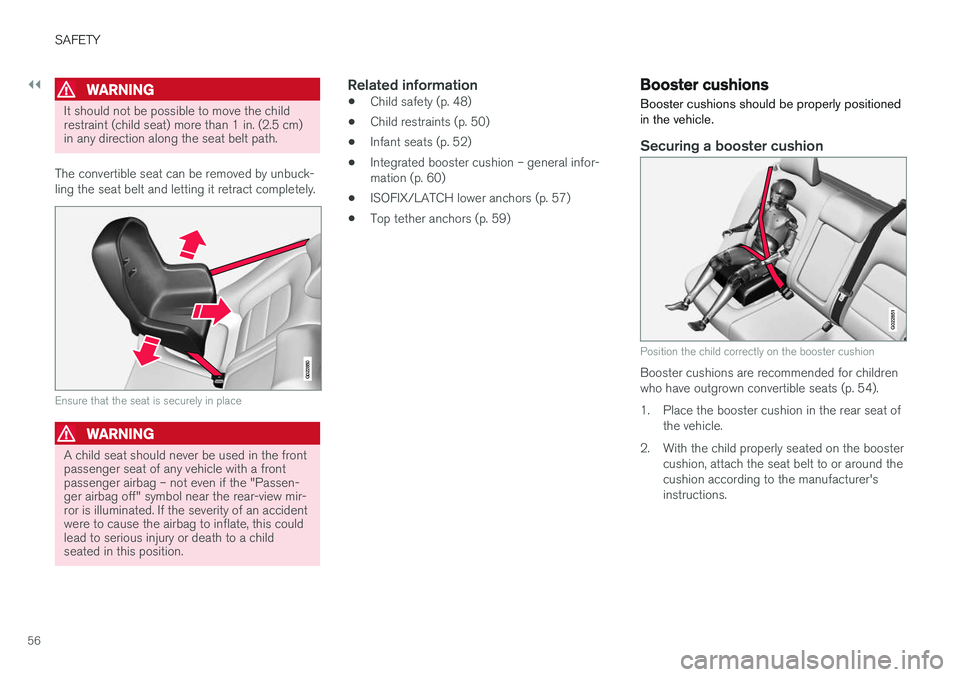
The convertible seat can be removed by unbuck- ling the seat belt and letting it retract completely.
G022850
Ensure that the seat is securely in place
WARNING
A child seat should never be used in the front passenger seat of any vehicle with a frontpassenger airbag – not even if the "Passen-ger airbag off" symbol near the rear-view mir-ror is illuminated. If the severity of an accidentwere to cause the airbag to inflate, this couldlead to serious injury or death to a childseated in this position.
Related information
• Child safety (p. 48)
• Child restraints (p. 50)
• Infant seats (p. 52)
• Integrated booster cushion – general infor- mation (p. 60)
• ISOFIX/LATCH lower anchors (p. 57)
• Top tether anchors (p. 59)
Booster cushions
Booster cushions should be properly positioned in the vehicle.
Securing a booster cushion
G022851
Position the child correctly on the booster cushion
Booster cushions are recommended for children who have outgrown convertible seats (p. 54).
1. Place the booster cushion in the rear seat of the vehicle.
2. With the child properly seated on the booster cushion, attach the seat belt to or around the cushion according to the manufacturer'sinstructions.
Page 60 of 404

||
SAFETY
58
To access the anchors
1. Put the child restraint in position.
2. Kneel on the child restraint to press downthe seat cushion and locate the anchors by feel.
3. Fasten the attachment on the child restraint's lower straps to the ISOFIX/LATCH/LATCH lower anchors.
4. Firmly tension the lower child seat straps according to the manufacturer's instructions.
WARNING
Volvo's ISOFIX/LATCH anchors conform to FMVSS/CMVSS standards. Always refer tothe child restraint system's manual for weightand size ratings.
NOTE
• The rear seat's center position is not equipped with ISOFIX/LATCH loweranchors. When installing a child restraintin this position, attach the restraint's toptether strap (if it is so equipped) to thetop tether anchorage point and securethe restraint with the vehicle's center seatbelt.
• Always follow your child seat manufactur-er's installation instructions, and use bothISOFIX/LATCH lower anchors and toptethers whenever possible.
G018631
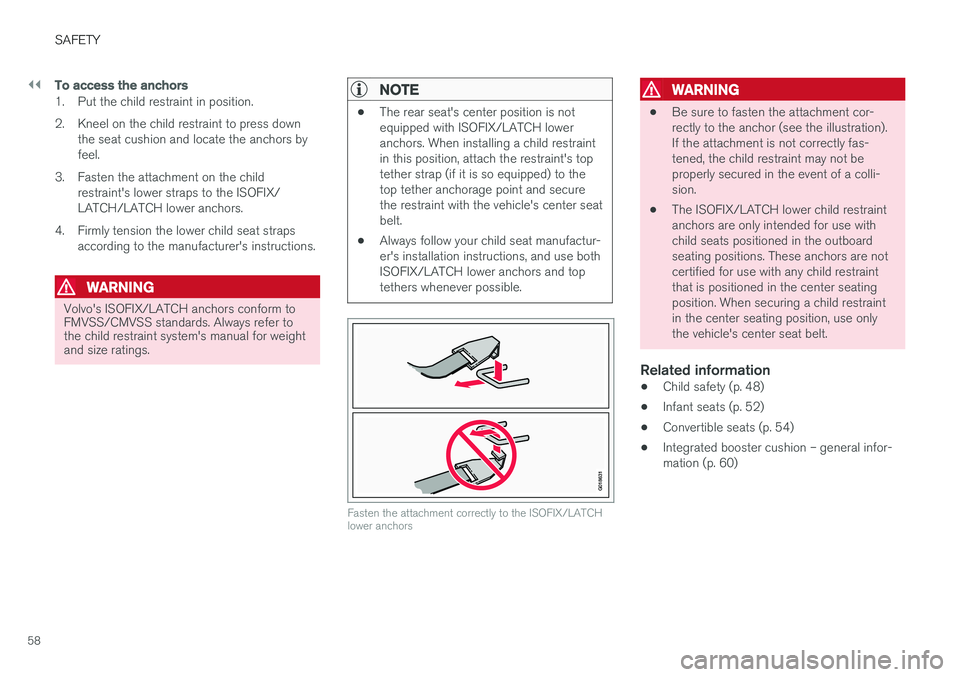
Fasten the attachment correctly to the ISOFIX/LATCH lower anchors
WARNING
•
Be sure to fasten the attachment cor- rectly to the anchor (see the illustration).If the attachment is not correctly fas-tened, the child restraint may not beproperly secured in the event of a colli-sion.
• The ISOFIX/LATCH lower child restraintanchors are only intended for use withchild seats positioned in the outboardseating positions. These anchors are notcertified for use with any child restraintthat is positioned in the center seatingposition. When securing a child restraintin the center seating position, use onlythe vehicle's center seat belt.
Related information
• Child safety (p. 48)
• Infant seats (p. 52)
• Convertible seats (p. 54)
• Integrated booster cushion – general infor-mation (p. 60)
Page 61 of 404

SAFETY
}}
59
Top tether anchorsYour Volvo is equipped with child restraint top tether anchorages in the rear seat. They arelocated on the rear side of the backrests.
Child restraint anchorages
Securing a child seat
1. Place the child restraint on the rear seat.
2. Route the top tether strap under the head restraint and attach it to the anchor.
3. Attach lower tether straps to the lower ISO- FIX/LATCH anchors. If the child restraint is not equipped with lower tether straps, or therestraint is used in the center seating posi-tion, follow instructions for securing a childrestraint using the Automatic LockingRetractor seat belt (see Child restraints(p. 50)).
4. Firmly tension all straps. Refer also to the child seat manufacturer'sinstructions for information on securing the childseat.
NOTE
On models equipped with the optional cargo compartment cover, this cover should beremoved before a child seat is attached to thechild restraint anchors.
WARNING
•
Always refer to the recommendations made by the child restraint manufacturer.
• Volvo recommends that the top tetheranchors be used when installing a for-ward-facing child restraint.
• Never route a top tether strap over thetop of the head restraint. The strapshould be routed beneath the headrestraint.
• Child restraint anchorages are designedto withstand only those loads imposed bycorrectly fitted child restraints. Under nocircumstances are they to be used foradult seat belts or harnesses. The ancho-rages are not able to withstand excessiveforces on them in the event of collision iffull harness seat belts or adult seat beltsare installed to them. An adult who uses abelt anchored in a child restraint anchor-age runs a great risk of suffering severeinjuries should a collision occur.
• Do not install rear speakers that requirethe removal of the top tether anchors orinterfere with the proper use of the toptether strap.
Related information
•Child safety (p. 48)
• Infant seats (p. 52)
Page 62 of 404

SAFETY
60•
Convertible seats (p. 54)
• Integrated booster cushion – general infor- mation (p. 60)
• ISOFIX/LATCH lower anchors (p. 57)
Integrated booster cushion – general information
The booster cushions are designed to raise the child higher so that the shoulder strap crossesover the child's collarbone, not over the neck.
Integrated two-stage booster cushion 2Volvo's optional integrated booster cushions are located in the outboard seating positions. Thesebooster cushions have been specially designedto help safeguard children in the rear seat. Theyshould be stowed (p. 64) (folded down into theseat cushion) when not in use. When using anintegrated booster cushion (p. 62), the childmust be secured with the vehicle's three-pointseat belt. If using a booster cushion does not result in proper positioning of the shoulder strap, then thechild should be placed in a properly secured childrestraint (see (p. 50) ). The shoulder belt mustnever be placed behind the child's back or underthe arm.
Correct seating position: the shoulder belt is across the collarbone
Incorrect seating position: the child's head is above the head restraint and the shoulder belt is not across thecollarbone
Before driving, check that:
2
Canada only: This cushion may be referred to as a built-in booster cushion.
Page 85 of 404

INSTRUMENTS AND CONTROLS
* Option/accessory.83
Ignition mode I
–With the remote key fully pressed into the ignition slot8
, press START/STOP ENGINE
briefly.
Ignition mode II
–With the remote key fully pressed into the ignition slot 8
, press START/STOP ENGINE
for approximately 2 seconds.
Returning to mode 0
To return to mode 0 from mode II or I, press
START/STOP ENGINE briefly.
Starting and stopping the engineSee Starting the engine (p. 258) and Switching off the engine (p. 260) for information on star-ting the engine and switching it off.
Emergency towingSee Towing the vehicle (p. 295) for importantinformation about the remote key when the vehi-cle is being towed.
Related information
•Inserting/removing remote key (p. 81)
Front seats
The front seats can be adjusted in a number of ways to help provide the most comfortable seat-ing position.
Raise/lower the seat, pump up/down.
Front-rear adjustment: lift the bar and move the seat to the position of your choice.
Raise/lower front edge of seat cushion, pump up/down.
Backrest tilt: turn the control to adjust the angle of the backrest.
Electronic lumbar support *. Press the button
to adjust.
Control panel for power seat *, see Front
seats – power seat (p. 84).
WARNING
• Do not adjust the seat while driving. The seat should be adjusted so that the brakepedal can be depressed fully. In addition,position the seat as far rearward as com-fort and control allow.
• Check that the seat is securely lockedinto position after adjusting.
Related information
• Front seats – power seat (p. 84)
• Rear seats – folding backrest (p. 89)
• Rear seats – head restraints (p. 87)
8
Not necessary in vehicles with the optional keyless drive.
Page 86 of 404

INSTRUMENTS AND CONTROLS
* Option/accessory.
84
Front seats – folding backrest *9
The front passenger's seat backrest can be folded down to make it easier to transport longobjects.
The front passenger seat backrest can be folded to a horizontal position to make room for a longload. Fold the backrest as follows:
Move the seat as far back and down as pos- sible.
Adjust the backrest to an upright position.
Lift the catches on the rear of the backrest.
Without releasing the catches, push the backrest forward. Move the seat as far forward as possible so that the head restraint slides under the glovecompartment.
Return the seat to its upright position in thereverse order.
WARNING
• When transporting long objects, cover sharp edges on the load to help preventinjury to occupants. Secure the load tohelp prevent shifting during sudden stops.
• When the seat's backrest is returned tothe upright position, push and pull it to besure that it is securely locked in this posi-tion.
Related information
•
Front seats (p. 83)
• Front seats – power seat (p. 84)
• Rear seats – folding backrest (p. 89)
• Rear seats – head restraints (p. 87)
Front seats – power seat 10
The power seat(s) can be adjusted for a short period after unlocking the door with the remotecontrol without the key in the ignition slot. Seatadjustment is normally made when the ignition ison and can always be made when the engine isrunning.
Power seat
Power seat adjustment controls
Front edge of seat cushion up/down
Raise/lower the seat
Seat forward/rearward
Backrest tilt
Electronic lumbar support *
9
The front passenger's seat backrest on models equipped with the optional sport seat cannot be folded down
10 Optional on certain models
Page 92 of 404

||
INSTRUMENTS AND CONTROLS
90
Release and lower the center head restraint (see Rear seats – head restraints (p. 87)) ifthe center and/or right section of the back-rest is to be lowered. The outboard headrestraints fold down automatically.
Pull up the backrest release control on the respective section(s) (
) and fold the sec-
tion(s) down. A red indicator (
) shows that
the backrest is not locked in the upright position.
NOTE
It may be necessary to move the front seats forward or put their backrests in a moreupright position before folding down the rearseat backrests.
WARNING
• When one or more sections of the back- rest is returned to the upright position,check that it is properly locked in place bypushing and pulling it. The red indicatorsshould also not be visible.
• Return the outboard head restraints tothe upright position.
• Long loads should always be securelyanchored to help avoid injury in the eventof a sudden stop.
• Always turn the engine off and apply theparking brake when loading/unloadingthe vehicle.
• Place the transmission in the Park (
P)
position to help prevent inadvertentmovement of the gear selector.
• On hot days, the temperature in the vehi-cle interior can rise very quickly. Exposureof people to these high temperatures foreven a short period of time can causeheat-related injury or death. Small chil-dren are particularly at risk.
Related information
• Front seats (p. 83)
• Front seats – power seat (p. 84)
• Rear seats – head restraints (p. 87)
Page 114 of 404

||
INSTRUMENTS AND CONTROLS
* Option/accessory.
112
Tilt position
G028900
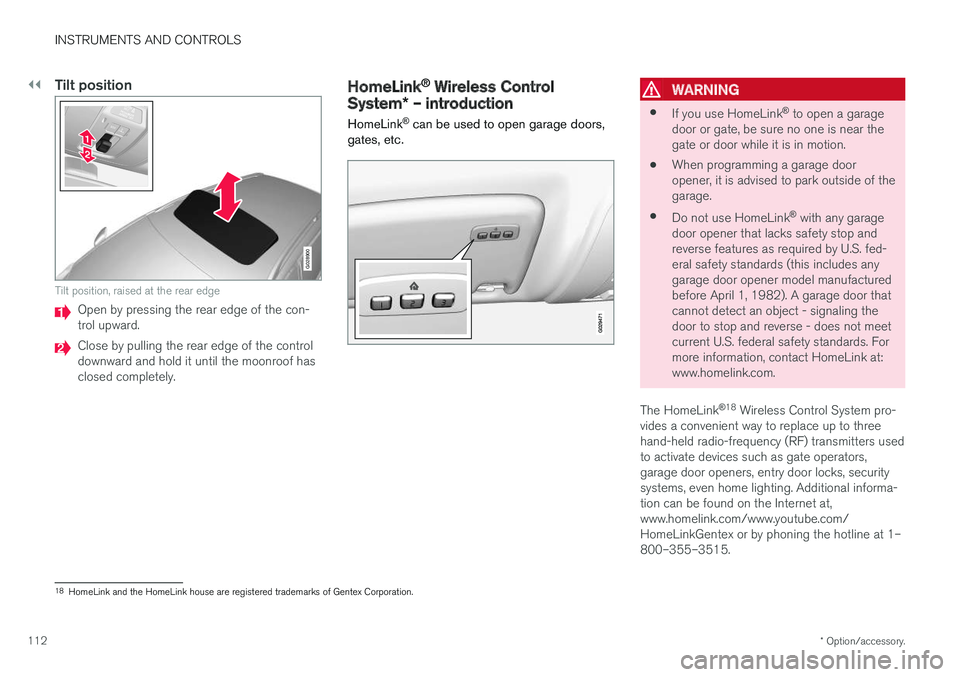
Tilt position, raised at the rear edge
Open by pressing the rear edge of the con- trol upward.
Close by pulling the rear edge of the control downward and hold it until the moonroof hasclosed completely.
HomeLink ®
Wireless Control
System * – introduction
HomeLink ®
can be used to open garage doors,
gates, etc.WARNING
• If you use HomeLink ®
to open a garage
door or gate, be sure no one is near the gate or door while it is in motion.
• When programming a garage dooropener, it is advised to park outside of thegarage.
• Do not use HomeLink ®
with any garage
door opener that lacks safety stop andreverse features as required by U.S. fed-eral safety standards (this includes anygarage door opener model manufacturedbefore April 1, 1982). A garage door thatcannot detect an object - signaling thedoor to stop and reverse - does not meetcurrent U.S. federal safety standards. Formore information, contact HomeLink at:www.homelink.com.
The HomeLink ®
18
Wireless Control System pro-
vides a convenient way to replace up to threehand-held radio-frequency (RF) transmitters usedto activate devices such as gate operators,garage door openers, entry door locks, securitysystems, even home lighting. Additional informa-tion can be found on the Internet at,www.homelink.com/www.youtube.com/HomeLinkGentex or by phoning the hotline at 1–800–355–3515.
18 HomeLink and the HomeLink house are registered trademarks of Gentex Corporation.