2018 VOLVO V60 CROSS COUNTRY warning
[x] Cancel search: warningPage 260 of 404

STARTING AND DRIVING
* Option/accessory.
258
Starting the engine
The engine can be started/switched off using the remote key and the START/STOP ENGINE
button.
Ignition slot with remote key inserted (see Ignition modes (p. 82) for more information on ignition modes)
WARNING
Before starting the engine:
• Fasten the seat belt.
• Check that the seat, steering wheel and mirrors are adjusted properly.
• Make sure the brake pedal can bedepressed completely. Adjust the seat ifnecessary.
WARNING
•Never use more than one floor mat at a time on the driver's floor. Before driving,remove the original mat from the driver'sseat floor before using any other type offloor mat. Any mat used in this positionshould be securely and properly anchoredin the attaching pins. An extra mat on thedriver's floor can cause the acceleratorand/or brake pedal to catch. Check thatthe movement of these pedals is notimpeded.
• Volvo's floor mats are specially manufac-tured for your car. They must be firmlysecured in the clips on the floor so thatthey cannot slide and become trappedunder the pedals on the driver's side.
1. Press the remote key into the ignition slot as far as possible, with the metallic key blade pointing outward (not inserted into the slot) 1
.
2. Depress the brake pedal 2
. 3.
Press and release the START/STOP
ENGINE button. The autostart function will
operate the starter motor until the engine starts or until its overheating function stopsit. The starter motor operates for a maximum of 10 seconds. If the engine has not started,repeat the procedure.
CAUTION
If the engine does not start after the third try, wait for approximately 3 minutes before tryingto start it again to give the battery time torecover its starting capacity.
NOTE
Keyless drive *
To start a vehicle equipped with the keyless drive feature, one of the remote keys must bein the passenger compartment. Follow theinstructions in steps 2 and 3 to start the vehi-cle.
1 On vehicles with the optional keyless drive, it is only necessary to have a remote key in the passenger
Page 261 of 404

STARTING AND DRIVING
259
WARNING
•Always remove the remote key from the ignition slot when leaving the vehicle and ensure that the ignition in mode
0 (see
Ignition modes (p. 82) for information about the ignition modes).
• On vehicles with the optional keylessdrive, never remove the remote key fromthe vehicle while it is being driven ortowed.
• Always place the gear selector in Parkand apply the parking brake before leav-ing the vehicle. Never leave the vehicleunattended with the engine running.
• Always open garage doors fully beforestarting the engine inside a garage toensure adequate ventilation. The exhaustgases contain carbon monoxide, which isinvisible and odorless but very poisonous.
NOTE
•
After a cold start, idle speed may be noticeably higher than normal for a shortperiod. This is done to help bring compo-nents in the emission control system totheir normal operating temperature asquickly as possible, which enables themto control emissions and help reduce the vehicle's impact on the environment 3
.
CAUTION
• When starting in cold weather, the auto- matic transmission may shift up at slightlyhigher engine speeds than normal untilthe automatic transmission fluid reachesnormal operating temperature.
• Do not race a cold engine immediatelyafter starting. Oil flow may not reachsome lubrication points fast enough toprevent engine damage.
• The engine should be idling when youmove the gear selector. Never accelerateuntil after you feel the transmissionengage. Accelerating immediately afterselecting a gear will cause harsh engage-ment and premature transmission wear.
• Selecting
P or N when idling at a stand-
still for prolonged periods of time will helpprevent overheating of the automatictransmission fluid.
Related information
• Switching off the engine (p. 260)
3
If the gear selector is in the D or R positions and the car is not moving, engine speed (rpm) will be lower and it will take longer for the engine to reach normal operating temperature.
Page 262 of 404
STARTING AND DRIVING
* Option/accessory.
260
Switching off the engine Switch off the engine by pressing the START/
STOP ENGINE button.
If the gear selector is not in the P position or if
the vehicle is moving, press the START/STOP
ENGINE button twice or press and hold it in until
the engine switches off.
Related information
• Ignition modes (p. 82)
Engine Remote Start (ERS)
* –
introduction
ERS is a feature that makes it possible to remotely start the engine using the remote key tocool or heat the passenger compartment beforedriving.
The climate system will start using automatic set- tings. When the engine is started using ERS, it will run for a maximum of 15 minutes before automati-cally switching off again. After 2 ERS starts, theengine must be started in the normal way beforeERS can be used again.
NOTE
• Always adhere to applicable State, Prov- ince and/or Local laws regarding engineidling when using ERS.
• The service life of the remote key's bat-tery is affected by ERS use. If this featureis used frequently, the battery should bereplaced once a year, see Remote key –replacing the battery (p. 159).
WARNING
Keep the following in mind before using ERS:
• The vehicle should be in view.
• The vehicle should be unoccupied.
• The vehicle must not be parked indoors or in an enclosed area. Exhaust fumes areharmful to the health.
Related information
•
Engine Remote Start (ERS)
* – starting the
engine (p. 261)
• Engine Remote Start (ERS)
* – switching off
the engine (p. 261)
Page 264 of 404
STARTING AND DRIVING
262
Jump startingFollow these instructions to jump start your vehi- cle's dead battery or to jump start another vehi-cle's dead battery using your vehicle.
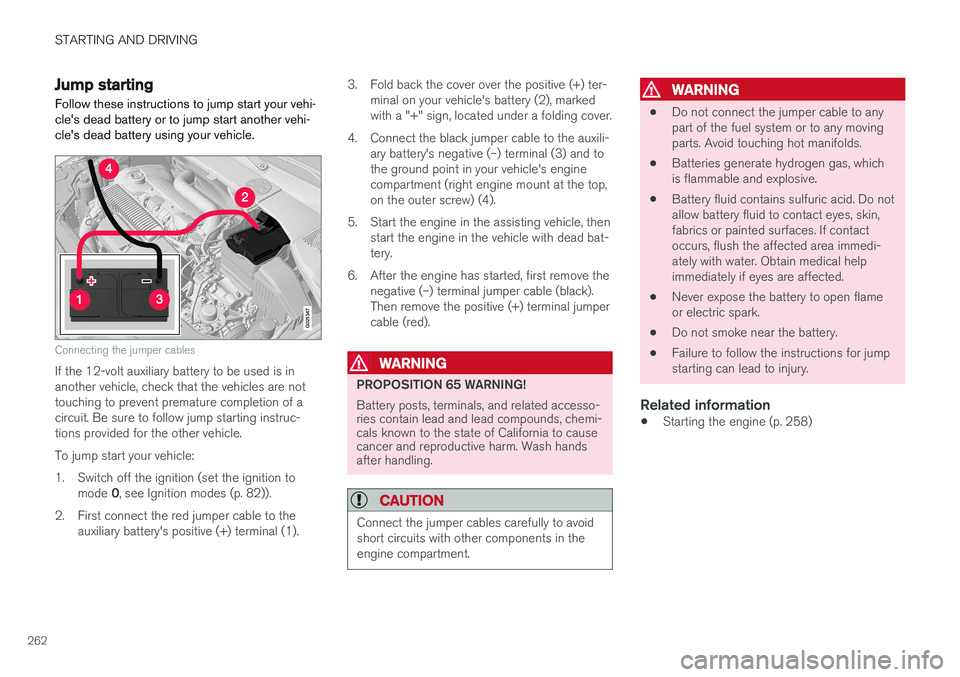
G021347
Connecting the jumper cables
If the 12-volt auxiliary battery to be used is in another vehicle, check that the vehicles are nottouching to prevent premature completion of acircuit. Be sure to follow jump starting instruc-tions provided for the other vehicle. To jump start your vehicle:
1. Switch off the ignition (set the ignition to mode 0, see Ignition modes (p. 82)).
2. First connect the red jumper cable to the auxiliary battery's positive (+) terminal (1). 3. Fold back the cover over the positive (+) ter-
minal on your vehicle's battery (2), marked with a "+" sign, located under a folding cover.
4. Connect the black jumper cable to the auxili- ary battery's negative (–) terminal (3) and tothe ground point in your vehicle's enginecompartment (right engine mount at the top,on the outer screw) (4).
5. Start the engine in the assisting vehicle, then start the engine in the vehicle with dead bat-tery.
6. After the engine has started, first remove the negative (–) terminal jumper cable (black).Then remove the positive (+) terminal jumpercable (red).WARNING
PROPOSITION 65 WARNING! Battery posts, terminals, and related accesso- ries contain lead and lead compounds, chemi-cals known to the state of California to causecancer and reproductive harm. Wash handsafter handling.
CAUTION
Connect the jumper cables carefully to avoid short circuits with other components in theengine compartment.
WARNING
• Do not connect the jumper cable to any part of the fuel system or to any movingparts. Avoid touching hot manifolds.
• Batteries generate hydrogen gas, whichis flammable and explosive.
• Battery fluid contains sulfuric acid. Do notallow battery fluid to contact eyes, skin,fabrics or painted surfaces. If contactoccurs, flush the affected area immedi-ately with water. Obtain medical helpimmediately if eyes are affected.
• Never expose the battery to open flameor electric spark.
• Do not smoke near the battery.
• Failure to follow the instructions for jumpstarting can lead to injury.
Related information
• Starting the engine (p. 258)
Page 266 of 404
||
STARTING AND DRIVING
264
Shiftlock
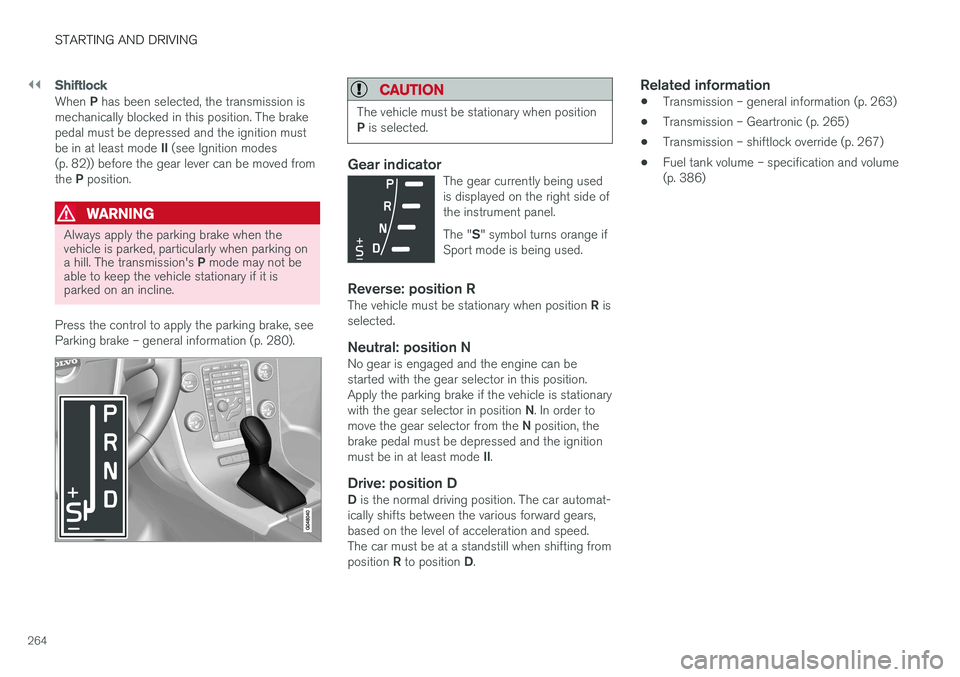
When P has been selected, the transmission is
mechanically blocked in this position. The brake pedal must be depressed and the ignition must be in at least mode II (see Ignition modes
(p. 82)) before the gear lever can be moved fromthe P position.
WARNING
Always apply the parking brake when the vehicle is parked, particularly when parking on a hill. The transmission's P mode may not be
able to keep the vehicle stationary if it is parked on an incline.
Press the control to apply the parking brake, see Parking brake – general information (p. 280).
CAUTION
The vehicle must be stationary when position P is selected.
Gear indicatorThe gear currently being used is displayed on the right side ofthe instrument panel. The " S" symbol turns orange if
Sport mode is being used.
Reverse: position RThe vehicle must be stationary when position R is
selected.
Neutral: position NNo gear is engaged and the engine can be started with the gear selector in this position.Apply the parking brake if the vehicle is stationary with the gear selector in position N. In order to
move the gear selector from the N position, the
brake pedal must be depressed and the ignitionmust be in at least mode II.
Drive: position DD is the normal driving position. The car automat-
ically shifts between the various forward gears, based on the level of acceleration and speed.The car must be at a standstill when shifting from position R to position D.
Related information
• Transmission – general information (p. 263)
• Transmission – Geartronic (p. 265)
• Transmission – shiftlock override (p. 267)
• Fuel tank volume – specification and volume (p. 386)
Page 273 of 404
STARTING AND DRIVING
271
Condition/situation The gear selector is moved from D to SB
, R or
" +/– ".
The driver's door is opened with the gear selector in D – an audible signal and a text
message will inform the driver that Start/Stop is active.
A Certain engines only
B Sport mode (where applicable)
WARNING
Do not open the hood if the engine has auto- stopped. The engine could suddenly auto-start. Before opening the hood:
• Switch off the ignition using the
START/
STOP ENGINE button.
• Be aware that if the engine has been run- ning, components in the engine compart-ment will be very hot.
If the engine does not auto-start, this couldbe due to :
• The driver's seat belt is not fastened
• The gear selector is in
P and the driver's
door is opened In these cases, the driver will have to restart the engine by pressing the
START/STOP ENGINE
button.
Related information
• Start/Stop – introduction (p. 268)
• Start/Stop – function (p. 269)
• Start/Stop – settings (p. 271)
• Start/Stop – Auto-stop exceptions (p. 270)
• Start/Stop – Hill Start Assist (HSA) (p. 268)
• Start/Stop – symbols and messages (p. 272)
Start/Stop – settings
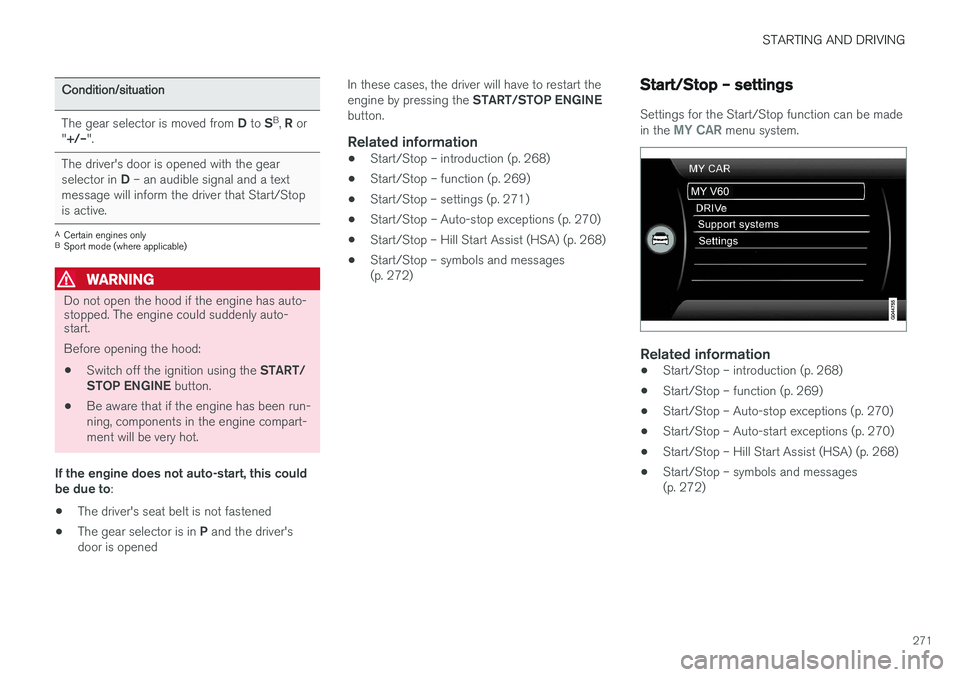
Settings for the Start/Stop function can be made in the MY CAR menu system.
Related information
•
Start/Stop – introduction (p. 268)
• Start/Stop – function (p. 269)
• Start/Stop – Auto-stop exceptions (p. 270)
• Start/Stop – Auto-start exceptions (p. 270)
• Start/Stop – Hill Start Assist (HSA) (p. 268)
• Start/Stop – symbols and messages (p. 272)
Page 277 of 404
STARTING AND DRIVING
}}
275
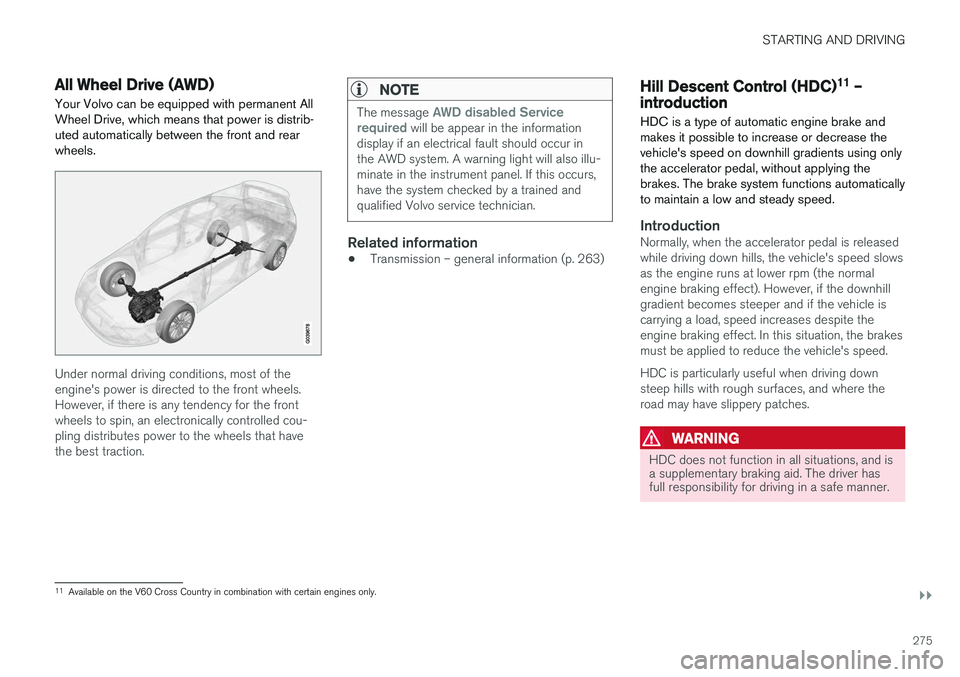
All Wheel Drive (AWD)Your Volvo can be equipped with permanent All Wheel Drive, which means that power is distrib-uted automatically between the front and rearwheels.
Under normal driving conditions, most of the engine's power is directed to the front wheels.However, if there is any tendency for the frontwheels to spin, an electronically controlled cou-pling distributes power to the wheels that havethe best traction.
NOTE
The message AWD disabled Service
required will be appear in the information
display if an electrical fault should occur in the AWD system. A warning light will also illu-minate in the instrument panel. If this occurs,have the system checked by a trained andqualified Volvo service technician.
Related information
• Transmission – general information (p. 263)
Hill Descent Control (HDC) 11
–
introduction
HDC is a type of automatic engine brake and makes it possible to increase or decrease thevehicle's speed on downhill gradients using onlythe accelerator pedal, without applying thebrakes. The brake system functions automaticallyto maintain a low and steady speed.
IntroductionNormally, when the accelerator pedal is released while driving down hills, the vehicle's speed slowsas the engine runs at lower rpm (the normalengine braking effect). However, if the downhillgradient becomes steeper and if the vehicle iscarrying a load, speed increases despite theengine braking effect. In this situation, the brakesmust be applied to reduce the vehicle's speed. HDC is particularly useful when driving down steep hills with rough surfaces, and where theroad may have slippery patches.
WARNING
HDC does not function in all situations, and is a supplementary braking aid. The driver hasfull responsibility for driving in a safe manner.
11 Available on the V60 Cross Country in combination with certain engines only.
Page 279 of 404

STARTING AND DRIVING
}}
* Option/accessory.277
NOTE
Engine response to pressure on the accelera- tor pedal may be slightly slower than normalwhen HDC is activated.
Related information
•Hill Descent Control (HDC) – introduction (p. 275)
• Brakes – general (p. 277)
Brakes – general The brake system is a hydraulic system consist- ing of two separate brake circuits. If a problemshould occur in one of these circuits, it is stillpossible to stop the vehicle with the other brakecircuit.
If the brake pedal must be depressed farther than normal and requires greater foot pressure,the stopping distance will be longer. A warning light in the instrument panel will light up to warn the driver that a fault has occurred. If this light comes on while driving or braking, stop immediately and check the brake fluid levelin the reservoir.
NOTE
Press the brake pedal hard and maintain pressure on the pedal – do not pump thebrakes.
WARNING
If the fluid level is below the
MIN mark in the
reservoir or if a brake system message is shown in the information display: DO NOT
DRIVE . Have the vehicle towed to a trained
and qualified Volvo service technician and have the brake system inspected.
Brake pad inspection
On vehicles equipped with a jack *, the condition
of the brake pads can be checked by raising the vehicle (see Changing a wheel – removing wheel(p. 303) for information about using the jack andremoving a wheel) and performing a visualinspection of the brake pads.
WARNING
• If the vehicle has been driven immediately prior to a brake pad inspection, the wheelhub, brake components, etc., will be veryhot. Allow time for these components tocool before carrying out the inspection.
• Apply the parking brake and put the gear selector in the Park (
P) position.
• Block the wheels standing on the ground, use rigid wooden blocks or large stones.