2018 VOLVO V60 CROSS COUNTRY instrument panel
[x] Cancel search: instrument panelPage 321 of 404
WHEELS AND TIRES
}}
319
Tire Monitor status informationThe current status of the system and the tires is indicated by color-coded graphics.
This status can be displayed by pressing the MY
CAR button on the center console and going to
SettingsCar settingsTire monitoring.
The following color-coded graphics indicate:
• All green
: the system is operational and all
tire pressures are at or above the recom- mended levels.
• One yellow wheel
: the tire indicated is
under-inflated.
• All wheels yellow
: two or more tires are
under-inflated
• All wheels gray
: the system is currently
unavailable. It might be necessary to drive ata speed of at least 20 mph (30 km/h) forseveral minutes for the system to becomeoperational.
• All wheels gray in combination with the message
Tire press. syst Service
required and the telltale in the instru-
ment panel (
) is illuminated : the sys-
tem is not functioning correctly. Have it checked by a trained and qualified Volvoservice technician.
• All wheels gray in combination with the message
Tire press. syst currently
unavailable and the telltale in the instru- ment panel (
) is illuminated
: the sys-
tem is temporarily unavailable. It should become operational again shortly.
Related information
• Tire Monitor – messages (p. 319)
Tire Monitor – messages
When low tire pressure has been detected, a message will be displayed and the tire pressure warning telltale in the instrument panel (
)
will illuminate.
MessagesIf the telltale illuminates, one of the following message will also be displayed: •
Tire pressure low/Check, adjust and
calibrate
•Tire pressure system/Service required
•Tire pressure system/Currently
unavailable
Erasing warning messagesTo erase a low tire pressure message and turn off the telltale:
1. Use a tire pressure gauge to check the infla- tion pressure of all four tires.
2. Re-inflate the tires to the correct pressure (consult the tire pressure decal on the driv- er's door opening.
3. Recalibrate Tire Monitor, see Calibrating Tire Monitor (p. 318).
Page 322 of 404

||
WHEELS AND TIRES
320
NOTE
To help avoid incorrect tire inflation pressure, only inflate the tires when they are cold. Thetires are considered to be cold when theyhave the same temperature as the surround-ing (ambient) air. This temperature is normallyreached after the vehicle has been parked forat least 3 hours. After driving a distance ofapproximately 1 mile (1.6 km), the tires areconsidered to be hot.
CAUTION
•After inflating the tires, always reinstall the valve cap to help avoid damage to thevalve from dirt, gravel, etc.
• Use plastic valve caps only. Metal capscould corrode and become difficult toremove.
WARNING
•
Incorrect inflation pressure could lead to tire failure, resulting in a loss of control ofthe vehicle.
• Tire monitoring systems cannot indicatesudden tire damage caused by externalfactors (e.g., a blowout) in advance.
Related information
•Tire inflation – checking pressure (p. 309)
Tire Pressure Monitoring System (TPMS) – general information TPMS uses sensors mounted in the tire valves to check inflation pressure levels. When thevehicle is moving at a speed of approximately20 mph (30 km/h) or faster, these sensorstransmit inflation pressure data to a receiverlocated in the vehicle.
NOTE
USA – FCC ID: KR5S180052050 This device complies with part 15 of the FCC rules. Operation is subject to the followingconditions: (1) This device may not causeharmful interference, and (2) this device mustaccept any interference received, includinginterference that may cause undesired opera-tion.
When low inflation pressure is detected or if a sensor is not functioning properly, TPMS will light up the tire pressure warning light (
) (also
referred to as a telltale) in the instrument panel and will display one of the following messages:
Tire pressure low, Tire needs air now or Tire
press. syst Service required.
NOTE
If a malfunction occurs in the system, the tire pressure warning light will flash for approxi-mately 1 minute and then remain illuminated.
Tire press. syst Service required will be
displayed.
Related information
• Tire Pressure Monitoring System (TPMS) – recalibrating (p. 322)
• Tire Pressure Monitoring System (TPMS) –messages (p. 323)
• Tire Pressure Monitoring System (TPMS) –activating/deactivating (p. 322)
• Tire Pressure Monitoring System (TPMS) –changing wheels (p. 321)
Page 323 of 404

WHEELS AND TIRES
321
Tire Pressure Monitoring System (TPMS) – changing wheels
Please keep the following in mind when chang- ing or replacing the factory installed TPMSwheels/tires on the vehicle:
• Not all aftermarket wheels are equipped withTPMS sensors in the valves.
• If the vehicle is equipped with a temporaryspare tire, this tire does not have a TPMSsensor.
• If wheels without TPMS sensors are moun-ted on the vehicle, a text message will dis-played in the instrument panel each time thevehicle is driven above 20 mph (30 km/h) for10 minutes or more.
• Once TPMS sensors are properly installed,the warning message should not reappear. Ifthe message is still displayed, drive the vehi-cle for several minutes at a speed of 20 mph(30 km/h) or faster to erase the message.
• Volvo recommends that TPMS sensors befitted on all wheels used on the vehicle,including winter tires. Volvo does not recom-mend moving sensors back and forthbetween sets of wheels.
CAUTION
When inflating tires, press the pump's mouth- piece straight onto the valve to help avoidbending or otherwise damaging the valve.
CAUTION
•After inflating the tires, always reinstall the valve cap to help avoid damage to thevalve from dirt, gravel, etc.
• Use plastic valve caps only. Metal capscould corrode and become difficult toremove.
NOTE
•
If you change to tires with a different dimension than the factory-installed ones,the TPMS system must be reconfiguredfor these tires. This must be done by atrained and qualified Volvo service techni-cian.
• If a tire is changed, or if the TPMS sensoris moved to another wheel, the sensor'sseal, nut, and valve core should bereplaced.
• When installing TPMS sensors, the vehi-cle must be parked for at least15 minutes with the ignition off. If thevehicle is driven within 15 minutes, aTPMS error message will be displayed.
Related information
• Tire Pressure Monitoring System (TPMS) – general information (p. 320)
• Tire Pressure Monitoring System (TPMS) –recalibrating (p. 322)
• Tire Pressure Monitoring System (TPMS) –messages (p. 323)
• Tire Pressure Monitoring System (TPMS) –activating/deactivating (p. 322)
Page 325 of 404
WHEELS AND TIRES
323
Tire Pressure Monitoring System (TPMS) – messages
Erasing warning messagesWhen a low tire pressure warning message has been displayed and the tire pressure warning light in the instrument panell (
) has come
on:
1. Use a tire pressure gauge to check the infla- tion pressure of all four tires.
2. Re-inflate the tire(s) to the correct pressure (consult the tire pressure decal on the driv- er's door opening).
3. In certain cases, it may be necessary to drive the vehicle for several minutes at a speed of20 mph (30 km/h) or faster. This will erasethe warning text and the telltale will go out.
NOTE
• The tire monitoring systems use a tem- perature compensated pressure value.This pressure value is dependent on tiretemperature and ambient temperature,which can differ from the recommendedcold tire pressure in the tire inflation tableand on the tire pressure placard locatedon the driver's side B-pillar (the structuralmember at the side of the vehicle, at therear of the driver's door opening). Thismeans that it may sometimes be neces-sary to inflate them slightly above therecommended cold pressure value(approx. 3-4 psi or 0.2-0.3 bar) in orderto reset a low tire pressure warning.
• To help avoid incorrect tire inflation pres-sure, if possible only inflate the tireswhen they are cold. The tires are consid-ered to be cold when they have the sametemperature as the surrounding (ambi-ent) air. This temperature is normallyreached after the vehicle has beenparked for at least 3 hours. After driving adistance of approximately 1 mile (1.6 km),the tires are considered to be hot.
CAUTION
•
After inflating the tires, always reinstall the valve cap to help avoid damage to thevalve from dirt, gravel, etc.
• Use plastic valve caps only. Metal capscould corrode and become difficult toremove.
WARNING
•Incorrect inflation pressure could lead to tire failure, resulting in a loss of control ofthe vehicle.
• Tire monitoring systems cannot indicatesudden tire damage caused by externalfactors (e.g., a blowout) in advance.
Related information
•Tire Pressure Monitoring System (TPMS) –general information (p. 320)
• Tire Pressure Monitoring System (TPMS) –recalibrating (p. 322)
• Tire Pressure Monitoring System (TPMS) –activating/deactivating (p. 322)
• Tire Pressure Monitoring System (TPMS) –changing wheels (p. 321)
• Tire pressure monitoring - overview (p. 316)
Page 338 of 404
||
MAINTENANCE AND SERVICING
336
CSB menu accessOnce the prerequisites have been established, all CSB-related menus can be accessed in MY CAR
by pressing OK/MENU and then selecting
Scheduled maintenance & repair.
Booking information and data from the
vehicle
If you request an appointment from your vehicle, with your consent, booking information and data about your vehicle 1
will be transmitted to your
preferred retailer.
Using the serviceOnce the prerequisites have been established, all CSB-related menus can be accessed in MY CAR
by pressing OK/MENU and then selecting
Maintenance & repair.
If the time for the next regularly scheduled serv- ice is approaching, if the vehicle requires certaintypes of repairs or if a system needs to bechecked, a message will be displayed. You willthen by guided through the steps required tobook service or repairs.
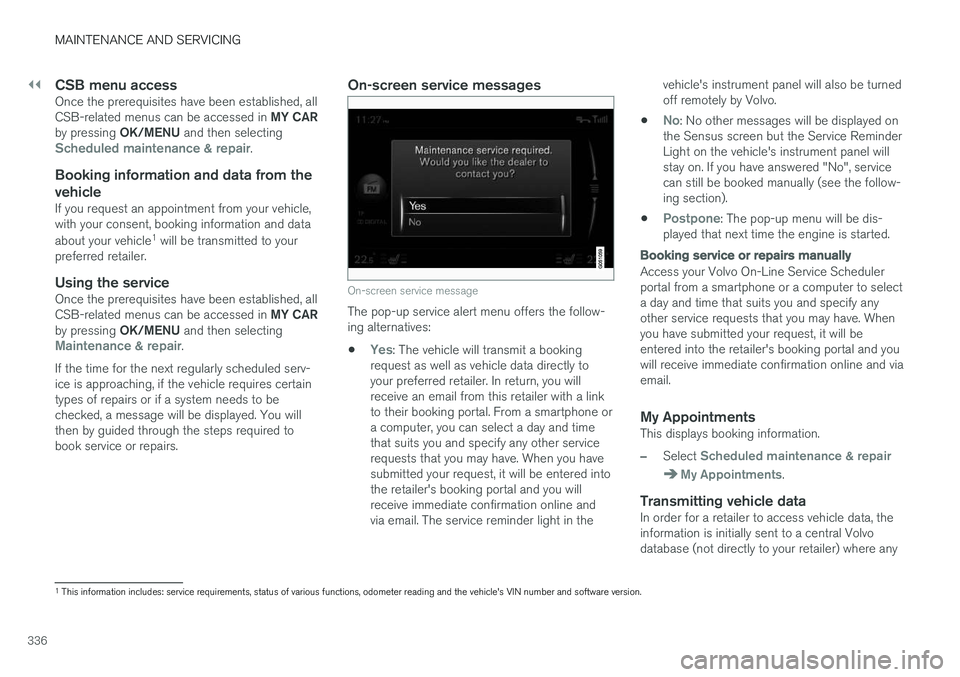
On-screen service messages
On-screen service message
The pop-up service alert menu offers the follow- ing alternatives:
•
Yes: The vehicle will transmit a booking
request as well as vehicle data directly to your preferred retailer. In return, you willreceive an email from this retailer with a linkto their booking portal. From a smartphone ora computer, you can select a day and timethat suits you and specify any other servicerequests that you may have. When you havesubmitted your request, it will be entered intothe retailer's booking portal and you willreceive immediate confirmation online andvia email. The service reminder light in the vehicle's instrument panel will also be turnedoff remotely by Volvo.
•
No: No other messages will be displayed on
the Sensus screen but the Service Reminder Light on the vehicle's instrument panel willstay on. If you have answered "No", servicecan still be booked manually (see the follow-ing section).
•
Postpone: The pop-up menu will be dis-
played that next time the engine is started.
Booking service or repairs manually
Access your Volvo On-Line Service Scheduler portal from a smartphone or a computer to selecta day and time that suits you and specify anyother service requests that you may have. Whenyou have submitted your request, it will beentered into the retailer's booking portal and youwill receive immediate confirmation online and viaemail.
My AppointmentsThis displays booking information.
–Select Scheduled maintenance & repair
My Appointments.
Transmitting vehicle dataIn order for a retailer to access vehicle data, the information is initially sent to a central Volvodatabase (not directly to your retailer) where any
1 This information includes: service requirements, status of various functions, odometer reading and the vehicle's VIN number and software version.
Page 343 of 404
MAINTENANCE AND SERVICING
* Option/accessory.341
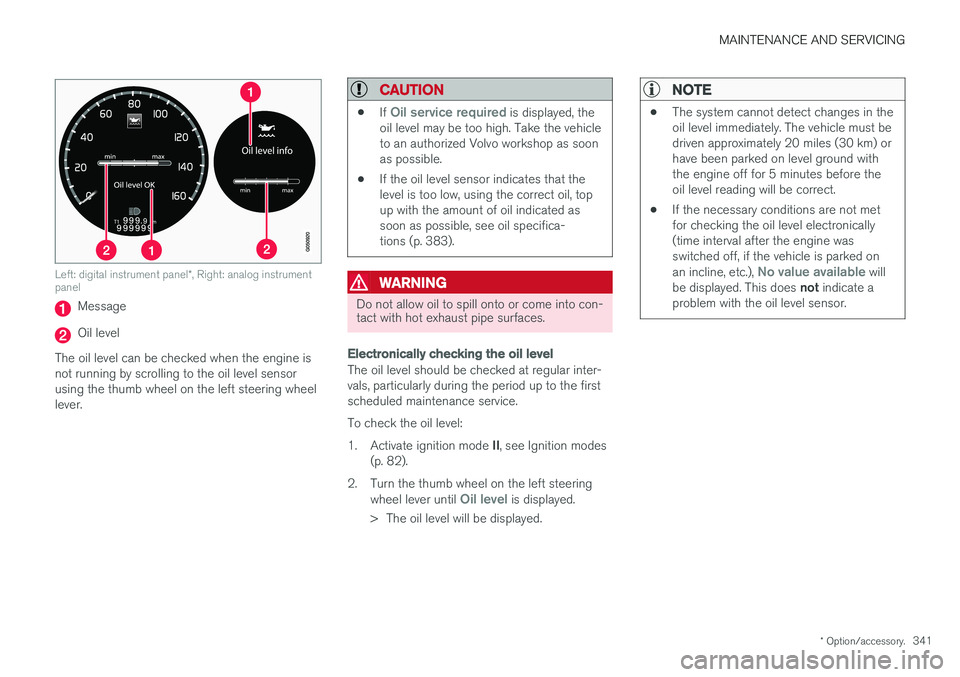
Left: digital instrument panel *, Right: analog instrument
panel
Message
Oil level
The oil level can be checked when the engine is not running by scrolling to the oil level sensorusing the thumb wheel on the left steering wheellever.
CAUTION
• If Oil service required is displayed, the
oil level may be too high. Take the vehicle to an authorized Volvo workshop as soonas possible.
• If the oil level sensor indicates that thelevel is too low, using the correct oil, topup with the amount of oil indicated assoon as possible, see oil specifica-tions (p. 383).
WARNING
Do not allow oil to spill onto or come into con- tact with hot exhaust pipe surfaces.
Electronically checking the oil level
The oil level should be checked at regular inter- vals, particularly during the period up to the firstscheduled maintenance service. To check the oil level:1.
Activate ignition mode II, see Ignition modes
(p. 82).
2. Turn the thumb wheel on the left steering wheel lever until
Oil level is displayed.
> The oil level will be displayed.
NOTE
• The system cannot detect changes in the oil level immediately. The vehicle must bedriven approximately 20 miles (30 km) orhave been parked on level ground withthe engine off for 5 minutes before theoil level reading will be correct.
• If the necessary conditions are not metfor checking the oil level electronically(time interval after the engine wasswitched off, if the vehicle is parked on an incline, etc.),
No value available will
be displayed. This does not indicate a
problem with the oil level sensor.
Page 366 of 404

||
MAINTENANCE AND SERVICING
* Option/accessory.
364
Pos Function A
Controls in left rear passenger's door20
Keyless drive
* 7.5
Power driver's seat
*20
Power front passenger's seat
*20
-
Infotainment system display 5
Infotainment system: amplifier, Sir- iusXM
™ satellite radio * 10
Sensus control module 15
Bluetooth hands-free system 5
-
Power moonroof
*
Courtesy lighting, climate system sensor 5
12-volt sockets in tunnel console 15
Heated rear seat
* (passenger's
side) 15
Heated rear seat
* (driver's side) 15
Pos
Function A
-
Heated front passenger's seat*15
Heated driver's seat
*15
Park assist
*
Blind Spot Information System (BLIS) *, park assist camera *5
All Wheel Drive
* control module 15
Active chassis system
*10
Positions: fusebox B
Pos
Function A
Tailgate wiper 15
-
Front courtesy lighting, driver's door power window controls, power seat(s)*, 7.5
Instrument panel 5
Adaptive cruise control/collision warning
* 10
Pos
Function A
Courtesy lighting, rain sensor*,
HomeLInk ®
Wireless Control Sys-
tem * 7.5
Steering wheel module 7.5
Cental locking: fuel filler door 10
Electrically heated steering wheel
*15
Electrically heated windshield
*15
Tailgate unlock 10
Electrical folding rear seat out- board head restraints
*10
Fuel pump 20
Climate system control panel 5
-
Alarm, On-board diagnostic sys- tem
5
Satellite radio
*, audio system
amplifier 10
Airbag system, occupant weight sensor
10
Collision warning system
*5
Page 375 of 404
MAINTENANCE AND SERVICING
}}
373
Cleaning the seat beltsClean only with lukewarm water and a mild soap solution.
Cleaning floor matsThe floor mats should be vacuumed or brushedclean regularly, especially during winter whenthey should be taken out for drying. Spots on tex-tile mats can be removed with a mild detergent.For best protection in winter, Volvo recommendsthe use of Volvo rubber floor mats. Consult yourVolvo retailer.
Spots on interior plastic, metal, or wood
surfaces
Cleaning interior plastic components should bedone with a cleaning agent specially designed forthis purpose. Consult your Volvo retailer.
CAUTION
• Do not use cleaning agents with high alcohol content such as washer fluid toclean instrument panel glass.
• Never spray cleaning agents or waterdirectly onto components with electricalbuttons or controls. Clean components ofthis type by applying the cleaning agent/water sparingly to a cloth and wiping thecomponents so that no liquid penetratesinto these components.
Related information
•Washing the vehicle (p. 369)
Touching up paintwork
Paint damage requires immediate attention to avoid rusting. Make it a habit to check the finishregularly, for instance washing the vehicle.Touch-up if necessary.
Paint repairs require special equipment and skill. Contact your Volvo retailer for any extensive dam-age. Minor scratches can be repaired by using Volvo touch-up paint.
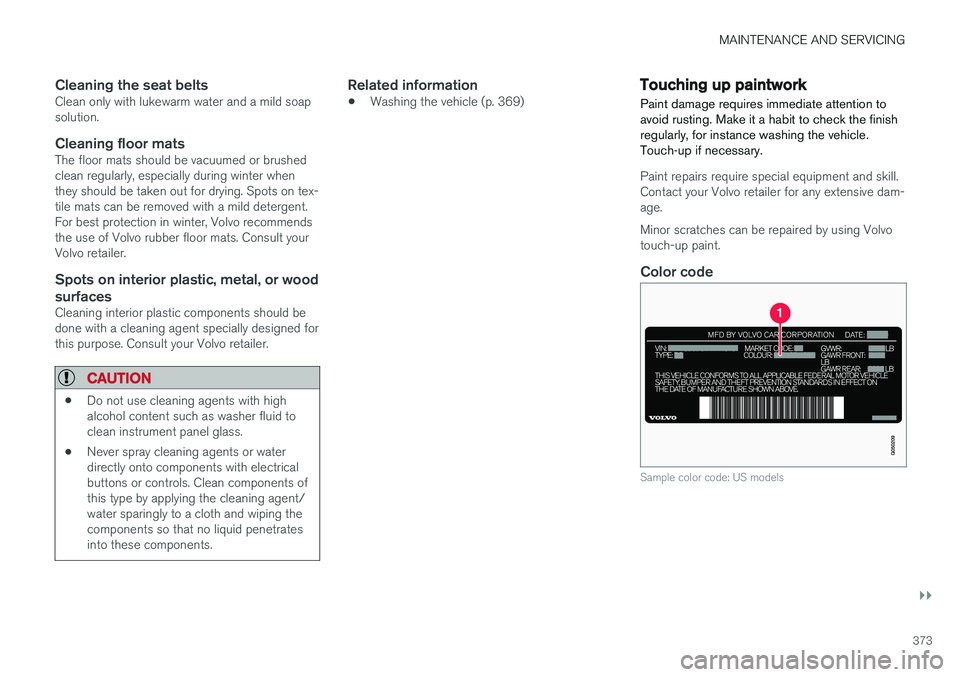
Color code
Sample color code: US models