2018 VOLVO V60 CROSS COUNTRY instrument panel
[x] Cancel search: instrument panelPage 278 of 404
||
STARTING AND DRIVING
276
Related information
•Hill Descent Control (HDC) – operation (p. 276)
• Brakes – general (p. 277)Hill Descent Control (HDC) 12
–
operation
Function
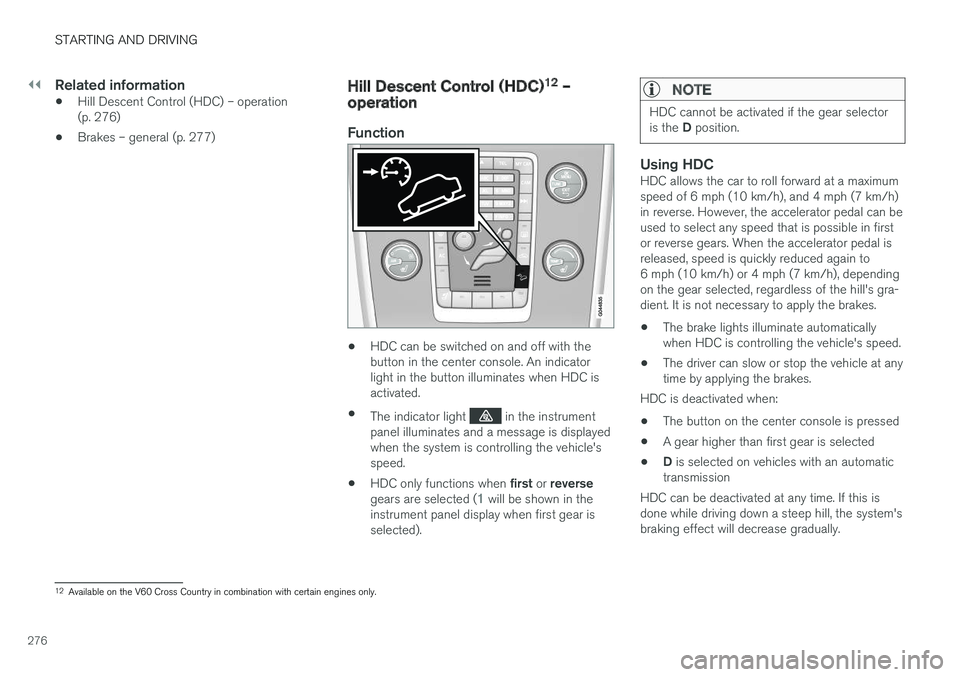
• HDC can be switched on and off with the button in the center console. An indicatorlight in the button illuminates when HDC isactivated.
• The indicator light
in the instrument
panel illuminates and a message is displayed when the system is controlling the vehicle'sspeed.
• HDC only functions when
first or reverse
gears are selected (
1 will be shown in the
instrument panel display when first gear is selected).
NOTE
HDC cannot be activated if the gear selector is the D position.
Using HDCHDC allows the car to roll forward at a maximum speed of 6 mph (10 km/h), and 4 mph (7 km/h)in reverse. However, the accelerator pedal can beused to select any speed that is possible in firstor reverse gears. When the accelerator pedal isreleased, speed is quickly reduced again to6 mph (10 km/h) or 4 mph (7 km/h), dependingon the gear selected, regardless of the hill's gra-dient. It is not necessary to apply the brakes.
• The brake lights illuminate automaticallywhen HDC is controlling the vehicle's speed.
• The driver can slow or stop the vehicle at anytime by applying the brakes.
HDC is deactivated when:
• The button on the center console is pressed
• A gear higher than first gear is selected
• D
is selected on vehicles with an automatic
transmission
HDC can be deactivated at any time. If this isdone while driving down a steep hill, the system'sbraking effect will decrease gradually.
12 Available on the V60 Cross Country in combination with certain engines only.
Page 279 of 404

STARTING AND DRIVING
}}
* Option/accessory.277
NOTE
Engine response to pressure on the accelera- tor pedal may be slightly slower than normalwhen HDC is activated.
Related information
•Hill Descent Control (HDC) – introduction (p. 275)
• Brakes – general (p. 277)
Brakes – general The brake system is a hydraulic system consist- ing of two separate brake circuits. If a problemshould occur in one of these circuits, it is stillpossible to stop the vehicle with the other brakecircuit.
If the brake pedal must be depressed farther than normal and requires greater foot pressure,the stopping distance will be longer. A warning light in the instrument panel will light up to warn the driver that a fault has occurred. If this light comes on while driving or braking, stop immediately and check the brake fluid levelin the reservoir.
NOTE
Press the brake pedal hard and maintain pressure on the pedal – do not pump thebrakes.
WARNING
If the fluid level is below the
MIN mark in the
reservoir or if a brake system message is shown in the information display: DO NOT
DRIVE . Have the vehicle towed to a trained
and qualified Volvo service technician and have the brake system inspected.
Brake pad inspection
On vehicles equipped with a jack *, the condition
of the brake pads can be checked by raising the vehicle (see Changing a wheel – removing wheel(p. 303) for information about using the jack andremoving a wheel) and performing a visualinspection of the brake pads.
WARNING
• If the vehicle has been driven immediately prior to a brake pad inspection, the wheelhub, brake components, etc., will be veryhot. Allow time for these components tocool before carrying out the inspection.
• Apply the parking brake and put the gear selector in the Park (
P) position.
• Block the wheels standing on the ground, use rigid wooden blocks or large stones.
Page 281 of 404

STARTING AND DRIVING
279
Brakes – symbols
Symbols in the instrument panel
SymbolSpecification
Steady glow – Check the brake fluid level. If the level is low, fill withbrake fluid and check for the causeof the brake fluid loss.
Automatic function check: steady glow for two seconds when theengine is started.
WARNING
If and come on at the same
time and the brake level is below the MIN
mark in the reservoir or if a brake system-rela- ted message is shown in the information dis- play: DO NOT DRIVE . Have the vehicle towed
to a trained and qualified Volvo service techni- cian and have the brake system inspected.
Related information
• Brakes – general (p. 277)
• Parking brake – general information (p. 280)
Anti-lock braking system (ABS) The ABS system helps to improve vehicle con- trol (stopping and steering) during severe brak-ing conditions by limiting brake lockup.
When the system "senses" impending lockup, braking pressure is automatically modulated inorder to help prevent lockup that could lead to askid. The system performs a brief self-diagnostic test when the engine has been started and driverreleases the brake pedal. Another automatic testmay be performed when the vehicle first reachesa speed of approximately 6 mph (10 km/h). Thebrake pedal will pulsate several times and asound may be audible from the ABS controlmodule, which is normal.
Related information
• Parking brake – general information (p. 280)
• Emergency Brake Assistance (EBA) (p. 280)
• Brakes – general (p. 277)
Brake lights The brake lights come on automatically when the brakes are applied.
Adaptive brake lights
The adaptive brake lights activate in the event of sudden braking or if the ABS system is activated.This function causes an additional taillight oneach side of the vehicle to illuminate to help alertvehicles traveling behind. The adaptive brake lights activate if:
• The ABS system activates for more than approximately a half second
• In the event of sudden braking while thevehicle is moving at speeds above approxi-mately 6 mph (10 km/h).
When the vehicle has come to a stop, the brakelights and additional taillights remain on for aslong as the brake pedal is depressed or untilbraking force on the vehicle is reduced.
Related information
• Brakes – general (p. 277)
• Parking brake – general information (p. 280)
Page 283 of 404
STARTING AND DRIVING
281
Low battery voltageIf the battery voltage is too low, the parking brake cannot be applied or released. Connect
an auxiliary battery if the battery voltage is toolow, see Jump starting (p. 262).
Parking on a hill
• If the vehicle is pointing uphill, turn the frontwheels so that they point away from the curb.
• If the vehicle is pointing downhill, turn thefront wheels so that they point toward thecurb.
The parking brake should also be applied.
Related information
• Parking brake – applying (p. 281)
• Parking brake – releasing (p. 282)
• Parking brake – symbols and messages(p. 283)
• Brakes – general (p. 277)
Parking brake – applying
Applying the electric parking brake
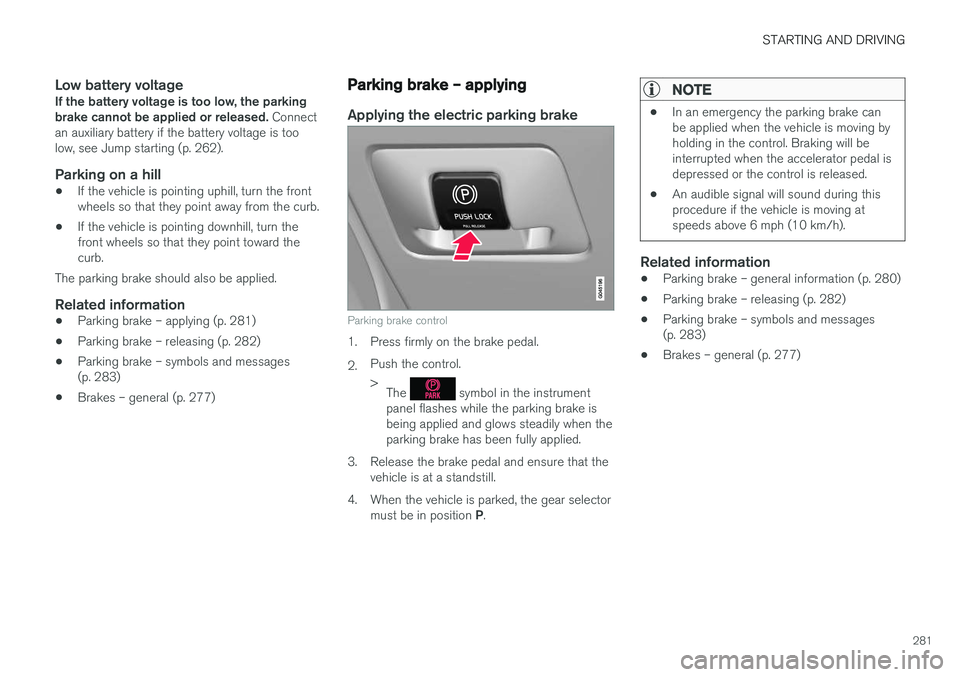
Parking brake control
1. Press firmly on the brake pedal. 2.Push the control. >
The
symbol in the instrument
panel flashes while the parking brake is being applied and glows steadily when theparking brake has been fully applied.
3. Release the brake pedal and ensure that the vehicle is at a standstill.
4. When the vehicle is parked, the gear selector must be in position P.
NOTE
• In an emergency the parking brake can be applied when the vehicle is moving byholding in the control. Braking will beinterrupted when the accelerator pedal isdepressed or the control is released.
• An audible signal will sound during thisprocedure if the vehicle is moving atspeeds above 6 mph (10 km/h).
Related information
•Parking brake – general information (p. 280)
• Parking brake – releasing (p. 282)
• Parking brake – symbols and messages (p. 283)
• Brakes – general (p. 277)
Page 285 of 404
STARTING AND DRIVING
283
Parking brake – symbols and messages
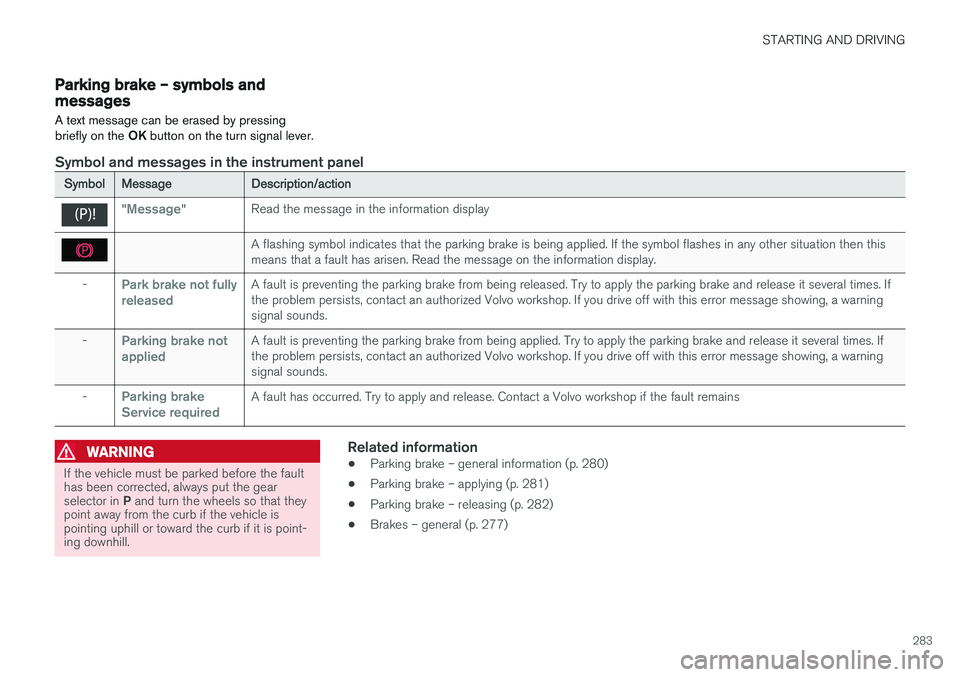
A text message can be erased by pressing briefly on the OK button on the turn signal lever.
Symbol and messages in the instrument panel
Symbol Message Description/action
"Message"Read the message in the information display
A flashing symbol indicates that the parking brake is being applied. If the symbol flashes in any other situation then this means that a fault has arisen. Read the message on the information display.
-
Park brake not fully releasedA fault is preventing the parking brake from being released. Try to apply the parking brake and release it several times. If the problem persists, contact an authorized Volvo workshop. If you drive off with this error message showing, a warningsignal sounds.
-
Parking brake not appliedA fault is preventing the parking brake from being applied. Try to apply the parking brake and release it several times. If the problem persists, contact an authorized Volvo workshop. If you drive off with this error message showing, a warningsignal sounds.
-
Parking brake Service requiredA fault has occurred. Try to apply and release. Contact a Volvo workshop if the fault remains
WARNING
If the vehicle must be parked before the fault has been corrected, always put the gear selector in P and turn the wheels so that they
point away from the curb if the vehicle is pointing uphill or toward the curb if it is point-ing downhill.
Related information
• Parking brake – general information (p. 280)
• Parking brake – applying (p. 281)
• Parking brake – releasing (p. 282)
• Brakes – general (p. 277)
Page 289 of 404
STARTING AND DRIVING
}}
287
cle inspection programs will make detection of misfueling easier, possibly resulting in emissiontest failure for misfueled vehicles.
NOTE
Some U.S. and Canadian gasolines contain an octane enhancing additive called methyl-cyclopentadienyl manganese tricarbonyl(MMT). If such fuels are used, your EmissionControl System performance may be affected,and the Check Engine Light (malfunctionindicator light) located on your instrumentpanel may light. If this occurs, please returnyour vehicle to a trained and qualified Volvoservice technician for service.
Gasoline containing alcohol and ethers, "Oxygenated fuels"
Some fuel suppliers sell gasoline containing "oxygenates" which are usually alcohols orethers. In some areas, state or local laws requirethat the service pump be marked indicating useof alcohols or ethers. However, there are areas inwhich the pumps are unmarked. If you are notsure whether there is alcohol or ethers in thegasoline you buy, check with the service stationoperator. To meet seasonal air quality standards,some areas require the use of "oxygenated" fuel. Volvo allows the use of the following "oxygen- ated" fuels; however, the octane ratings (p. 287)listed must still be met.
Alcohol – Ethanol
Fuels containing up to 10% ethanol by volume may be used. Ethanol may also be referred to asEthyl alcohol, or "Gasohol". Ethers – MTBE: Fuels containing up to 15% MTBE may be used.
MethanolDo not use gasolines containing methanol(methyl alcohol, wood alcohol). This practice canresult in vehicle performance deterioration andcan damage critical parts in the fuel system. Suchdamage may not be covered under the NewVehicle Limited Warranty.
Refueling – octane rating Volvo recommends premium fuel for best per- formance, but using 87 octane
13
or above will
not affect engine reliability.
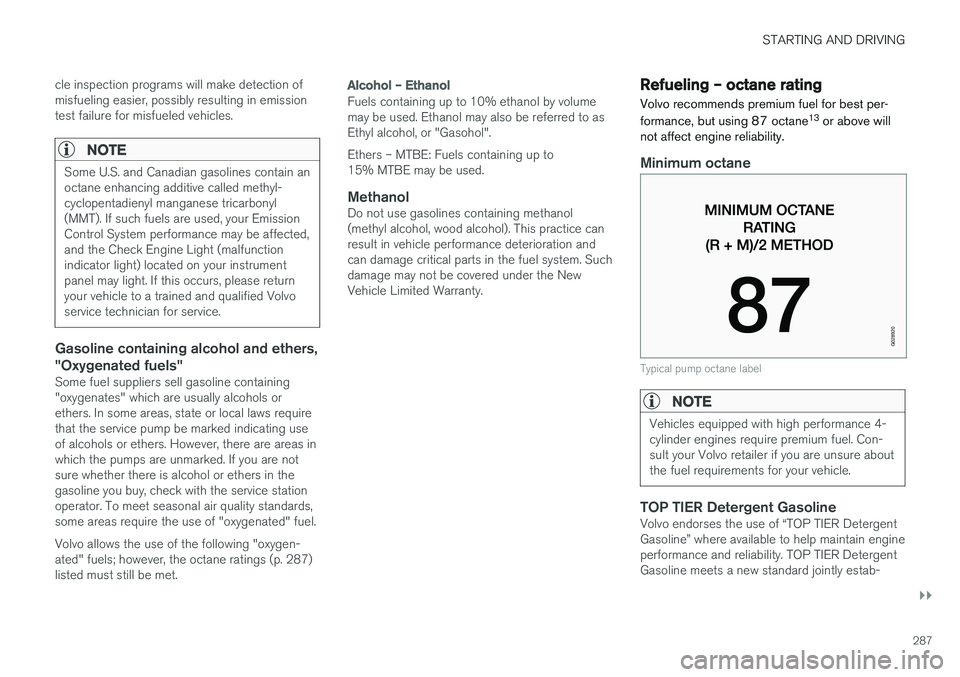
Minimum octane
G028920
Typical pump octane label
NOTE
Vehicles equipped with high performance 4- cylinder engines require premium fuel. Con-sult your Volvo retailer if you are unsure aboutthe fuel requirements for your vehicle.
TOP TIER Detergent GasolineVolvo endorses the use of “TOP TIER Detergent Gasoline” where available to help maintain engineperformance and reliability. TOP TIER DetergentGasoline meets a new standard jointly estab-
Page 296 of 404
||
STARTING AND DRIVING
294
WARNING
•Bumper-attached trailer hitches must not be used on Volvos, nor should safetychains be attached to the bumper.
• Trailer hitches attaching to the vehiclerear axle must not be used.
• Never connect a trailer's hydraulic brakesystem directly to the vehicle brake sys-tem, nor a trailer's lighting system directlyto the vehicle lighting system. Consultyour nearest authorized Volvo retailer forcorrect installation.
• When towing a trailer, the trailer's safetychains or wire must be correctly fastenedto the attachment points provided in thetrailer hitch on the vehicle. The safetychain or wire must never be fastened toor wound around the towing ball.
Trailer cable
An adapter is required if the vehicle's trailer hitch has a 13-pin connector and the trailer has 7 pins.Use an adapter cable approved by Volvo. Makesure the cable does not drag on the ground.
Related information
•
Loading – general (p. 146)
Trailer Stability Assist (TSA)
Trailer Stability Assist is a system designed to help stabilize a vehicle that is towing a trailerwhen the vehicle and trailer have begun to swayand is part of the stability system. For informationon the stability system, see Stability system –introduction (p. 174)
FunctionA vehicle towing a trailer may begin to sway for various reasons. Normally this only occurs at highspeeds but, for example, if the trailer is overloa-ded or if the load is unevenly distributed in thetrailer, there is risk of swaying at speeds betweenapproximately 45-55 mph (70-90 km/h). Swaying may be caused by factors such as:
• The vehicle and trailer are hit by a sudden, strong crosswind
• The vehicle and trailer are traveling on anuneven road surface or drive over a bump
• Sudden movements of the steering wheel
Facts about TSA
• TSA intervenes at speeds above approxi-mately 40 mph (60 km/h)
• The stability system symbol in the instrumentpanel will flash when TSA is working
• If the driver switches off the stability system'sSpin Control function, TSA will also beswitched off (but will be on again the nexttime the engine is started) •
TSA may not intervene when the vehicle andtrailer begin to sway if the driver tries to com-pensate for the swaying motion by movingthe steering wheel rapidly
How TSA worksOnce swaying has begun, it can be very difficultto stop, which makes it difficult to control thevehicle and trailer. The TSA system continuously monitors the vehi- cle's movements, particularly lateral movement. Ifthe system detects a tendency to sway, thebrakes are applied individually on the frontwheels, which has a stabilizing effect on the vehi-cle and trailer. This is often enough to enable thedriver to regain control of the vehicle. If this is not adequate to stop the swaying motion, the brakes are applied to all of the wheels on thevehicle and on the trailer if it is equipped withbrakes, and engine power is temporarily reduced.As the swaying motion begins to decrease andthe vehicle-trailer have once again become sta-ble, TSA will now stop regulating the brakes/engine power and the driver regains control ofthe vehicle.
Related information
•
Towing a trailer (p. 292)
• Loading – general (p. 146)
Page 319 of 404

WHEELS AND TIRES
}}
317
system that illuminates a low tire pressure telltale (
) when one or more of your tires is signifi-
cantly under-inflated. Accordingly, when the low tire pressure telltale illuminates, you should stopand check your tires as soon as possible, andinflate them to the proper pressure. Driving on a significantly under-inflated tire cau- ses the tire to overheat and can lead to tire fail-ure. Under-inflation also reduces fuel efficiencyand tire tread life, and may affect the vehicle'shandling and stopping ability. Please note that atire pressure monitoring system is not a substi-tute for proper tire maintenance, and it is the driv-er's responsibility to maintain correct tire pres-sure, even if under-inflation has not reached thelevel to trigger illumination of the system's lowtire pressure telltale. Your vehicle has also been equipped with a TPMS malfunction indicator to indicate when thesystem is not operating properly. The monitoringsystem's malfunction indicator is combined withthe low tire pressure telltale. When the system detects a malfunction, the tell- tale will flash for approximately one minute andthen remain continuously illuminated. Thissequence will continue upon subsequent vehiclestart-ups as long as the malfunction exists. Whenthe malfunction indicator is illuminated, the sys-tem may not be able to detect or signal low tirepressure as intended. System malfunctions may occur for a variety ofreasons, including the installation of replacementor alternate tires or wheels on the vehicle thatprevent the tire pressure monitoring system fromfunctioning properly. Always check the system's malfunction telltale after replacing one or more tires or wheels onyour vehicle to ensure that the replacement oralternate tires and wheels allow the system tocontinue to function properly.
NOTE
The system indicates low tire pressure but does not replace normal tire maintenance. Forinformation on correct tire pressure, pleaserefer to the tire inflation decal on the driver'sdoor opening or consult your Volvo retailer.
WARNING
Incorrect inflation pressure could lead to tire failure, resulting in a loss of control of thevehicle.
Related information
•
Tire Monitor - introduction (p. 317)
• Tire Pressure Monitoring System (TPMS) – general information (p. 320)
Tire Monitor - introduction Tire Monitor uses the rotational speed of the tires in combination with signal analysis of theABS sensor signals to determine if they areproperly inflated.
When a tire is under-inflated, its diameter (and consequently also its rotational speed) changes.By comparing the individual tires with each otherit is possible to determine if one or more tires areunder inflated. When low inflation pressure is detected or if the system is not functioning properly, Tire Monitorwill light up the tire pressure warning light (
) (also referred to as a telltale) in the
instrument panel and will display one of several messages in the text window, for example:
Tire
pressure low Check tires. Adjust the inflation
pressure and recalibrate if necessary.
NOTE
If a malfunction occurs in the system, the tire pressure warning light will flash for approxi-mately 1 minute and then remain illuminated.
Tire press. syst Service required will be
displayed.