2018 VOLKSWAGEN T-ROC signal light
[x] Cancel search: signal lightPage 6 of 502

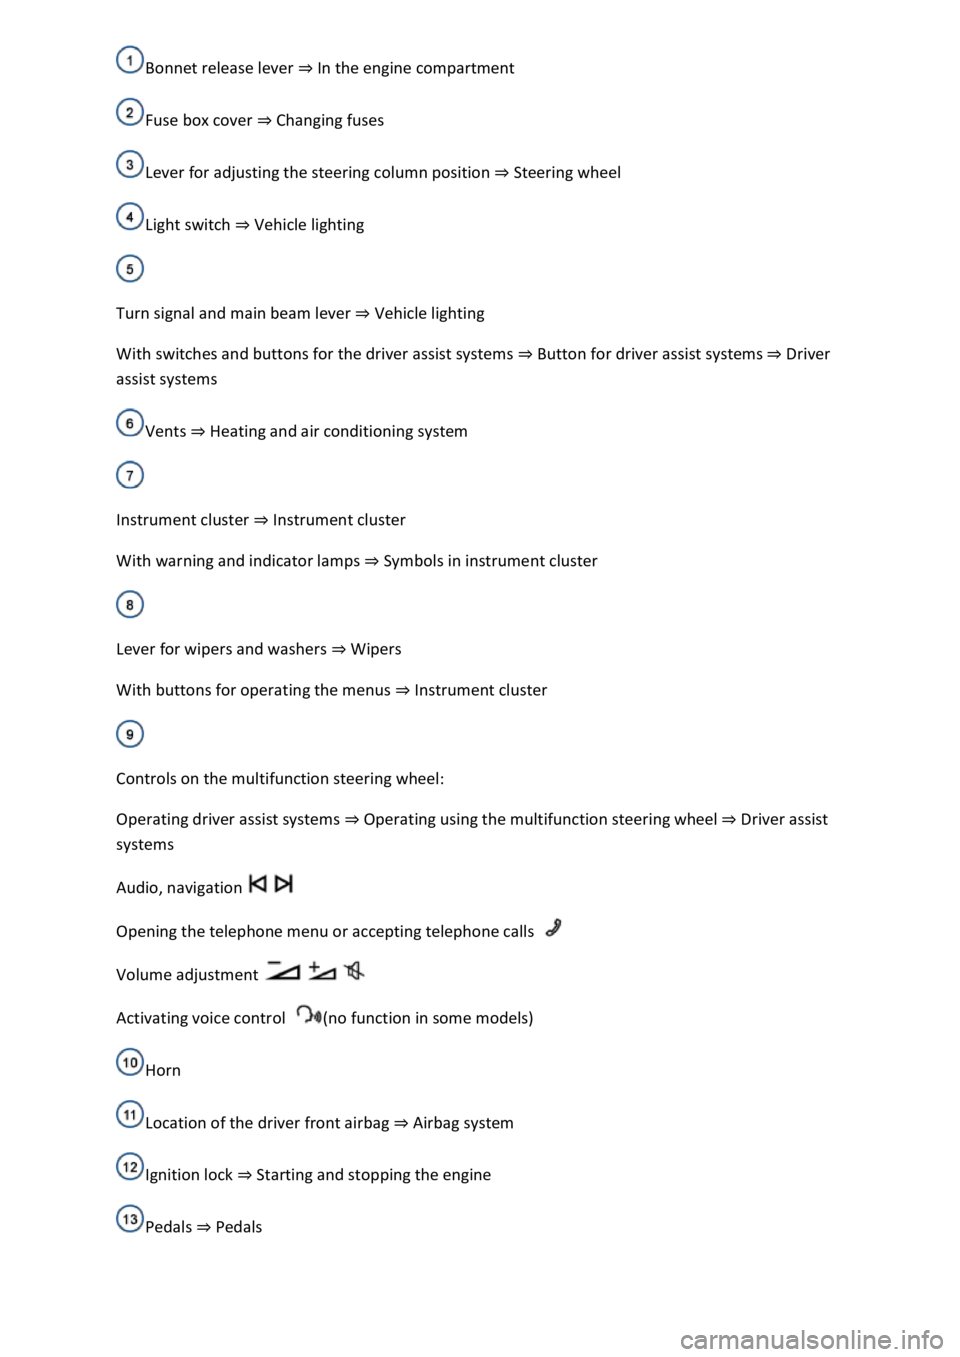
In the engine compartment
Fuse box cover Changing fuses
Lever for adjusting the steering column position Steering wheel
Light switch Vehicle lighting
Turn signal and main beam lever Vehicle lighting
With switches and buttons for the driver assist systems Button for driver assist systemsDriver
assist systems
Vents Heating and air conditioning system
Instrument cluster Instrument cluster
With warning and indicator lamps Symbols in instrument cluster
Lever for wipers and washers Wipers
With buttons for operating the menus Instrument cluster
Controls on the multifunction steering wheel:
Operating driver assist systems Operating using the multifunction steering wheelDriver assist
systems
Audio, navigation
Opening the telephone menu or accepting telephone calls
Volume adjustment
Activating voice control (no function in some models)
Horn
Location of the driver front airbag Airbag system
Ignition lock Starting and stopping the engine
Pedals Pedals
Page 24 of 502

rocker switch on the wiper lever or the
or buttons on the multifunction steering wheel. Then press the or button or
wait a few seconds. The speed is now saved and the warning is activated.
To deactivate, press the or button again. The stored speed will be deleted.
The speed warning can be adjusted within a range of 30 km/h (18 mph) to 250 km/h (155 mph).
Some settings can be saved in the user accounts for personalisation and therefore change
automatically when the user account is changed Personalis
1) Varies depending on the instrument cluster version.
2) Not available in all countries.
Warning and information messages
First read and observe the introductoryinformation and safety warnings
The system runs a check on certain components and functions in the vehicle when the ignition is
switched on or while the vehicle is in motion. Malfunctions are indicated by red and yellow warning
symbols with information messages on the instrument cluster display Symbols in instrument
cluster
messages and symbols can vary depending on the version of the instrument cluster.
In addition, a list of current malfunctions can be opened manually. To open the list, select the
Vehicle status or Vehicle menu Instrument cluster menus
Priority 1 warning (red)The symbol flashes or lights up (sometimes together with a signal tone).
Do not drive on! Danger. Check the fault and correct the cause. Seek expert assistance if
necessary.Priority 2 warning (yellow)The symbol flashes or lights up (sometimes together with a
signal tone). Malfunctions and insufficient service fluids can damage the vehicle and cause it to
break down. Check the fault as soon as possible. Seek expert assistance if necessary.Information
messageInformation about various vehicle procedures and conditions.
With some equipment levels, some settings and displays may also appear in the Infotainment
system.
If several warnings are present, the symbols will appear for several seconds, one after another. The
symbols will continue to appear until the faults are rectified.
If warning messages about malfunctions are displayed when the ignition is switched on, it may not
be possible to adjust some settings as described, or the information display may appear differently.
If this is the case, take the vehicle to a qualified workshop to have the malfunctions rectified.
Page 28 of 502

After validation and evaluation of the information from the camera, the Infotainment system and
the current vehicle data, the activated Dynamic Road Sign Display shows up to three valid road signs
Fig. 14 with the accompanying additional signs:
1st position:The road sign that currently applies for the driver is shown on the left-hand side of the
display, e.g. a speed limit of 130 km/h (80 mph) Fig. 14.2nd position:Road signs that do not
always apply (e.g. 100 km/h (60 mph) in wet) are shown in second place.Additional sign:if the
windscreen wiper is active while the vehicle is in motion, the now valid road sign with the additional
In wet sign, for example, will be moved left to the first position.3rd position:Further road signs that
do not always apply will be displayed in the third position, e.g. overtaking not permitted at certain
times Fig. 14.
Speed warning
If the Dynamic Road Sign Display detects that an applicable speed limit has been exceeded, it can
issue an acoustic warning signal and display a message on the instrument cluster display.
The speed warning can be set or completely deactivated in the vehicle settings in the Infotainment
system Vehicle settings menu km/h (3 mph)
within a range between 0 km/h (mph) and 15 km/h (9 mph) above the permitted maximum speed.
Trailer mode
In vehicles with a factory-fitted towing bracket and a trailer with an electrical connection to the
vehicle, the display of road signs that may apply to the vehicle when towing a trailer, e.g. applicable
speed limits and no-overtaking signs, can be activated or deactivated in the vehicle settings in the
Infotainment system Vehicle settings menu
In trailer mode, the speed warning function display can be adjusted to the type of trailer or to legal
requirements. The settings can be adjusted in increments of 10 km/h (5 mph) within a range
between 60 km/h (40 mph) and 130 km/h (80 mph). If a higher speed is set than is permitted for
driving with a trailer in the country in which you are currently travelling, Dynamic Road Sign Display
automatically issues a warning at the usual speed limit, e.g. at 80 km/h (50 mph) in Germany.
If the speed warning for the trailer is deactivated, Dynamic Road Sign Display issues warnings as if
the vehicle was being driven without a trailer.
Function limitations
Dynamic Road Sign Display is subject to system-related limitations. The following conditions can
restrict the function of Dynamic Road Sign Display, or prevent it from working altogether:
Poor visibility, e.g. snow, rain, fog or heavy spray.
Glare, e.g. due to oncoming traffic or sunlight.
High speeds.
Covered or dirty camera.
Road signs that are located outside of the camera's field of view.
Page 47 of 502

Checklist
Observe the following information both before and during every journey to ensure your own safety,
and the safety of all passengers and other road users
Check that all lights and turn signals are working properly.
Check the tyre pressure and fuel level Tyre pressure, Fuel gauge.
Check the washer fluid level Washer fluid.
Make sure that you have a good, clear view through all of the windows Caring for and cleaning the
vehicle exterior.
Secure any objects and luggage in the stowage compartments, the luggage compartment or on the
roof Transporting items.
Ensure that you are able to operate the pedals freely at all times.
Secure any children travelling in the vehicle in a restraint system suitable for their weight and size
Safe transport of children.
Adjust the front seats, head restraints and mirrors properly to match the size of the occupants
Sitting position, Mirrors.
Wear shoes that provide proper support for your feet when using the pedals.
The floor mat in the footwell on the driver side must leave the pedal area free and must be securely
fastened.
Page 50 of 502

Turn signals
Side lights, dipped beam headlights and main beam headlights
Tail light clusters
Brake lights
Rear fog light
Number plate light
Information on changing bulbs Changing bulbs
DANGER
Please observe important safety information about the front passenger front airbag Fitting and
using chi
WARNING
Driving under the influence of alcohol, drugs, medication or narcotics could cause accidents and fatal
injuries.
Alcohol, drugs, medication and narcotics can severely impair senses, reaction times and driving
safety. This could cause you to lose control of the vehicle.
WARNING
Always observe current traffic regulations and speed limits, and think ahead when driving. The
correct interpretation of the driving situation can make the difference between reaching your
destination safely and having an accident with serious injuries.
NOTICE
Volkswagen is not responsible for any vehicle damage caused by low-quality fuel, inadequate
servicing work or non-availability of Genuine Parts.
Observe the instructions and information for vehicles with an N1 approval Information about
vehicles with N1 approval (light commercial vehicle)
Page 85 of 502

indicate a change in direction or lane change by operating the turn signal. The hazard warning lights
will be interrupted temporarily.
Switch on the hazard warning lights, e.g. in the following situations:
When traffic ahead suddenly starts moving more slowly or you reach the tail end of a traffic jam to
warn vehicles behind you.
There is an emergency situation.
The vehicle has broken down.
When tow-starting or towing.
Always follow local regulations on the use of the hazard warning lights.
If the hazard warning lights are not working, you must use an alternative method of drawing
attention to the broken-down vehicle. This method must comply with traffic legislation.
WARNING
Any broken-down vehicle poses a high accident risk for the vehicle occupants and for other road
users.
Stop the vehicle as soon as possible and when safe to do so.
Park the vehicle at a safe distance from moving traffic.
Switch on the hazard warning lights.
Never leave other persons alone in the vehicle, particularly children or people requiring assistance.
This applies in particular when the doors are locked. People locked in the vehicle may be subjected
to very high or very low temperatures.
WARNING
Ignoring any of the items on this important safety checklist can lead to accidents and severe injuries.
Always follow the instructions in the checklist and observe the general safety procedures.
WARNING
The components of the exhaust system become very hot. This can cause fires and serious injuries.
Park the vehicle so that no part of the exhaust system can come into contact with any inflammable
material underneath the vehicle, e.g. dry grass, fuel.
Page 109 of 502

button again moves the boot lid back into the starting position.
Signal tones
If the boot lid is opened or closed from the vehicle interior or using the vehicle key, signal tones will
sound.
Changing and storing the opening angle
If the area behind or above the vehicle is smaller than the path of the boot lid, the opening angle of
the boot lid can be changed.
Stop the opening procedure at the desired open position (at least half open).
In the boot lid, press and hold the button Fig. 63until the hazard warning lights flash.
The changed opening angle will be stored.
The hazard warning lights flash and an acoustic signal sounds to confirm that the changed opening
angle has been stored.
Resetting and storing the opening angle
The opening angle must be reset and stored again in order for the boot lid to open fully again.
Push the opened boot lid up as far as it will go by hand. You will need to use increased force for this.
In the boot lid, press and hold the button Fig. 63until the hazard warning lights flash.
The opening angle will be reset.
The hazard warning lights flash and an acoustic signal sounds to confirm that the opening angle has
been reset.
NOTICE
Before opening or closing the boot lid, please check that there is enough space to open and close it,
for example when in a garage.
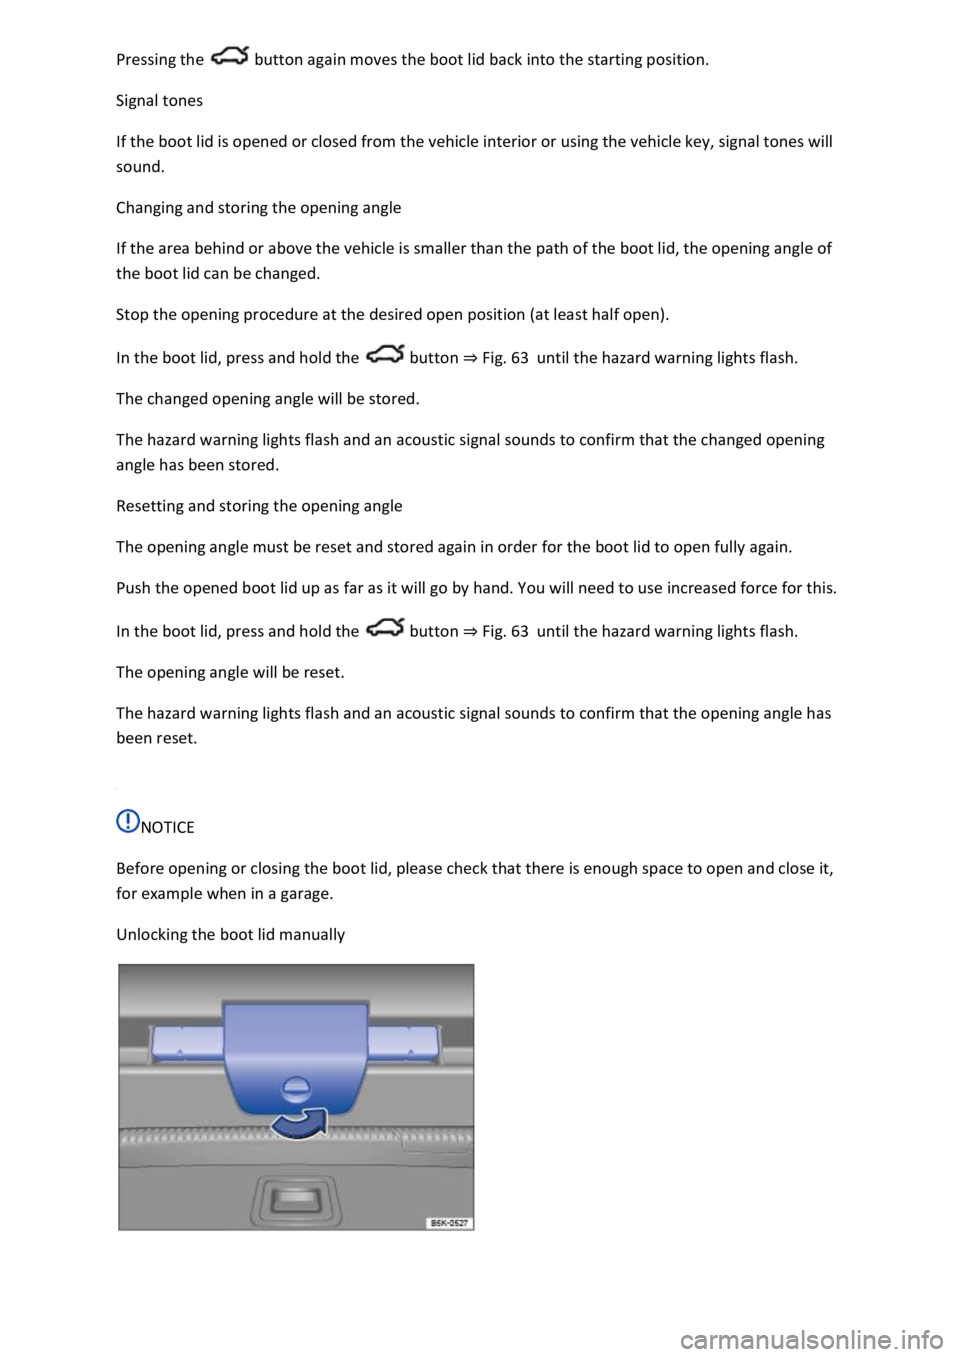
Unlocking the boot lid manually
Page 129 of 502

The rear centre armrest must always be folded up while the vehicle is in motion in order to reduce
the risk of injury.
The middle seat on the rear bench seat must never be used when the centre armrest is folded down
neither by adults nor children. An incorrect sitting position can cause severe injuries.
Lights
Turn signals
Switching turn signals on and off
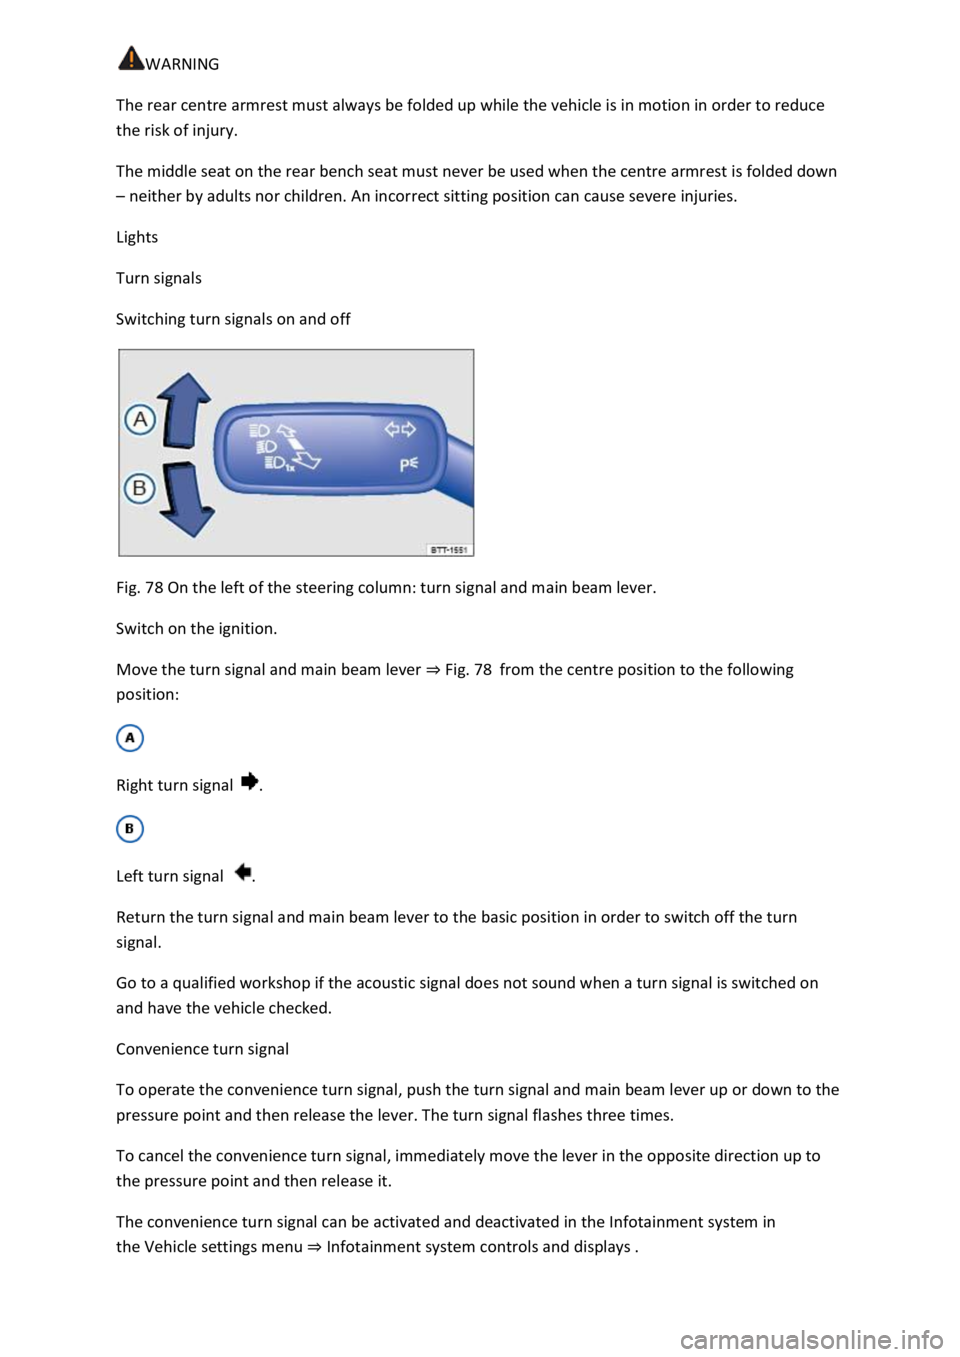
Fig. 78 On the left of the steering column: turn signal and main beam lever.
Switch on the ignition.
Move the turn signal and main beam lever Fig. 78from the centre position to the following
position:
Right turn signal .
Left turn signal .
Return the turn signal and main beam lever to the basic position in order to switch off the turn
signal.
Go to a qualified workshop if the acoustic signal does not sound when a turn signal is switched on
and have the vehicle checked.
Convenience turn signal
To operate the convenience turn signal, push the turn signal and main beam lever up or down to the
pressure point and then release the lever. The turn signal flashes three times.
To cancel the convenience turn signal, immediately move the lever in the opposite direction up to
the pressure point and then release it.
The convenience turn signal can be activated and deactivated in the Infotainment system in
the Vehicle settings menu Infotainment system controls and displays