Page 310 of 502
Only use a towing bracket which has been approved by Volkswagen for your vehicle type. Always
check and observe the data provided by the towing bracket manufacturer.
Maximum power consumption of the trailer's electrical consumers
Never exceed the specified values.
Europe, Asia, Africa, South and Central America
All brake lights 84 watts
Turn signal per side 42 watts
All side lights 100 watts
All tail lights 42 watts
Rear fog light 42 watts
Australia
All brake lights 108 watts
Turn signal per side 54 watts
All side lights 100 watts
All tail lights 54 watts
Rear fog light 54 watts
WARNING
If the towing bracket is unsuitable or incorrectly fitted, the trailer could become detached from the
towing vehicle. This can cause serious accidents and fatal injuries.
Never fit a towing bracket to the rear bumper or its mountings. The towing bracket must not prevent
the rear bumper from functioning correctly.
Do not carry out any alterations to the exhaust or brake systems.
NOTICE
Page 315 of 502

156 Pin assignment for the trailer socket (illustration).
First read and observe the introductoryinformation and safety warnings
Pin assignment for the trailer socket Fig. 156
Left turn signal
Rear fog light
Earth for pins 1, 2, 4, 5, 6, 7, 8
Right turn signal
Tail light, right
Brake light
Tail light, left
Reversing light
Permanent positive
Permanent positive
Earth for pin 10
Not assigned
Earth for pin 9
Trailer socket
A 13-pin trailer socket produces the electrical connection between the towing vehicle and the trailer.
When the vehicle electrically detects a trailer, the consumers in the trailer are supplied with an
electrical voltage via the electrical connection (pins 9 and 10). Pin 9 is assigned as the permanent
positive, enabling operation of the trailer interior lighting, for example.
Electrical consumers such as a caravan refrigerator are supplied with power only when the engine is
running (pin 10).
To avoid overloading the electrical system, do not connect the earth wires (pins 3, 11 and 13) with
each other.
If the trailer has a 7-pin plug you will need to use a suitable adapter cable. The function of pin 10 is
then not available.
Page 338 of 502

Damaged or dirty wiper blades can scratch the window glass.
can damage the graphite coating of the wiper blades during cleaning.
Wax deposits from car washes on the windscreen and rear window can cause the wiper blades to
rub. Remove wax residue using a special cleaning product or cleaning cloths.
Changing bulbs
Introduction
This chapter contains information on the followingsubjects:
Checklist
Changing bulbs in the front headlights (halogen bulbs)
Changing the bulbs in the headlights (lights with LED technology)
Changing the front turn signal bulbs
Changing bulbs in the front bumper
Changing bulbs in the tail light clusters (LED l
Changing bulbs in the number plate light (LED lights)
Troubleshooting
Changing the vehicle bulbs requires a certain amount of technical skill. Volkswagen therefore
recommends having bulbs replaced by a qualified workshop if you are uncertain. The work must be
performed by an expert if other vehicle parts around the affected bulbs need to be removed.
Volkswagen recommends having bulbs replaced by a Volkswagen dealership.
You should keep a box with spare light bulbs for the lights that ensure the vehicle is roadworthy in
the vehicle at all times. Spare bulbs are available from Volkswagen dealerships. In some countries it
is a legal requirement to have these spare bulbs in the vehicle.
It may be illegal to drive with defective lights of the exterior lighting.
Information on indicator and warning lamps can be found in the troubleshooting section at the end
of the chapter Troubleshooting
LED lights on the vehicle
The exterior lighting may feature LEDs: Owners cannot replace the LEDs themselves. If some LEDs
fail, this may be an indication that more elements are on the point of failure. In this case, have the
lights checked and replaced if necessary at a qualified workshop.
Page 340 of 502
t read and observe the introductoryinformation and safety warnings
Checklist
Always carry out the following actions for changing a bulb in the given order
Park the vehicle on a firm and level surface at a safe distance from the flow of traffic.
Switch on the electronic parking brake Electronic parking brake.
Turn the light switch to position 0 Switching lights on and off.
Move the turn signal and main beam lever to neutral position Switching turn signals on and off.
Automatic gearbox: move the selector lever to position P DSG
Page 343 of 502

t clockwise as far as it will go.
Close the bonnet In the engine compartment
Changing the bulbs in the headlights (lights with LED technology)
First read and observe the introductoryinformation and safety warnings
These lamps use LED technology. The LEDs cannot be replaced by customers. If some LEDs fail, this
may be an indication that more elements are on the point of failure. In this case, have the lights
checked and renewed if necessary at a qualified workshop.
Changing the front turn signal bulbs
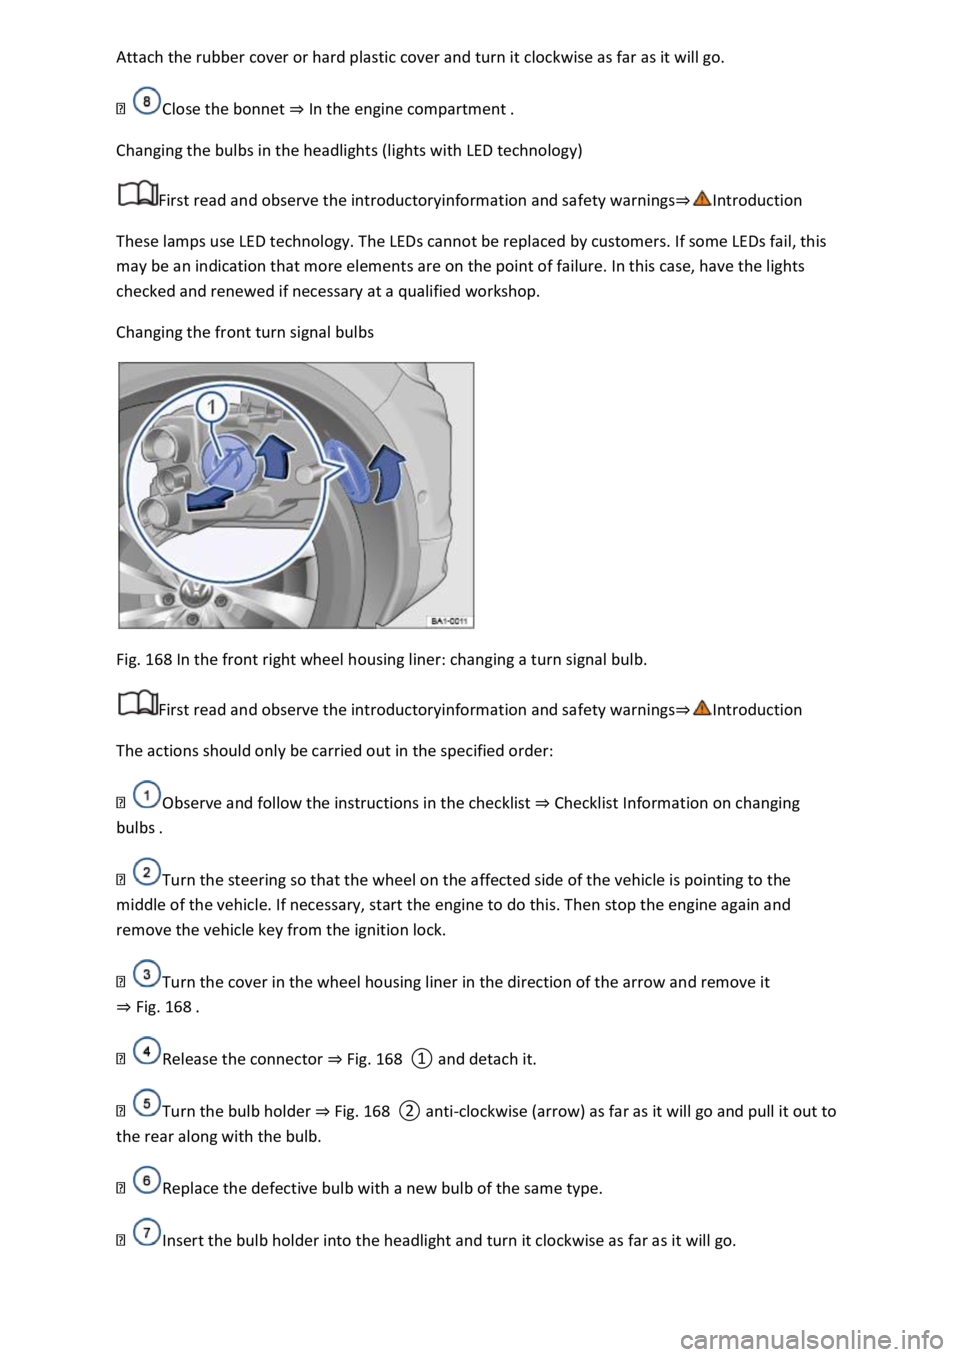
Fig. 168 In the front right wheel housing liner: changing a turn signal bulb.
First read and observe the introductoryinformation and safety warnings
The actions should only be carried out in the specified order:
Observe and follow the instructions in the checklist Checklist Information on changing
bulbs
Turn the steering so that the wheel on the affected side of the vehicle is pointing to the
middle of the vehicle. If necessary, start the engine to do this. Then stop the engine again and
remove the vehicle key from the ignition lock.
Turn the cover in the wheel housing liner in the direction of the arrow and remove it
Fig. 168
Release the connector Fig. 168
Turn the bulb holder Fig. 168clockwise (arrow) as far as it will go and pull it out to
the rear along with the bulb.
Replace the defective bulb with a new bulb of the same type.
Insert the bulb holder into the headlight and turn it clockwise as far as it will go.
Page 357 of 502

WARNING
Never tow a vehicle that has no power supply.
assistance.
NOTICE
When pushing the vehicle by hand, do not press on the tail light clusters, the side spoilers on the
rear window, the rear spoiler or large panels. This could damage the vehicle and the rear spoiler
could become detached.
NOTICE
Remove and install the cover and the towing eye carefully so as to avoid damage to the vehicle, e.g.
the paintwork.
Notes on tow-starting and towing
First read and observe the introductoryinformation and safety warnings
It is still possible to activate the turn signals in a vehicle that is being towed, even if the hazard
warning lights are switched on. To do this, operate the turn signal lever in the required direction
while the ignition is switched on. The hazard warning lights will not flash while the turn signal is
being used. The hazard warning lights will start flashing again automatically as soon as the turn
signal lever is moved back to the neutral position.
When should your vehicle not be tow-started or towed?
an 50 km.
accident.
If the vehicle cannot be towed on its own four wheels due to one of the above conditions, seek
expert assistance and have the vehicle transported on a recovery vehicle if necessary.
Tow-starting
First read and observe the introductoryinformation and safety warnings
Preparations for tow-starting
Vehicles with an automatic gearbox: