Page 42 of 502

Fig. 23
Display areas.
Arrow buttons for changing to the lap timer.
Opening the performance monitor
Press the MENU button or function button on the Infotainment system.
Touch the Vehicle function button.
Touch the Selection function button.
Touch the Sport function button.
If you would like to switch between the performance monitor and the lap timer Lap timer
one of the arrow buttons on the left and right above the instruments Fig. 23
Selecting instruments and setting units
The display can show a maximum of three instruments at the same time. Each instrument can be
selected for each display area Fig. 23
To change between instruments, swipe vertically over the display. The currently selected instrument
will then disappear and a new instrument will appear.
The units can be adjusted for some instruments in the Infotainment system Vehicle settings
menu
The following instruments can be displayed:
Charge pressure display: the charge pressure display Fig. 23
ar). The further to the right the
needle on the scale, the higher the engine power output.
Accelerometer (G-meter): the accelerometer (G-meter) Fig. 23
-type area shows the
acceleration level and the direction of the acting force (in the opposite direction according to
physical laws). If you drive to the left, for example, the red marking will move in the right area of the
instrument (and vice versa). If you accelerate, the red marking will move down. If you brake, the red
marking will move up. The level of acceleration is indicated by the position of the red marking which
moves outwards. If the acceleration increases, the red marking will move away from the centre area.
Power display: the power display Fig. 23
Coolant temperature display: the needle may move further in a clockwise direction under high
engine loads and with high outside temperatures. This is no cause for concern unless the
indicator lamp in the instrument cluster display is lit up or flashing Coolant temperature display
Oil temperature display: the needle is in the middle area under normal driving conditions. If the
needle is in the bottom left area, this means that the engine has not yet reached its operating
temperature. Avoid excessively high speeds and acceleration when the engine has not yet reached
Page 43 of 502

needle may move further in a clockwise direction under high engine
loads and at high outside temperatures. This is no cause for concern unless the indicator lamp
in the instrument cluster display is lit up or flashing Engine oil
Adapting the display areas to the driving situation
Choose the three possible instruments corresponding to your individual driving style and the driving
situation.
WARNING
Accidents and injuries can occur if the driver is distracted. Operating the Infotainment system can
distract you from the road.
Always drive carefully and responsibly.
NOTICE
When starting from cold, avoid high engine speeds, driving at full throttle and over-loading the
engine.
Due to the principle of performance determination used in the vehicle, the physical accuracy of the
displayed values is not guaranteed.
Lap timer
First read and observe the introductoryinformation and safety warnings
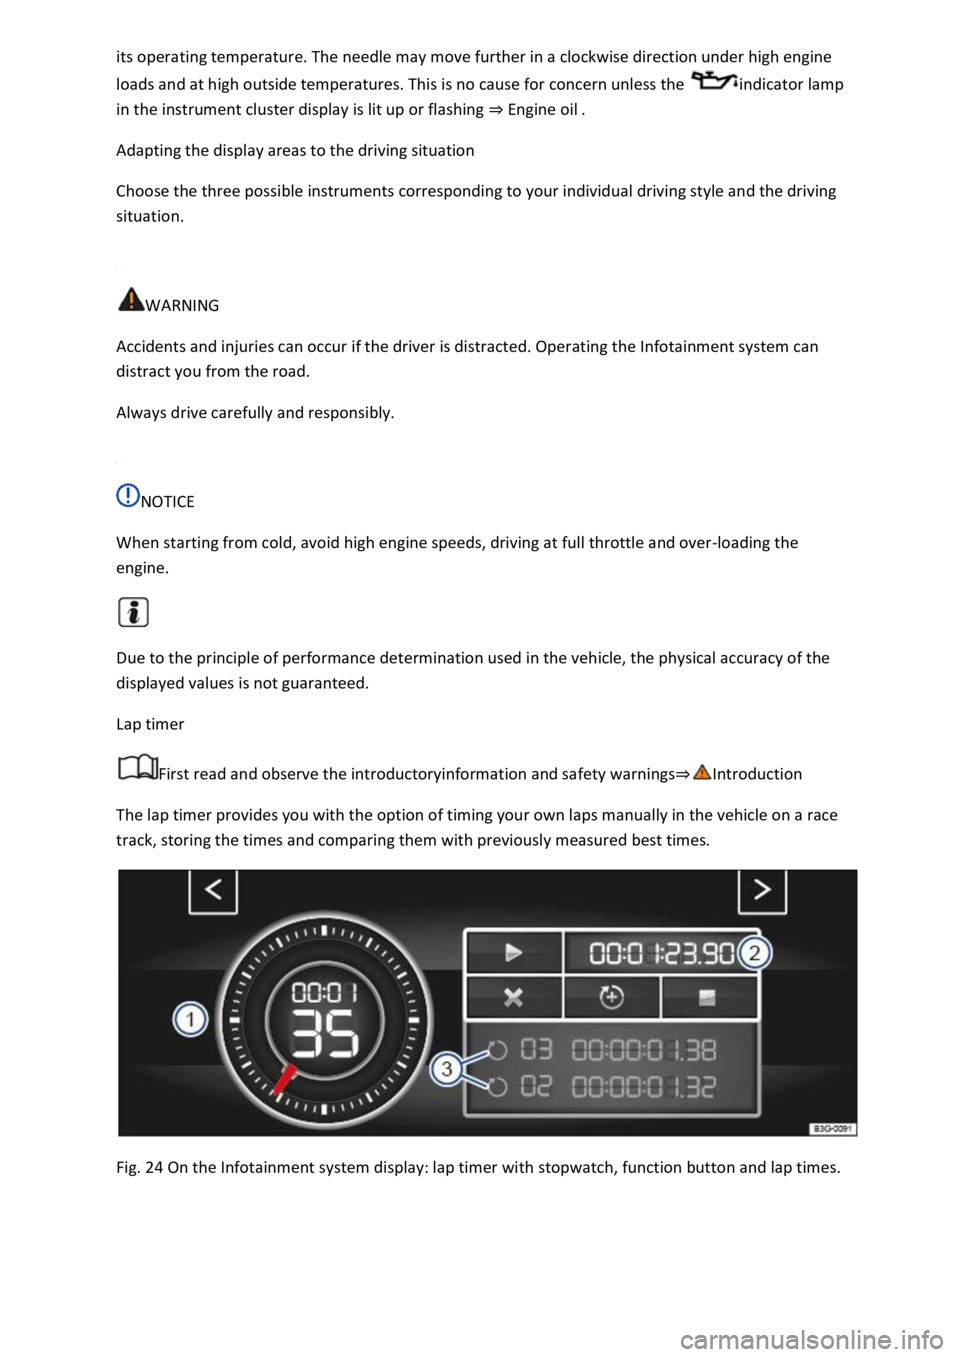
The lap timer provides you with the option of timing your own laps manually in the vehicle on a race
track, storing the times and comparing them with previously measured best times.
Fig. 24 On the Infotainment system display: lap timer with stopwatch, function button and lap times.
Page 49 of 502

Is fuel in the adequate quality available Fuel and emission control?
Are the correct service fluids that comply with Volkswagen specifications available in the destination
country Service fluids and consumables?
Will the navigation function in the factory-fitted Infotainment system work with the available
navigation data in the destination country?
Are special tyres necessary for travelling in the destination country?
Is a fire extinguisher a requirement in your destination country?
Which requirements must be observed regarding high-visibility waistcoats?
Checklist
Do not work on the engine and in the engine compartment unless you are familiar with the task, are
aware of the general safety procedures and have the correct equipment, service fluids and suitable
tools In the engine compartment
are uncertain. Make sure you check the following on a regular basis:
Washer fluid level Washer fluid
Engine oil level Engine oil
Coolant level Coolant
Brake fluid level Brake fluid
Tyre pressure Wheels and tyres
Page 89 of 502
-Net Mobile online services
Opening and closing
Vehicle key
Functions of the vehicle key
Fig. 50 Vehicle key.
Key to Fig. 50
Central locking button: unlock the vehicle.
Unlock the boot lid separately.
Central locking button: lock the vehicle.
Fold the key bit in and out.
Indicator lamp: flashes when button is pressed.
Unlocking or locking the vehicle from outside
To unlock: press the button.
To lock: press the button.
Press the or button Opening and closing the boot lid
Unlocking: all turn signals flash twice.
Locking: all turn signals flash once.
WARNING
Improper or unsupervised use of the vehicle keys can cause accidents or serious injuries.
Always take all vehicle keys with you every time you leave the vehicle. Otherwise, children or
unauthorised persons could lock the doors and the boot lid, start the engine or switch on the
ignition and operate electrical equipment, such as the electric windows.
Page 94 of 502
or is covered by another item, e.g. an aluminium case Starting and stopping the
engine
If the vehicle has a DSG
Page 95 of 502

the ignition has been switched off or the driver has switched off the
engine before leaving the vehicle.
A symbol in the instrument cluster display Displaysindicates if one or more doors are not closed
properly. Do not drive on! Open the appropriate door and then close it again.
This symbol is also visible when the ignition is switched off and will go out a few seconds after the
vehicle has been locked when all doors are closed.
WARNING
A door which is not closed properly could open suddenly while the vehicle is in motion. This could
lead to serious injuries.
Stop as soon as possible and close the door.
Make sure that the door is closed properly and that the lock has engaged. The closed door must be
flush with the surrounding body panels.
Doors should be opened or closed only when you are sure that nobody is in their path.
WARNING
Any door being held open by the door arrester could close unexpectedly in strong winds or if the
vehicle is on a slope. This could lead to injuries.
Always hold doors by the handle when opening and closing doors.
WARNING
The opening and closing paths of the doors and boot lid are potential danger areas where injury can
occur.
The doors and boot lid should therefore be opened or closed only when you are sure that nobody is
in their path.
WARNING
Careless locking of the doors can cause serious injuries.
If the vehicle is locked from the outside, the doors and electric windows cannot be opened from the
inside.
The central locking system locks all doors. Locking the vehicle from the inside can prevent the doors
from being opened unintentionally and unauthorised persons from entering the vehicle. However,
locked doors can delay assistance to passengers inside the vehicle in the event of an accident or
emergency.
Page 99 of 502

Unlocking or locking the vehicle with Keyless Accessis not activated if the vehicle
was locked manually.
Things to note when unlocking manually
The alarm is triggered when the driver door is opened Anti-theft alarm
After unlocking, an emergency start must be carried out Starting and stopping the engine
Switch on the ignition to switch off the alarm.
The electronic immobiliser recognises a valid vehicle key.
The anti-theft alarm is not activated when the vehicle is locked manually using the key bit Anti-
theft alarm
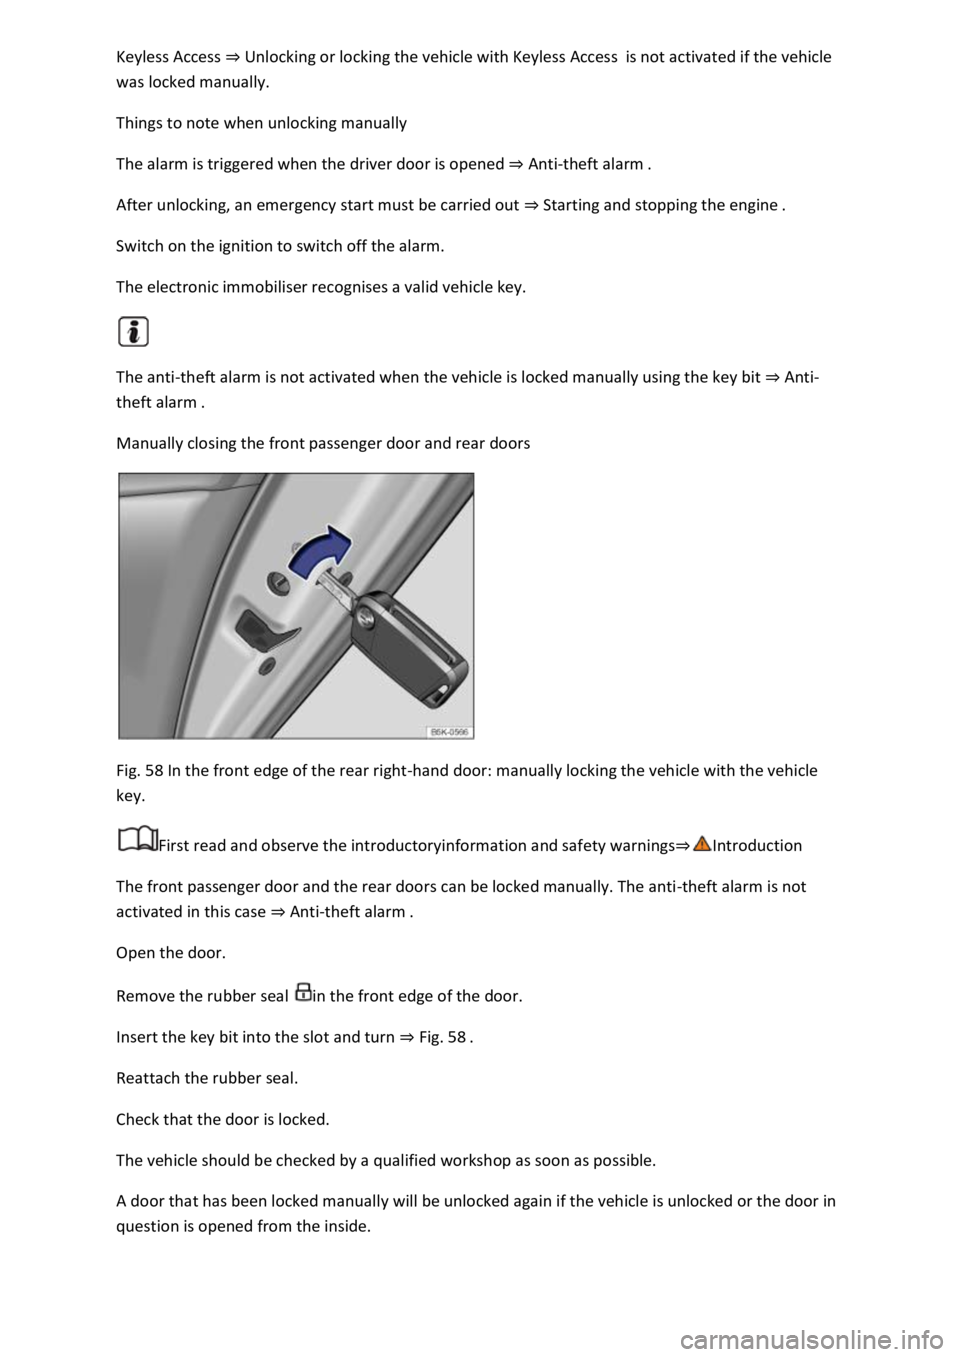
Manually closing the front passenger door and rear doors
Fig. 58 In the front edge of the rear right-hand door: manually locking the vehicle with the vehicle
key.
First read and observe the introductoryinformation and safety warnings
The front passenger door and the rear doors can be locked manually. The anti-theft alarm is not
activated in this case Anti-theft ala
Open the door.
Remove the rubber seal in the front edge of the door.
Insert the key bit into the slot and turn Fig. 58
Reattach the rubber seal.
Check that the door is locked.
The vehicle should be checked by a qualified workshop as soon as possible.
A door that has been locked manually will be unlocked again if the vehicle is unlocked or the door in
question is opened from the inside.
Page 102 of 502

Go to a qualified workshop. Volkswagen recommends using a Volkswagen dealership for this
purpose.
Turn signals do not flash
If the turn signals do not flash as confirmation when the vehicle is locked:
At least one of the doors or the boot lid is not closed.
OR: convenience closing is in progress and not all windows and the glass roof have been closed.
Vehicle locks itself automatically
The vehicle will lock itself again automatically after approx. 45 seconds if one of the following
conditions applies:
The vehicle has been unlocked but not opened.
The ignition has not been switched on.
The boot lid has not been opened.
The vehicle has been unlocked using the lock cylinder.
The vehicle has been locked using the central locking button in the vehicle interior.
Response when locking the vehicle with a second vehicle key
Keyless Access: the vehicle key located inside the vehicle will be blocked from starting the engine if
the vehicle has been locked from the outside using a second vehicle key. Press the button on the
vehicle key in the vehicle interior to enable it to start the engine Starting and stopping the
engine
Locking the vehicle after airbags have been triggered
The entire vehicle is unlocked if the airbags are activated in an accident. Depending on the extent of
the damage, the vehicle can be locked as follows after an accident:
Switch the ignition off and then back on again.
Automatic deactivation of the sensors
The vehicle is not unlocked or locked for an extended period.
A sensor has been triggered an excessive number of times.
Reactivating the sensors:
Unlock the vehicle with the button in the vehicle key.
NOTICE