2018 VOLKSWAGEN T-ROC key
[x] Cancel search: keyPage 40 of 502

Introduction
This chapter contains information on the followingsubjects:
Vehicle settings menu
Performance monitor
Lap timer
Personalisat
The Infotainment system combines key vehicle systems in a central operating unit, e.g. menu
settings, radio or navigation system.
General information on operation
The following section contains relevant information on the settings that can be adjusted in the
Vehicle settings menu. Basic information on operating the Infotainment system and on warning and
safety instructions is contained in a separate manual Infotainment system,.
Systems settings and vehicle information display
After pressing the button or touching the function button followed by the Vehicle function
button, touch the corresponding function buttons to display information or make settings. The
current status of systems can be checked or system faults displayed by touching the function
button in the Vehicle status menu.
Vehicle settings (setup) Vehicl
Think Blue. Trainer. Think Blue. Trainer.
Performance monitor Performance monitor
Lap timer Lap timer
Offroad display Offroad driving situations
Auxiliary heater settings Auxiliary heater and ventilation
Active media.
Driving data.
Vehicle status.
Convenience consumers.
Radio station selection.
WARNING
Accidents and injuries can occur if the driver is distracted. Operating the Infotainment system can
distract you from the road.
Page 44 of 502

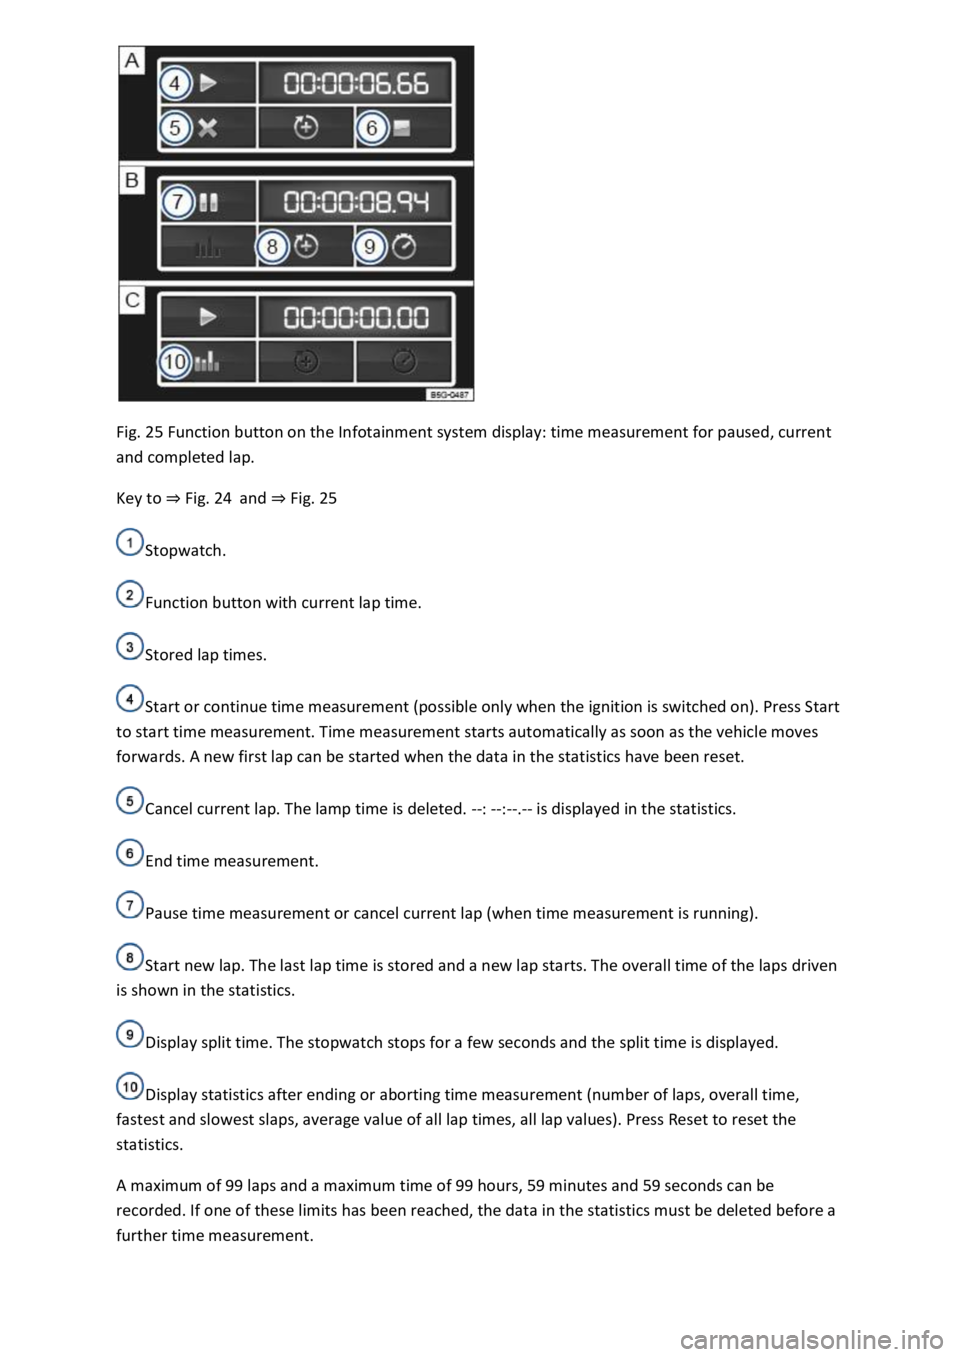
Fig. 25 Function button on the Infotainment system display: time measurement for paused, current
and completed lap.
Key to Fig. 24and Fig. 25
Stopwatch.
Function button with current lap time.
Stored lap times.
Start or continue time measurement (possible only when the ignition is switched on). Press Start
to start time measurement. Time measurement starts automatically as soon as the vehicle moves
forwards. A new first lap can be started when the data in the statistics have been reset.
Cancel current lap. The lamp time is deleted. --: --:--.-- is displayed in the statistics.
End time measurement.
Pause time measurement or cancel current lap (when time measurement is running).
Start new lap. The last lap time is stored and a new lap starts. The overall time of the laps driven
is shown in the statistics.
Display split time. The stopwatch stops for a few seconds and the split time is displayed.
Display statistics after ending or aborting time measurement (number of laps, overall time,
fastest and slowest slaps, average value of all lap times, all lap values). Press Reset to reset the
statistics.
A maximum of 99 laps and a maximum time of 99 hours, 59 minutes and 59 seconds can be
recorded. If one of these limits has been reached, the data in the statistics must be deleted before a
further time measurement.
Page 45 of 502

Press the MENU button or function button, depending on the version of the Infotainment system.
Touch the Vehicle function button.
Touch the Selection function button.
Touch the Sport function button. The performance monitor is displayed.
Touch one of the arrow buttons Fig. 23
You can change between the lap timer and performance monitor at any time using the arrow
buttons Fig. 23Fig. 24
Measuring lap times
The stopwatch measures the lap time in two areas:
The red needle and the numerical value in the centre show the running time in seconds. The smaller
display in the inner area shows minutes and hours.
The display on the right side shows the current lap time with an accuracy of 1/100 seconds. There is
no difference between the stopwatch and lap times if there are not yet any laps with split times
stored in the lap timer.
WARNING
Avoid operating the lap timer when the vehicle is in motion if possible.
Make lap timer settings and access statistics only when the vehicle is stationary.
When the vehicle is in motion, use the lap timer only in driving situations which are easy to control.
Personalisation
First read and observe the introductoryinformation and safety warnings
The personalisation function allows personalised vehicle settings, such as air conditioning system,
instrument cluster or lighting settings, to be saved in a user account. Four user accounts are
available. Users are identified by the vehicle keys upon unlocking the vehicle. A user account is
assigned to each vehicle key.
Changes to the settings will be assigned to the active user account and saved upon locking the
vehicle or changing the user account.
Welcome and user account selection
When personalisation is activated, the name of the current user account appears on the instrument
cluster display for approximately ten seconds after you switch on the ignition.
During this time, you can select a user account using the buttons on the wiper lever or multifunction
steering wheel Infotainment system controls and displays
Page 46 of 502

User management and settings
When the ignition is switched on, you can use the Personalisation menu in the Infotainment system
for user management and to make settings. The menu can be accessed via the vehicle settings in the
Infotainment system.
Changing the user account
You can select the user account either via the Personalisation menu or via the Vehicle status menu.
Manually assigning vehicle keys to user accounts
You can assign a vehicle key to the currently active user account. For this purpose, select Manual key
assignment.
Automatically assigning vehicle keys to user accounts
If you have selected Automatic key assignment, the following vehicle key is assigned to the user
account upon changing the user account:
Vehicles without Keyless Access: vehicle key used to unlock the vehicle.
Vehicles with Keyless Access: vehicle key that is identified first by the personalisation function
when you open the driver door.
Personalised vehicle settings
Opening and closing (single door unlocking, window convenience opening etc.)
Light and vision (daytime running lights, cornering light, lane change flash etc.)
Settings for air conditioning system
Active driver assist systems
Driving profile selection
Multifunction display and instrument cluster (selection of displays)
Infotainment system (display brightness and station sorting)
A new vehicle key will be assigned to the current user account. To assign the vehicle key to a
different user account, select the required user account and manually assign it to the vehicle key.
Safety
Page 63 of 502

neck, over or under the arm or behind the back.
The lap part of the seat belt must always lie across the pelvis, never across the stomach.
The seat belt must always lie flat and snugly on the body. Tighten the belt slightly if necessary.
For pregnant women, the seat belt must be positioned evenly over the chest and as low as possible
over the pelvis. It must also lie flat so that no pressure is exerted on the abdomen this applies in
every stage of pregnancy Fig. 37
Adjusting seat belt routing to body size
The following equipment can be used to adjust the seat belt routing:
Seat belt height adjuster for the front seats Seat belt height adjuster
Height-adjustable front seats Sitting position
WARNING
Incorrect seat belt routing can cause severe injuries in the event of an accident or a sudden braking
or driving manoeuvre.
The seat belts offer best protection only when the backrests are in an upright position and the seat
belts have been fastened properly.
The seat belt itself or a loose seat belt can cause serious injuries if the seat belt shifts from harder
body parts in the direction of softer body parts (e.g. stomach).
The shoulder part of the seat belt must lie on the centre of the shoulder and never under the arm or
across the neck.
The seat belt must lie flat and snugly on the upper body.
The lap part of the seat belt must lie across the pelvis and never across the stomach. The seat belt
must lie flat and snugly on the pelvis. Tighten the belt slightly if necessary.
For pregnant women, the lap part of the seat belt must be as low as possible over the pelvis and lie
flat around the round stomach.
Do not twist the belt webbing while the seat belt is being worn.
Never hold the seat belt away from the body by hand.
The belt webbing should not lie over hard or fragile objects, such as glasses, pens or keys.
Never use seat belt clips, retaining rings or similar items to alter the seat belt routing.
If a person's physical build prevents them from routing the seat belt properly, contact a qualified
workshop to find out about any special modifications so that the seat belts and airbags can provide
Page 69 of 502

does not
mean there is a fire in the vehicle.
The fine dust can cause irritation to the skin and eye membranes as well as cause breathing
difficulties, particularly for those people suffering from asthma or other respiratory health problems.
In order to reduce breathing difficulties, get out of the vehicle or open the windows or doors in
order to breathe fresh air.
If you should come into contact with the dust, you should wash your hands and face with a mild
soap and water before eating.
Do not rub the dust into your eyes or into open wounds.
If dust has entered your eyes, rinse them with water.
WARNING
Cleaning agents that contain solvents cause the surface of the airbag modules to become porous. In
an accident that triggers the airbag, loose plastic parts can cause serious injury.
Never clean the dash panel or the airbag covers with cleaning agents that contain solvents.
Types of front passenger front airbag system
First read and observe the introductoryinformation and safety warnings
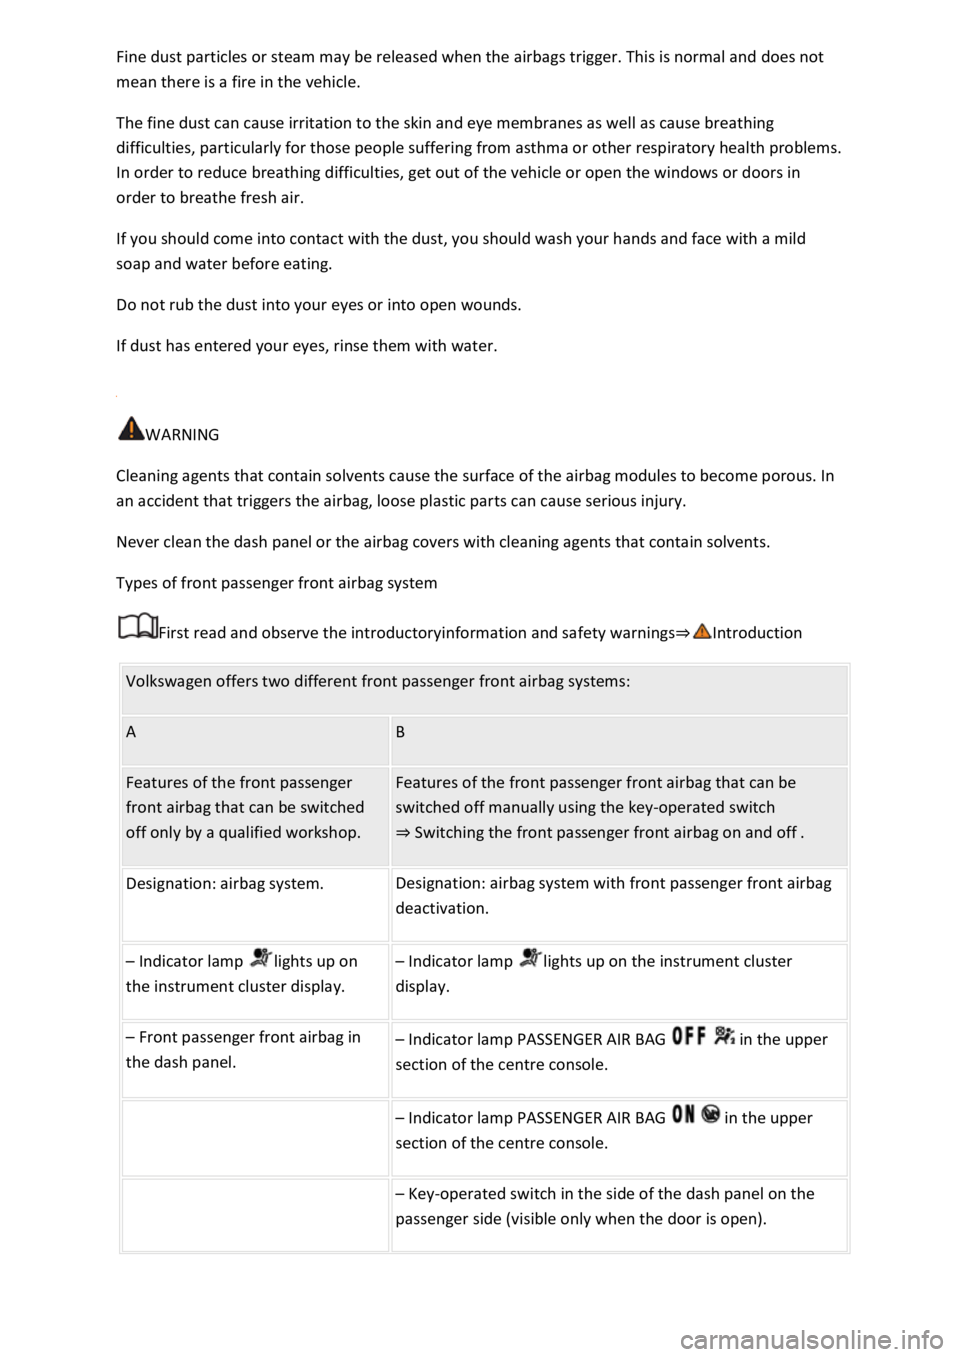
Volkswagen offers two different front passenger front airbag systems:
A B
Features of the front passenger
front airbag that can be switched
off only by a qualified workshop.
Features of the front passenger front airbag that can be
switched off manually using the key-operated switch
Switching the front passenger front airbag on and off.
Designation: airbag system. Designation: airbag system with front passenger front airbag
deactivation.
Indicator lamp lights up on
the instrument cluster display.
Indicator lamp lights up on the instrument cluster
display.
Front passenger front airbag in
the dash panel.
Indicator lamp PASSENGER AIR BAG in the upper
section of the centre console.
Indicator lamp PASSENGER AIR BAG in the upper
section of the centre console.
Key-operated switch in the side of the dash panel on the
passenger side (visible only when the door is open).
Page 73 of 502

anywhere in the airbag deployment zone.
No other people, animals or objects may be carried between the occupants of the front seats and
the airbag deployment zone. Make sure that children and passengers also keep to this rule.
Do not attach any objects, e.g. mobile navigation devices, to the windscreen above the front airbag
on the front passenger side.
Do not cover or stick anything on the steering wheel hub or the soft plastic surface of the airbag unit
on the front passenger side, and do not obstruct or modify them in any way.
WARNING
The front airbags are deployed in front of the steering wheel Fig. 40and dash panelFig. 41
When driving, always hold the steering wheel with both hands on the outside of the rim at the 9
o'clock and 3 o'clock positions.
Adjust the driver seat so that there is at least 25 cm between your breastbone and the hub of the
steering wheel. Contact a qualified workshop if your physical build makes this impracticable.
Adjust the front passenger seat so that the distance between the front passenger and the dash panel
is as large as possible.
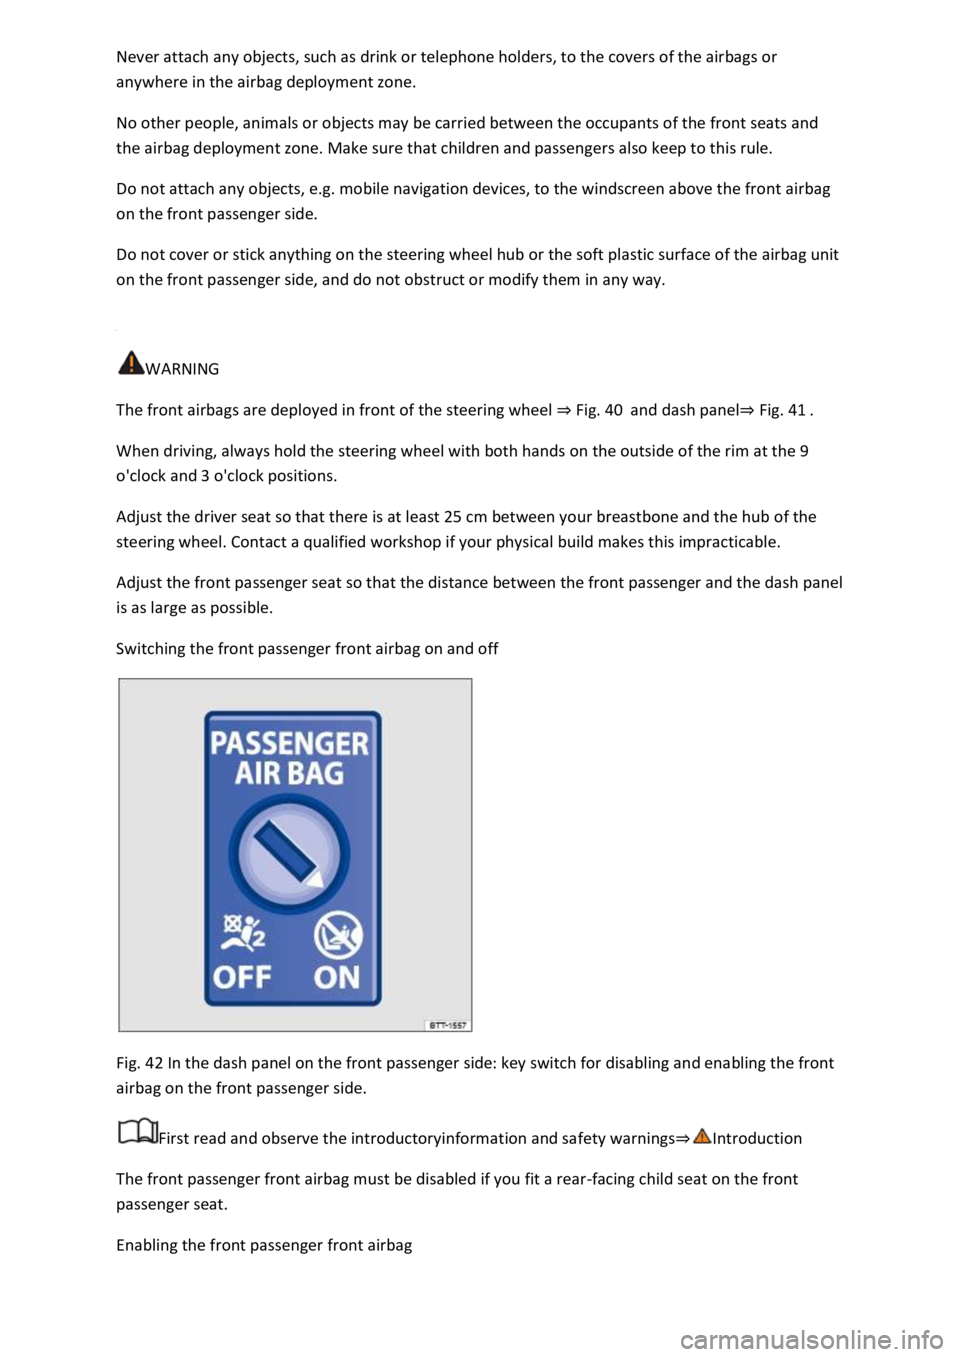
Switching the front passenger front airbag on and off
Fig. 42 In the dash panel on the front passenger side: key switch for disabling and enabling the front
airbag on the front passenger side.
First read and observe the introductoryinformation and safety warnings
The front passenger front airbag must be disabled if you fit a rear-facing child seat on the front
passenger seat.
Enabling the front passenger front airbag
Page 74 of 502

Open the door on the front passenger side.
Fold the key bit of the vehicle key all the way out Vehicle key
Insert the key bit into the key-operated switch on the dash panel Fig. 42until you feel the second
point of resistance. Around three quarters of the key bit should be inserted in the key switch at this
point
Turn the vehicle key, without using force, to the position .
Remove the vehicle key from the key-operated switch and fold away the key bit
The PASSENGER AIR BAG indicator lamp in the upper section of the centre console lights up
and goes out after approximately 60 seconds Indicator lamp
Close the door on the front passenger side.
Check that the PASSENGER AIR BAG indicator lamp in the upper section of the centre
console does not light up when the ignition is switched on Indicator lamp
Disabling the front passenger front airbag
Switch off the ignition.
Open the door on the front passenger side.
Fold the key bit of the vehicle key all the way out Vehicle key
Insert the fully folded-out key bit of the vehicle key into the key-operated switch in the dash panel
Fig. 42up to the second point of resistance. Around three quarters of the key bit should be
inserted in the key switch at this point
Turn the vehicle key, without using force, to the position .
Remove the vehicle key from the key-operated switch and fold away the key bit
Close the door on the front passenger side.
The PASSENGER AIR BAG indicator lamp in the upper section of the centre console lights
up continuously when the ignition is switched on Indicator lamp
Indication that front passenger front airbag is disabled
A deactivated front passenger front airbag is indicated only by the continuously lit
PASSENGER AIR BAG indicator lamp in the upper section of the centre console (
lights up yellow continuously) Indicator lamp
If the PASSENGER AIR BAG indicator lamp in the upper section of the centre console does
not light up continuously or lights up together with the indicator lamp in the instrument cluster
display, do not fit a child restraint system on the front passenger seat for safety reasons. The front
passenger front airbag could trigger during an accident.