Page 7 of 127

Introduction7Important information on
operation and traffic safety9 Warning
Drive safely at all times. Only
operate the Infotainment system if the traffic conditions allow a safeusage.
In the interest of safety, it might be
appropriate to stop the vehicle
before operating the Infotainment
system (e.g. for entries of
addresses).
9 Warning
The usage of the navigation
system does not release the driver
from the responsibility for a
correct, vigilant attitude in road
traffic. Always follow the
applicable traffic rules.
9 Warning
In some areas one-way streets
and other roads and entrances
(e.g. pedestrian zones) that you
are not allowed to turn into are not marked on the map. In such areas
the Infotainment system may
issue a warning that must be
accepted. Here you must pay
particular attention to one-way
streets, roads and entrances that
you are not allowed to drive into.
Radio reception
Radio reception may be disrupted by
static, noise, distortion or loss of
reception due to:
● changes in distance from the transmitter
● multi-path reception due to reflection
● shadowing
Page 13 of 127
Introduction13Press Ì to display the main menu of
the apps mode.
Touch CarPlay or Android Auto . A
menu with different selectable apps is displayed.
For a detailed description 3 29.
Settings
Press SET and then select Audio
settings to display the respective
menu.
For a detailed description 3 14.
Press SET and then OPTIONS to
display a menu for various system-
related settings.
For a detailed description 3 14.
Vehicle settings
Select Í to open a menu for various
vehicle-related settings.
Vehicle settings are described in the
Owner's Manual.
Page 14 of 127

14Basic operationBasic operationBasic operation............................ 14
Tone settings ............................... 17
Volume settings ........................... 18
System settings ........................... 18Basic operation
The Infotainment system display has
a touch-sensitive surface that allows
direct interaction with the displayed
menu controls.Caution
Do not use pointed or hard items
like ballpoint pens, pencils or
similar for touch screen operation.
Menu operation
Selecting or activating a screen
button or menu item
Touch a screen button or menu item.
Notice
Most icons displayed in a menu, like e or d in the illustrated example,
serve as screen buttons that initiate
certain actions if you touch them.
The corresponding system function is
activated, a message is shown, or a
submenu with further options is
displayed.
Notice
In subsequent chapters, the
operating steps for selecting and
activating a screen button or menu
item via the touch screen will be
described as "...select
name>/- /".
Page 15 of 127

Basic operation15Ù and G screen buttons
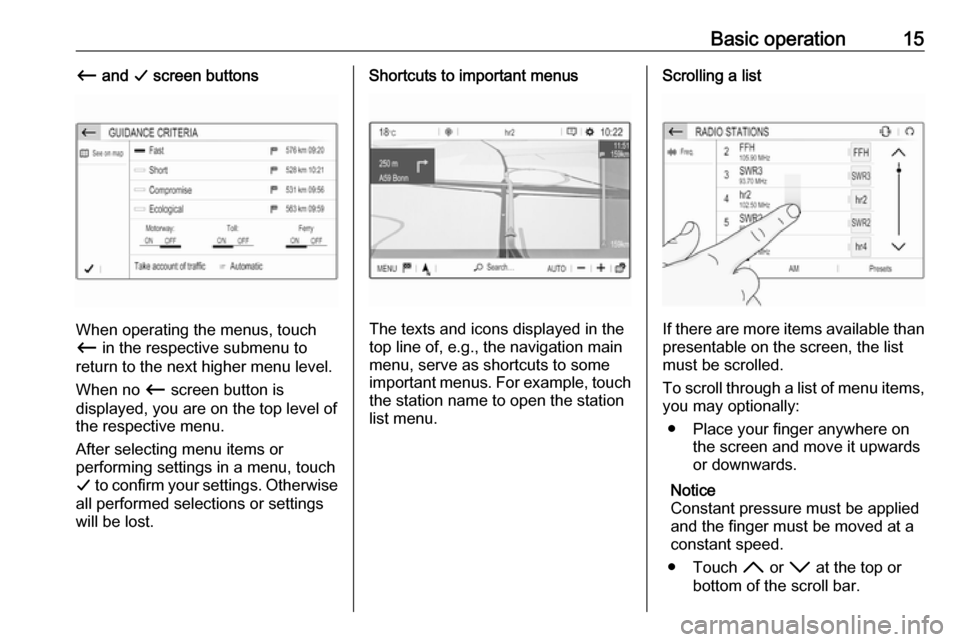
When operating the menus, touch
Ù in the respective submenu to
return to the next higher menu level.
When no Ù screen button is
displayed, you are on the top level of
the respective menu.
After selecting menu items or
performing settings in a menu, touch
G to confirm your settings. Otherwise
all performed selections or settings
will be lost.
Shortcuts to important menus
The texts and icons displayed in the
top line of, e.g., the navigation main
menu, serve as shortcuts to some
important menus. For example, touch
the station name to open the station
list menu.
Scrolling a list
If there are more items available than
presentable on the screen, the list
must be scrolled.
To scroll through a list of menu items, you may optionally:
● Place your finger anywhere on the screen and move it upwards
or downwards.
Notice
Constant pressure must be applied
and the finger must be moved at a
constant speed.
● Touch H or I at the top or
bottom of the scroll bar.
Page 16 of 127

16Basic operation● Touch anywhere on the guidingline of the scroll bar.
● Move the slider of the scroll bar up and down with your finger.
Updating a list
Touch Ü (see image above) to
manually update, e.g., station lists,
contacts lists or destination lists.
Input fields and keyboards
Input fields are indicated by o
.
Touch the input field to open a
keyboard for text or number input.
Depending on the application or
function currently active, different keyboards are displayed.Keyboards for text input
Keyboards for text input may contain
several input fields. To enable a field for text input, touch it.
To enter a character, touch the
respective screen button. The
character is entered upon release.
Touch and hold a letter screen button
to display associated letters in a letter pop-up menu. Release and then
select the desired letter.
To switch to the symbol keyboard,
touch 0..#.
To switch back to the letter keyboard
or to switch between capital and small letters, touch Aa.
To switch the letter keyboard
between normal order and
alphabetical order, touch ç.
To delete the most recently entered character or symbol, touch k.
To delete a character or symbol at any point of your input: touch at the
desired point to place a blinking
cursor, then touch k.Keyboards for number input
Page 19 of 127

Basic operation19Configuring the systemSelect System settings to perform
some basic system configurations,
e.g.:
● Adjust the display of units for temperature or fuel consumption.
● Reset the system configuration to
factory defaults.
● Update the installed software version.
Changing display language To adjust the language for the menutexts, select Languages and then
select the desired language.
Notice
If the selected display language is
supported by the embedded speech
recognition, the language of the
speech recognition will be changed
accordingly; if not, embedded
speech recognition will be not
available.
Adjusting time and date
Select Setting the time-date .
Changing time and date formats
To change the time and date formats, select the respective tabs and then
select the desired formats.
Setting time and date
By default the displayed time and
date is automatically adjusted by the
system.
To manually adjust the displayed time
and date:
Select the Time tab.
Set Synchronization with GPS
(UTC): to OFF and then select the
Time field to set the desired time.
Select the Date tab and then select
the Date: field to set the desired date.
Adjusting the screen
Select Screen configuration .
Text scroll function
Select the Animation tab.
If long texts on the screen should be scrolled automatically, activate
Automatic scrolling .
If Automatic scrolling is deactivated,
long texts are truncated.
Adjusting the brightness
Select Brightness and set the
brightness of the screen to the
desired level.
Storing your personal settings
Select Setting of the profiles .
Page 20 of 127

20Basic operation
You can store a multitude of settings
in a personal profile. For example, all
current tone settings, all radio
presets, one phone book, the map
settings and your preferred
addresses.
In case you share the vehicle with
other people, this enables you to
restore your personal settings from
your profile at any time.
A maximum of three personal profiles may be stored.
Additionally, a Common profile is
available. All settings done at any
time are automatically stored in that
profile. If no personal profile is
activated, the Common profile is
active.
Storing your personal profile
After performing all your personal
settings:
Select one of the personal profile
tabs.
Select the input field o and enter the
desired name of your personal profile.
If you want to add a photo to the
profile:
Connect a USB device with the
desired photo stored on it to the USB
port 3 26, touch the photo frame
and then select the desired photo.
Confirm your selection to download
the selected photo to the system.
Finally, confirm your inputs to store
them in your personal profile.
Activating your personal profile
Press SET and then select the tab
with the name of your personal
profile.
Activating the Common profile
If a personal profile is currently active:Press SET and then select
Deactivate profile .
Resetting a personal profile
You can at any time reset a personal
profile to restore the default factory
settings on that profile.
Select the respective profile and then select Reset profile .
Resetting the Common profile
You can at any time reset the
Common profile to restore the default
factory settings on that profile.
Select Common profile and then
select Reset common profile .
Page 21 of 127

Radio21RadioUsage.......................................... 21
Radio data system (RDS) ............23
Digital audio broadcasting ...........23Usage
Activating the radio
Press AUDIO . The audio main menu
last selected is displayed.
If radio main menu not active, select
SOURCES and then select Radio.
The station last played will be
received.
Selecting a waveband
Repeatedly select Band to toggle
between the different wavebands.
Searching for stations
Automatic station search
Briefly touch < or > to play the
previous or next receivable station.
Manual station search
Press and hold < or >. Release when
the required frequency has almost
been reached.
A search is made for the next station that can be received and it is played
automatically.
Station tuning
If you exactly know the reception
frequency of a radio station, you may
enter that frequency manually.
Select OPTIONS , select Radio
stations and then select the desired
waveband.
Select Freq., enter the reception
frequency and confirm your input.
If a station is receivable on that
frequency, the respective station is
played.