Page 123 of 632
1232. Instrument cluster
2
Instrument cluster
YARIS_HV_OM_Europe_OM52J66E
EV indicator can be activated or deactivated by pressing the display
change button when the EV indicator customization display is dis-
played.
To change the EV indicator customization display, display the odometer
and press and hold the display change button until the display changes.
The clock can be adjusted by pressing the buttons.
Adjust the hours
Adjust the minutes
■ When disconnecting and reconnecting battery terminals
The following information data will be reset.
● Average fuel consumption
● Driving range
● Average vehicle speed
● Clock data
■ Liquid crystal display
Small spots or light spots may appear on the display. This phenomenon is
characteristic of liquid crystal display, and there is no problem continuing to
use the display.
■ Changing the pre-crash warning timing
P. 266
EV indicator customization
Clock
1
2
Page 129 of 632
1292. Instrument cluster
2
Instrument cluster
YARIS_HV_OM_Europe_OM52J66E
●Clock
Adjusts the hour and minute, and switches between 12-hour and
24-hour display of the clock. ( P. 130)
● Settings
Select the menu to set up the following items.
• Language
Select to change the language on the display.
•Units
Select to change the unit of measure for the multi-information display.
• (EV indicator) setup
Select to activate/deactivate the EV indicator on/off.
• Drive information
Select to select up to 2 items that will be displayed on a Drive informa-
tion screen.
• Pop-up display
Select to set the pop-up displays*2, which may appear in some situa-
tions, on/off.
• Default settings
Registered or changed meter settings will be deleted or returned to their
default setting.
*1: If equipped
*2: Incoming call display of the hands-free phone system (if equipped).
Page 130 of 632

1302. Instrument cluster
YARIS_HV_OM_Europe_OM52J66E
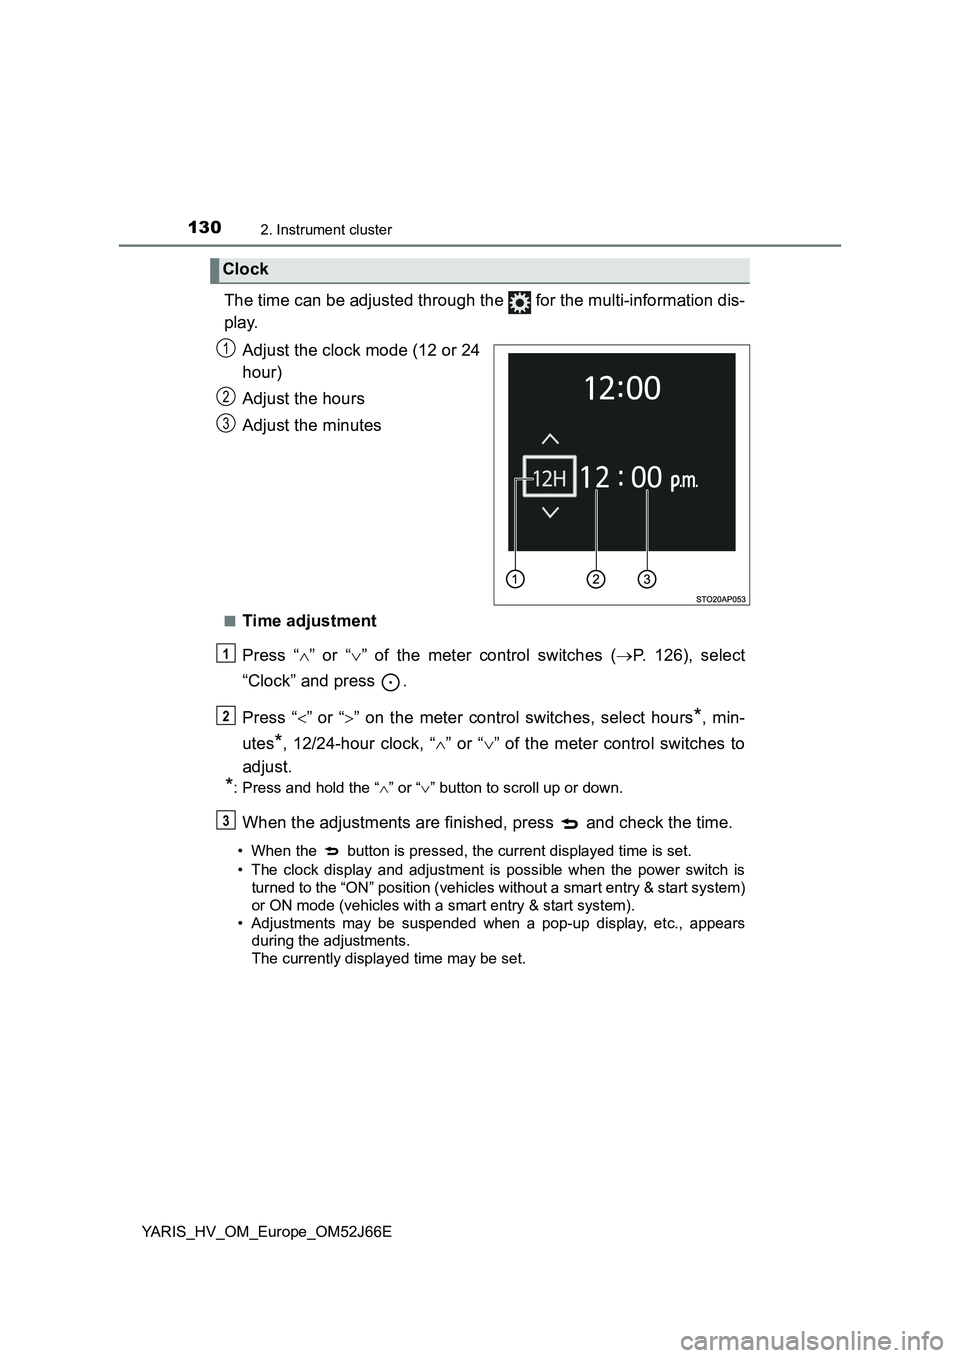
The time can be adjusted through the for the multi-information dis-
play.
Adjust the clock mode (12 or 24
hour)
Adjust the hours
Adjust the minutes
■Time adjustment
Press “ ” or “” of the meter control switches (P. 126), select
“Clock” and press .
Press “ ” or “” on the meter control switches, select hours*, min-
utes*, 12/24-hour clock, “ ” or “” of the meter control switches to
adjust.
*: Press and hold the “ ” or “” button to scroll up or down.
When the adjustments are finished, press and check the time.
• When the button is pressed, the current displayed time is set.
• The clock display and adjustment is possible when the power switch is
turned to the “ON” position (vehicles without a smart entry & start system)
or ON mode (vehicles with a smart entry & start system).
• Adjustments may be suspended when a pop-up display, etc., appears
during the adjustments.
The currently displayed time may be set.
Clock
1
2
3
1
2
3
Page 131 of 632

1312. Instrument cluster
2
Instrument cluster
YARIS_HV_OM_Europe_OM52J66E
■Pop-up display
In some situations, such as when a switch operation is performed, a pop-up
display will be temporarily display ed on the multi-information display.
The pop-up display function can be set on/off.
■ Setting display automatic cancelation
“Settings” item in settings display is not selectable during driving and cannot
be operated.
Also, the settings screen is temporarily canceled in the following situations.
● A warning message is displayed.
● The vehicle starts off.
■ Liquid crystal display
Small spots or light spots may appear on the display. This phenomenon is
characteristic of liquid crystal displays, and there is no problem continuing to
use the display.
■ When disconnecting and reconnecting 12-volt battery terminals
The drive information and clock data will be reset.
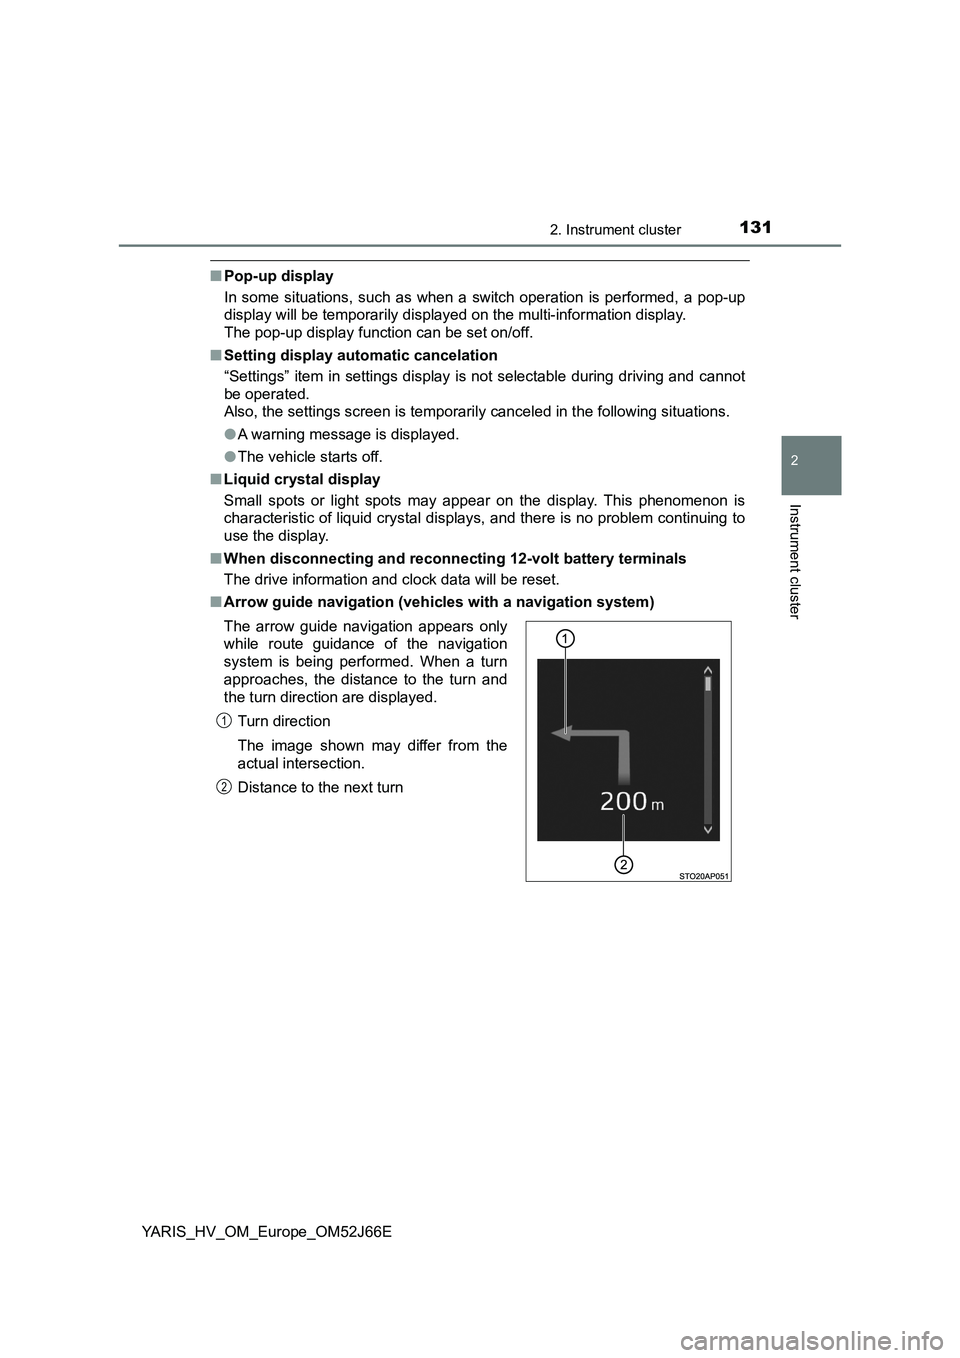
■ Arrow guide navigation (vehicles with a navigation system)
The arrow guide navigation appears only
while route guidance of the navigation
system is being performed. When a turn
approaches, the distance to the turn and
the turn direction are displayed.
Turn direction
The image shown may differ from the
actual intersection.
Distance to the next turn
1
2
Page 369 of 632
3695-7. “SETUP” menu
5
Audio system
YARIS_HV_OM_Europe_OM52J66E
Select “Delete contacts” using the tune/scroll knob. (P. 358)
Select the desired phone number using the knob and press
(“Yes”).
To delete all the registered phone numbers, select “All delete” using
the knob and press (“Yes”).
Press (“A-Z”) to display the registered names in alphabetical
order of the initial.
Select “Delete other PB” using the tune/scroll knob. ( P. 358)
Select the desired phonebook using the knob and press
(“Yes”).
Select “Call volume” using the tune/scroll knob. ( P. 358)
Change the call volume.
To decrease the volume: Turn the knob counterclockwise.
To increase the volume: Turn the knob clockwise.
To set the volume, press (“Back”).
Deleting a registered phone number
Deleting another cellular phone’s phonebook
Setting call volume
1
2
1
2
1
2
Page 370 of 632
3705-7. “SETUP” menu
YARIS_HV_OM_Europe_OM52J66E
Select “Ring tone volume” using the tune/scroll knob. (P. 358)
Change the ring tone volume.
To decrease the volume: Turn the knob counterclockwise.
To increase the volume: Turn the knob clockwise.
To set the volume, press (“Back”).
Select “Ring tone” using the tune/scroll knob. ( P. 358)
Using the knob, select a ring tone [1 - 3]. To set the selected ring
tone, press (“Back”).
Select “Transfer history” using the tune/scroll knob ( P. 358) and
press (“Yes”).
■ Phone number
Up to 1000 names can be stored.
■ Call history
Up to 10 numbers can be stored in each of the outgoing, incoming and
missed call history memories.
■ Limitation of number of digits
A phone number that exceeds 24 digits cannot be registered.
Setting ring tone volume
Setting ring tone
Transferring call histories
1
2
1
2
Page 377 of 632
3775-9. Bluetooth® Phone
5
Audio system
YARIS_HV_OM_Europe_OM52J66E
Speaking on the phone
A call can be transferred between the cellular phone and system while
dialing, receiving a call, or during a call. Use one of the following
methods:
a. Operate the cellular phone.
Refer to the manual that comes with the cellular phone for the operation
of the phone.
b. Press the * (“Phone”).
*: This operation can be performed only when transferring a call from the
cellular phone to the system during a call.
Press (“Mute”).
Press [0-9] and using the tune/scroll knob input the desired
digits.
To decrease the volume: Turn the power/volume knob counterclock-
wise.
To increase the volume: Turn the power/volume knob clockwise.
: If equipped
Transferring a call
Muting your voice
Inputting digits
Setting call volume
Page 387 of 632
3876-1. Using the air conditioning system and defogger
6
Interior features
YARIS_HV_OM_Europe_OM52J66E
■Adjusting the temperature setting
To adjust the temperature set-
ting, turn the temperature con-
trol dial clockwise or
counterclockwise.
If is not pressed, the sys-
tem will blow ambient tempera-
ture air or heated air.
Cooling and dehumidification
function on/off button
Left-hand side temperature
control dial
Left-hand side temperature
display
Fan speed display
Air outlet display
Right-hand side temperature
display
Right-hand side temperature
control dial
Windshield defogger button
Rear window defogger switch/
rear window defogger and out-
side rear view mirror defog-
gers switch (if equipped)
Air outlet selector button
“OFF” button
Fan speed control button
Automatic mode button
Outside/recirculated air mode
button
Dual mode button
1
2
3
4
5
6
7
8
9
10
11
12
13
14
15