Page 362 of 520

3627-3. Do-it-yourself maintenance
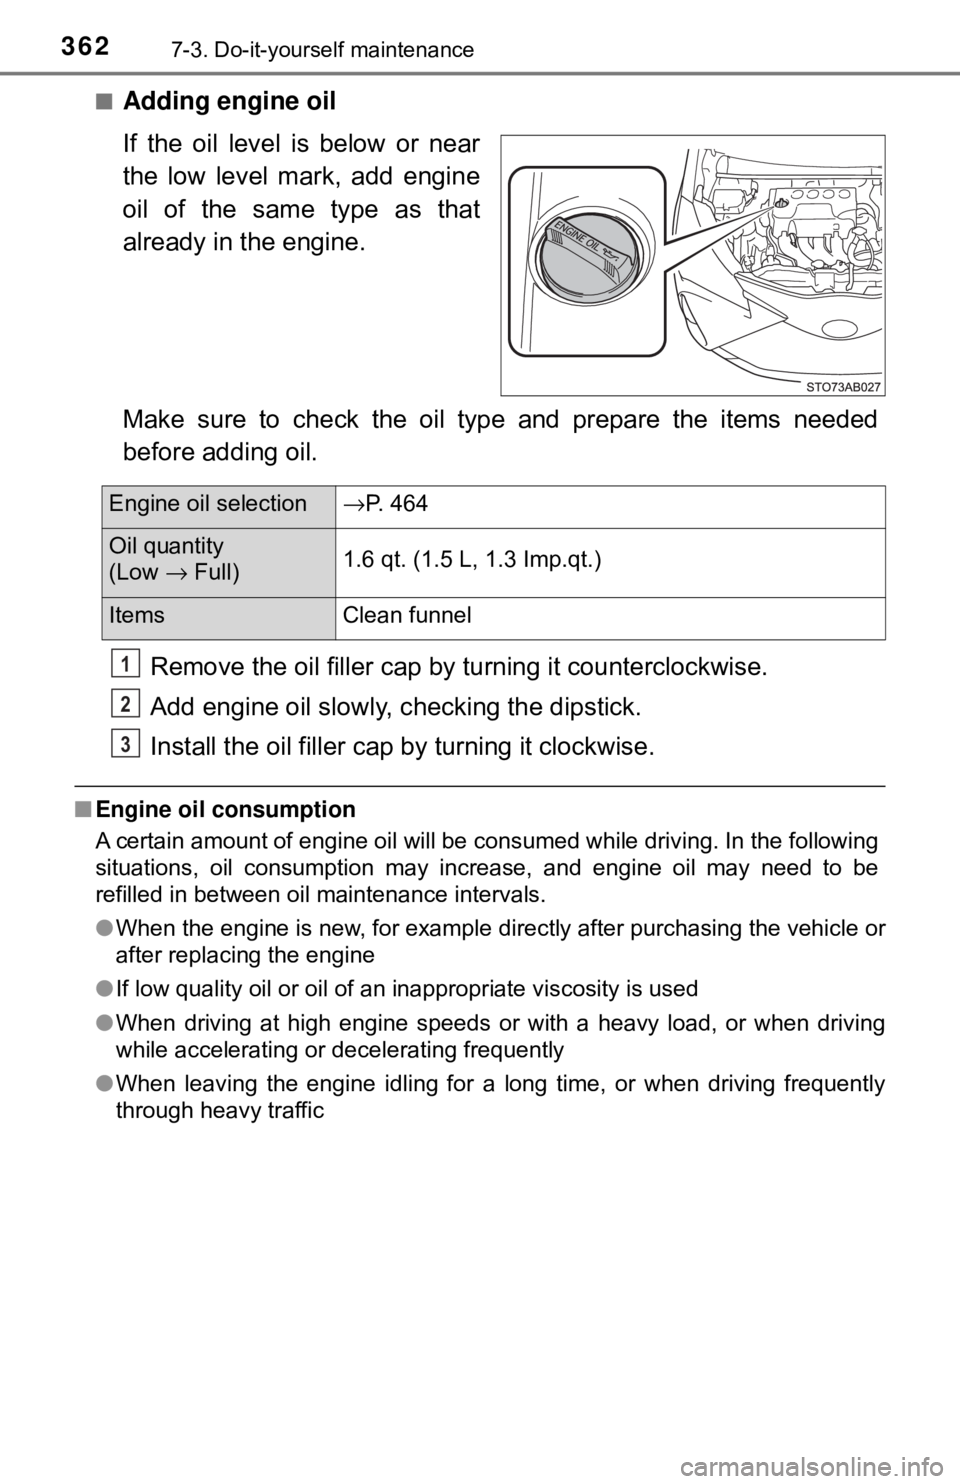
■Adding engine oil
If the oil level is below or near
the low level mark, add engine
oil of the same type as that
already in the engine.
Make sure to check the oil type and prepare the items needed
before adding oil.Remove the oil filler cap by turning it counterclockwise.
Add engine oil slowly, c hecking the dipstick.
Install the oil filler cap by turning it clockwise.
■Engine oil consumption
A certain amount of engine oil will be consumed while driving. In the following
situations, oil consumption may increase, and engine oil may need to be
refilled in between oil maintenance intervals.
●When the engine is new, for example directly after purchasing the vehicle or
after replacing the engine
● If low quality oil or oil of an inappropriate viscosity is used
● When driving at high engine speeds or with a heavy load, or when driving
while accelerating or decelerating frequently
● When leaving the engine idling for a long time, or when driving frequently
through heavy traffic
Engine oil selection →P. 464
Oil quantity
(Low → Full) 1.6 qt. (1.5 L, 1.3 Imp.qt.)
Items
Clean funnel
1
2
3
Page 372 of 520

3727-3. Do-it-yourself maintenance
■How to initialize the tire pressure warning systemPark the vehicle in a safe place and turn the engine switch to the
“LOCK” position.
Initialization cannot be performed while the vehicle is moving.
Adjust the tire pressure to the specified cold tire inflation pres-
sure level. ( →P. 469)
Make sure to adjust the tire pressu re to the specified cold tire infla-
tion pressure level. The tire pressure warning system will operate
based on this pressure level.
Turn the engine switch to the “ON” position.
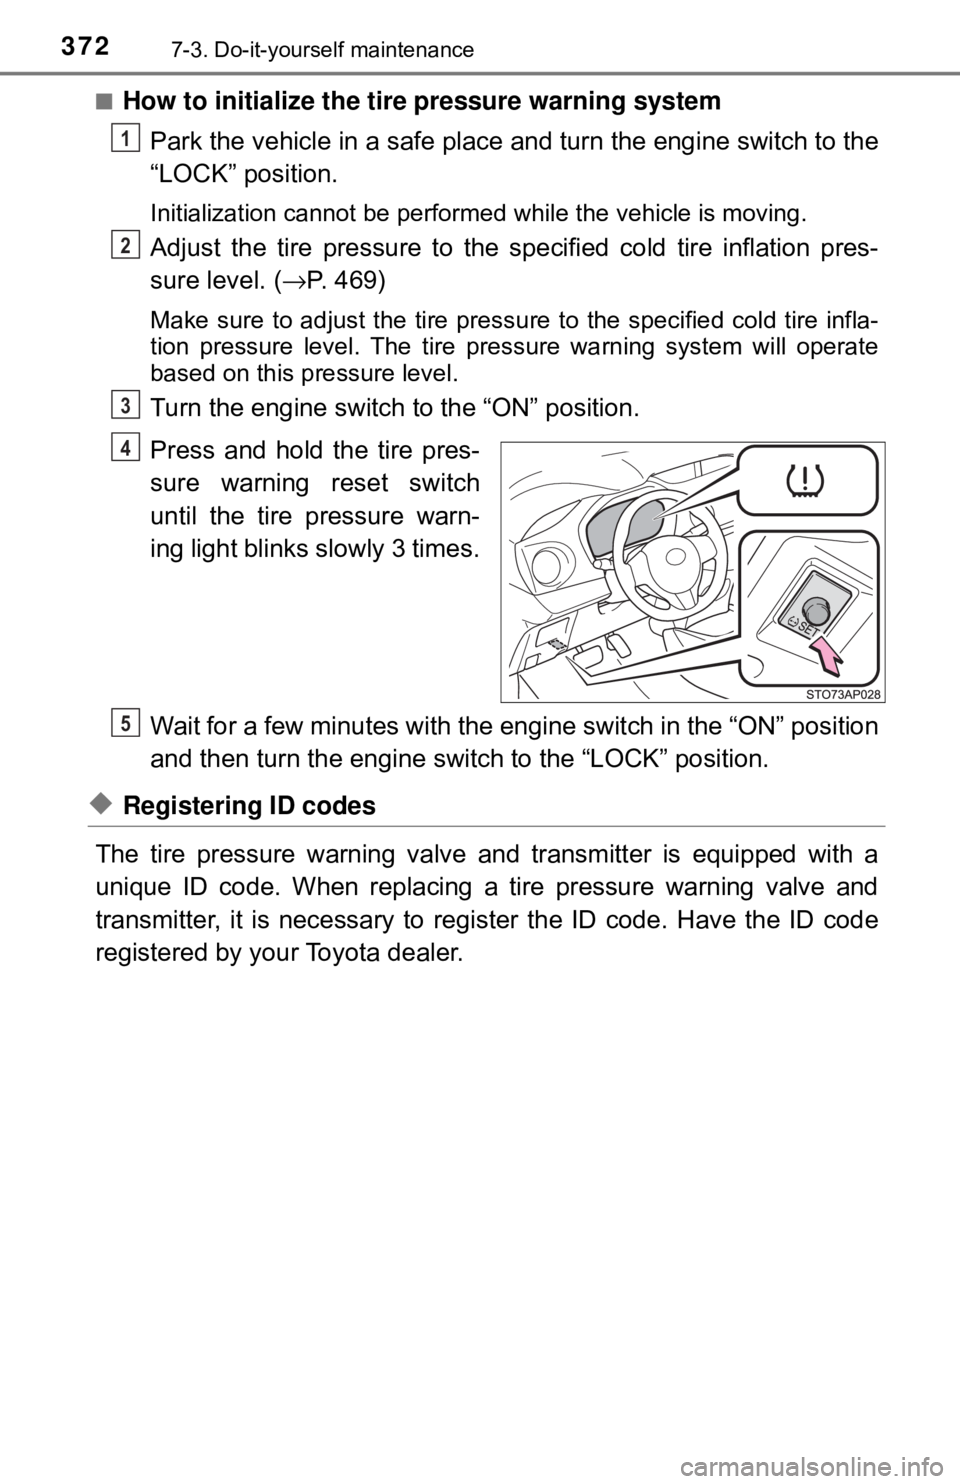
Press and hold the tire pres-
sure warning reset switch
until the tire pressure warn-
ing light blinks slowly 3 times.
Wait for a few minutes with the eng ine switch in the “ON” position
and then turn the engine switch to the “LOCK” position.
◆Registering ID codes
The tire pressure warning valve and transmitter is equipped with a
unique ID code. When replacing a tire pressure warning valve and
transmitter, it is necessary to register the ID code. Have the ID code
registered by your Toyota dealer.
1
2
3
4
5
Page 385 of 520
3857-3. Do-it-yourself maintenance
7
Maintenance and care
Air conditioning filter
Turn the engine switch to the “LOCK” position.
Open the glove box and slide
off the damper.
Push in each side of the glove
box to disconnect the upper
claws.
Pull out the glove box and dis-
connect the lower claws.
The air conditioning filter must be changed regularly to maintain
air conditioning efficiency.
Removal method
1
2
3
4
Page 386 of 520
3867-3. Do-it-yourself maintenance
Remove the filter cover.Unlock the filter cover.
Move the filter cover in the
direction of the arrow, and
then pull it out of the claws.
Remove the air conditioning fil-
ter and replace it with a new
one.
The “ ↑UP” marks shown on the fil-
ter should be pointing up.
■ Checking interval
Inspect and replace the air conditioning filter according to the maintenance
schedule. In dusty areas or areas with heavy traffic flow, early replacement
may be required. (For scheduled maintenance information, please refer to the
“Scheduled Maintenance Guide” or “Owner’s Manual Supplement”.)
■ If air flow from the vents decreases dramatically
The filter may be clogged. Check the filter and replace if necessary.
5
1
2
6
Page 391 of 520
3917-3. Do-it-yourself maintenance
7
Maintenance and care
Checking and replacing fuses
Turn the engine switch to the “LOCK” position.
Open the fuse box cover.
Engine compartment (type A fuse box)
Push the tab in and lift the lid
off.
Engine compartment (type B fuse box)
Push the tab in and lift the lid
off.
If any of the electrical components do not operate, a fuse may
have blown. If this happens, check and replace the fuses as nec-
essary.
1
2
Page 399 of 520
3997-3. Do-it-yourself maintenance
7
Maintenance and care
Install the rubber cover.
Ensure the rubber cover is
securely attached.Fit the rubber cover outer
circumference in firmly.
Fit the rubber cover
around the light bulb in
until the light bulb plug can
be seen.
Plug the connector.
Vehicles with proj ector type headlights
Turn the bulb base counter-
clockwise.
Pull the bulb out while press-
ing the lock release of the
connector.
7
1
2
8
1
2
Page 400 of 520
4007-3. Do-it-yourself maintenance
Replace the light bulb, plug
the connector, and then
install the bulb base.
Align the 3 tabs on the light bulb
with the mounting and insert.
Turn and secure the bulb
base.
Shake the bulb base gently to
check that it is not loose, turn
the headlights on once and visu-
ally confirm that no light is leak-
ing through the mounting.
■
Front turn signal lights and pa rking lights/front turn signal
lights
Turn the bulb base counter-
clockwise.
Remove the light bulb.
When installing, reve rse the steps listed.
3
14
1
2
3
Page 401 of 520
4017-3. Do-it-yourself maintenance
7
Maintenance and care
■Front side marker lightsTurn the bulb base counter-
clockwise.
Remove the light bulb
When installing, reve rse the steps listed.
■Front fog lights (if equipped)
Turn the steering wheel and
change the tire direction to
the opposite direction of light
to be exchanged.
Remove the bolt.
1
2
3
1
2