2018 TOYOTA TUNDRA garage door opener
[x] Cancel search: garage door openerPage 5 of 672

5
1
9 8
7 5 4
3
2
10
6
5-9. Bluetooth® phone
Using a Bluetooth®
phone .............................. 370
Making a call ..................... 372
Receiving a call ................. 375
Speaking on the phone ..... 376
Bluetooth
® phone
message function ............ 379
Using the steering wheel switches ................ 383
Bluetooth
® phone
settings............................ 384
Contact/Call History Settings ........................... 386
What to do if... (Troubleshooting) ............ 395
5-10. Using the voice command system
Voice command system .... 399
5-11. Bluetooth
®
Bluetooth®......................... 403
5-12. Antenna Antenna ............................. 408
6-1. Using the air conditioning system
Manual air conditioning system............................. 412
Automatic air conditioning system............................. 419
Seat heaters/ seat ventilators ................ 426 6-2. Using the interior lights
Interior lights list................. 429• Personal/interior lights
main switch ................... 430
• Personal/interior lights .............................. 430
• Cargo lamp main switch ............................ 431
6-3. Using the storage features List of storage features ...... 432• Glove box ...................... 434
• Console box (front separated type seat) ..... 435
• Card holder ................... 436
• Map holder (front bench type seat)............ 438
• Pen holder ..................... 439
• Tissue pocket ................ 440
• Overhead console ......... 441
• Cup holders ................... 442
• Bottle holders ................ 444
• Auxiliary boxes (front bench type seat)............ 445
• Storage box ................... 447
Luggage compartment features ........................... 449
6-4. Using the other interior features Other interior features........ 450• Sun visors ..................... 450
• Vanity mirrors ................ 450
• Clock ............................. 451
• Power outlets ................ 452
• Armrest.......................... 454
• Assist grips .................... 455
Garage door opener .......... 456
Compass ........................... 465
6Interior features
Page 25 of 672
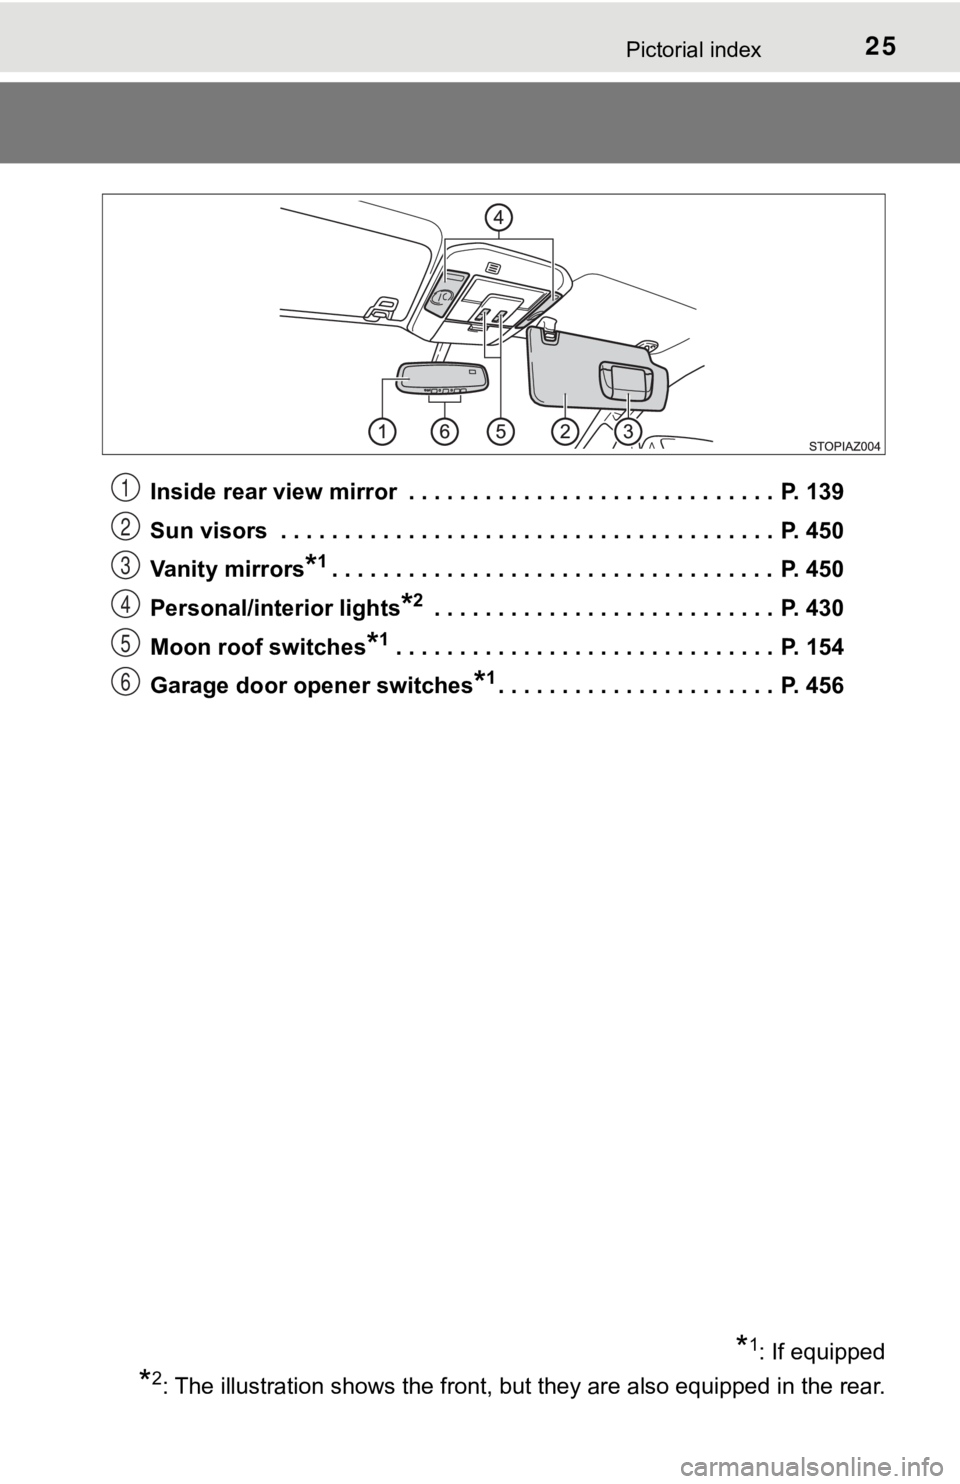
25Pictorial index
Inside rear view mirror . . . . . . . . . . . . . . . . . . . . . . . . . . . . . P. 139
Sun visors . . . . . . . . . . . . . . . . . . . . . . . . . . . . . . . . . . . . . . . P. 450
Vanity mirrors
*1. . . . . . . . . . . . . . . . . . . . . . . . . . . . . . . . . . . P. 450
Personal/interior lights
*2 . . . . . . . . . . . . . . . . . . . . . . . . . . . P. 430
Moon roof switches
*1 . . . . . . . . . . . . . . . . . . . . . . . . . . . . . . P. 154
Garage door opener switches
*1. . . . . . . . . . . . . . . . . . . . . . P. 456
*1: If equipped
*2: The illustration shows the front, but they are also equipped in the rear.
1
2
3
4
5
6
Page 411 of 672

411
6Interior features
6-1. Using the air conditioning system
Manual air conditioning system............................. 412
Automatic air conditioning system............................. 419
Seat heaters/ seat ventilators ................ 426
6-2. Using the interior lights Interior lights list ................ 429• Personal/interior lightsmain switch ................... 430
• Personal/interior
lights ............................. 430
• Cargo lamp main switch ............................ 431 6-3. Using the storage features
List of storage features ..... 432• Glove box...................... 434
• Console box (front separated type seat) ..... 435
• Card holder ................... 436
• Map holder (front bench type seat) ........... 438
• Pen holder .................... 439
• Tissue pocket................ 440
• Overhead console......... 441
• Cup holders .................. 442
• Bottle holders ................ 444
• Auxiliary boxes (front bench type seat) ........... 445
• Storage box .................. 447
Luggage compartment features ........................... 449
6-4. Using the other interior features Other interior features ....... 450• Sun visors ..................... 450
• Vanity mirrors................ 450
• Clock ............................. 451
• Power outlets ................ 452
• Armrest ......................... 454
• Assist grips ................... 455
Garage door opener.......... 456
Compass ........................... 465
Page 456 of 672
4566-4. Using the other interior features
Garage door opener
The HomeLink® wireless control system in your vehicle has 3 buttons
which can be programmed to operate 3 different devices. Refer to the
programming methods on the following pages to determine the
method which is approp riate for the device.
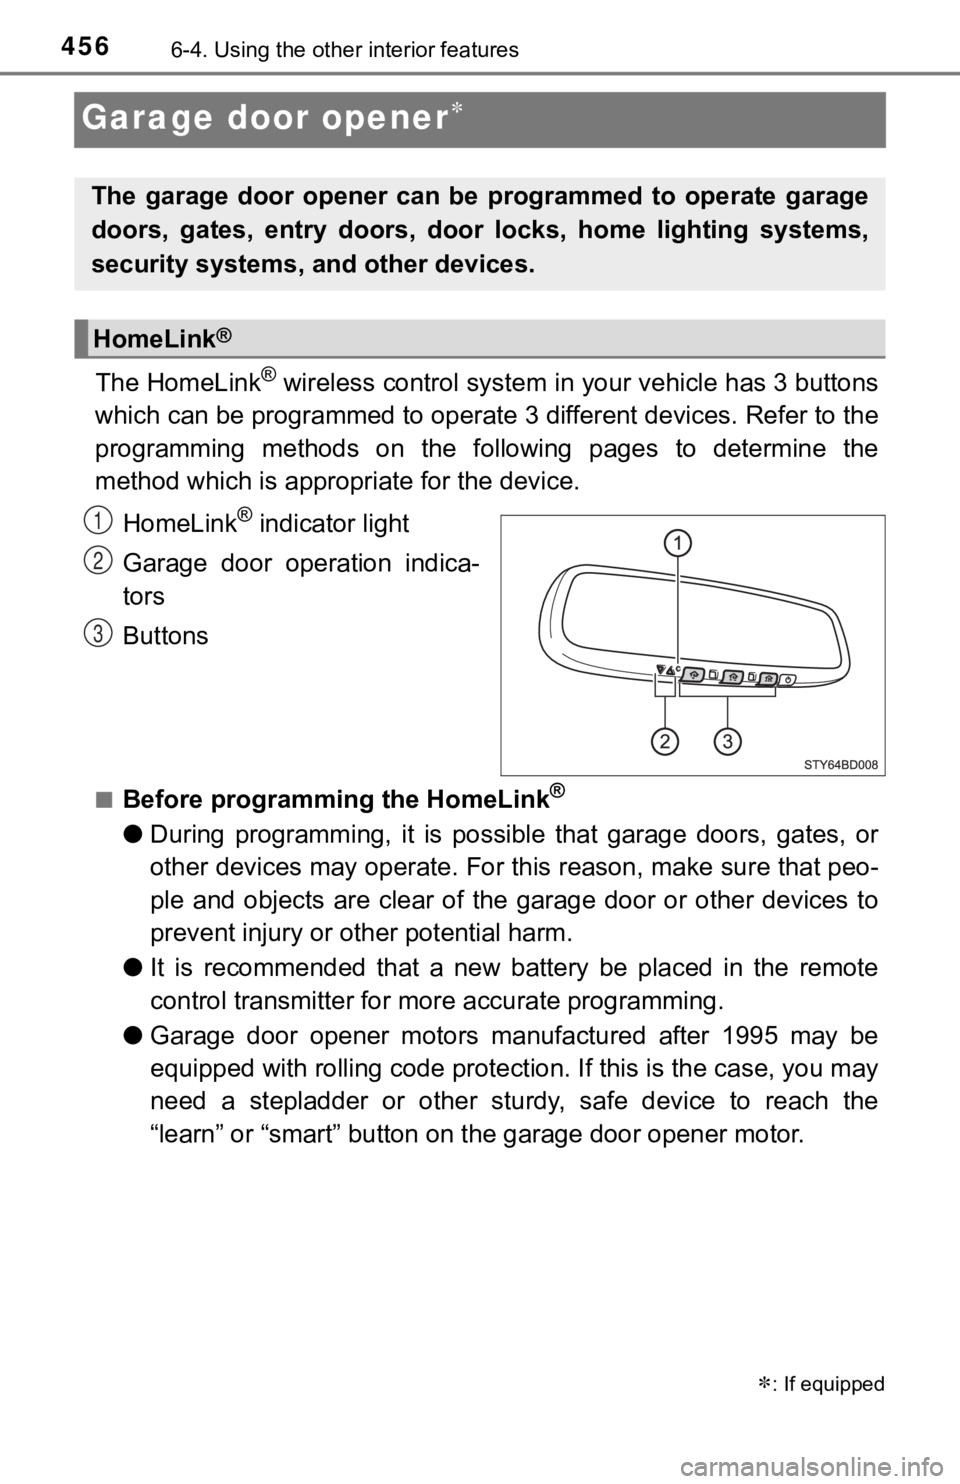
HomeLink
® indicator light
Garage door operation indica-
tors
Buttons
■Before programming the HomeLink®
● During programming, it is possible that garage doors, gates, or
other devices may operate. For this reason, make sure that peo-
ple and objects are clear of the garage door or other devices t o
prevent injury or other potential harm.
● It is recommended that a new battery be placed in the remote
control transmitter for mo re accurate programming.
● Garage door opener motors manufactured after 1995 may be
equipped with rolling code pro tection. If this is the case, you may
need a stepladder or other sturdy, safe device to reach the
“learn” or “smart” button on the garage door opener motor.
: If equipped
The garage door opener can be programmed to operate garage
doors, gates, entry doors, door locks, home lighting systems,
security systems, and other devices.
HomeLink®
1
2
3
Page 458 of 672
4586-4. Using the other interior features
Test the HomeLink® operation by pressing the newly pro-
grammed button and observi ng the indicator light:
● Indicator light illuminates: Progr amming of a fixed code device
has completed. The garage door or other device should oper-
ate when a HomeLink
® button is pressed and released.
● Indicator light flashes rapidly: The garage door opener motor
or other device is equipped with a rolling code. To complete
programming, firmly press and hold the HomeLink
® button for
2 seconds then release it.
● If the garage door or other device does not operate, proceed
to “Programming a rolling code system”.
Repeat the steps above to program another device for any of the
remaining HomeLink
® buttons.
■Programming a rolling code system
2 or more people may be necessary to complete rolling code pro-
gramming.
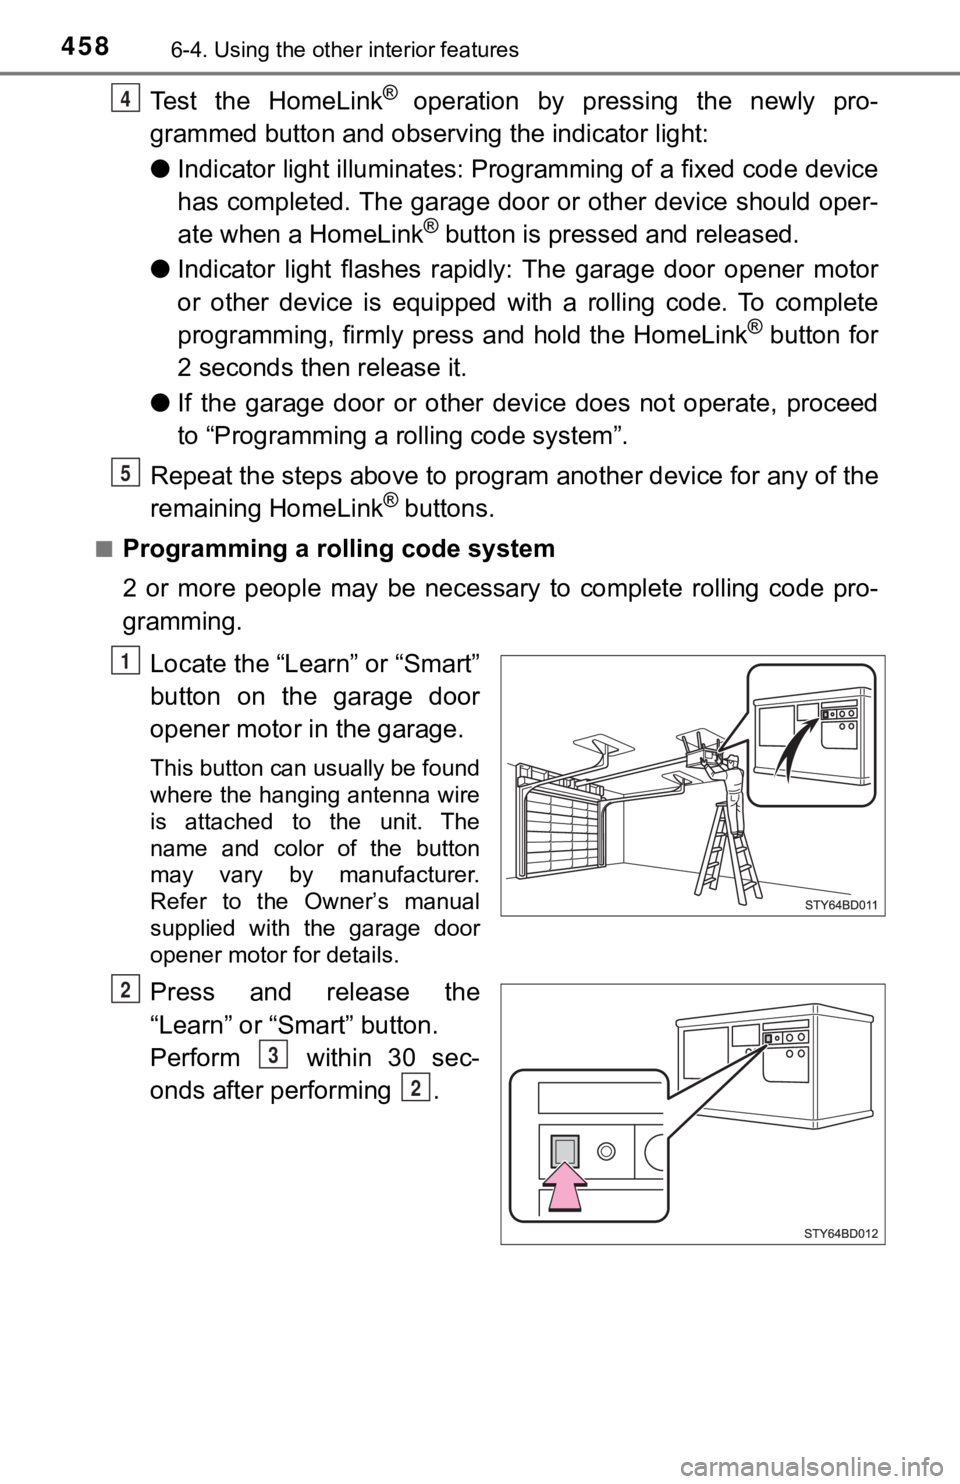
Locate the “Learn” or “Smart”
button on the garage door
opener motor in the garage.
This button can usually be found
where the hanging antenna wire
is attached to the unit. The
name and color of the button
may vary by manufacturer.
Refer to the Owner’s manual
supplied with the garage door
opener motor for details.
Press and release the
“Learn” or “Smart” button.
Perform within 30 sec-
onds after performing .
4
5
1
2
3
2
Page 459 of 672
4596-4. Using the other interior features
6
Interior features
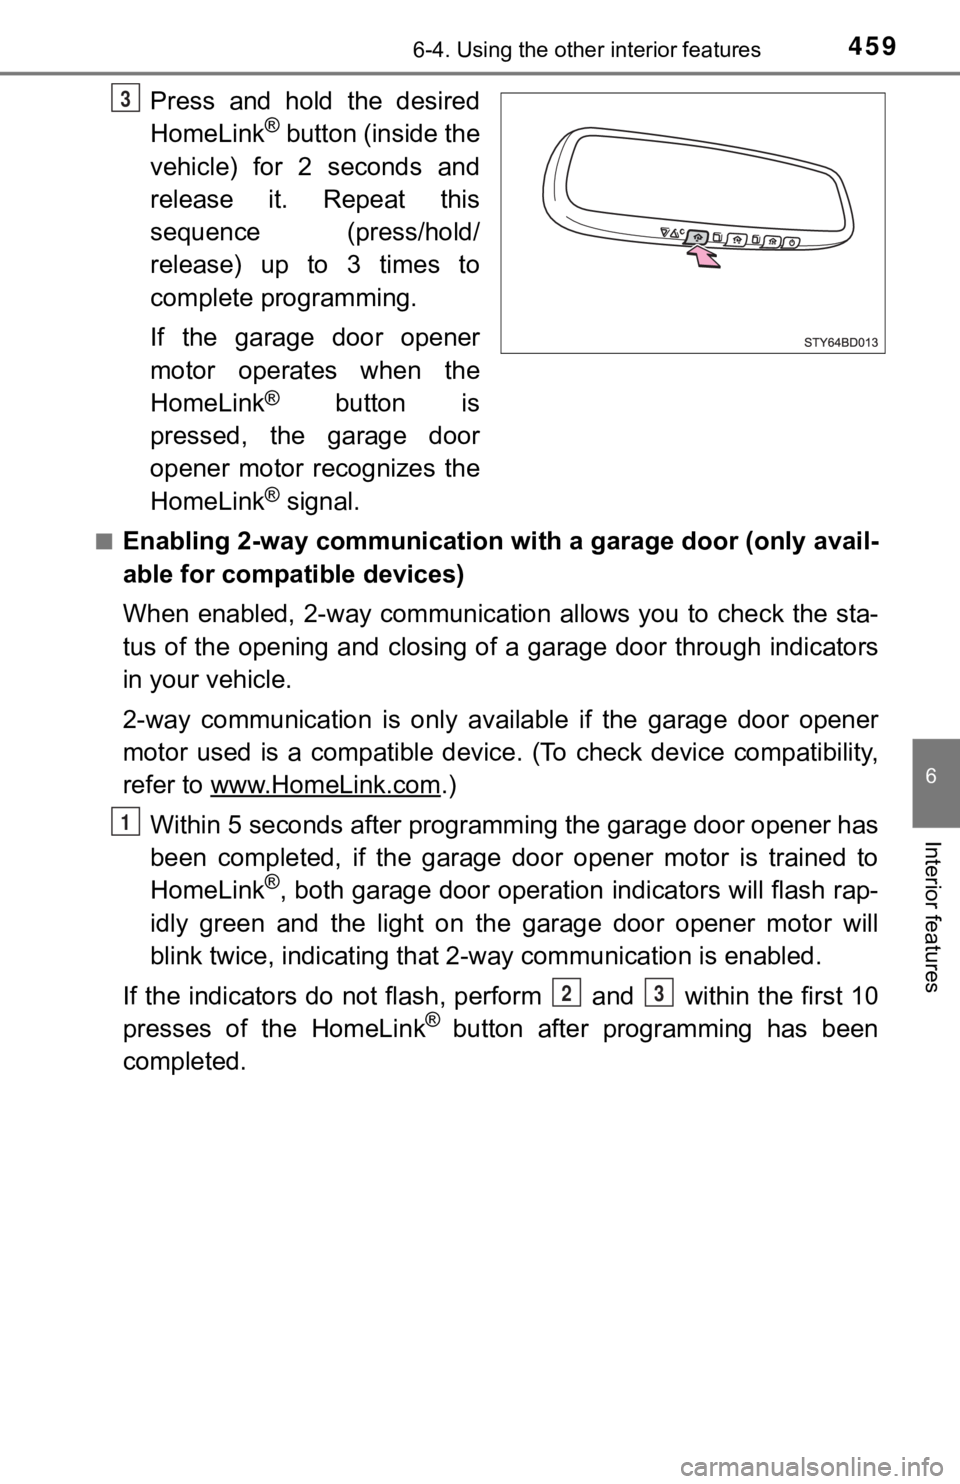
Press and hold the desired
HomeLink® button (inside the
vehicle) for 2 seconds and
release it. Repeat this
sequence (press/hold/
release) up to 3 times to
complete programming.
If the garage door opener
motor operates when the
HomeLink
® button is
pressed, the garage door
opener motor recognizes the
HomeLink
® signal.
■Enabling 2-way communication with a garage door (only avail-
able for compatible devices)
When enabled, 2-way communication allows you to check the sta-
tus of the opening and closing of a garage door through indicat ors
in your vehicle.
2-way communication is only available if the garage door opener
motor used is a compatible device. (To check device compatibility,
refer to www.HomeLink.com
.)
Within 5 seconds after programming the garage door opener has
been completed, if the garage door opener motor is trained to
HomeLink
®, both garage door operation indicators will flash rap-
idly green and the light on the garage door opener motor will
blink twice, indicating that 2 -way communication is enabled.
If the indicators do not flash, perform and within the first 10
presses of the HomeLink
® button after programming has been
completed.
3
1
23
Page 460 of 672
4606-4. Using the other interior features
Press a programmed HomeLink® button to operate a garage
door.
Within 1 minute of pressing the HomeLink
® button, after the
garage door operation has stopped, press the “Learn” or “Smart”
button on the garage door opener motor. Within 5 seconds of the
establishment of 2-way commu nication with the garage door
opener, both garage door operation indicators in the vehicle wi ll
flash rapidly green and the light on the garage door opener mot or
will blink twice, indicating that 2- way communication is enabled.
■Reprogramming a single HomeLink® button
When the following procedure is performed, buttons which alread y
have devices registered to them can be overwritten:
With one hand, press and hold the desired HomeLink
® button.
When the HomeLink
® indicator starts flas hing orange, release
the HomeLink® button and perform “Programming the Home-
Link®” (it takes 20 seconds for the HomeLink® indicator to
start flashing).
Press the appropriate HomeLink
® button. The HomeLink® indicator
light should turn on.
Operating the HomeLink®
2
3
1
2
1
Page 461 of 672
4616-4. Using the other interior features
6
Interior features
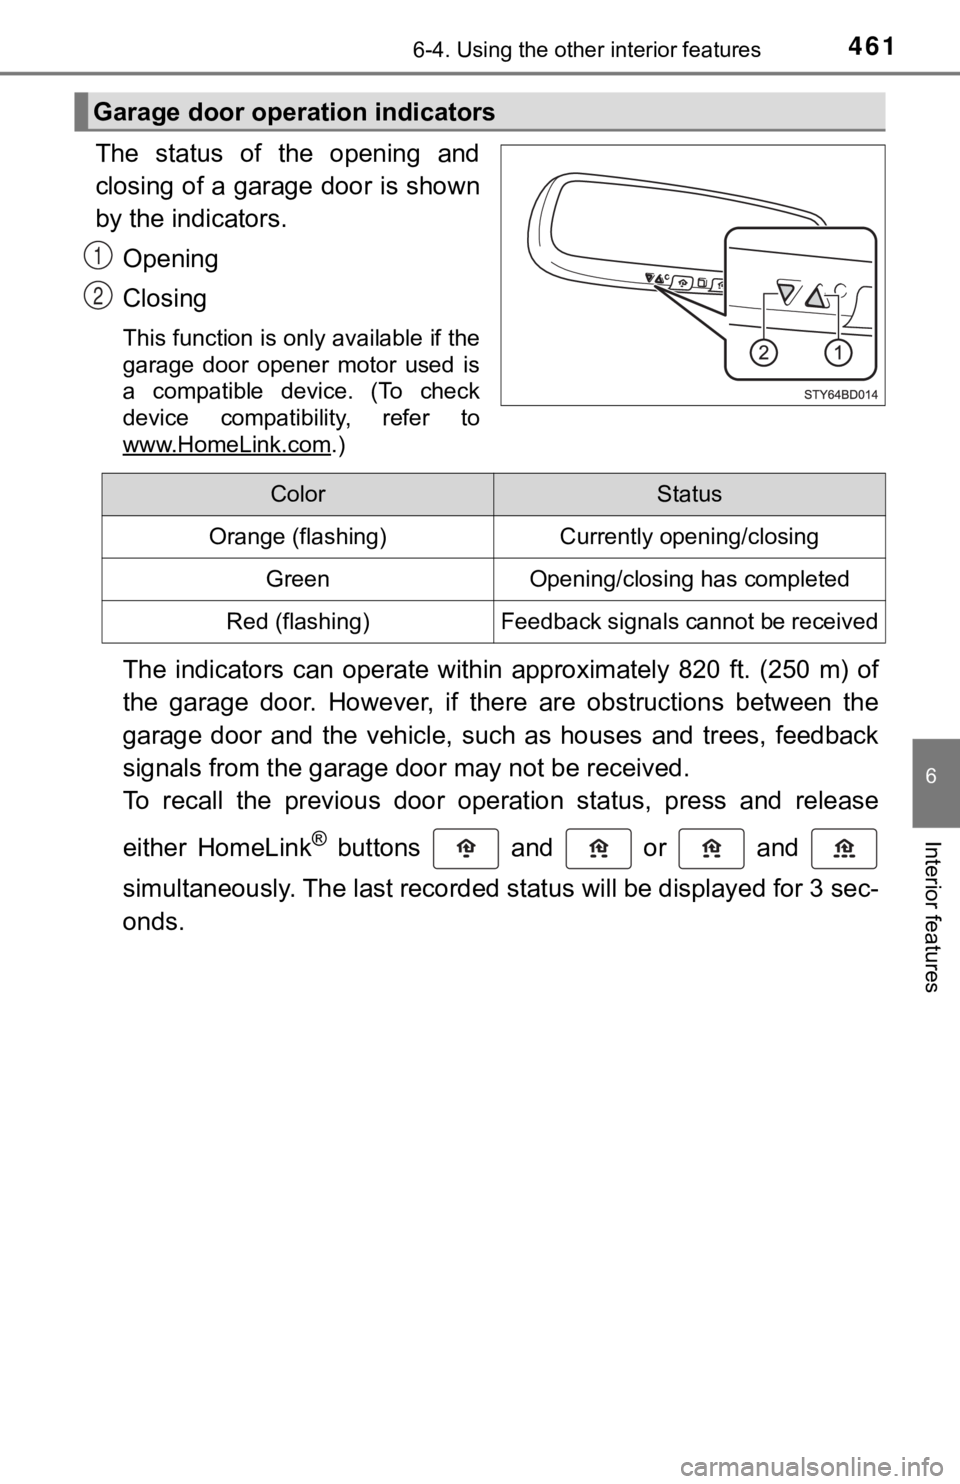
The status of the opening and
closing of a garage door is shown
by the indicators.Opening
Closing
This function is only available if the
garage door opener motor used is
a compatible device. (To check
device compatibility, refer to
www.HomeLink.com
.)
The indicators can operate within approximately 820 ft. (250 m) of
the garage door. However, if there are obstructions between the
garage door and the vehicle, such as houses and trees, feedback
signals from the garage door may not be received.
To recall the previous door operation status, press and release
either HomeLink
® buttons and or and
simultaneously. The last recorded status will be displayed for 3 sec-
onds.
Garage door operation indicators
1
2
ColorStatus
Orange (flashing)Currently opening/closing
GreenOpening/closing has completed
Red (flashing)Feedback signals cannot be received