Page 297 of 820
PRIUS_OM_OM47B89U_(U)
2974-5. Using the driving support systems
4
Driving
Press the LDA switch to turn the
LDA system on.
The LDA indicator illuminates and
a message is displayed on the
multi-information display.
Press the LDA switch again to turn
the LDA system off.
When the LDA system is turned on
or off, operation of the LDA system
continues in the same condition
the next time the hybrid system is
started.
WARNING
■Preventing LDA system malfunctio ns and operations performed by
mistake
● Do not modify the headlights or place stickers, etc., on the surface of the
lights.
● Do not modify the suspension etc. If the suspension etc. needs to be
replaced, contact your Toyota dealer.
● Do not install or place anything on the hood or grille. Also, do not install a
grille guard (bull bars, kangaroo bar, etc.).
● If your windshield needs repairs, contact your Toyota dealer.
Turning LDA system on
Page 301 of 820

PRIUS_OM_OM47B89U_(U)
3014-5. Using the driving support systems
4
Driving
■Conditions in which functions may not operate properly
In the following situations, the camera sensor may not detect white (yellow)
lines and various functions may not operate normally.
●There are shadows on the road that run parallel with, or cover, the white
(yellow) lines.
● The vehicle is driven in an area without white (yellow) lines, such as in front
of a tollgate or checkpoint, or at an intersection, etc.
● The white (yellow) lines are cracked, “Botts’ dots”, “Raised pavement
marker” or stones are present.
● The white (yellow) lines cannot be seen or are difficult to see due to sand,
etc.
● The vehicle is driven on a road surface that is wet due to rain, puddles, etc.
● The traffic lines are yellow (which may be more difficult to recognize than
lines that are white).
● The white (yellow) lines cross over a curb, etc.
● The vehicle is driven on a bright surface, such as concrete.
● The vehicle is driven on a surface that is bright due to reflected light, etc.
● The vehicle is driven in an area where the brightness changes suddenly,
such as at the entrances and exits of tunnels, etc.
● Light from the headlights of an oncoming vehicle, the sun, etc., enters the
camera.
● The vehicle is driven where the road diverges, merges, etc.
● The vehicle is driven on a slope.
● The vehicle is driven on a road which tilts left or right, or a winding road.
● The vehicle is driven on an unpaved or rough road.
● The vehicle is driven around a sharp curve.
● The traffic lane is excessively narrow or wide.
● The vehicle is extremely tilted due to carrying heavy luggage or having
improper tire pressure.
● The distance to the preceding vehicle is extremely short.
● The vehicle is moving up and down a large amount due to road conditions
during driving (poor roads or road seams).
● The headlight lenses are dirty and emit a faint amount of light at night, or the
beam axis has deviated.
● The vehicle is struck by a crosswind.
● The vehicle has just changed lanes or crossed an intersection.
● Snow tires, etc., are equipped.
Page 405 of 820

PRIUS_OM_OM47B89U_(U)
4054-5. Using the driving support systems
4
Driving
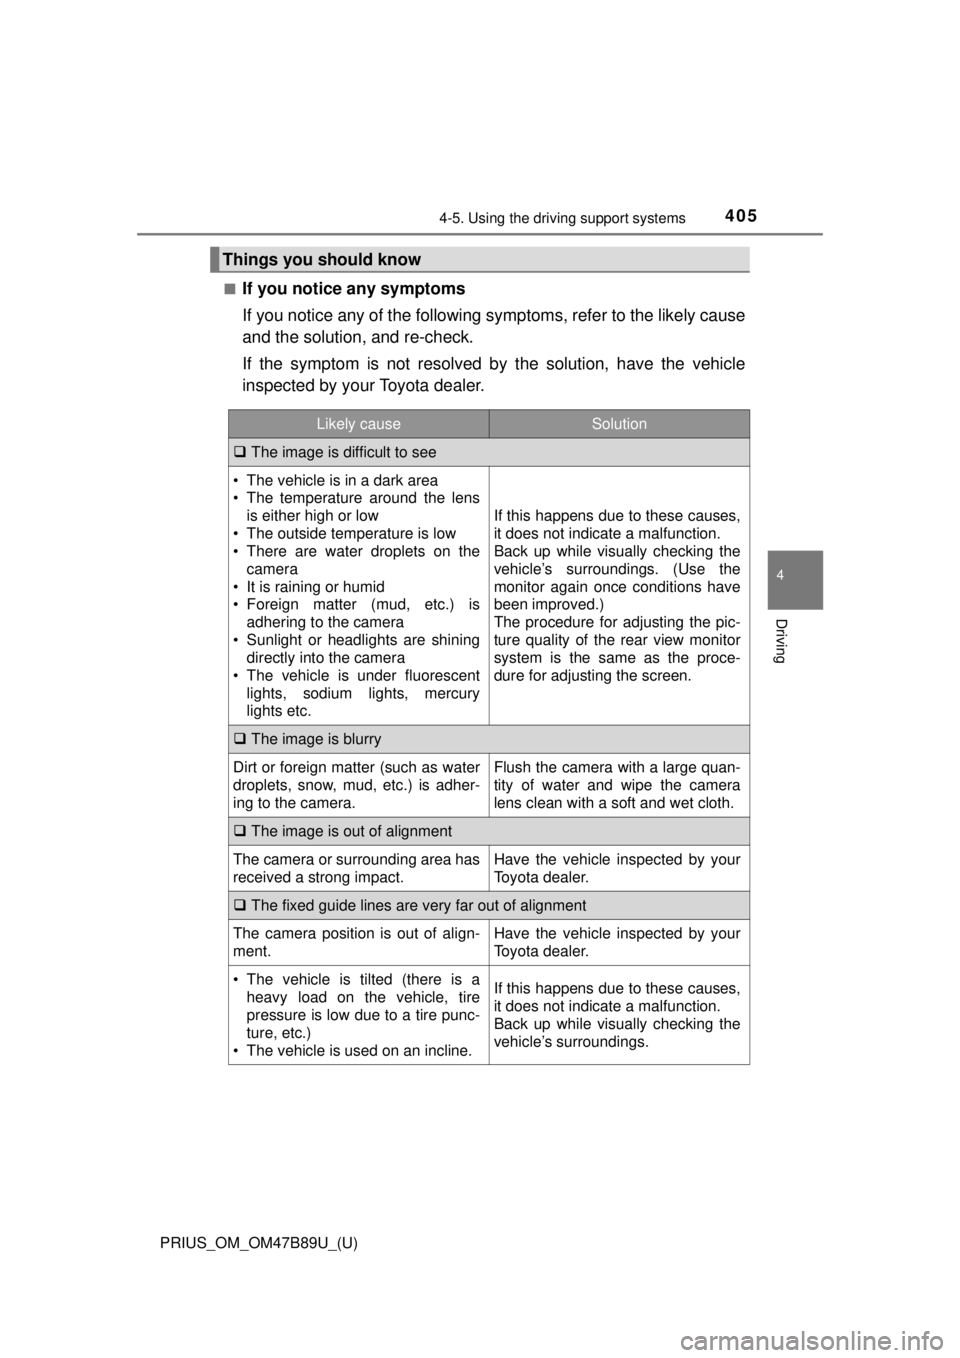
■If you notice any symptoms
If you notice any of the following symptoms, refer to the likely cause
and the solution, and re-check.
If the symptom is not resolved by the solution, have the vehicle
inspected by your Toyota dealer.
Things you should know
Likely causeSolution
The image is difficult to see
• The vehicle is in a dark area
• The temperature around the lens
is either high or low
• The outside temperature is low
• There are water droplets on the camera
• It is raining or humid
• Foreign matter (mud, etc.) is adhering to the camera
• Sunlight or headlights are shining directly into the camera
• The vehicle is under fluorescent
lights, sodium lights, mercury
lights etc.
If this happens due to these causes,
it does not indicate a malfunction.
Back up while visually checking the
vehicle’s surroundings. (Use the
monitor again once conditions have
been improved.)
The procedure for adjusting the pic-
ture quality of the rear view monitor
system is the same as the proce-
dure for adjusting the screen.
The image is blurry
Dirt or foreign matter (such as water
droplets, snow, mud, etc.) is adher-
ing to the camera.Flush the camera with a large quan-
tity of water and wipe the camera
lens clean with a soft and wet cloth.
The image is out of alignment
The camera or surrounding area has
received a strong impact.Have the vehicle inspected by your
Toyota dealer.
The fixed guide lines are very far out of alignment
The camera position is out of align-
ment.Have the vehicle inspected by your
Toyota dealer.
• The vehicle is tilted (there is a
heavy load on the vehicle, tire
pressure is low due to a tire punc-
ture, etc.)
• The vehicle is used on an incline.If this happens due to these causes,
it does not indicate a malfunction.
Back up while visually checking the
vehicle’s surroundings.
Page 436 of 820
436
PRIUS_OM_OM47B89U_(U)
5-2. Setup
Display settings
Press the “SETUP” button.
Select “Display” on the “Setup” screen.Adjust screen contrast/bright-
ness.
Adjust screen contrast/bright-
ness of the rear view monitor
camera.
Changes to day mode.
Select “General” or “Camera” on the “Display Settings” screen.
Adjust the display as desired by selecting “+” or “-”.
When the headlights are tur ned on, the screen dims.
However, the screen can be switch ed to day mode by selecting “Day
Mode”.
The screen will stay in day mode when the headlights are turned on until
“Day Mode” is selected again.
Settings are available for adjusting the contrast and brightness
of the screen.
Screen for display settings
1
2
1
2
3
Adjusting the screen contrast/brightness
Day mode
1
2
Page 660 of 820

660
PRIUS_OM_OM47B89U_(U)
7-3. Do-it-yourself maintenance
■Replacing the following bulbs
If any of the lights listed below has burnt out, have it replaced by
your Toyota dealer.
● Headlights and daytime running lights
● Front side marker lights
● Parking lights (LED type: if equipped)
● Fog lights
● Rear side marker/tail lights
● Stop lights
● High mounted stoplight
● License plate lights
■LED lights
The lights other than the parking lights (bulb type: if equipped), front turn sig-
nal lights, rear turn signal lights and back-up lights each consist of a number
of LEDs. If any of the LEDs burn out, take your vehicle to your Toyota dealer
to have the light replaced.
■ Condensation build-up on the inside of the lens
Temporary condensation build-up on the inside of the headlight lens does not
indicate a malfunction. Contact your Toyota dealer for more information in the
following situations:
●Large drops of water have built up on the inside of the lens.
● Water has built up inside the headlight.
■ When replacing light bulbs
→P. 651
Page 661 of 820

PRIUS_OM_OM47B89U_(U)
6617-3. Do-it-yourself maintenance
7
Maintenance and care
WARNING
■Replacing light bulbs
● Be sure to stop the hybrid system and turn off the lights. Do not attempt to
replace the bulb immediately after turning off the lights.
The bulbs become very hot and may cause burns.
● Do not touch the glass portion of the light bulb with bare hands. When it is
unavoidable to hold the glass portion, use and hold with a clean dry cloth
to avoid getting moisture and oils on the bulb.
Also, if the bulb is scratched or dropped, it may blow out or crack.
● Fully install light bulbs and any parts used to secure them. Failure to do so
may result in heat damage, fire, or water entering the headlight unit. This
may damage the headlights or cause condensation to build up on the lens.
● Do not attempt to repair or disassemble light bulbs, connectors, electric
circuits or component parts.
Doing so may result in death or serious injury due to electric shock.
■ To prevent damage or fire
● Make sure bulbs are fully seated and locked.
● Check the wattage of the bulb before installing to prevent heat damage.
Page 724 of 820

724
PRIUS_OM_OM47B89U_(U)
8-2. Steps to take in an emergency
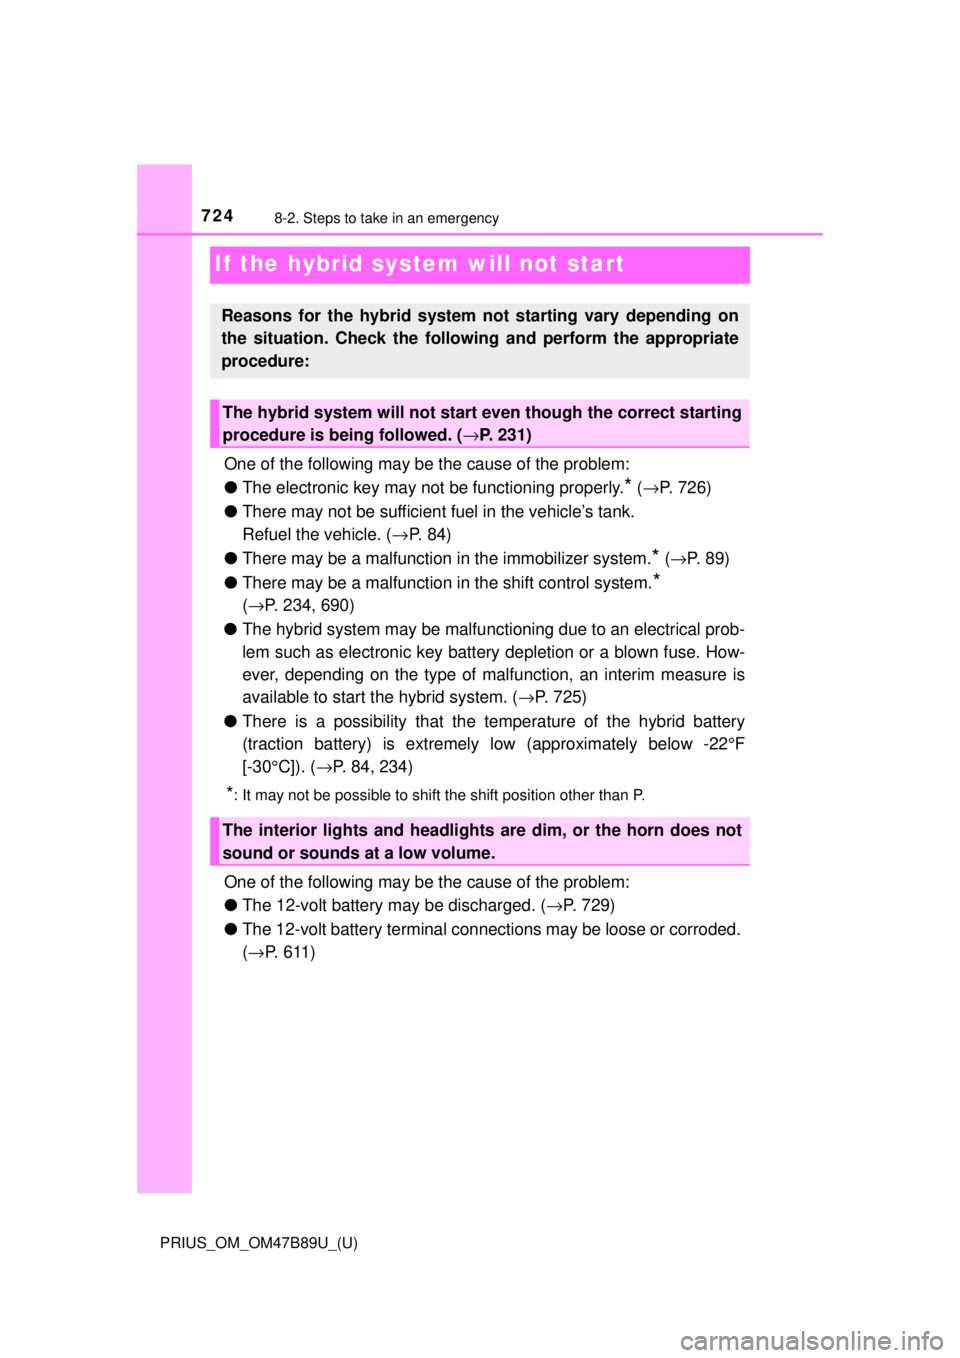
If the hybrid system will not start
One of the following may be the cause of the problem:
●The electronic key may not be functioning properly.
* (→ P. 726)
● There may not be sufficient fuel in the vehicle’s tank.
Refuel the vehicle. ( →P. 84)
● There may be a malfunction in the immobilizer system.
* (→ P. 8 9 )
● There may be a malfunction in the shift control system.
*
( → P. 234, 690)
● The hybrid system may be malfunctioning due to an electrical prob-
lem such as electronic key battery depletion or a blown fuse. How-
ever, depending on the type of malfunction, an interim measure is
available to start the hybrid system. (→ P. 725)
● There is a possibility that the temperature of the hybrid battery
(traction battery) is extremely low (approximately below -22°F
[-30°C]). ( →P. 84, 234)
*: It may not be possible to shift the shift position other than P.
One of the following may be the cause of the problem:
● The 12-volt battery may be discharged. ( →P. 729)
● The 12-volt battery terminal con nections may be loose or corroded.
( → P. 6 1 1 )
Reasons for the hybrid system not starting vary depending on
the situation. Check the follo wing and perform the appropriate
procedure:
The hybrid system will not start even though the correct starting
procedure is being followed. ( →P. 231)
The interior lights and headlights are dim, or the horn does not
sound or sounds at a low volume.
Page 731 of 820

7318-2. Steps to take in an emergency
PRIUS_OM_OM47B89U_(U)
8
When trouble arises
Once the hybrid system has started, remove the jumper cables in
the exact reverse order from which they were connected.
To install the engine cover, conduct the removal procedure in
reverse. After installing, check that the fixed pins are inserted
securely.
Once the hybrid system starts, ha ve the vehicle inspected at your
Toyota dealer as soon as possible.
■ Starting the hybrid system when the 12-volt battery is discharged
The hybrid system cannot be started by push-starting.
■ To prevent 12-volt battery discharge
●Turn off the headlights and the audio system while the hybrid system is off.
● Turn off any unnecessary electrical components when the vehicle is running
at a low speed for an extended period, such as in heavy traffic.
■ When the 12-volt battery is removed or discharged
●Information stored in the ECU is cleared. When the 12-volt battery is
depleted, have the vehicle inspected at your Toyota dealer.
● Some systems may require initialization. ( →P. 780)
■ When removing the 12-volt battery terminals
When the 12-volt battery terminals are removed, the information stored in the
ECU is cleared. Before removing the 12-volt battery terminals, contact your
Toyota dealer.
■ Charging the 12-volt battery
The electricity stored in the 12-volt battery will discharge gradually even when
the vehicle is not in use, due to natural discharge and the draining effects of
certain electrical appliances. If the vehicle is left for a long time, the 12-volt
battery may discharge, and the hybrid system may be unable to start. (The
12-volt battery recharges automatically while the hybrid system is operating.)
7
8