Page 449 of 660
4497-3. Do-it-yourself maintenance
AVENSIS_OM_OM20C79E_(EE)
7
Maintenance and care
NOTICE
■If you remove the air cleaner filter
Driving with the air cleaner filter removed may cause excessive engine wear
due to dirt in the air.
■ If the brake fluid level is low or high
It is normal for the brake fluid level to go down slightly as the brake pads
wear or when the fluid level in the accumulator is high.
If the reservoir needs frequent refilling, it may indicate a serious problem.
Page 453 of 660
4537-3. Do-it-yourself maintenance
AVENSIS_OM_OM20C79E_(EE)
7
Maintenance and care
Engine compartment
Gasoline engine
Washer fluid tank (P. 466)
Engine coolant reservoir
(P. 461)
Engine oil filler cap (P. 458)
Engine oil level dipstick
(P. 456)Battery (P. 463)
Fuse box (P. 496)
Electric cooling fan
Condenser (P. 463)
Radiator (P. 463)1
2
3
4
5
6
7
8
9
Page 454 of 660
4547-3. Do-it-yourself maintenance
AVENSIS_OM_OM20C79E_(EE)
Diesel engine
Washer fluid tank (P. 466)
Engine coolant reservoir
(P. 461)
Engine oil filler cap (P. 458)
Engine oil level dipstick
(P. 456)
Fuel filter (P. 467)Fuse box (P. 496)
Battery (P. 463)
Electric cooling fans
Condenser (P. 463)
Intercooler (P. 463)
Radiator (P. 463)1
2
3
4
5
6
7
8
9
10
11
Page 455 of 660
4557-3. Do-it-yourself maintenance
AVENSIS_OM_OM20C79E_(EE)
7
Maintenance and care
■Removing the engine compartment cover
■Installing the clips
Rotate center portion
Push up center portion
Insert
Press
Engine compartment cover
1
2
3
4
NOTICE
■ After installing an engine compartment cover
Make sure that the cover is securely installed in its original position.
Page 456 of 660
4567-3. Do-it-yourself maintenance
AVENSIS_OM_OM20C79E_(EE)
With the engine at operating temperature and turned off, check the oil
level on the dipstick.
■Checking the engine oil
Park the vehicle on level ground. After warming up the engine
and turning it off, wait more than 5 minutes for the oil to drain
back into the bottom of the engine.
Hold a rag under the end and pull the dipstick out.
Wipe the dipstick clean.
Flat dipstick: Reinsert the dipstick fully.
Non-flat dipstick: Reinsert
the non-flat dipstick fully with
its protruding areas ( in the
illustration) pointing towards
the engine.
Engine oil
1
2
Gasoline engineDiesel engine
3
4
1
Page 457 of 660
4577-3. Do-it-yourself maintenance
AVENSIS_OM_OM20C79E_(EE)
7
Maintenance and care
Holding a rag under the end, pull the dipstick out and check the
oil level.
Low
Normal
Excessive
The shape of the dipstick may differ depending on the type of vehicle or
engine
Wipe the dipstick and reinsert it fully.
5
1
2
3
Flat dipstickNon-flat dipstick type A
Non-flat dipstick type B
Measuring side
6
Page 458 of 660

4587-3. Do-it-yourself maintenance
AVENSIS_OM_OM20C79E_(EE)■
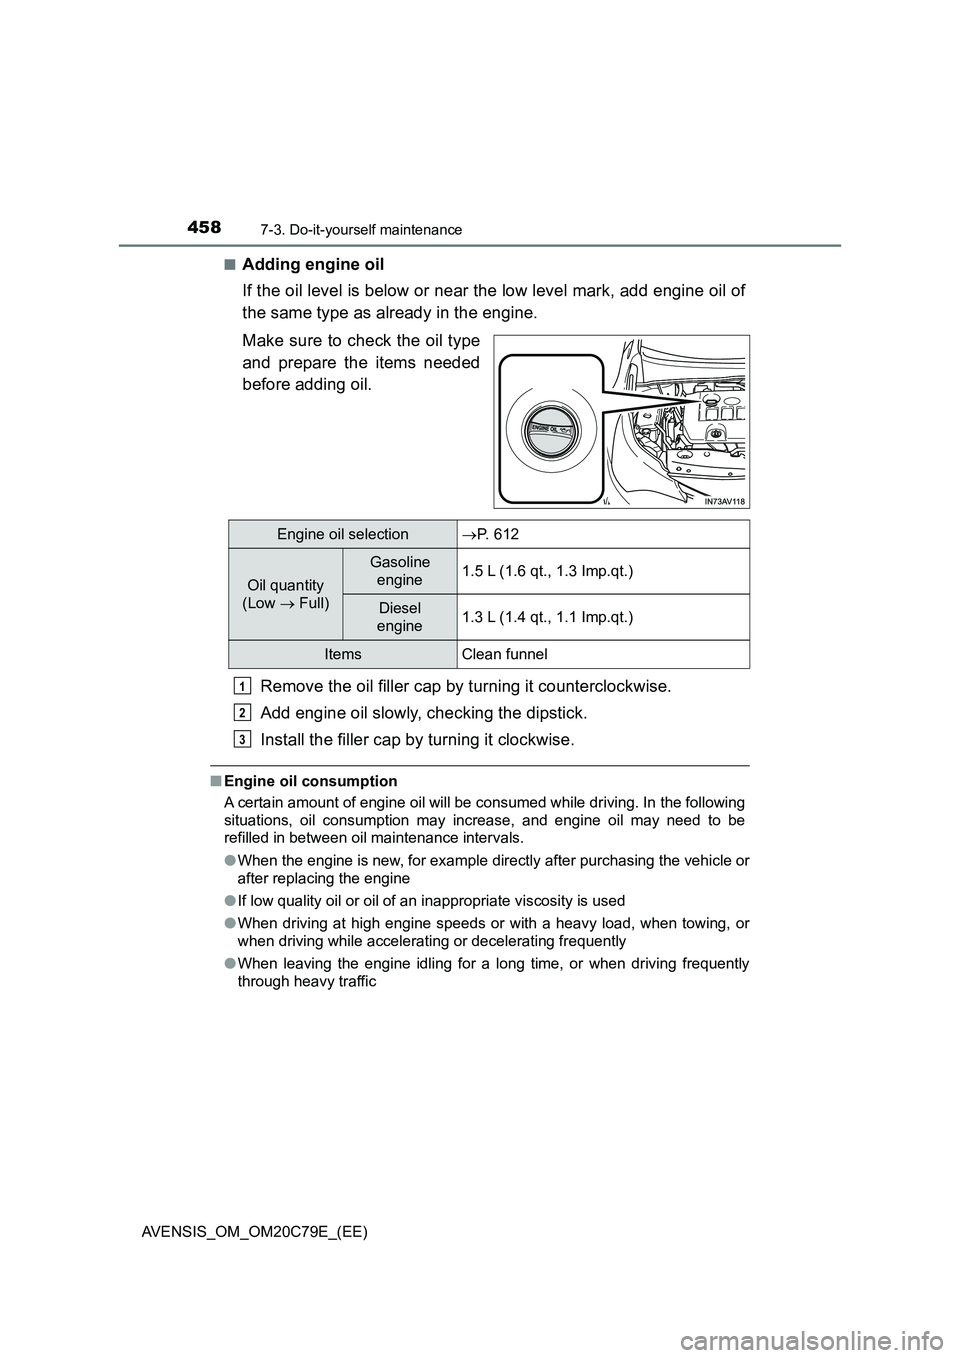
Adding engine oil
If the oil level is below or near the low level mark, add engine oil of
the same type as already in the engine.
Make sure to check the oil type
and prepare the items needed
before adding oil.
Remove the oil filler cap by turning it counterclockwise.
Add engine oil slowly, checking the dipstick.
Install the filler cap by turning it clockwise.
■Engine oil consumption
A certain amount of engine oil will be consumed while driving. In the following
situations, oil consumption may increase, and engine oil may need to be
refilled in between oil maintenance intervals.
●When the engine is new, for example directly after purchasing the vehicle or
after replacing the engine
●If low quality oil or oil of an inappropriate viscosity is used
●When driving at high engine speeds or with a heavy load, when towing, or
when driving while accelerating or decelerating frequently
●When leaving the engine idling for a long time, or when driving frequently
through heavy traffic
Engine oil selectionP. 612
Oil quantity
(Low Full)
Gasoline
engine1.5 L (1.6 qt., 1.3 Imp.qt.)
Diesel
engine1.3 L (1.4 qt., 1.1 Imp.qt.)
Items Clean funnel
1
2
3
Page 459 of 660

4597-3. Do-it-yourself maintenance
AVENSIS_OM_OM20C79E_(EE)
7
Maintenance and care
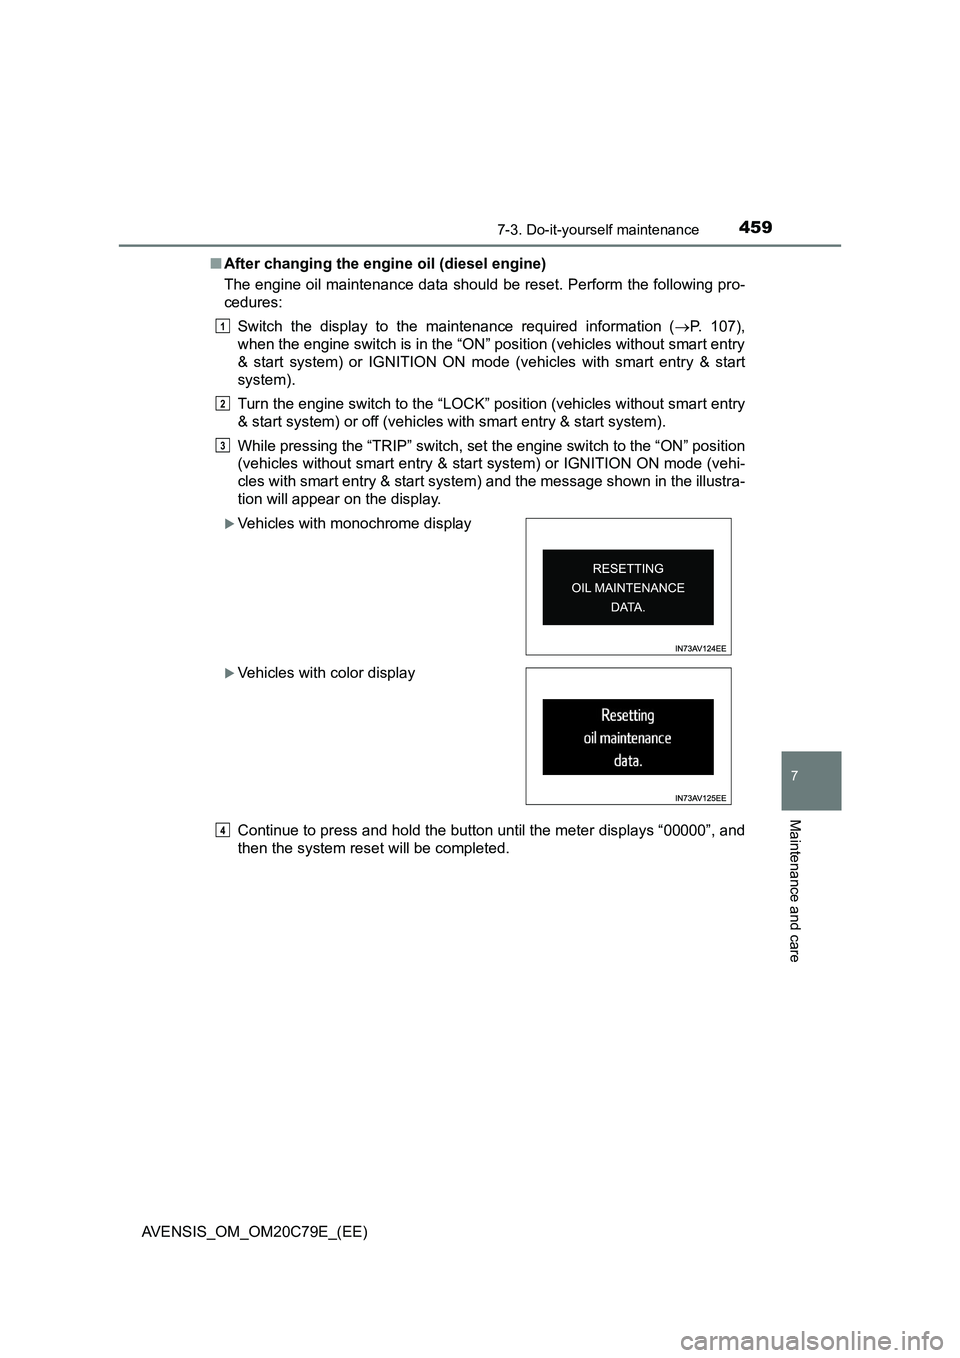
■After changing the engine oil (diesel engine)
The engine oil maintenance data should be reset. Perform the following pro-
cedures:
Switch the display to the maintenance required information (P. 107),
when the engine switch is in the “ON” position (vehicles without smart entry
& start system) or IGNITION ON mode (vehicles with smart entry & start
system).
Turn the engine switch to the “LOCK” position (vehicles without smart entry
& start system) or off (vehicles with smart entry & start system).
While pressing the “TRIP” switch, set the engine switch to the “ON” position
(vehicles without smart entry & start system) or IGNITION ON mode (vehi-
cles with smart entry & start system) and the message shown in the illustra-
tion will appear on the display.
Continue to press and hold the button until the meter displays “00000”, and
then the system reset will be completed.
Vehicles with monochrome display
Vehicles with color display
1
2
3
4