Page 67 of 213

Braking SystemsWarning: Properly functioning braking
systems are critical to ensure safety. If you experience a problem with the brake
pedal, brake caliper, or any component of
a Model X braking system, contact Tesla
immediately.
Model X has an anti-lock braking system
(ABS) that prevents the wheels from locking
when you apply maximum brake pressure. This
improves steering control during heavy
braking in most road conditions.
During emergency braking conditions, the
ABS constantly monitors the speed of each
wheel and varies the brake pressure according
to the grip available.
The alteration of brake pressure can be felt as
a pulsing sensation through the brake pedal.
This demonstrates that the ABS is operating
and is not a cause for concern. Keep
firm and
steady pressure on the brake pedal while
experiencing the pulsing.
The ABS indicator flashes briefly on
the instrument panel when you firststart Model X. If this indicator lights
up at any other time, an ABS fault
has occurred and the ABS is not
operating. Contact Tesla. The braking
system remains fully operational and
is not
affected by an ABS failure.
However, braking distances may
increase.
If the instrument panel displays this
indicator at any time other than
displaying
briefly when you first start
Model X, a brake system fault is
detected or the brake
fluid level is
low. Contact Tesla immediately.
Emergency Braking
In an emergency, fully press the brake pedal and maintain
firm pressure, even on low
traction surfaces. The ABS varies the braking
pressure to each wheel according to the
amount of traction available. This prevents
wheels from locking and ensures that you stop
as safely as possible.
Warning: Do not pump the brake pedal.
Doing so interrupts operation of the ABS
and can increase braking distance.Warning: Always maintain a safe distance
from the vehicle in front of you and beaware of hazardous driving conditions.
While the ABS can improve stopping
distance, it cannot overcome the laws of physics. It also does not prevent the
danger of hydroplaning (where a layer of
water prevents direct contact between the tires and the road).
Automatic Emergency Braking automatically
applies full braking in situations where a
collision is considered imminent (see Automatic Emergency Braking on page 109).
Warning: Automatic Emergency Braking
is not designed to prevent a collision. At best, it can minimize the impact of a
frontal collision by attempting to reduce
your driving speed. Depending on Automatic Emergency Braking to avoid a
collision can result in serious injury or death.
Brake Wear
Model X brake pads are equipped with wear indicators. A wear indicator is a thin metal
strip attached to the brake pad that squeals as
it rubs against the rotor when the pad wears
down. This squealing sound indicates that the
brake pads have reached the end of their service life and require replacement. To
replace the brake pads, contact Tesla Service.
Brakes must be periodically inspected visually by removing the tire and wheel. For detailed
specifications and service limits for rotors and
brake pads, see Brakes on page 184.
Warning:
Neglecting to replace worn
brake pads damages the braking system
and can result in a braking hazard.
Regenerative Braking
Whenever Model X is moving and your foot is
off the accelerator, regenerative braking slows
down Model X and feeds any surplus energy
back to the Battery.
By anticipating your stops and reducing or
removing pressure from the accelerator pedal
to slow down, you can take advantage of regenerative braking to increase driving range.
Of course, this is no substitute for regular
braking when needed for safety.
Note: If regenerative braking is aggressively
slowing Model X (such as when your foot is
completely
off the accelerator pedal at
highway speeds), the brake lights turn on to
alert others that you are slowing down.
Brakes
66Model X Owner
Page 87 of 213

Warning: You must use the Model X
trailer hitch when towing a trailer. Never
attempt to attach a
different type of
trailer hitch.
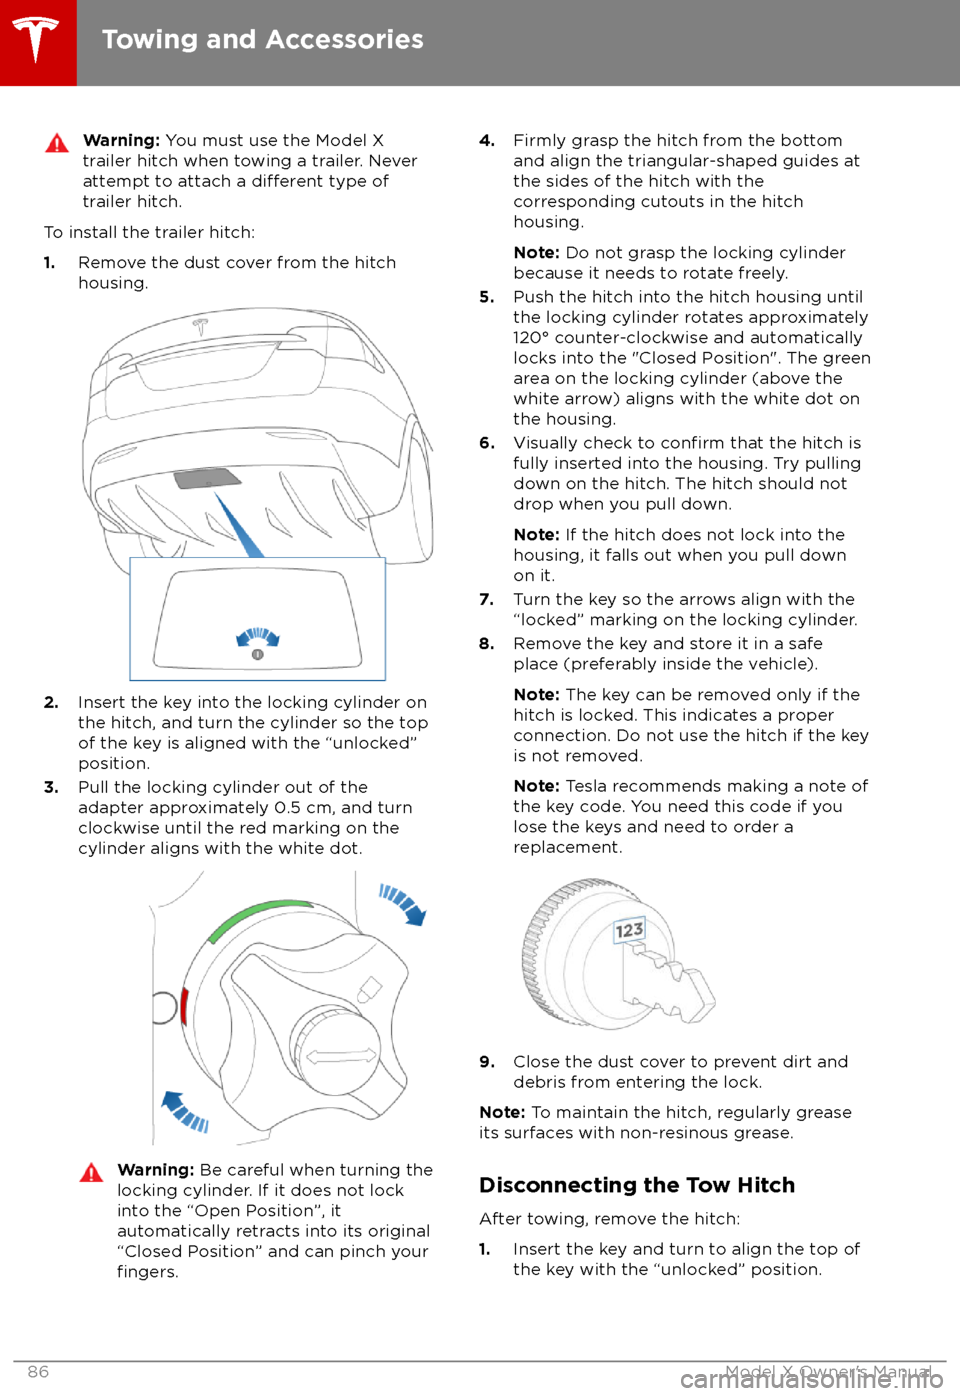
To install the trailer hitch:
1. Remove the dust cover from the hitch
housing.
2. Insert the key into the locking cylinder on
the hitch, and turn the cylinder so the top of the key is aligned with the “unlocked”
position.
3. Pull the locking cylinder out of the
adapter approximately 0.5 cm, and turn
clockwise until the red marking on the
cylinder aligns with the white dot.
Warning: Be careful when turning the
locking cylinder. If it does not lock
into the “Open Position”, it
automatically retracts into its original “Closed Position” and can pinch your
fingers.
4. Firmly grasp the hitch from the bottom
and align the triangular-shaped guides at
the sides of the hitch with the
corresponding cutouts in the hitch
housing.
Note: Do not grasp the locking cylinder
because it needs to rotate freely.
5. Push the hitch into the hitch housing until
the locking cylinder rotates approximately 120
Page 88 of 213
2.While firmly holding the bottom of the
hitch (to prevent it from dropping to the ground), pull the locking cylinder out
approximately 0.5 cm, and turn it clockwise until the red marking on the
locking cylinder aligns with the white dot.
At this point, the locking cylinder is locked
in the "open" and the hitch drops out of
the housing.Warning: Be careful when turning the
locking cylinder. If it does not lock
into the “Open Position”, it
automatically retracts into its original “closed" position and can pinch your
fingers.
3. Reinstall the dust cover on the hitch
housing to prevent dirt from accumulating
inside the housing.
4. Close the dust cover on the hitch
Page 117 of 213
1.Status bar
The top line displays provides shortcuts to lock/unlock Model X, to access HomeLink (if equipped) and Driver
Profiles, display vehicle information (the Tesla “T”), download software
updates, display network strength and Bluetooth
Page 143 of 213

Touch the zoom icons in the top right area to
zoom the map in and out on your current or
chosen location. Touch the North/Heading Up icon to center the map on your current
location and change the orientation of the
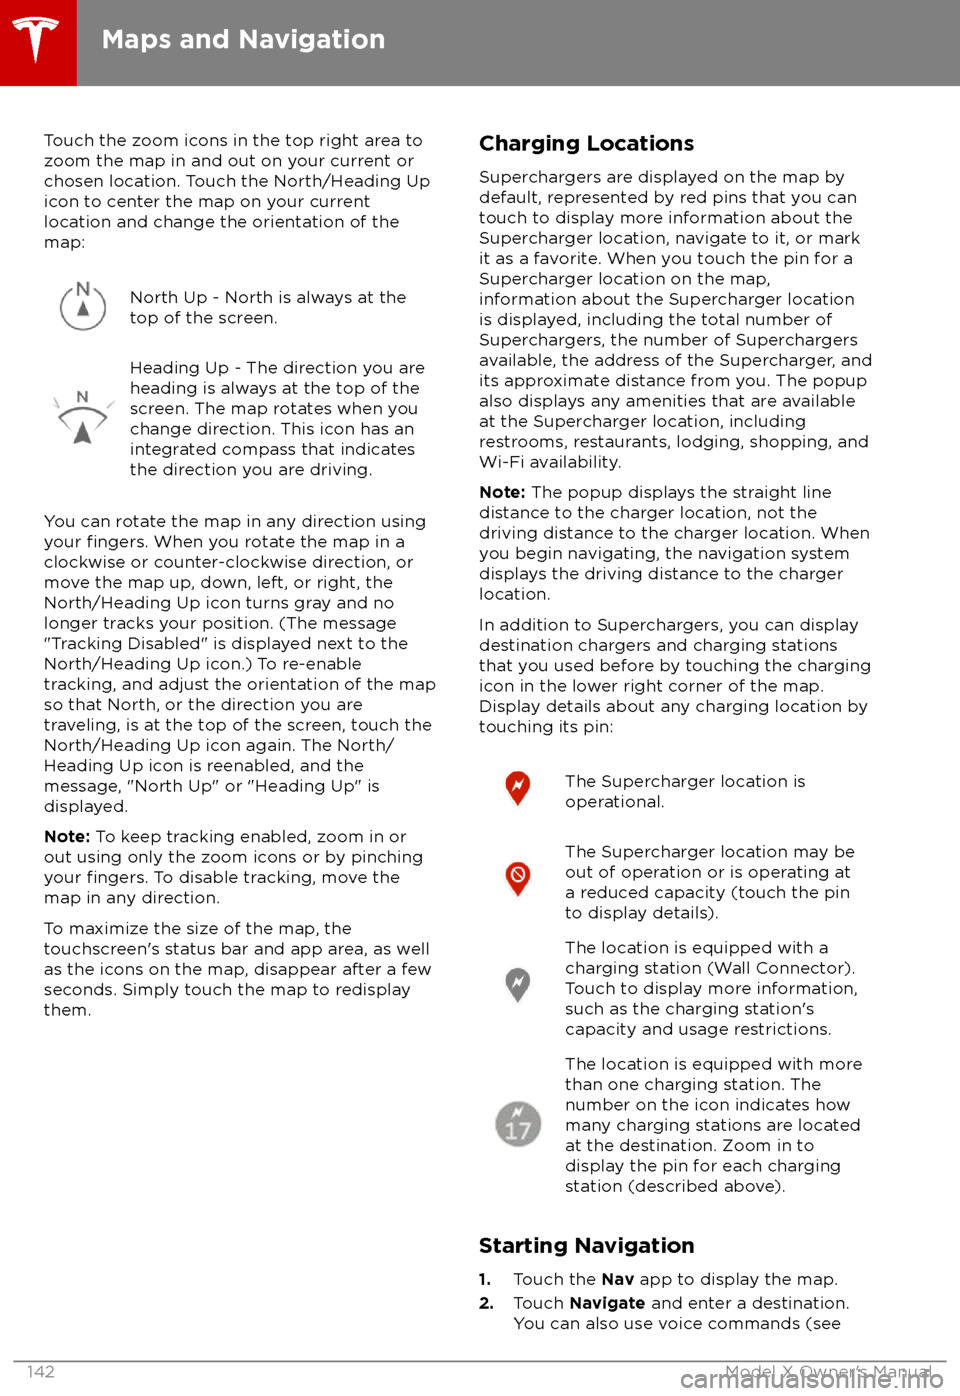
map:North Up - North is always at the
top of the screen.Heading Up - The direction you are
heading is always at the top of the
screen. The map rotates when you
change direction. This icon has an
integrated compass that indicates
the direction you are driving.
You can rotate the map in any direction using
your fingers. When you rotate the map in a
clockwise or counter-clockwise direction, or
move the map up, down, left, or right, the
North/Heading Up icon turns gray and no
longer tracks your position. (The message
"Tracking Disabled" is displayed next to the North/Heading Up icon.) To re-enable
tracking, and adjust the orientation of the map
so that North, or the direction you are
traveling, is at the top of the screen, touch the
North/Heading Up icon again. The North/
Heading Up icon is reenabled, and the
message, "North Up" or "Heading Up" is
displayed.
Note: To keep tracking enabled, zoom in or
out using only the zoom icons or by pinching
your
fingers. To disable tracking, move the
map in any direction.
To maximize the size of the map, the
touchscreen
Page 148 of 213

About the Security SystemIf Model X does not detect a key nearby and a
locked door or trunk is opened, an alarm sounds and the headlights and turn signals
flash. To deactivate the alarm, press any
button on the key.
To manually enable or disable the alarm
system, touch Controls > Settings > Safety &
Security > Alarm . When set to ON, Model X
activates its alarm one minute after you exit,
the doors lock, and a recognized key is no
longer detected.
If your Model X is equipped with the optional security package, it includes a battery-backed
siren that sounds in situations where a locked door or trunk is opened and Model X does not
detect a key nearby. If the Tilt/Intrusion
setting is on, the siren also sounds if Model X
detects motion inside the cabin or if the vehicle is moved or tilted (for example, with a
tow truck or jack). To temporarily turn the Tilt/
Intrusion detection system
off, touch
Controls > Settings > Safety & Security > Tilt/
Intrusion > OFF . The Tilt/Intrusion setting is
enabled every time Model X is unlocked.
Note: If you plan to leave something that
moves, such as a dog, inside your locked
Model X, remember to turn
off Tilt/Intrusion .
Motion detected inside Model X activates the
siren.
Note: The Alarm must be on to enable Tilt/
Intrusion .
Security Settings
Using the Touchscreen147
Page 152 of 213
Loading New Software
Model X updates its software wirelessly,
providing new features throughout your term of ownership. Tesla recommends that you
install software updates as soon as they are
available. The
first time you enter Model X
after an update is made available, a scheduling window displays on the touchscreen. The
scheduling window displays again at the end
of your
first driving session.
Note: Some software updates can take up to
three hours to complete. Model X must be in
Park while the new software is being installed.
To ensure the fastest and most reliable
delivery of software updates, leave the Wi-Fi
turned on and connected whenever possible
(see Connecting to Wi-Fi on page 150).
When a software update is available, a yellow
clock icon appears on the touchscreen
Page 158 of 213
Opening the Charge Port
The charge port is located on the left side of
Model X, behind a door that is part of the rear
tail light assembly. Park so that the charge
cable easily reaches the charge port.
With Model X unlocked (or a recognized key is
within range) and in Park, press and release
the button on the Tesla charge cable to open the charge port door.
You can also open the charge port door using
any of these methods: