2018 SUBARU CROSSTREK child lock
[x] Cancel search: child lockPage 58 of 474
(59,1)
北米Model "A1320BE-C" EDITED: 2017/ 10/ 10
seatback”F1-6.
2. Place the child restraint system in the
rear seating position.
3. Run the lap and shoulder belt through
or around the child restraint system follow-
ing the instructions provided by its manu-
facturer.
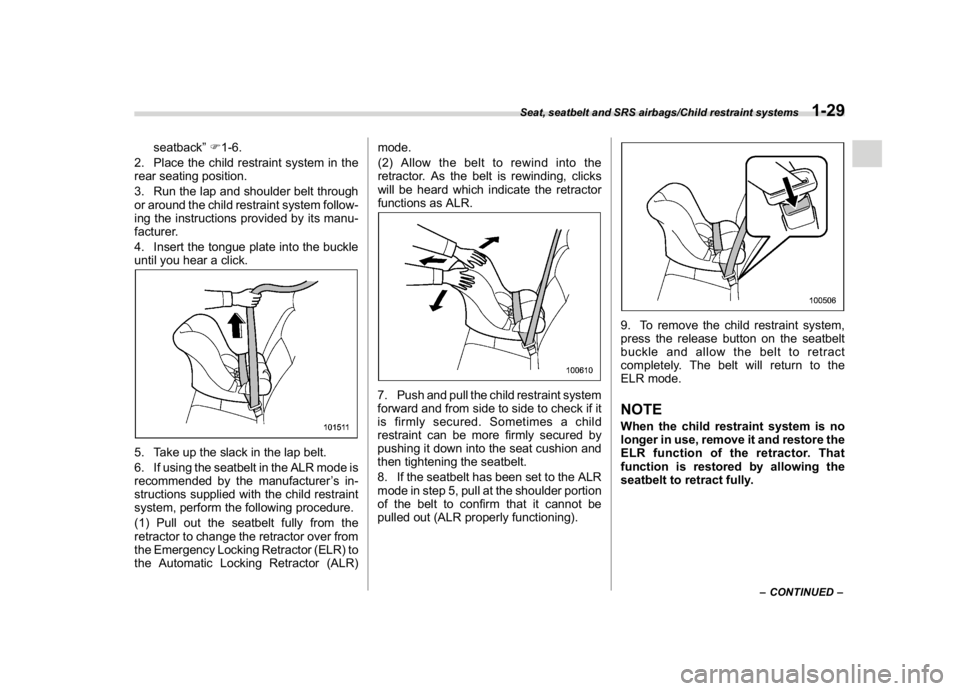
4. Insert the tongue plate into the buckle
until you hear a click.
5. Take up the slack in the lap belt.
6. If using the seatbelt in the ALR mode is
recommended by the manufacturer’s in-
structions supplied with the child restraint
system, perform the following procedure.
(1) Pull out the seatbelt fully from the
retractor to change the retractor over from
the Emergency Locking Retractor (ELR) to
the Automatic Locking Retractor (ALR)mode.
(2) Allow the belt to rewind into the
retractor. As the belt is rewinding, clicks
will be heard which indicate the retractor
functions as ALR.
7. Push and pull the child restraint system
forward and from side to side to check if it
is firmly secured. Sometimes a child
restraint can be more firmly secured by
pushing it down into the seat cushion and
then tightening the seatbelt.
8. If the seatbelt has been set to the ALR
mode in step 5, pull at the shoulder portion
of the belt to confirm that it cannot be
pulled out (ALR properly functioning).
9. To remove the child restraint system,
press the release button on the seatbelt
buckle and allow the belt to retract
completely. The belt will return to the
ELR mode.NOTEWhen the child restraint system is no
longer in use, remove it and restore the
ELR function of the retractor. That
function is restored by allowing the
seatbelt to retract fully.
–CONTINUED–
Seat, seatbelt and SRS airbags/Child restraint systems
1-29
1
Page 59 of 474
(60,1)
北米Model "A1320BE-C" EDITED: 2017/ 10/ 10
!Installing forward facing child re-
straint
WARNING
Before installing a child restraint
system, be sure to confirm that the
seatback is securely locked into
place. Otherwise, in an accident,
serious injury or death could result.
1. Shake the seatback slightly to confirm
that it is securely locked into place.
–Check the red colored unlocking
marker which is attached to the bottom
of the lock release knob is invisible. For
details, refer to“Folding down the rear
seatback”F1-6.
2. Prepare the rear seat head restraint
where a child restraint system is intended
to be installed in the following way.
–When a child restraint system is
installed on thewindow-side seating
position, remove the rear seat head
restraint. For details, refer to“Rear
seats”F1-9.
Store the head restraint in the cargo
area. Avoid placing the head restraint
in the passenger compartment to pre-
vent it from being thrown around in the
passenger compartment in a sudden
stop or a sharp turn.–When a child restraint system is
installed on therear center seating
position, raise the rear seat head
restraint to the extended position. Do
not remove the head restraint. For
details, refer to“Rear seats”F1-9.
3. Place the child restraint system in the
rear seating position.
WARNING
When you intend to install a child
restraint system on the rear center
seating position, if the child restraint
system does not fit snugly against
the contours of the rear center seat
cushion, install the child restraint
system on the window-side seating
position to be safe. For details, refer
to“Where to place a child restraint
system”F1-26.
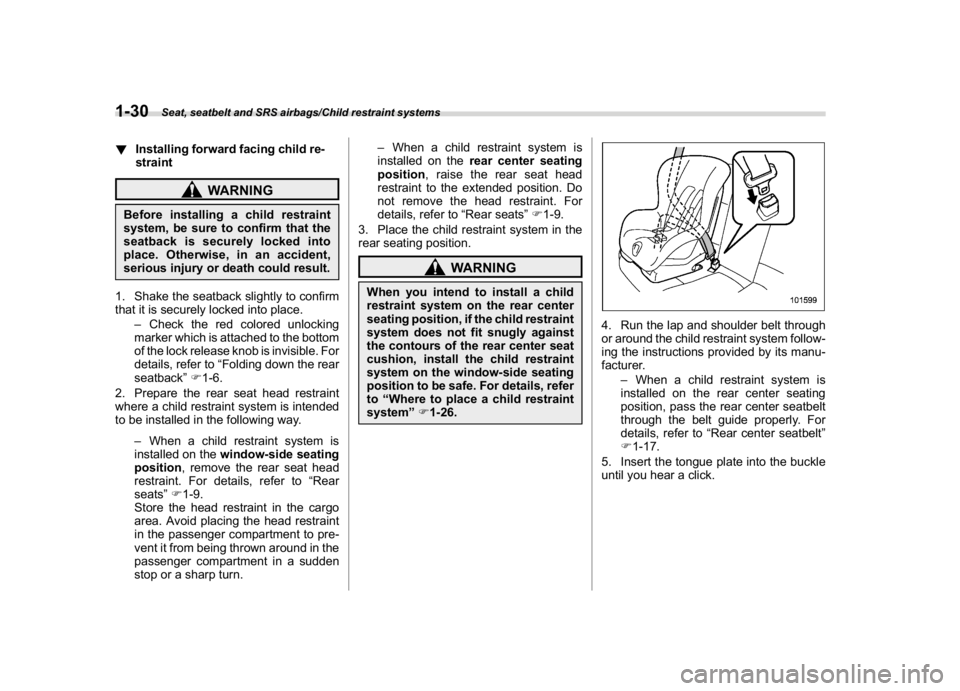
4. Run the lap and shoulder belt through
or around the child restraint system follow-
ing the instructions provided by its manu-
facturer.
–When a child restraint system is
installed on the rear center seating
position, pass the rear center seatbelt
through the belt guide properly. For
details, refer to“Rear center seatbelt”
F1-17.
5. Insert the tongue plate into the buckle
until you hear a click.
Seat, seatbelt and SRS airbags/Child restraint systems
1-30
Page 60 of 474
(61,1)
北米Model "A1320BE-C" EDITED: 2017/ 10/ 10
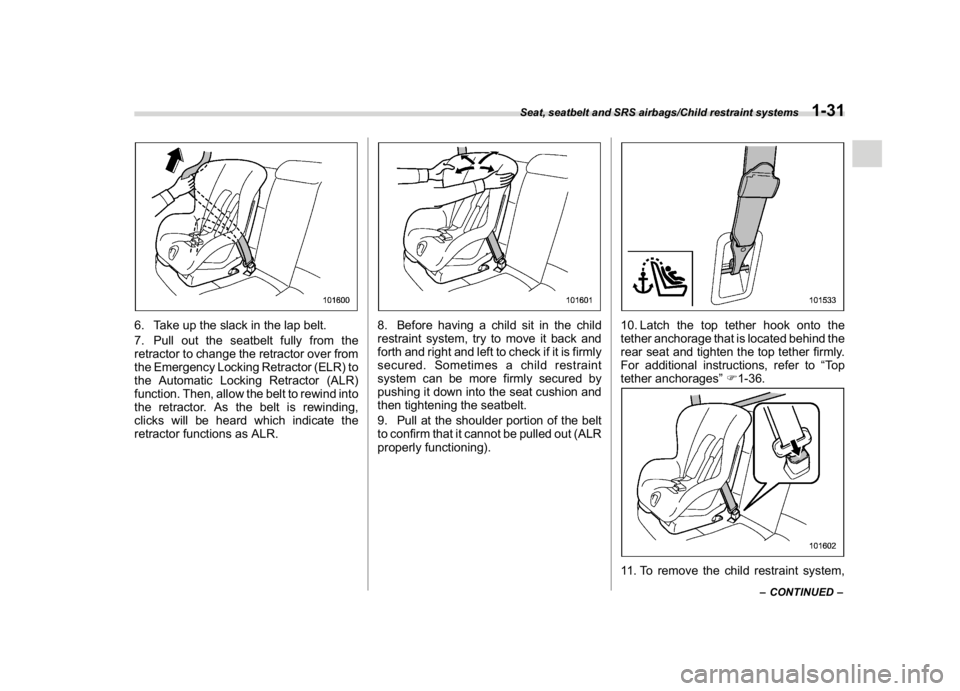
6. Take up the slack in the lap belt.
7. Pull out the seatbelt fully from the
retractor to change the retractor over from
the Emergency Locking Retractor (ELR) to
the Automatic Locking Retractor (ALR)
function. Then, allow the belt to rewind into
the retractor. As the belt is rewinding,
clicks will be heard which indicate the
retractor functions as ALR.
8. Before having a child sit in the child
restraint system, try to move it back and
forth and right and left to check if it is firmly
secured. Sometimes a child restraint
system can be more firmly secured by
pushing it down into the seat cushion and
then tightening the seatbelt.
9. Pull at the shoulder portion of the belt
to confirm that it cannot be pulled out (ALR
properly functioning).
10. Latch the top tether hook onto the
tether anchorage that is located behind the
rear seat and tighten the top tether firmly.
For additional instructions, refer to“To p
tether anchorages”F1-36.11. To remove the child restraint system,
–CONTINUED–
Seat, seatbelt and SRS airbags/Child restraint systems
1-31
1
Page 63 of 474
(64,1)
北米Model "A1320BE-C" EDITED: 2017/ 10/ 10
The lower anchorages (bars) are used for
installing a child restraint system only on
the rear seat window-side seating posi-
tions. For each window-side seating posi-
tion, two lower anchorages are provided.
Each lower anchorage is located where
the seat cushion meets the seatback.
!Tether anchoragesThe tether anchorages (upper an-
chorages) are provided at the locations
shown in the above illustration. For details,
refer to“Top tether anchorages”F1-36.!To install a child restraint system
using lower and tether an-
chorages
To install a child restraint system using
lower and tether anchorages, perform the
following procedure.
WARNING
Before installing a child restraint
system, be sure to confirm that the
seatback is securely locked into
place. Otherwise, in an accident,
serious injury or death could result.
1. Shake the seatback slightly to confirm
that it is securely locked into place.
–Check the red colored unlocking
marker which is attached to the bottom
of the lock release knob is invisible. For
details, refer to“Folding down the rear
seatback”F1-6.
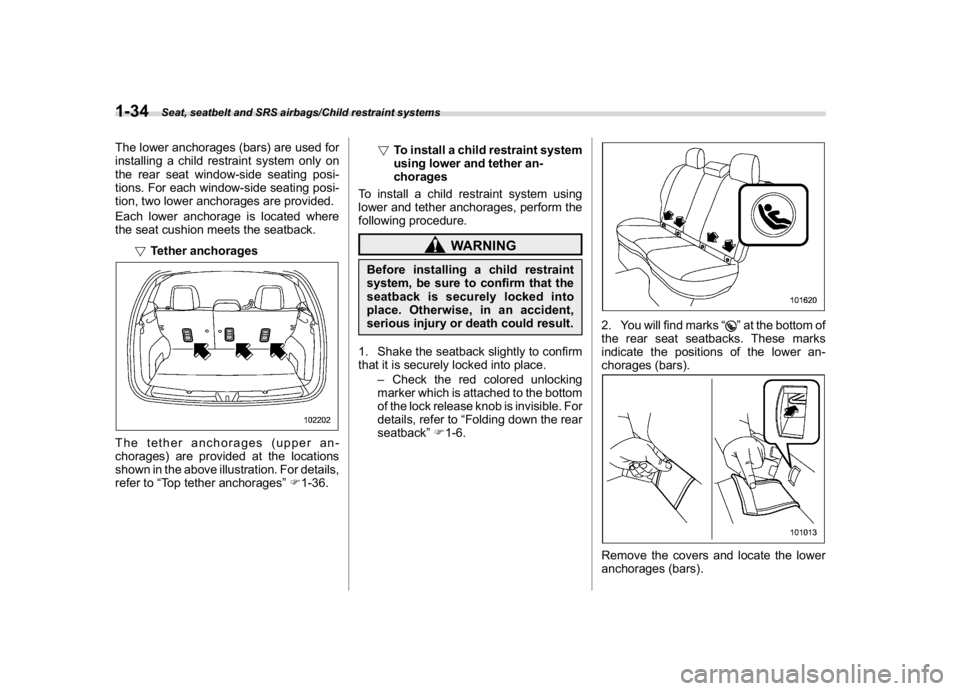
2. You will find marks“
”at the bottom of
the rear seat seatbacks. These marks
indicate the positions of the lower an-
chorages (bars).
Remove the covers and locate the lower
anchorages (bars).
Seat, seatbelt and SRS airbags/Child restraint systems
1-34
Page 81 of 474
(82,1)
北米Model "A1320BE-C" EDITED: 2017/ 10/ 10
!If the front passenger’s frontal
airbag ON indicator illuminates
and the OFF indicator turns off
even when an infant or a small
child is in a child restraint sys-
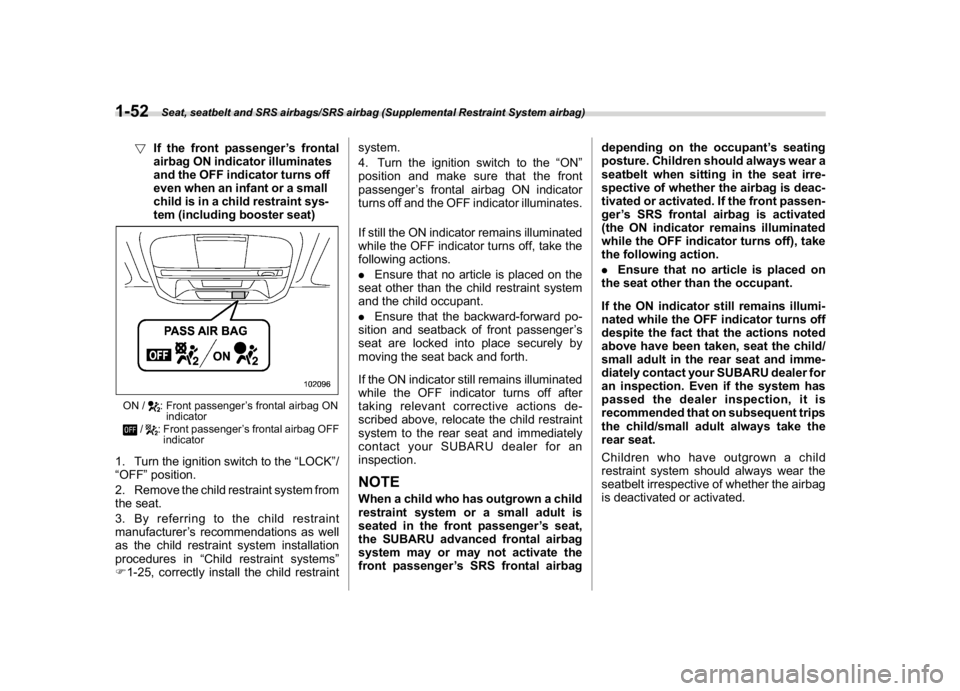
tem (including booster seat)ON /
: Front passenger’s frontal airbag ON
indicator
/
: Front passenger’s frontal airbag OFF
indicator
1. Turn the ignition switch to the“LOCK”/
“OFF”position.
2. Remove the child restraint system from
the seat.
3. By referring to the child restraint
manufacturer’s recommendations as well
as the child restraint system installation
procedures in“Child restraint systems”
F1-25, correctly install the child restraintsystem.
4. Turn the ignition switch to the“ON”
position and make sure that the front
passenger’s frontal airbag ON indicator
turns off and the OFF indicator illuminates.
If still the ON indicator remains illuminated
while the OFF indicator turns off, take the
following actions.
.Ensure that no article is placed on the
seat other than the child restraint system
and the child occupant.
.Ensure that the backward-forward po-
sition and seatback of front passenger’s
seat are locked into place securely by
moving the seat back and forth.
If the ON indicator still remains illuminated
while the OFF indicator turns off after
taking relevant corrective actions de-
scribed above, relocate the child restraint
system to the rear seat and immediately
contact your SUBARU dealer for an
inspection.
NOTEWhen a child who has outgrown a child
restraint system or a small adult is
seated in the front passenger’s seat,
the SUBARU advanced frontal airbag
system may or may not activate the
front passenger’s SRS frontal airbagdepending on the occupant’s seating
posture. Children should always wear a
seatbelt when sitting in the seat irre-
spective of whether the airbag is deac-
tivated or activated. If the front passen-
ger’s SRS frontal airbag is activated
(the ON indicator remains illuminated
while the OFF indicator turns off), take
the following action.
.Ensure that no article is placed on
the seat other than the occupant.
If the ON indicator still remains illumi-
nated while the OFF indicator turns off
despite the fact that the actions noted
above have been taken, seat the child/
small adult in the rear seat and imme-
diately contact your SUBARU dealer for
an inspection. Even if the system has
passed the dealer inspection, it is
recommended that on subsequent trips
the child/small adult always take the
rear seat.
Children who have outgrown a child
restraint system should always wear the
seatbelt irrespective of whether the airbag
is deactivated or activated.
Seat, seatbelt and SRS airbags/SRS airbag (Supplemental Restraint System airbag)
1-52
Page 100 of 474
(103,1)
北米Model "A1320BE-C" EDITED: 2017/ 10/ 10
Keys.........................................................................2-2
Key number plate................................................... 2-2
Keyless access with push-button start system
(if equipped).........................................................2-2
Safety precautions................................................. 2-3
Locking and unlocking by holding the access
key fob ................................................................ 2-6
Unlock using PIN Code Access.............................2-10
Power saving function.......................................... 2-11
Power saving function of access key fob..............2-12
Disabling keyless access function.........................2-12
Selecting audible signal operation.........................2-13
Warning chimes and warning indicator..................2-13
When access key fob does not operate properly ... 2-14
Replacing battery of access key fob......................2-14
Replacing access key fob.....................................2-14
Certification for keyless access with push-
button start system.............................................2-14
Immobilizer............................................................2-15
Security indicator light..........................................2-15
Key replacement...................................................2-15
Certification for immobilizer system......................2-16
Remote keyless entrysystem..............................2-17
Locking the doors.................................................2-18
Unlocking the doors..............................................2-18
Unlocking the rear gate.........................................2-19
Vehicle finder function..........................................2-19
Sounding a panic alarm........................................2-19
Setting audible signal operation
(models without“keyless access with push-
button start system”) ..........................................2-19Replacing the battery............................................2-20
Replacing lost transmitters...................................2-20
Certification for remote keyless entry system........2-20
Door locks.............................................................2-21
Locking and unlocking from the outside...............2-21
Locking and unlocking from the inside.................2-22
Key lock-in prevention function............................2-23
Battery drainage prevention function....................2-24
Alarm system........................................................2-24
Alarm system operation........................................2-25
Arming the system...............................................2-25
Disarming the system...........................................2-26
Alarm system setting............................................2-26
If you have accidentally triggered the alarm
system..............................................................2-27
Valet mode...........................................................2-27
Child safety locks.................................................2-28
Windows................................................................2-28
Power window operation.......................................2-28
Initialization of power window with one-touch
auto up/down function.......................................2-30
Rear gate...............................................................2-31
Lock/unlock..........................................................2-31
Open/close...........................................................2-31
Moonroof (if equipped).........................................2-32
Moonroof switches...............................................2-33
Sunshade.............................................................2-34
Keys and doors
2
Page 122 of 474
(125,1)
北米Model "A1320BE-C" EDITED: 2017/ 10/ 10
belts and child restraints, locking
the doors reduces the chance of
being thrown out of the vehicle in an
accident.
It also helps prevent passengers
from falling out if a door is acciden-
tally opened, and intruders from
unexpectedly opening doors and
entering your vehicle.
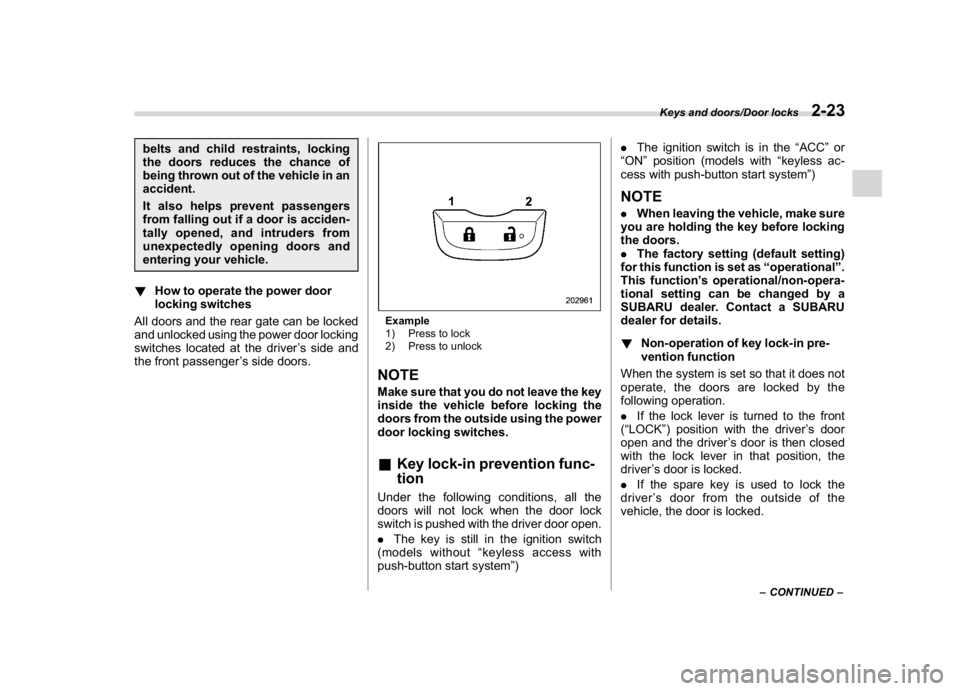
!How to operate the power door
locking switches
All doors and the rear gate can be locked
and unlocked using the power door locking
switches located at the driver’s side and
the front passenger’s side doors.
Example
1) Press to lock
2) Press to unlockNOTEMake sure that you do not leave the key
inside the vehicle before locking the
doors from the outside using the power
door locking switches.&Key lock-in prevention func-
tionUnder the following conditions, all the
doors will not lock when the door lock
switch is pushed with the driver door open.
.The key is still in the ignition switch
(models without“keyless access with
push-button start system”).The ignition switch is in the“ACC”or
“ON”position (models with“keyless ac-
cess with push-button start system”)
NOTE.When leaving the vehicle, make sure
you are holding the key before locking
the doors.
.The factory setting (default setting)
for this function is set as“operational”.
This function’s operational/non-opera-
tional setting can be changed by a
SUBARU dealer. Contact a SUBARU
dealer for details.
!Non-operation of key lock-in pre-
vention function
When the system is set so that it does not
operate, the doors are locked by the
following operation.
.If the lock lever is turned to the front
(“LOCK”) position with the driver’s door
open and the driver’s door is then closed
with the lock lever in that position, the
driver’s door is locked.
.If the spare key is used to lock the
driver’s door from the outside of the
vehicle, the door is locked.
–CONTINUED–
Keys and doors/Door locks
2-23
2
Page 127 of 474
(130,1)
北米Model "A1320BE-C" EDITED: 2017/ 10/ 10
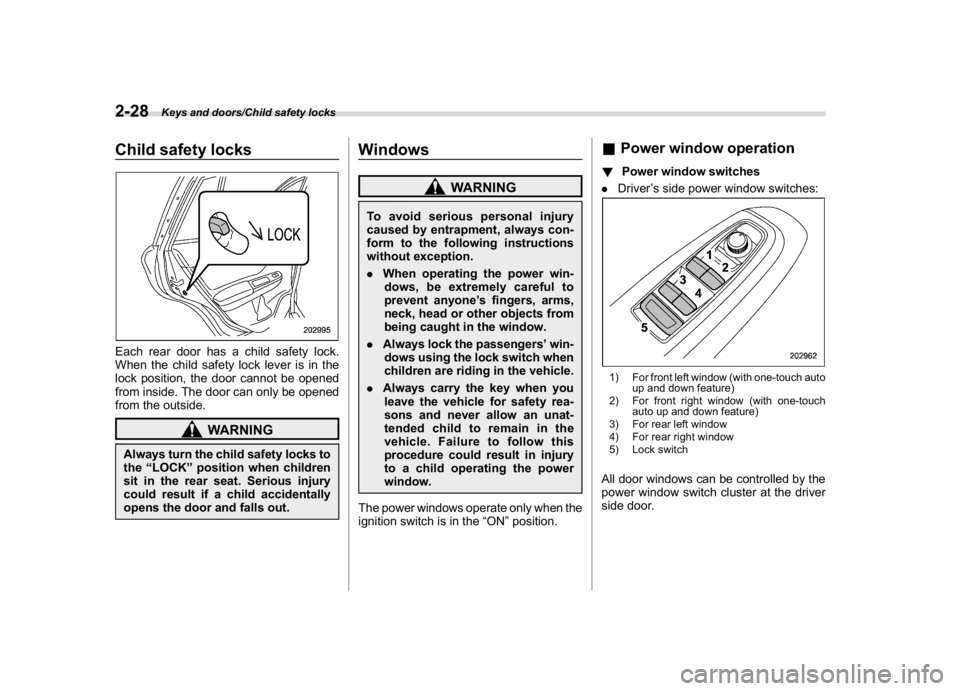
Child safety locksEach rear door has a child safety lock.
When the child safety lock lever is in the
lock position, the door cannot be opened
from inside. The door can only be opened
from the outside.
WARNING
Always turn the child safety locks to
the“LOCK”position when children
sit in the rear seat. Serious injury
could result if a child accidentally
opens the door and falls out.
Windows
WARNING
To avoid serious personal injury
caused by entrapment, always con-
form to the following instructions
without exception.
.When operating the power win-
dows, be extremely careful to
prevent anyone’s fingers, arms,
neck, head or other objects from
being caught in the window.
.Always lock the passengers’win-
dows using the lock switch when
children are riding in the vehicle.
.Always carry the key when you
leave the vehicle for safety rea-
sons and never allow an unat-
tended child to remain in the
vehicle. Failure to follow this
procedure could result in injury
to a child operating the power
window.
The power windows operate only when the
ignition switch is in the“ON”position.
&Power window operation!Power window switches
.Driver’s side power window switches:1) For front left window (with one-touch auto
up and down feature)
2) For front right window (with one-touch
auto up and down feature)
3) For rear left window
4) For rear right window
5) Lock switchAll door windows can be controlled by the
power window switch cluster at the driver
side door.
Keys and doors/Child safety locks
2-28