2018 SUBARU CROSSTREK ESP
[x] Cancel search: ESPPage 46 of 474
(47,1)
北米Model "A1320BE-C" EDITED: 2017/ 10/ 10
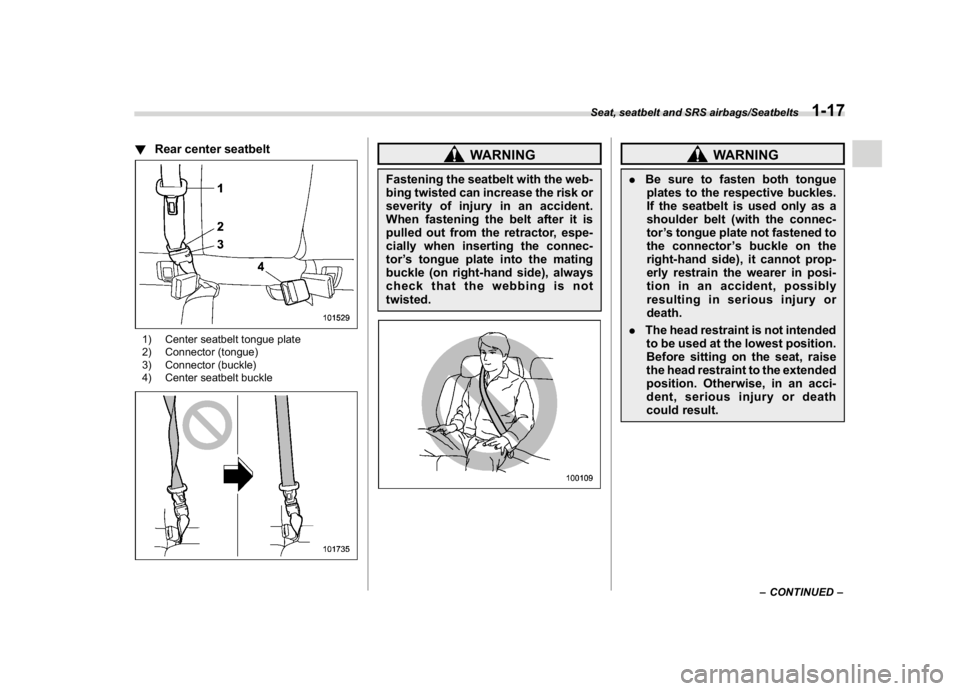
!Rear center seatbelt1) Center seatbelt tongue plate
2) Connector (tongue)
3) Connector (buckle)
4) Center seatbelt buckle
WARNING
Fastening the seatbelt with the web-
bing twisted can increase the risk or
severity of injury in an accident.
When fastening the belt after it is
pulled out from the retractor, espe-
cially when inserting the connec-
tor’s tongue plate into the mating
buckle (on right-hand side), always
check that the webbing is not
twisted.
WARNING
.Be sure to fasten both tongue
plates to the respective buckles.
If the seatbelt is used only as a
shoulder belt (with the connec-
tor’s tongue plate not fastened to
the connector’s buckle on the
right-hand side), it cannot prop-
erly restrain the wearer in posi-
tion in an accident, possibly
resulting in serious injury or
death.
.The head restraint is not intended
to be used at the lowest position.
Before sitting on the seat, raise
the head restraint to the extended
position. Otherwise, in an acci-
dent, serious injury or death
could result.
–CONTINUED–
Seat, seatbelt and SRS airbags/Seatbelts
1-17
1
Page 56 of 474
(57,1)
北米Model "A1320BE-C" EDITED: 2017/ 10/ 10
.Automatic Locking Retractor/Emer-
gency Locking Retractor (ALR/ELR) seat-
belts
.Lower anchorages (bars)
.Upper anchorages (tether anchorages)
Some types of child restraints might not be
able to be secured firmly due to projection
of the seat cushion.
In this seating position, you should use
only a child restraint system that has a
bottom base that fits snugly against the
contours of the seat cushion and can be
securely retained using the seatbelt.
C: Rear seat, center seating position
The ALR/ELR seatbelt and an upper
anchorage (tether anchorage) are pro-
vided in this position.
Some types of child restraints might not be
able to be secured firmly due to projection
of the seat cushion.
In this seating position, you should use
only a child restraint system that has a
bottom base that fits snugly against the
contours of the seat cushion and can be
securely retained using the seatbelt.
When you install a child restraint system in
the rear seat’s center seating position,
raise the center head restraint.
Lower anchorages (bars) for window-side
seating positions may be used for a seat inthecenterseatingpositionifachild
restraint system manufacturer’s instruc-
tions permit and specify using anchors as
far apart as those in this vehicle.
If a child restraint system is not correctly
fixed in place (for example, if a child
restraint system can be moved more than
1 inch (2.5 cm) from side to side), you
should install the child restraint system in a
rear seat, window-side seating position.
WARNING
.Even with advanced airbags, chil-
dren can be seriously injured by
the airbag. Place children in the
rear seat properly restrained at
all times. The SRS airbag deploys
with considerable speed and
force and can injure or even kill
children, especially if they are not
restrained or improperly re-
strained. Because children are
lighter and weaker than adults,
their risk of being injured from
deployment is greater.
For that reason, be sure to secure
ALL types of child restraint de-
vices (including forward facing
child seats) in the REAR seats at
all times. You should choose a
restraint device which is appro-priate for the child’s age, height
and weight. According to acci-
dent statistics, children are safer
when properly restrained in the
rear seating positions than in the
front seating positions.
.Do not use lower anchorages
(bars) for a seat in the center
seating position unless a child
restraint system manufacturer’s
instructions permit and specify
using anchors spaced as far
apart as those in this vehicle.
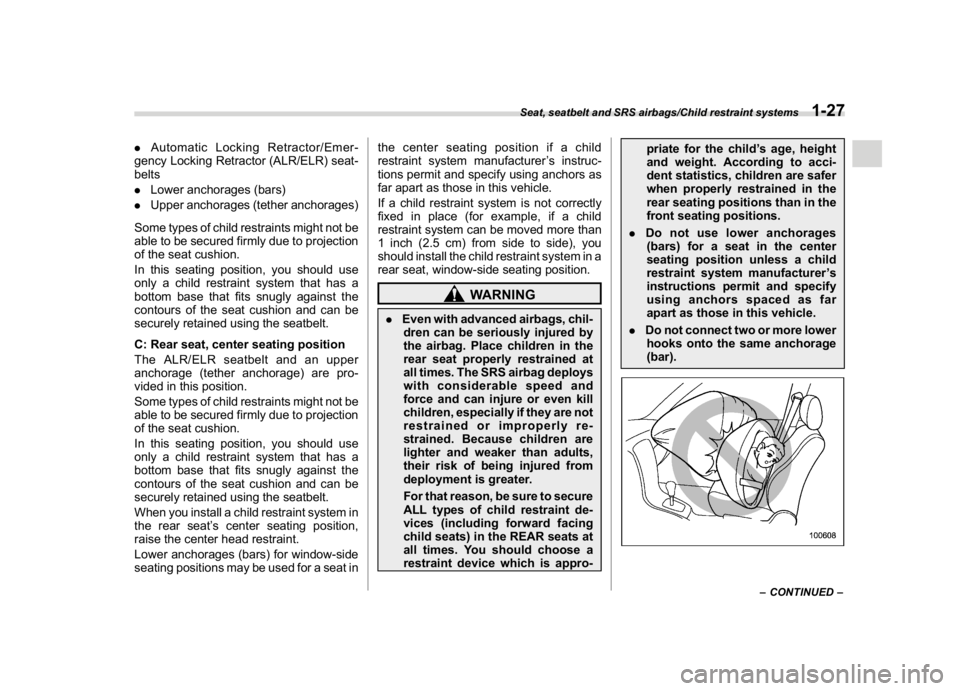
.Do not connect two or more lower
hooks onto the same anchorage
(bar).
–CONTINUED–
Seat, seatbelt and SRS airbags/Child restraint systems
1-27
1
Page 71 of 474
(72,1)
北米Model "A1320BE-C" EDITED: 2017/ 10/ 10
face on or near the SRS side
airbag. They could prevent prop-
er deployment of the SRS side
airbag, reducing protection avail-
able to the front seat’s occupant.
.Do not install a seat cover unless
it is a genuine SUBARU seat
cover exclusively designed for
use with the SRS airbag. Even
when using a genuine SUBARU
seat cover, the SRS side airbag
system may not function nor-
mally if the seat cover is not
installed correctly.
&General precautions regard-
ing SRS airbag system and
children
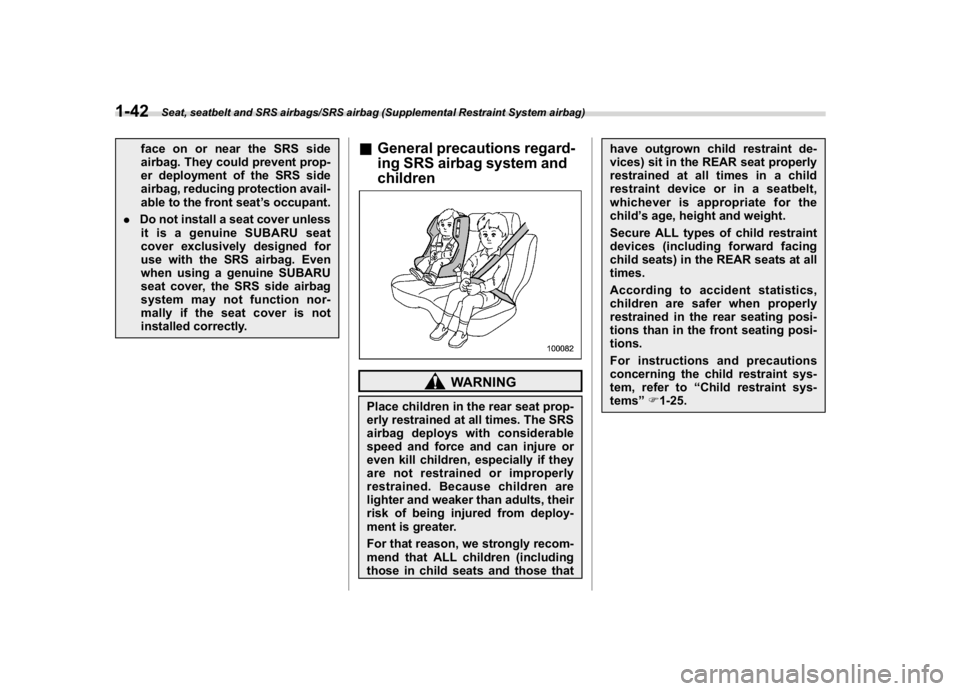
WARNING
Place children in the rear seat prop-
erly restrained at all times. The SRS
airbag deploys with considerable
speed and force and can injure or
even kill children, especially if they
are not restrained or improperly
restrained. Because children are
lighter and weaker than adults, their
risk of being injured from deploy-
ment is greater.
For that reason, we strongly recom-
mend that ALL children (including
those in child seats and those thathave outgrown child restraint de-
vices) sit in the REAR seat properly
restrained at all times in a child
restraint device or in a seatbelt,
whichever is appropriate for the
child’s age, height and weight.
Secure ALL types of child restraint
devices (including forward facing
child seats) in the REAR seats at all
times.
According to accident statistics,
children are safer when properly
restrained in the rear seating posi-
tions than in the front seating posi-
tions.
For instructions and precautions
concerning the child restraint sys-
tem, refer to“Child restraint sys-
tems”F1-25.
Seat, seatbelt and SRS airbags/SRS airbag (Supplemental Restraint System airbag)
1-42
Page 79 of 474
(80,1)
北米Model "A1320BE-C" EDITED: 2017/ 10/ 10
case, contact your SUBARU dealer
immediately.
CAUTION
Electrical devices, such as cell
phones, laptops, portable music
players, or electronic games, espe-
cially when connected to the acces-
sory power outlet and placed on the
front passenger’s seat or used by
the person sitting in the front pas-
senger’s seat, may affect the opera-
tion of the occupant detection sys-
tem. If either of the following situa-
tions occurs when using an electro-
nic device in the vehicle, at first try
to relocate that device to avoid it
creating any interference.
.The SRS airbag system warning
light illuminates.
.The front passenger’s frontal air-
bag ON and OFF indicators oper-
ate erratically.
If the device continues to cause
interference, the use of that device
in the vehicle should be discontin-
ued.
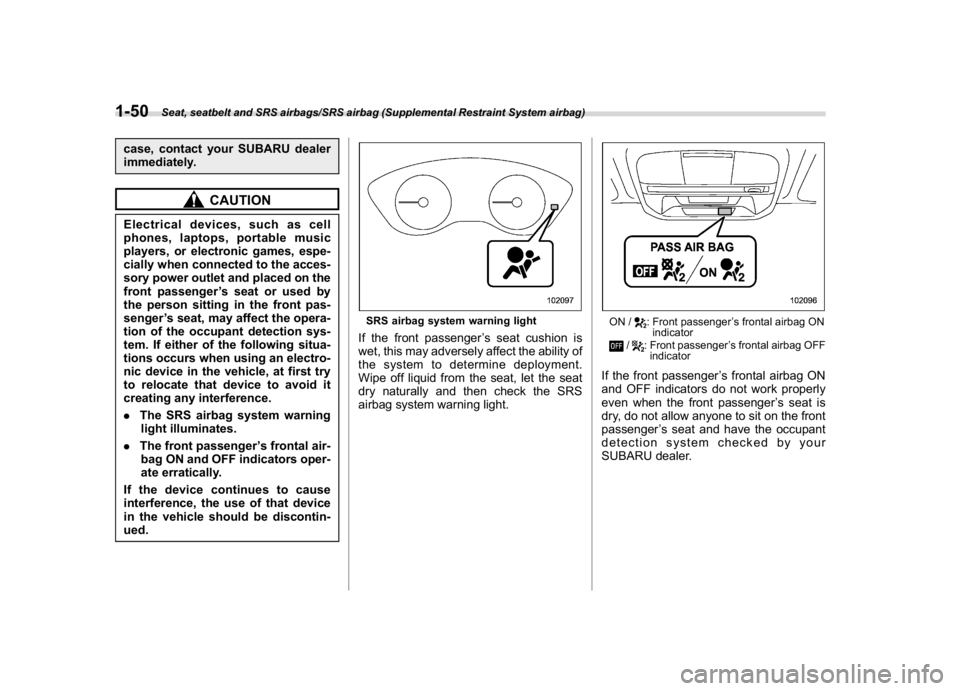
SRS airbag system warning lightIf the front passenger’s seat cushion is
wet, this may adversely affect the ability of
the system to determine deployment.
Wipe off liquid from the seat, let the seat
dry naturally and then check the SRS
airbag system warning light.
ON /
: Front passenger’s frontal airbag ON
indicator
/
: Front passenger’s frontal airbag OFF
indicator
If the front passenger’s frontal airbag ON
and OFF indicators do not work properly
even when the front passenger’s seat is
dry, do not allow anyone to sit on the front
passenger’s seat and have the occupant
detection system checked by your
SUBARU dealer.
Seat, seatbelt and SRS airbags/SRS airbag (Supplemental Restraint System airbag)
1-50
Page 81 of 474
(82,1)
北米Model "A1320BE-C" EDITED: 2017/ 10/ 10
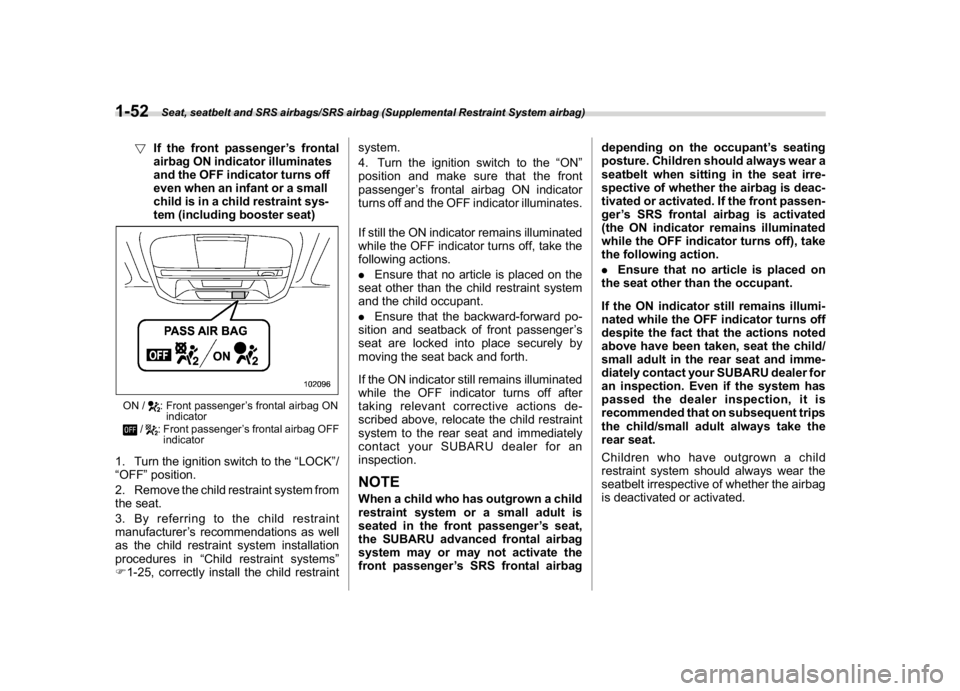
!If the front passenger’s frontal
airbag ON indicator illuminates
and the OFF indicator turns off
even when an infant or a small
child is in a child restraint sys-
tem (including booster seat)ON /
: Front passenger’s frontal airbag ON
indicator
/
: Front passenger’s frontal airbag OFF
indicator
1. Turn the ignition switch to the“LOCK”/
“OFF”position.
2. Remove the child restraint system from
the seat.
3. By referring to the child restraint
manufacturer’s recommendations as well
as the child restraint system installation
procedures in“Child restraint systems”
F1-25, correctly install the child restraintsystem.
4. Turn the ignition switch to the“ON”
position and make sure that the front
passenger’s frontal airbag ON indicator
turns off and the OFF indicator illuminates.
If still the ON indicator remains illuminated
while the OFF indicator turns off, take the
following actions.
.Ensure that no article is placed on the
seat other than the child restraint system
and the child occupant.
.Ensure that the backward-forward po-
sition and seatback of front passenger’s
seat are locked into place securely by
moving the seat back and forth.
If the ON indicator still remains illuminated
while the OFF indicator turns off after
taking relevant corrective actions de-
scribed above, relocate the child restraint
system to the rear seat and immediately
contact your SUBARU dealer for an
inspection.
NOTEWhen a child who has outgrown a child
restraint system or a small adult is
seated in the front passenger’s seat,
the SUBARU advanced frontal airbag
system may or may not activate the
front passenger’s SRS frontal airbagdepending on the occupant’s seating
posture. Children should always wear a
seatbelt when sitting in the seat irre-
spective of whether the airbag is deac-
tivated or activated. If the front passen-
ger’s SRS frontal airbag is activated
(the ON indicator remains illuminated
while the OFF indicator turns off), take
the following action.
.Ensure that no article is placed on
the seat other than the occupant.
If the ON indicator still remains illumi-
nated while the OFF indicator turns off
despite the fact that the actions noted
above have been taken, seat the child/
small adult in the rear seat and imme-
diately contact your SUBARU dealer for
an inspection. Even if the system has
passed the dealer inspection, it is
recommended that on subsequent trips
the child/small adult always take the
rear seat.
Children who have outgrown a child
restraint system should always wear the
seatbelt irrespective of whether the airbag
is deactivated or activated.
Seat, seatbelt and SRS airbags/SRS airbag (Supplemental Restraint System airbag)
1-52
Page 118 of 474
(121,1)
北米Model "A1320BE-C" EDITED: 2017/ 10/ 10
and the rear gate) is extremely short,
the system may not respond.&Unlocking the rear gatePress the rear gate unlock button to unlock
the rear gate.
An electronic chirp will sound twice and the
hazard warning flashers will flash twice.&Vehicle finder functionUse this function to find your vehicle
parked among many vehicles in a large
parking lot. Provided you are within 30 feet
(10 meters) of the vehicle, pressing the
lock/arm button three times in a 5-second
period will cause your vehicle’s horn to
sound once and its hazard warning
flashers to flash three times.NOTEIf the interval between presses is too
short when you press the lock/arm
button three times, the system may
not respond to the signals from the
remote transmitter.
&Sounding a panic alarmTo activate the alarm, press the“PANIC”
button once.
The horn will sound and the hazard
warning flashers will flash.
To deactivate the panic alarm, press any
button on the remote transmitter. Unless a
button on the remote transmitter is
pressed, the alarm will be deactivated
after approximately 30 seconds.&Setting audible signal opera-
tion (models without“keyless
access with push-button start
system”)Using an electronic chirp, the system will
give you an audible signal when the doors
lock and unlock. If desired, you may turn
the audible signal off.
Perform the following steps to deactivate
the audible signal. You can also use the
same steps to restore the function.
1. Sit in the driver’s seat and shut all
doors and the rear gate.
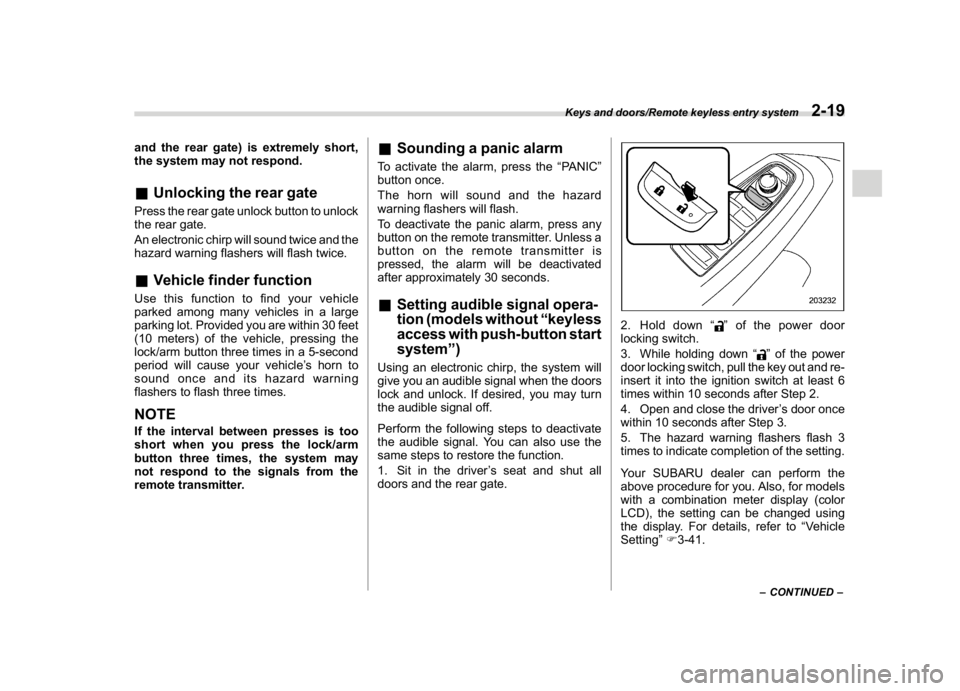
2. Hold down“
”of the power door
locking switch.
3. While holding down“
”of the power
door locking switch, pull the key out and re-
insert it into the ignition switch at least 6
times within 10 seconds after Step 2.
4. Open and close the driver’s door once
within 10 seconds after Step 3.
5. The hazard warning flashers flash 3
times to indicate completion of the setting.
Your SUBARU dealer can perform the
above procedure for you. Also, for models
with a combination meter display (color
LCD), the setting can be changed using
the display. For details, refer to“Vehicle
Setting”F3-41.–CONTINUED–
Keys and doors/Remote keyless entry system
2-19
2
Page 121 of 474
(124,1)
北米Model "A1320BE-C" EDITED: 2017/ 10/ 10
direction that the grooved side is facing
and insert it again.
!How to lock the vehicle without
using the key
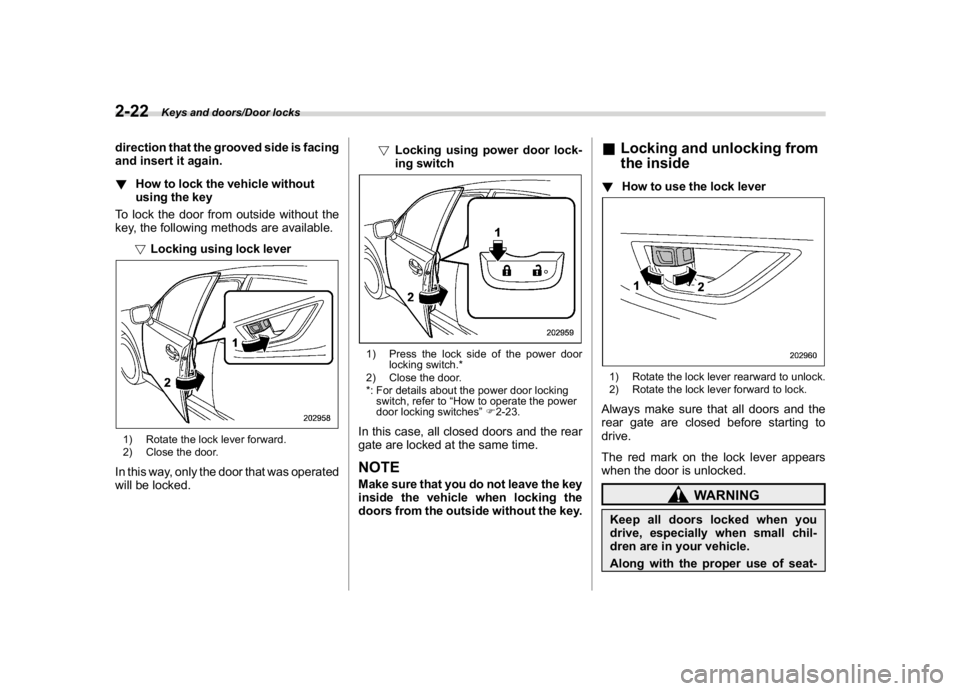
To lock the door from outside without the
key, the following methods are available.
!Locking using lock lever1) Rotate the lock lever forward.
2) Close the door.In this way, only the door that was operated
will be locked.!Locking using power door lock-
ing switch
1) Press the lock side of the power door
locking switch.*
2) Close the door.
*: For details about the power door locking
switch, refer to“How to operate the power
door locking switches”F2-23.In this case, all closed doors and the rear
gate are locked at the same time.NOTEMake sure that you do not leave the key
inside the vehicle when locking the
doors from the outside without the key.
&Locking and unlocking from
the inside!How to use the lock lever1) Rotate the lock lever rearward to unlock.
2) Rotate the lock lever forward to lock.Always make sure that all doors and the
rear gate are closed before starting to
drive.
The red mark on the lock lever appears
when the door is unlocked.
WARNING
Keep all doors locked when you
drive, especially when small chil-
dren are in your vehicle.
Along with the proper use of seat-
Keys and doors/Door locks
2-22
Page 135 of 474
(140,1)
北米Model "A1320BE-C" EDITED: 2017/ 10/ 10
Cruise control indicator light (if equipped).............3-31
Cruise control set indicator light (if equipped).......3-31
Automatic headlight beam leveler warning light
(models with LED headlights)..............................3-31
LED headlight warning light (models with LED
headlights)..........................................................3-31
Steering Responsive Headlight warning light/
Steering Responsive Headlight OFF indicator
light (if equipped)................................................3-31
Front fog light indicator light (if equipped) ............3-31
Headlight indicator light (if equipped)....................3-31
Steering responsive fog lights warning indicator/
Steering responsive fog lights OFF indicator
(if equipped).......................................................3-31
X-mode indicator (if equipped)..............................3-32
Hill descent control indicator (if equipped) ............3-32
BSD/RCTA warning indicator (if equipped).............3-32
BSD/RCTA OFF indicator (if equipped)..................3-32
RAB warning indicator (if equipped)......................3-32
RAB OFF indicator light (if equipped)....................3-32
Icy road surface warning indicator (if equipped)....3-32
Combination meter display (color LCD)
(if equipped).......................................................3-33
Basic operation.....................................................3-34
Welcome screen and Good-bye screen..................3-34
Warning screen.....................................................3-35
Telltale screen.......................................................3-35
Basic screens.......................................................3-36
Menu screens.......................................................3-38
Multi-function display (black andwhite).............3-42
Driving information display...................................3-43
Outside temperature indicator...............................3-46X-mode indicator (if equipped)..............................3-47
Clock....................................................................3-47
Multi-function display (color LCD)
(if equipped).......................................................3-47
Features...............................................................3-48
Welcome screen...................................................3-48
Self-check screen.................................................3-48
Interruption screen...............................................3-49
Basic operation....................................................3-49
Basic screens.......................................................3-50
Setting screen......................................................3-57
How to get the source code using the open
source...............................................................3-62
Clock......................................................................3-63
Setting the clock manually....................................3-63
Setting the clock automatically.............................3-66
Regulatory information.........................................3-66
Light control switch.............................................3-66
Precautions and tips.............................................3-66
Headlights............................................................3-67
High/low beam change (dimmer) ...........................3-68
Headlight flasher..................................................3-69
High beam assist function (if equipped)................3-69
Daytime running light system...............................3-72
Steering Responsive Headlight (SRH)
(if equipped).......................................................3-72
Headlight beam leveler
(models with LEDheadlights)..........................3-73
Fog light switch (ifequipped)..............................3-74
Steering responsive fog lights system
(if equipped)......................................................3-74
Instruments and controls