Page 9 of 226
1.3
ELECTRIC VEHICLE: introduction (2/5)
Electric vehicles have special features,
but operate in a similar manner to con-
ventional vehicles.
The main difference in electric vehicles
is the exclusive use of electric energy
instead of fuel, as used in convention
vehicles.
We therefore recommend that you read
these instructions describing your elec-
tric vehicle carefully.
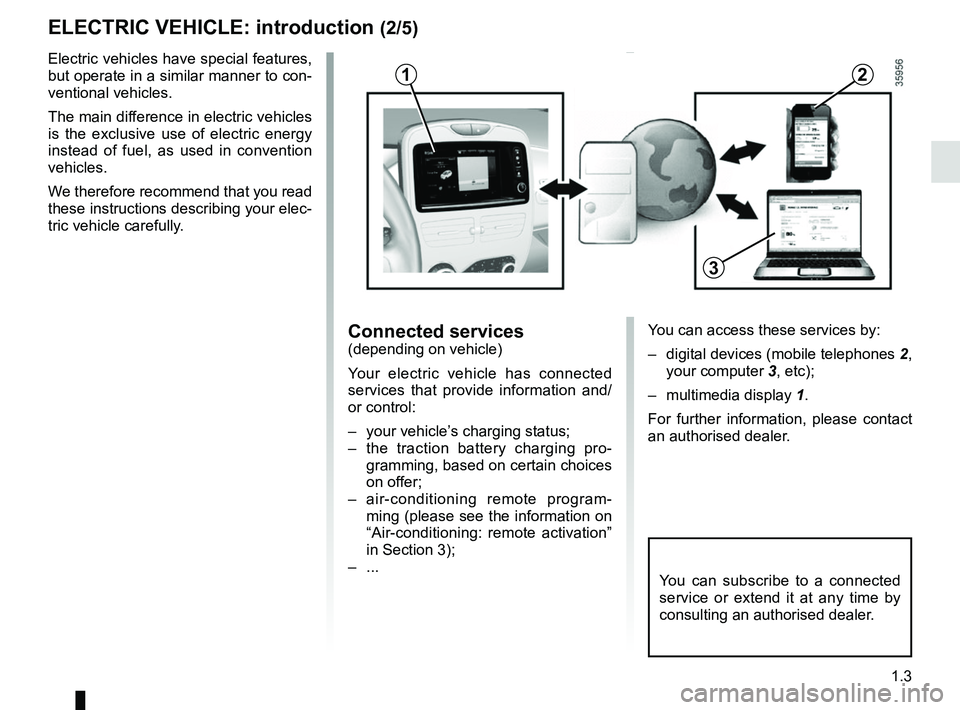
Connected services(depending on vehicle)
Your electric vehicle has connected
services that provide information and/
or control:
– your vehicle’s charging status;
– the traction battery charging pro-gramming, based on certain choices
on offer;
– air-conditioning remote program- ming (please see the information on
“Air-conditioning: remote activation”
in Section 3);
– ...
You can subscribe to a connected
service or extend it at any time by
consulting an authorised dealer.
12
3
You can access these services by:
– digital devices (mobile telephones 2,
your computer 3, etc);
– multimedia display 1.
For further information, please contact
an authorised dealer.
Page 22 of 226
1.16
This function sets the start time for
charging.
From the multimedia
display 1
(depending on the vehicle)
Programming the function start time
Select “Menu”, “Vehicle”, “Electrical ve-
hicle”, “Charge scheduler”.
ELECTRIC VEHICLE: charging programming (1/2)
You can choose:
– an instant charge start;
– a daily schedule;
– a weekly schedule.
Confirm your choice by selecting
“Done”.
1
Daily
On the menu A, press “Change ” and
set the charging start and end times,
then press “Select ” to confirm.
Weekly
On the menu B , press “Change” and
set the charging start and end times for
each weekday, then press “Select ” to
confirm.
NB: When the programming is con-
firmed, the warning light
comes
on on the instrument panel.
1
Always
charging Start at Calendar
Change
Select
Change
Select
Done
Charge schedulerAB
Page 65 of 226
1.59
DRIVING POSITION: LEFT-HAND DRIVE (2/2)
The equipment fitted, described below, DEPENDS ON THE VERSION AND COUNTRY.
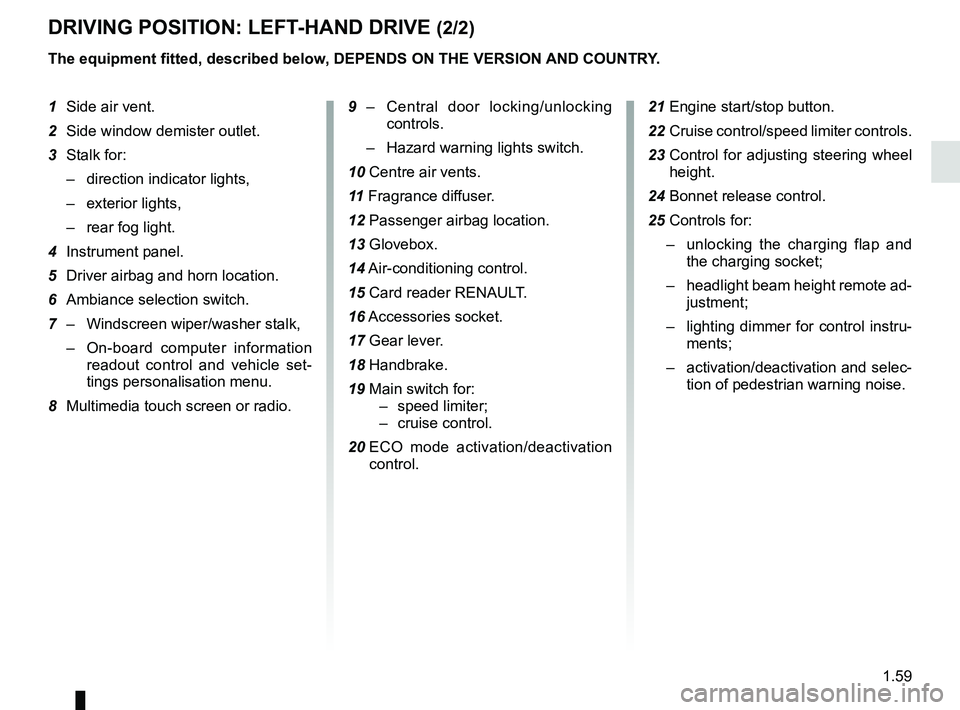
1 Side air vent.
2 Side window demister outlet.
3 Stalk for:
– direction indicator lights,
– exterior lights,
– rear fog light.
4 Instrument panel.
5 Driver airbag and horn location.
6 Ambiance selection switch.
7 – Windscreen wiper/washer stalk,
– On-board computer information
readout control and vehicle set-
tings personalisation menu.
8 Multimedia touch screen or radio. 9 –
Central door locking/unlocking
controls.
– Hazard warning lights switch.
10 Centre air vents.
11 Fragrance diffuser.
12 Passenger airbag location.
13 Glovebox.
14 Air-conditioning control.
15 Card reader RENAULT.
16 Accessories socket.
17 Gear lever.
18 Handbrake.
19 Main switch for: – speed limiter;
– cruise control.
20 ECO mode activation/deactivation
control. 21 Engine start/stop button.
22 Cruise control/speed limiter controls.
23 Control for adjusting steering wheel
height.
24 Bonnet release control.
25 Controls for: – unlocking the charging flap and
the charging socket;
– headlight beam height remote ad-
justment;
– lighting dimmer for control instru-
ments;
– activation/deactivation and selec-
tion of pedestrian warning noise.
Page 67 of 226
1.61
DRIVING POSITION: RIGHT-HAND DRIVE (2/2)
The equipment fitted, described below, DEPENDS ON THE VERSION AND COUNTRY.
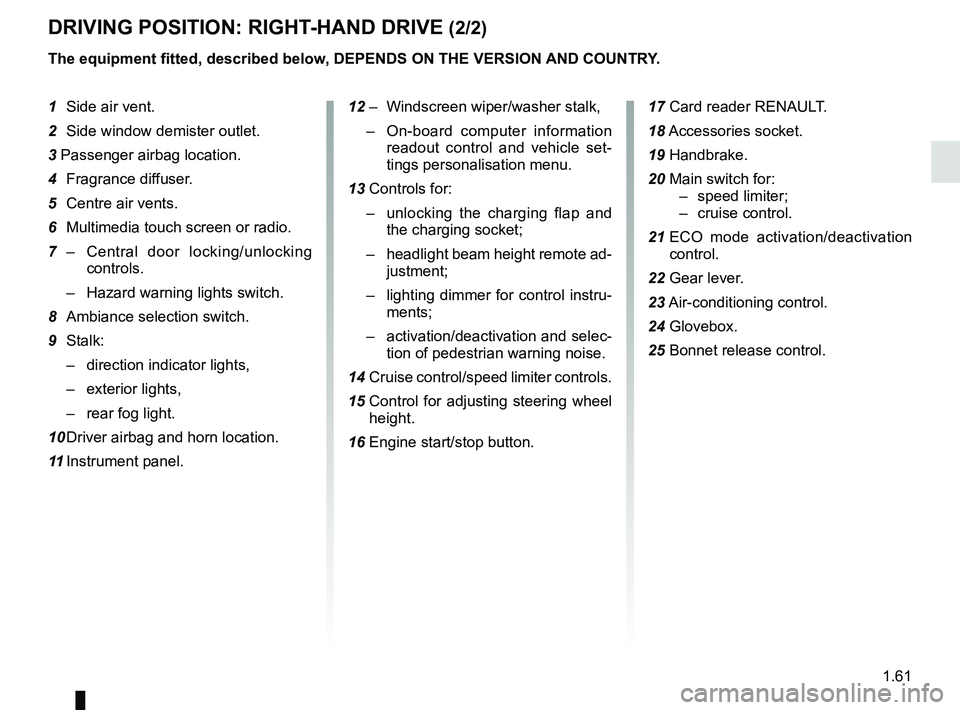
1 Side air vent.
2 Side window demister outlet.
3 Passenger airbag location.
4 Fragrance diffuser.
5 Centre air vents.
6 Multimedia touch screen or radio.
7 – Central door locking/unlocking
controls.
– Hazard warning lights switch.
8 Ambiance selection switch.
9 Stalk: – direction indicator lights,
– exterior lights,
– rear fog light.
10 Driver airbag and horn location.
11 Instrument panel. 12 – Windscreen wiper/washer stalk,
– On-board computer information
readout control and vehicle set-
tings personalisation menu.
13 Controls for: – unlocking the charging flap and
the charging socket;
– headlight beam height remote ad-
justment;
– lighting dimmer for control instru-
ments;
– activation/deactivation and selec-
tion of pedestrian warning noise.
14 Cruise control/speed limiter controls.
15 Control for adjusting steering wheel
height.
16 Engine start/stop button. 17 Card reader RENAULT.
18
Accessories socket.
19 Handbrake.
20 Main switch for: – speed limiter;
– cruise control.
21 ECO mode activation/deactivation
control.
22 Gear lever.
23 Air-conditioning control.
24 Glovebox.
25 Bonnet release control.
Page 71 of 226
1.65
DISPLAYS AND INDICATORS (1/2)
You may customise your instrument
panel A with content and colours of
your choice.
Press the switch 1 repeatedly to obtain
the desired display.
Charge meter 2Please refer to the information on the
“Charge meter” in Section 2.
The presence and operation of the display and indicators DEPENDS ON THE \
LEVEL OF EQUIPMENT AND THE COUNTRY.
Message indicating vehicle
ready for driving 3
The message READY comes on when
the engine is started.
Speedometer 4Vehicle speed is limited to approxi-
mately 80 mph (135 km/h).
Indicator of charging
programming and/or air
conditioning 5
A
124635
On-board computer display 6Please refer to the information on the
“Trip computer: general information” in
Section 1.
Instrument panel in milesIt is possible to switch to km/h.
On the multimedia display, select
“Menu”, “System ”, “System settings ”,
“Set units ” and confirm. To return to the
previous mode, repeat the same opera-
tion.
Page 101 of 226
2.7
DRIVING ADVICE, ECO-DRIVING (1/3)
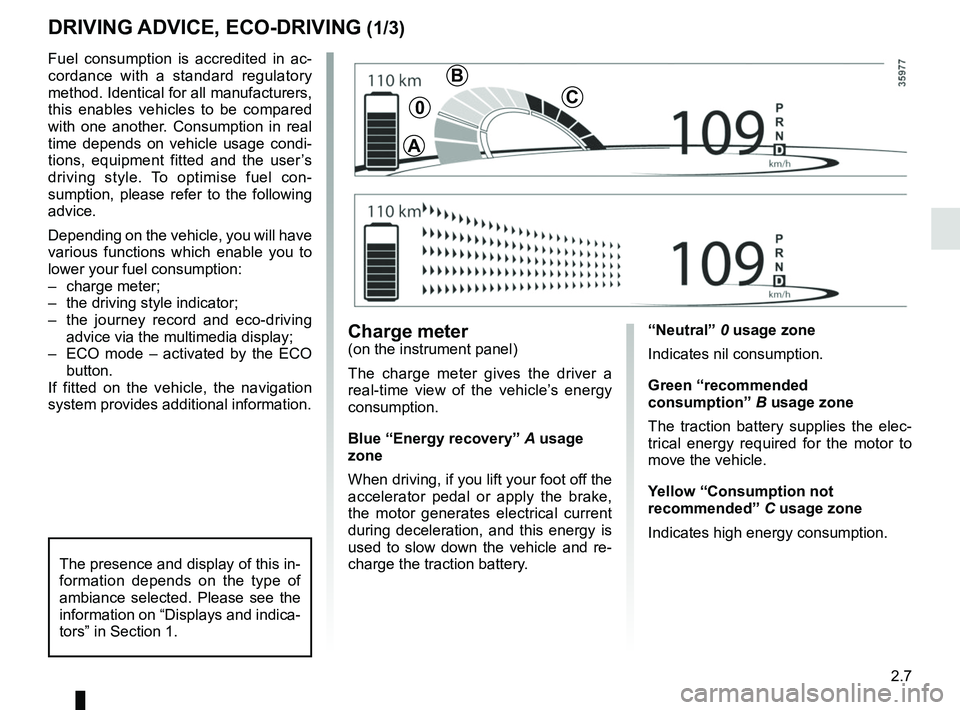
“Neutral” 0 usage zone
Indicates nil consumption.
Green “recommended
consumption” B usage zone
The traction battery supplies the elec-
trical energy required for the motor to
move the vehicle.
Yellow “Consumption not
recommended” C usage zone
Indicates high energy consumption.Charge meter(on the instrument panel)
The charge meter gives the driver a
real-time view of the vehicle’s energy
consumption.
Blue “Energy recovery” A usage
zone
When driving, if you lift your foot off the
accelerator pedal or apply the brake,
the motor generates electrical current
during deceleration, and this energy is
used to slow down the vehicle and re-
charge the traction battery.
Fuel consumption is accredited in ac-
cordance with a standard regulatory
method. Identical for all manufacturers,
this enables vehicles to be compared
with one another. Consumption in real
time depends on vehicle usage condi-
tions, equipment fitted and the user’s
driving style. To optimise fuel con-
sumption, please refer to the following
advice.
Depending on the vehicle, you will have
various functions which enable you to
lower your fuel consumption:
– charge meter;
– the driving style indicator;
– the journey record and eco-driving
advice via the multimedia display;
– ECO mode – activated by the ECO button.
If fitted on the vehicle, the navigation
system provides additional information.
The presence and display of this in-
formation depends on the type of
ambiance selected. Please see the
information on “Displays and indica-
tors” in Section 1.
A
B
C0
Page 102 of 226
2.8
Journey log (Driving ECO²
Score)
When the engine is switched off,
“Journey record” shows on the multi-
media display 2, for equipped vehicles,
letting you see information about your
last journey.
This indicates:
– average energy consumption;
– number of miles/kilometres travelled.
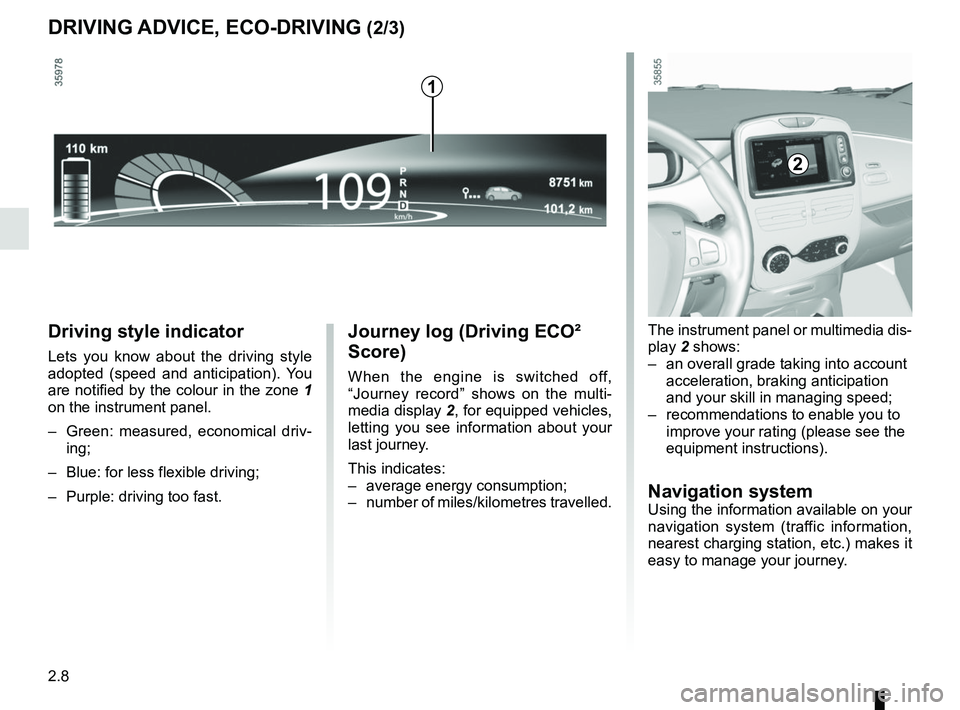
Driving style indicator
Lets you know about the driving style
adopted (speed and anticipation). You
are notified by the colour in the zone 1
on the instrument panel.
– Green: measured, economical driv- ing;
– Blue: for less flexible driving;
– Purple: driving too fast.
DRIVING ADVICE, ECO-DRIVING (2/3)
The instrument panel or multimedia dis-
play 2 shows:
– an overall grade taking into account acceleration, braking anticipation
and your skill in managing speed;
– recommendations to enable you to improve your rating (please see the
equipment instructions).
Navigation systemUsing the information available on your
navigation system (traffic information,
nearest charging station, etc.) makes it
easy to manage your journey.
2
1
Page 123 of 226
2.29
PARKING DISTANCE CONTROL (2/2)
In the event of an impact to
the underside of the vehicle
(e.g.: striking a post, raised
kerb or other street furni-
ture), this may result in damage to
the vehicle (e.g.: twisted axle), the
electrical circuit or the traction bat-
tery.
To avoid any risk of accident, have
your vehicle checked by an ap-
proved dealer.
Operating faults
Depending on the vehicle, when the
system detects an operating fault, the
message “check parking distance con-
trol” appears on the instrument panel,
accompanied by the warning light
© and a beep lasting approxi-
mately 5 seconds. Please contact an
authorised dealer.
Special featuresMake sure that the ultrasonic sensors
are not obscured (by dirt, mud, snow
etc.).
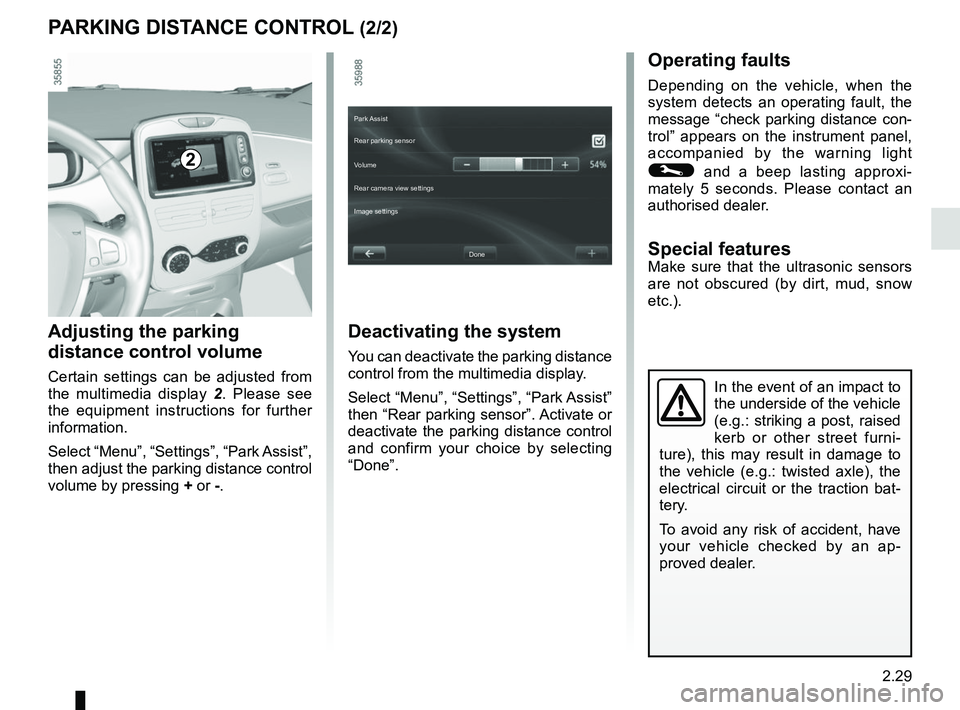
Adjusting the parking
distance control volume
Certain settings can be adjusted from
the multimedia display 2. Please see
the equipment instructions for further
information.
Select “Menu”, “Settings”, “Park Assist”,
then adjust the parking distance control
volume by pressing + or -.
2
Deactivating the system
You can deactivate the parking distance
control from the multimedia display.
Select “Menu”, “Settings”, “Park Assist”
then “Rear parking sensor”. Activate or
deactivate the parking distance control
and confirm your choice by selecting
“Done”.
Done
Park Assist
Rear parking sensor
Volume
Image settings Rear camera view settings