2018 RENAULT SCENIC rear view
[x] Cancel search: rear viewPage 110 of 364

1.104
WINDSCREEN WASH, WIPE (2/6)
1
F
2
Vehicle fitted with front
windscreen wiper rain sensor
The rain sensor is located on the winds-
creen, in front of the interior rear-view
mirror.
A single sweep
A short push will trigger one sweep
of the wipers.
B stop
C automatic wiper function
When this position is selected, the
system detects water on the wind-
screen and triggers the wipers at a
suitable wiping speed. It is possi-
ble to change the triggering thresh-
old and the time sweeps by turning
ring 2:
– F : minimum sensitivity
– G : maximum sensitivity
The higher the sensitivity, the quic-
ker the wipers will react and the
faster the wipe. When activating automatic wiping or
when increasing sensitivity, one sweep
of the blades is performed.
Note:
–
the rain sensor is only intended as a
driving aid. In the event of reduced
visibility, the driver should manually
activate the wipers. In foggy weather
or during snowfalls, wiping is not au-
tomatically triggered and remains
under the driver’s control;
– in the event of temperatures below
zero, automatic wiping is not acti-
vated when the vehicle is started. It
is automatically activated as soon as
the vehicle exceeds a certain speed
(approximately 5 mph (8 km/h));
– do not activate automatic wiping in
dry weather;
– fully de-ice the windscreen before
activating automatic wiping.
G
1
A
B
C
D
E
Page 112 of 364

1.106
Before any action involving
the windscreen (washing
the vehicle, de-icing,
cleaning the windscreen,
etc.) return stalk 1 to position B
(stop).
Risk of injury and/or damage.
In the event of obstacles on the
windscreen (dirt, snow, ice, etc.),
clean the windscreen (including the
central area located behind the in-
terior rear view mirror) and the rear
screen before starting the wipers
(risk of motor overheating).
If an object is preventing a blade
from moving, it may stop function-
ing. Remove the obstacle and react-
ivate the wiper using the wiper stalk.
WINDSCREEN WASH, WIPE (4/6)
Note:
Once the wipers have been switched
off, at least 1 minute after locking the
vehicle, it is possible to manually move
the blades. Do not force the blade arms
to move. This may risk damage to the
wiper motor, the arms and the blades.
After your intervention, to reposition the
blades correctly, make sure the blades
are resting on the windscreen, switch
on the ignition and activate the wiper
control.
The blade on the driver’s side must
always be above the passenger blade.
If this is not the case, a quick sweep of
the windscreen wipers should be per-
formed once the vehicle is travelling at
over 4 mph (7 km/h).
Specific front wiper position
(service position)
This position enables the blades to be
lifted to remove them from the winds-
creen.
This can be useful:
– to clean the blades;
– to release the blades from the winds-creen in winter;
– replace the blades (refer to the “Wiper blades: replacement” para-
graph in Section 5).
With the ignition on and the engine off,
lower the windscreen wiper stalk to
position E (fast continuous wipe). The
wiper arms stop in a position away from
the bonnet.
To return the blades to position, make
sure they have been placed on the
windscreen, then move the stalk to po-
sition B (stop) with the ignition on.
Before switching on the ignition,
place the wipers on the windscreen.
Otherwise, there may a risk of damage
to the bonnet or the wipers when they
are switched on.
Page 166 of 364
2.46
ACTIVE EMERGENCY BRAKING (7/7)
Limitation of the system operation
– A vehicle travelling in the opposite direction will not trigger any alert\
or any action on the system operation.
– The radar-camera area on the windscreen should be kept clean and free of\
any modifications in order to ensure the
proper operation of the system.
– The system cannot respond to small vehicles such as motorbikes or bicycl\
es as effectively as to other vehicles.
– The system may not operate properly when the road surface is slippery (\
rain, snow, black ice etc.).
– To ensure correct operation, the system needs to distinguish the complete\
outline of the pedestrian. So the system cannot detect:
– pedestrians in the darkness or in poor lighting conditions;
– partially visible pedestrians:
– pedestrians less than approximately 80 cm tall;
– pedestrians carrying large objects;
– ...
Deactivating the function
You must disable the function if:
– the brake lights are not functioning;
– the area of the radar-camera has been damaged (on the windscreen side o\
r the interior rear-view mirror side);
– the vehicle is being towed (breakdowns);
– the windscreen is cracked or distorted (do not carry out repairs on thi\
s area of the windscreen; have it changed by an Authorised Dealer).
Halting the function
You can halt the active braking function at any time by tapping the accel\
erator pedal or by turning the steering wheel in a avo id-
ance manoeuvre.
In the event of the system behaving abnormally, deactivate it and consult an authorised dealer.
Page 174 of 364
2.54
This function is an additional driving aid. This function is not under any circumstances intended to replace the due\
care
and attention of the driver, who should at all times be in control of the vehicle.
System servicing/repairs
– In the event of an impact, the camera alignment may be changed, and its \
operation may consequently be affected. Deactivate the function and consult an authorised dealer.
– Any work in the area where the camera is located (repairs, replacements\
, windscreen modifications etc.) must be carried out by a qualified professional.
Only an authorised dealer is qualified to service the system.
In the event of system disturbance
Some conditions can disturb or damage the operation of the system, such \
as:
– windscreen obscured (by dirt, ice, snow, condensation etc.);
– a complex environment (tunnel etc.);
– poor weather conditions (snow, hail, black ice etc.);
– poor visibility (night, fog etc.);
– road markings which are worn, lacking in contrast or very widely spaced \
from one another (lines partially erased etc);
– being dazzled (glaring sun, lights of vehicles travelling in the opposi\
te direction etc.);
– the road is narrow, winding or undulating (tight bends etc.);
– closely following a vehicle travelling in the same lane.
In this case, the “Lane Keeping Assist” may react incorrectly or not at all.
Risk of unwanted, incorrect correction or no correction of trajectory.
Deactivating the function
You must disable the function if:
– the area of the camera has been damaged (on the windscreen side or the \
interior rear-view mirror side);
– the road is slippery (snow, black ice, aquaplaning, gravel etc.) ;
– poor visibility (night, fog etc.);
– the windscreen is cracked or distorted (do not carry out windscreen rep\
airs in this area; have it changed by an Authorised Dealer);
– the vehicle is towing a trailer or a caravan;
– the vehicle is entering an area with several surface markings (an area \
with road works etc.).
LANE KEEPING ASSIST (4/4)
Page 184 of 364
2.64
OVERSPEED ALERT (1/3)
The overspeed alert with signage panel
recognition notifies the driver that they
are exceeding the speed limit for the
section of road on which they are cur-
rently travelling.For vehicles equipped with a navigation
system and if the vehicle is travelling in
a country where the speed units differ
from those of the vehicle, the system
displays the speed limit sign in the unit
of the country, alongside the speed limit
converted to the unit used by the vehi-
cle’s instrument panel.
For countries where the speed limit is
reduced during rainy weather on some
types of roads, on vehicles equipped
with a navigation system, the system
can modify the limited speed after a few
seconds of wiping the windscreen.
Special situations
The system does not take into account
exceptional speed limit measures, such
as peak pollution days.
On equipped vehicles, some infor-
mation is given on the head-up dis-
play.
Operating principle
The system detects speed limit signs
on the side of the road and displays the
speed limit.
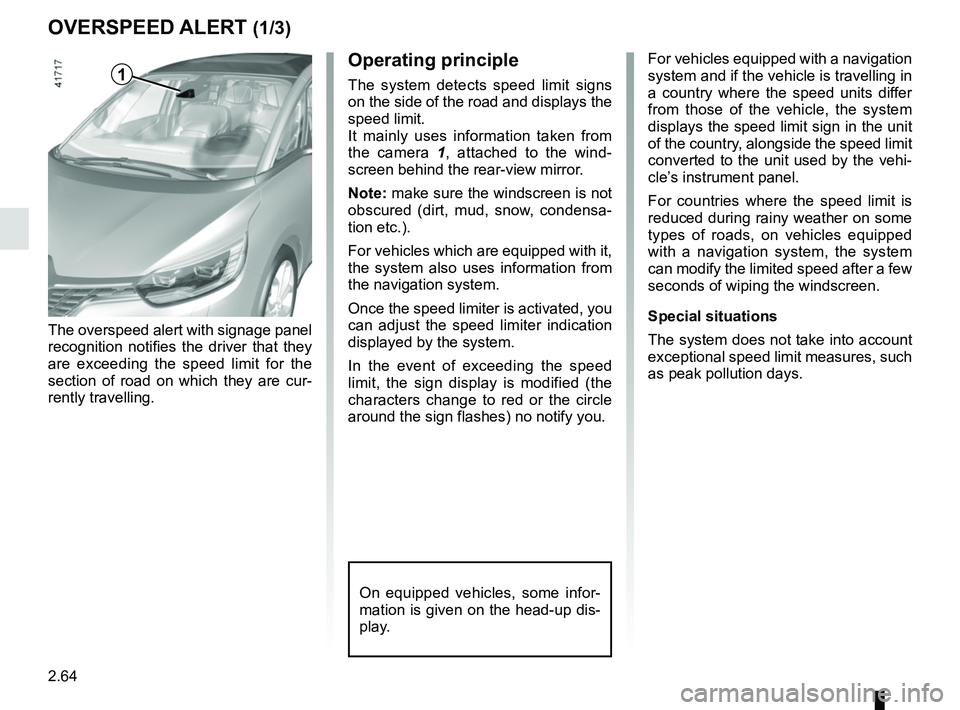
It mainly uses information taken from
the camera 1
, attached to the wind-
screen behind the rear-view mirror.
Note: make sure the windscreen is not
obscured (dirt, mud, snow, condensa-
tion etc.).
For vehicles which are equipped with it,
the system also uses information from
the navigation system.
Once the speed limiter is activated, you
can adjust the speed limiter indication
displayed by the system.
In the event of exceeding the speed
limit, the sign display is modified (the
characters change to red or the circle
around the sign flashes) no notify you.1
Page 200 of 364
2.80
ADAPTIVE CRUISE CONTROL (7/8)
This function is an additional driving aid. This function is not under any circumstances intended to replace the due\
care
and attention of the driver, who should at all times be in control of the vehicle.
The driver should always adapt their speed to the traffic conditions, regardless of the system indications.
The system should under no circumstances be taken to be an obstacle dete\
ctor or an anti-collision system.
System servicing/repairs
– In the event of an impact, the radar-camera alignment may be changed, an\
d its operation may consequently be affected. Deactivate the function and consult an authorised dealer.
– Any work in the area where the radar-camera is located (repairs, replac\
ements, windscreen modifications etc.) must be car- ried out by a qualified professional.
Only an authorised dealer is qualified to service the system.
Deactivating the function
You must disable the function if:
– the brake lights are not functioning;
– the area of the radar-camera has been damaged (on the windscreen side o\
r the interior rear-view mirror side);
– the vehicle is being towed (breakdowns);
– traffic is heavy;
– the vehicle is travelling in a tunnel;
– the vehicle is travelling on a windy road;
– the windscreen is cracked or distorted (do not carry out windscreen rep\
airs in this area; have it changed by an Authorised Dealer);
– the vehicle is travelling on a slippery road or in poor weather conditio\
ns (fog, snow, rain, side winds etc.).
In the event of the system behaving abnormally, deactivate it and consult an authorised dealer.
Page 208 of 364
2.88
This function is an additional
aid. It cannot, therefore,
under any circumstances
replace the vigilance or the
responsibility of the driver.
The driver should always be ready
for sudden incidents while driv-
ing: always ensure that there are
no small, narrow moving obstacles
(such as a child, animal, pushchair,
bicycle, stone, post etc.) in the blind
spot when manoeuvring.
The screen shows a reverse mirror
image.
The frames are a representation
projected on a flat surface. This in-
formation is to not be taken into ac-
count when superimposed on a
vertical object or an object on the
ground.
Objects which appear on the edge
of the screen may be deformed.
In very bright light (snow, vehicle in
sunshine etc.), the camera vision
may be adversely affected.
If the boot is open or poorly closed,
the message “Boot open” appears
and the camera display disappears.
You can also adjust the camera image
settings (brightness, contrast, etc.)
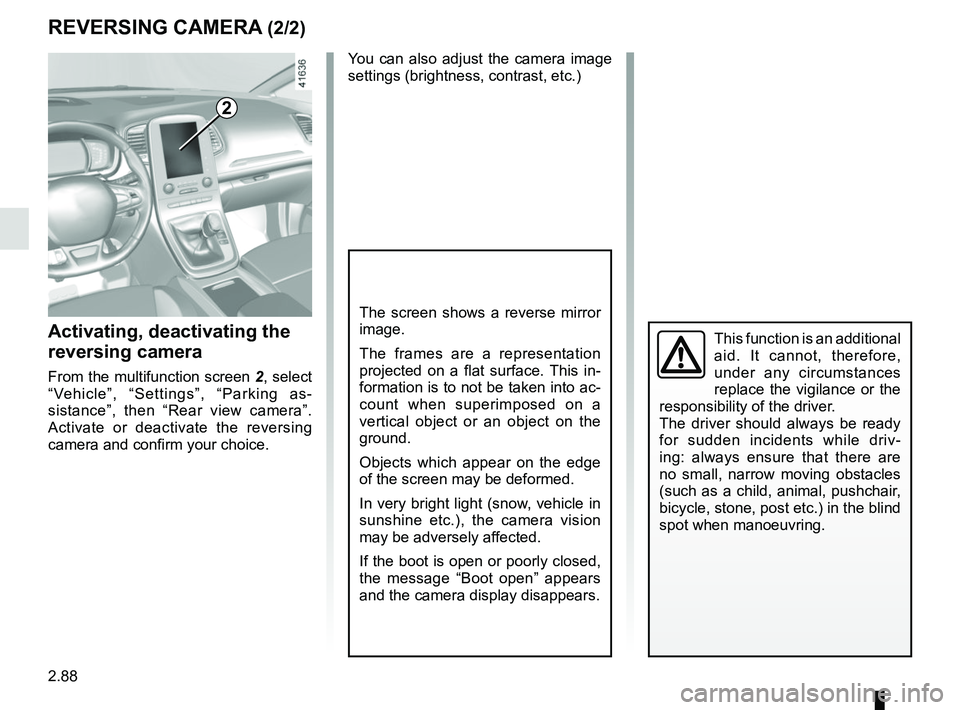
Activating, deactivating the
reversing camera
From the multifunction screen 2, select
“Vehicle”, “Settings”, “Parking as-
sistance”, then “Rear view camera”.
Activate or deactivate the reversing
camera and confirm your choice.
REVERSING CAMERA (2/2)
2
Page 222 of 364
3.6
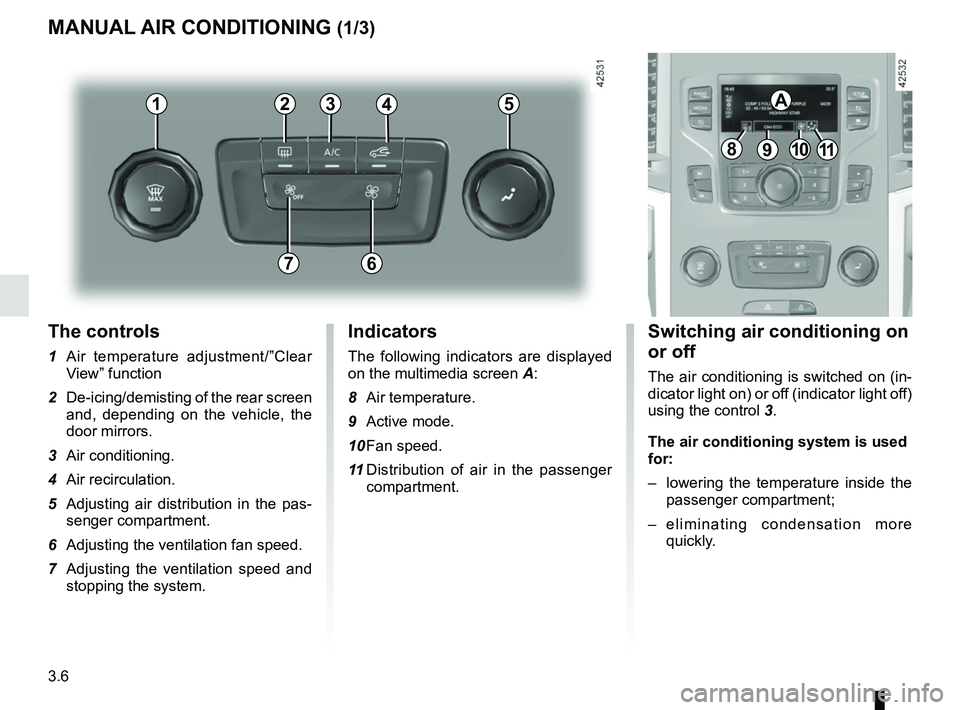
The controls
1 Air temperature adjustment/”Clear View” function
2 De-icing/demisting of the rear screen and, depending on the vehicle, the
door mirrors.
3 Air conditioning.
4 Air recirculation.
5 Adjusting air distribution in the pas- senger compartment.
6 Adjusting the ventilation fan speed.
7 Adjusting the ventilation speed and stopping the system.
MANUAL AIR CONDITIONING (1/3)
Switching air conditioning on
or off
The air conditioning is switched on (in-
dicator light on) or off (indicator light off)
using the control 3.
The air conditioning system is used
for:
– lowering the temperature inside the
passenger compartment;
– eliminating condensation more quickly.
Indicators
The following indicators are displayed
on the multimedia screen A:
8 Air temperature.
9 Active mode.
10 Fan speed.
11 Distribution of air in the passenger
compartment.
21
7
34
891011
A5
6