2018 RENAULT MASTER ignition
[x] Cancel search: ignitionPage 128 of 290
2.12
MAINTENANCE AND ANTIPOLLUTION ADVICE
Your vehicle complies with criteria for
recycling and recovering vehicles at the
end of their service life, which entered
into force in 2015.
Some parts of your vehicle have there-
fore been designed to facilitate future
recycling.
These parts are easy to remove so
that they can be recovered and reproc-
essed by recycling companies.
By virtue of its design, moderate fuel
consumption and initial settings, your
vehicle also conforms to current anti-
pollution regulations. The manufac-
turer is actively striving to reduce pol-
lutant exhaust gas emissions and to
save energy. But the fuel consumption
of your vehicle and the level of pollutant
exhaust gas emissions are also your
responsibility. Ensure that it is main-
tained and used correctly.Maintenance
It is important to remember that failure to
respect antipollution regulations could
lead to legal action being taken against
the vehicle owner. In addition, replacing
engine, fuel supply system and exhaust
components with parts other than those
originally recommended by the manu-
facturer may alter your vehicle so that
it no longer complies with antipollution
regulations.
Have your vehicle adjusted and
checked by an approved Dealer, in ac-
cordance with the instructions given in
your maintenance schedule: they will
have all the equipment necessary for
ensuring that your vehicle is maintained
to its original standard.
Engine adjustments
– Air filter, diesel filter: a choked el-
ement will reduce efficiency. It must
be replaced.
– Idle speed: this does not require ad- justment.
Exhaust gas monitoring
system
The exhaust gas monitoring system will
detect any operating faults in the vehi-
cle’s antipollution system.
If this system malfunctions, toxic sub-
stances may be released into the at-
mosphere or damage may occur.
ÄThis warning light on the in-
strument panel will indicate if
there are any faults in the system:
This lights up when the ignition is
switched on and goes out when the
engine is started.
– If it lights up continuously, consult an approved Dealer as soon as possi-
ble;
– if it flashes, reduce the engine speed until the light stops flashing. Contact
your approved dealer as soon as
possible.
Refer to the information on
«Additive tank» in Section 1.
Page 130 of 290
2.14
GEAR LEVER
Gear lever
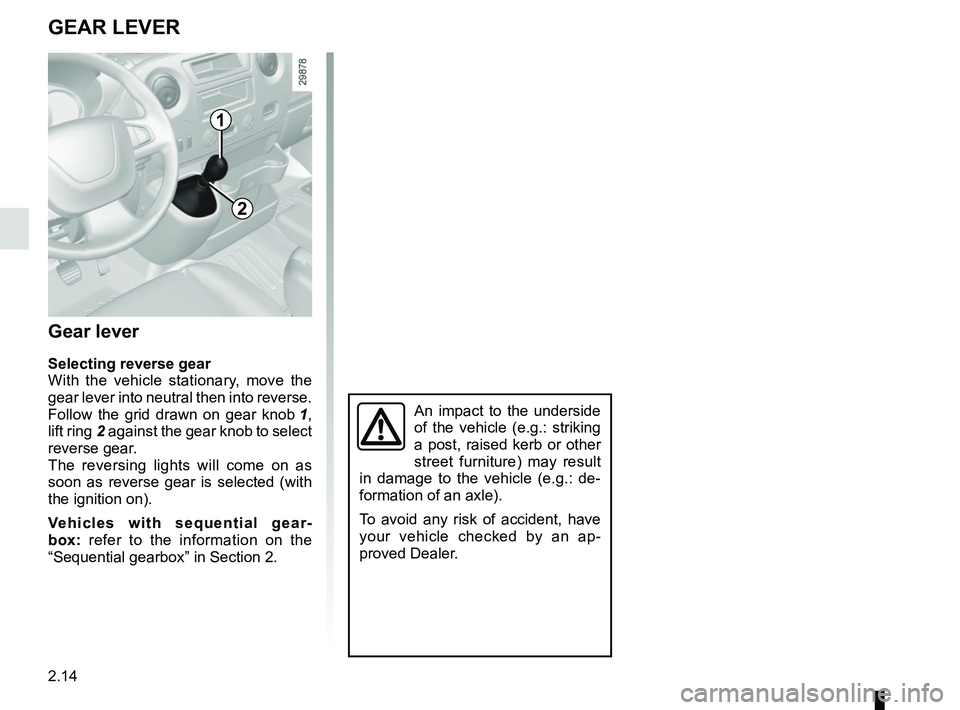
Selecting reverse gear
With the vehicle stationary, move the
gear lever into neutral then into reverse.
Follow the grid drawn on gear knob 1,
lift ring 2 against the gear knob to select
reverse gear.
The reversing lights will come on as
soon as reverse gear is selected (with
the ignition on).
Vehicles with sequential gear-
box: refer to the information on the
“Sequential gearbox” in Section 2.
1
2
An impact to the underside
of the vehicle (e.g.: striking
a post, raised kerb or other
street furniture) may result
in damage to the vehicle (e.g.: de-
formation of an axle).
To avoid any risk of accident, have
your vehicle checked by an ap-
proved Dealer.
Page 135 of 290
2.19
DRIVER CORRECTION DEVICES AND AIDS (4/8)
Pressing and holding one of the but-
tons 3 or 4 again will reactivate the
system. The message “AEBS ACTIVE”
is displayed and the
indicator
light goes out on the instrument panel.
This system is reactivated each time
the ignition is switched on.
Conditions for non-activation of the
system
The system cannot be activated:
– when the gear lever is in neutral;
– when the parking brake is activated;
– while cornering.
Operation
While driving (at speeds of between
about 9 and 62 mph (15 and 100 km/h)),
if there is a risk of collision with the ve-
hicle in front, the warning light
will flash on the instrument panel in red
and a beep will sound.
If the driver depresses the brake pedal
and the system still detects a collision
risk, the warning light
continues
to flash on the instrument panel, ac-
companied by a beep, until the system
no longer detects any risk of collision.
If the driver fails to react following
an alert of an imminent collision, the
system activates the brakes.
The system only detects vehicles
driving in the same direction of traf-
fic. The system cannot detect mo-
torcycles because of the difficulty in
forecasting their trajectory.
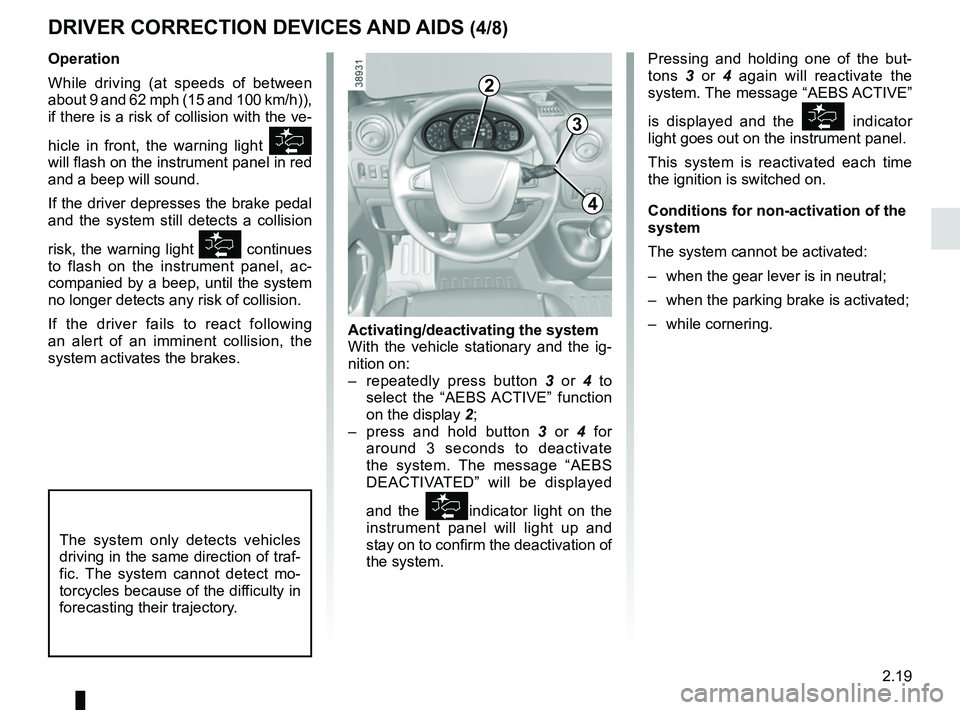
Activating/deactivating the system
With the vehicle stationary and the ig-
nition on:
– repeatedly press button 3 or 4 to
select the “AEBS ACTIVE” function
on the display 2;
– press and hold button 3 or 4 for
around 3 seconds to deactivate
the system. The message “AEBS
DEACTIVATED” will be displayed
and the
indicator light on the
instrument panel will light up and
stay on to confirm the deactivation of
the system.
3
4
2
Page 141 of 290

2.25
TYRE PRESSURE LOSS WARNING (2/3)
2
3
4
Note:
The standard tyre pressure cannot be
less than that recommended and indi-
cated on the door frame.
Display
Display 2 on the instrument panel in-
forms you of any tyre pressure faults
(flat tyre, punctured tyre, etc.).
“CHECK TYRE PRESSURES”
Warning light
comes on, along
with the message “CHECK TYRE
PRESSURES”.
These indicate that at least one tyre is
flat.
Check and, if necessary, readjust the
pressures of the four wheels when cold.
The warning light
goes off after a
few minutes’ driving.
“TYRE PUNCTURE”
The warning light
comes on
steady, accompanied by the message
“TYRE PUNCTURE” and a beep.
This message appears along with the
® warning light.
They indicate that at least one wheel
is punctured or severely underinflated.
Replace it or contact an approved
dealer if it is punctured. Top up the tyre
pressure if the wheel is deflated.
Warning light ® re-
quires you to stop immedi-
ately, for your own safety,
as soon as traffic conditions
allow.
Resetting procedure
With the ignition on:
– repeatedly press button 3 or 4 to
select the “TYRE PRESSURE
ACQUISITION” function on the dis-
play 2;
– press and hold (around 3 sec- onds) button 3 or 4 to start initiali-
sation. Display of the message “TP
ACQUISTION LAUNCHED” indi-
cates that the reset request for the
tyre pressure reference value has
been taken into account.
Reinitialisation is carried out after a few
minutes’ driving.
The sudden loss of pressure in a
tyre (burst tyre, etc.) cannot be de-
tected by the system.
Page 144 of 290
2.28
LANE DEPARTURE WARNING (2/3)Conditions for non-activation
of alerts
– Indicators activated or having been activated less than approximately
four seconds prior to departing from
the lane;
– Very fast lane departure;
– Driving continuously on a line;
– ...
Operating faults
In the event of a malfunction, a mes-
sage “LANE DEPARTURE CHECK” is
displayed on the instrument panel ac-
companied by the warning light
©.
Consult an approved dealer.
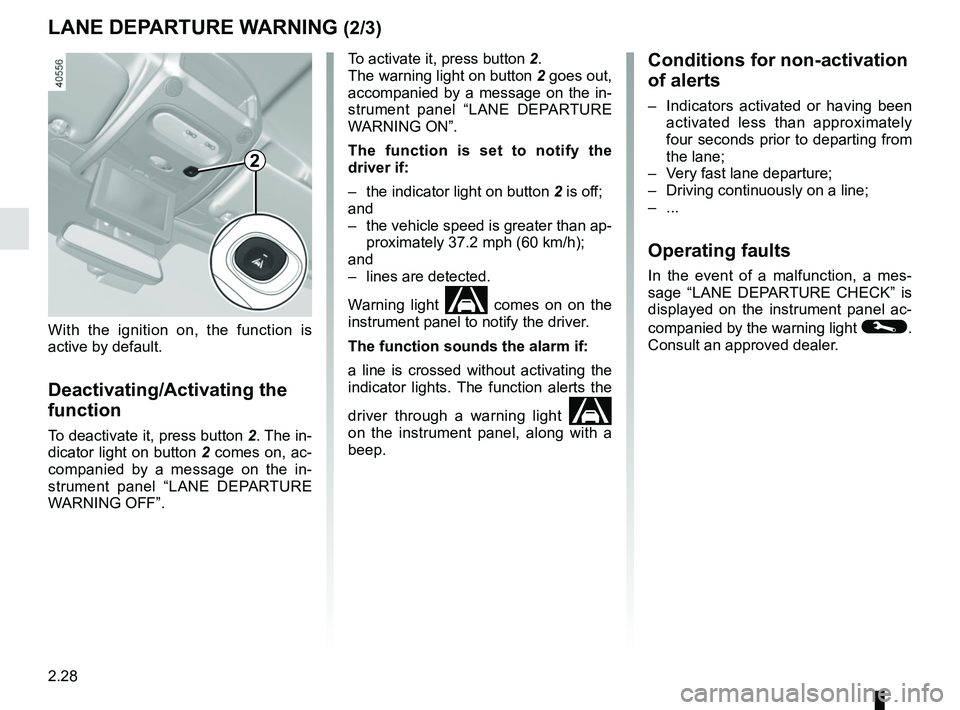
To activate it, press button 2.
The warning light on button
2 goes out,
accompanied by a message on the in-
strument panel “LANE DEPARTURE
WARNING ON”.
The function is set to notify the
driver if:
– the indicator light on button 2 is off;
and
– the vehicle speed is greater than ap- proximately 37.2 mph (60 km/h);
and
– lines are detected.
Warning light
comes on on the
instrument panel to notify the driver.
The function sounds the alarm if:
a line is crossed without activating the
indicator lights. The function alerts the
driver through a warning light
on the instrument panel, along with a
beep.
2
With the ignition on, the function is
active by default.
Deactivating/Activating the
function
To deactivate it, press button 2. The in-
dicator light on button 2 comes on, ac-
companied by a message on the in-
strument panel “LANE DEPARTURE
WARNING OFF”.
Page 155 of 290
2.39
Prolonged deactivation of the
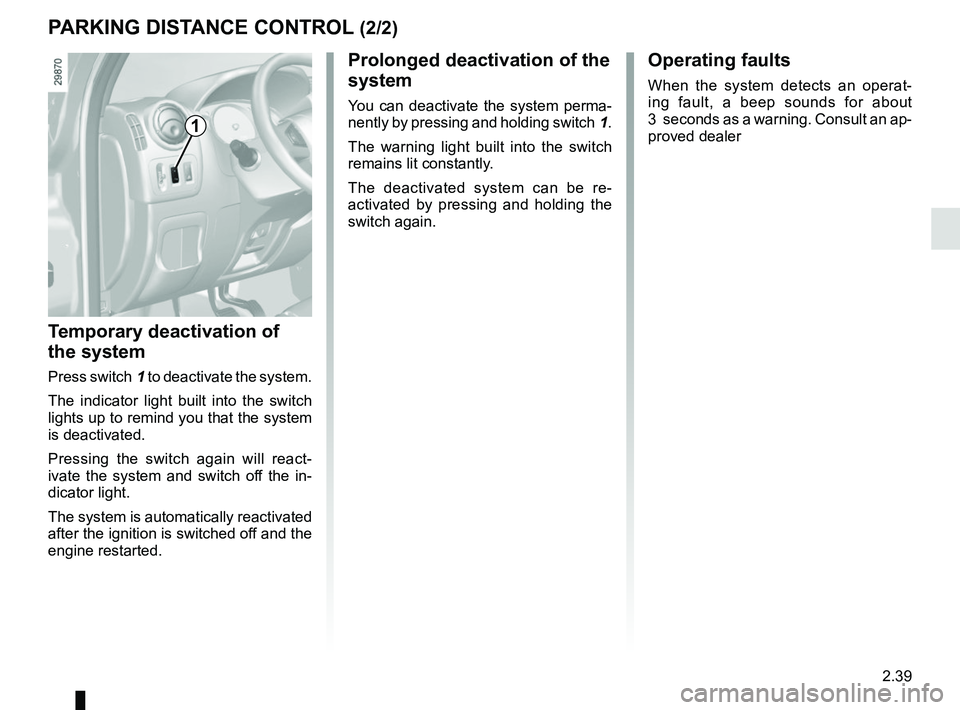
system
You can deactivate the system perma-
nently by pressing and holding switch 1.
The warning light built into the switch
remains lit constantly.
The deactivated system can be re-
activated by pressing and holding the
switch again.
Temporary deactivation of
the system
Press switch 1 to deactivate the system.
The indicator light built into the switch
lights up to remind you that the system
is deactivated.
Pressing the switch again will react-
ivate the system and switch off the in-
dicator light.
The system is automatically reactivated
after the ignition is switched off and the
engine restarted.
Operating faults
When the system detects an operat-
ing fault, a beep sounds for about
3 seconds as a warning. Consult an ap-
proved dealer
PARKING DISTANCE CONTROL (2/2)
1
Page 161 of 290
2.45
SEQUENTIAL GEARBOX (1/5)
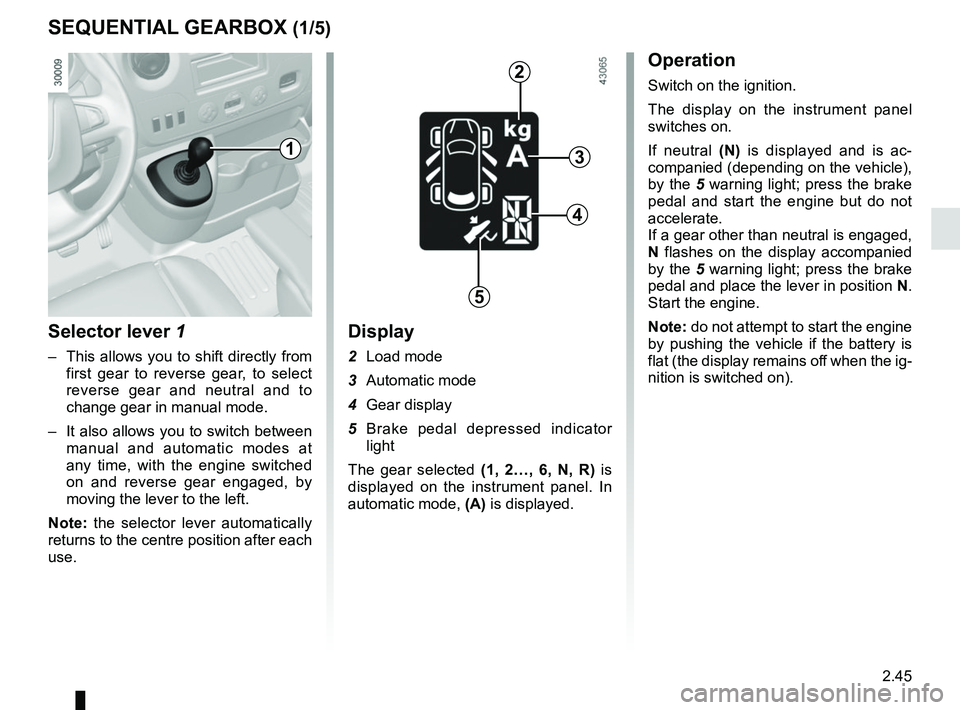
Selector lever 1
– This allows you to shift directly from first gear to reverse gear, to select
reverse gear and neutral and to
change gear in manual mode.
– It also allows you to switch between manual and automatic modes at
any time, with the engine switched
on and reverse gear engaged, by
moving the lever to the left.
Note: the selector lever automatically
returns to the centre position after each
use.
Display
2 Load mode
3 Automatic mode
4 Gear display
5 Brake pedal depressed indicator light
The gear selected (1, 2…, 6, N, R) is
displayed on the instrument panel. In
automatic mode, (A) is displayed.
Operation
Switch on the ignition.
The display on the instrument panel
switches on.
If neutral (N) is displayed and is ac-
companied (depending on the vehicle),
by the 5 warning light; press the brake
pedal and start the engine but do not
accelerate.
If a gear other than neutral is engaged,
N flashes on the display accompanied
by the 5 warning light; press the brake
pedal and place the lever in position N.
Start the engine.
Note: do not attempt to start the engine
by pushing the vehicle if the battery is
flat (the display remains off when the ig-
nition is switched on).
1
2
3
4
5
Page 164 of 290

2.48
SEQUENTIAL GEARBOX (4/5)
Operation in automatic mode
Automatic mode is selected by default
every time the ignition is switched on.
The letter A appears on the display.
The vehicle is controlled using the ac-
celerator and the brake. Gears will
change automatically at the correct
moment and at a suitable engine speed
because the automatic mode takes the
road surface and the chosen driving
style into consideration.
Gears may be shifted manually in this
mode. Pushing the lever forwards
or backwards shifts a gear upwards
(except if there is a risk of underrev-
ving) or downwards (except if there is a
risk of overrevving).
Note: automatic mode takes account
of:
– the position and speed of depression of the accelerator pedal to assess
driving style and select the optimum
gear;
– action on the brake pedal, to com- mence engine braking in preparation
for a downshift.
You can stop the vehicle at red lights,
with the gear engaged, by depressing
the brake pedal; there is no need to
change to neutral (N).
The vehicle will move off again:
– either slowly, if you release the brake without accelerating (e.g. when in a
traffic jam);
– or quickly, if you release the brake and accelerate.
Accelerating and overtaking
– Slowly depress the accelerator pedal to accelerate gradually;
The oil level in the automatic gear-
box system reservoir varies depend-
ing on use. Adding oil is strictly
forbidden (except by qualified ap-
proved network personnel).
– to obtain maximum vehicle per-
formance regardless of the mode
selected (automatic or manual),
quickly depress the accelerator
pedal beyond the kickdown point.
The speed with which you depress the
pedal will allow you to downshift ac-
cording to the vehicle’s capabilities.
Parking the vehicle
It is possible to park in gear (for exam-
ple, on a slope):
– with the ignition on, select a gear with your foot on the brake ;
– check that a gear other than N is dis- played on the instrument panel, then
remove the ignition key;
– apply the handbrake.
To disengage the gear, switch on the
ignition without starting the engine and
shift the selector lever to neutral with
the brake pedal depressed . Check
that N is displayed on the instrument
panel.