Page 176 of 290
3.10
ôThe air flow is directed mainly
to the dashboard air vents.
öThe air flow is directed towards
all the air vents and the pas-
senger footwells.
FThe air flow is directed mainly
towards the footwells.
The manual air distribution option
causes the operating tell-tale light
on display 4 to go out (automatic
mode), but only air distribution is no
longer controlled automatically by
the system.
Press button 3 to return to auto-
matic mode.
Distribution of air in the
passenger compartment
There are five possible combinations
for air distribution, which may be se-
lected by pressing buttons 6 and 8 re-
peatedly. The arrows on display 4 indi-
cate the setting selected:
õThe air flow is directed to the
windscreen demisting vents
and the side windows.
÷The air flow is directed to the
windscreen and side window
demisting vents, and the passenger
footwells.
AUTOMATIC CLIMATE CONTROL (4/6)
346
8
Page 187 of 290

3.21
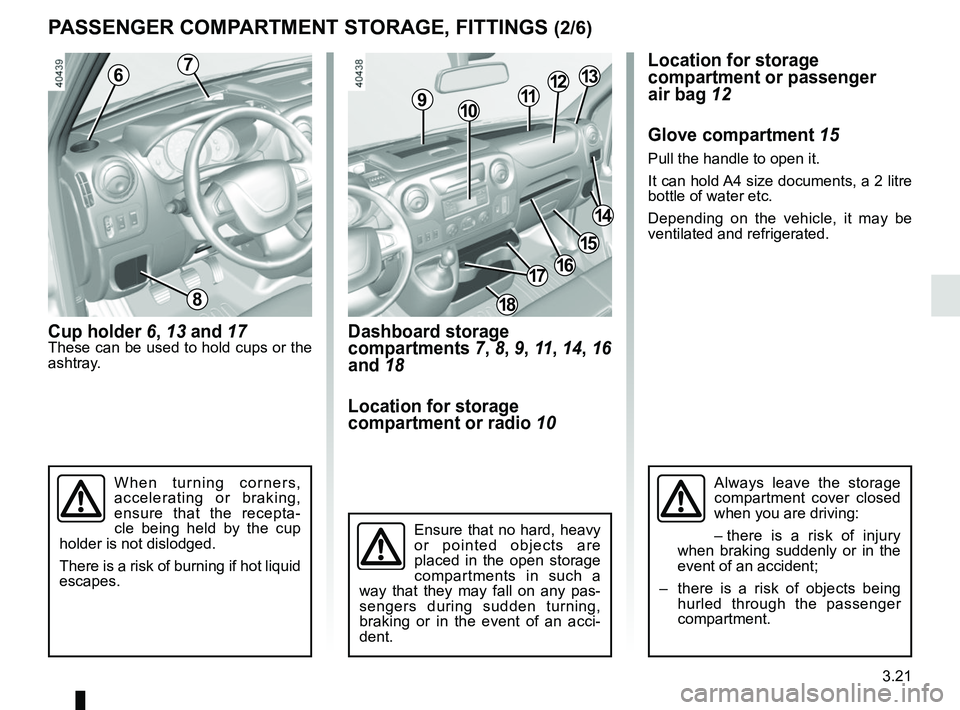
Dashboard storage
compartments 7, 8, 9, 11, 14, 16
and 18
Location for storage
compartment or radio 10
PASSENGER COMPARTMENT STORAGE, FITTINGS (2/6)
Cup holder 6, 13 and 17These can be used to hold cups or the
ashtray.
When turning corners,
accelerating or braking,
ensure that the recepta-
cle being held by the cup
holder is not dislodged.
There is a risk of burning if hot liquid
escapes.
Location for storage
compartment or passenger
air bag 12
Glove compartment 15
Pull the handle to open it.
It can hold A4 size documents, a 2 litre
bottle of water etc.
Depending on the vehicle, it may be
ventilated and refrigerated.
Always leave the storage
compartment cover closed
when you are driving:
– there is a risk of injury
when braking suddenly or in the
event of an accident;
– there is a risk of objects being hurled through the passenger
compartment.
Ensure that no hard, heavy
or pointed objects are
placed in the open storage
compartments in such a
way that they may fall on any pas-
sengers during sudden turning,
braking or in the event of an acci-
dent.
6
8
7
91011
13
14
15
1617
18
12
Page 188 of 290
3.22
Token holder and card
holder 19
Token holder A
Card holder B
This can be used for storing motorway
tickets, cards, etc.
Dashboard upper storage
compartment 23
To open it, lift the handle.
PASSENGER COMPARTMENT STORAGE, FITTINGS (3/6)
18
Nothing should be placed
on the floor area in front of
the driver as such objects
may slide under the pedal
during braking manoeuvres, thus
obstructing its use.
Location for storage
compartment or tray 20
Location for storage
compartment or sockets for
audio multiconnection unit 21
Location for storage
compartment or switches 22
A
B
1920
22
23
21
Page 214 of 290

4.18
You should not:
Position objects such as deodorants,
scents etc. near air vents as this could
damage your dashboard trim.
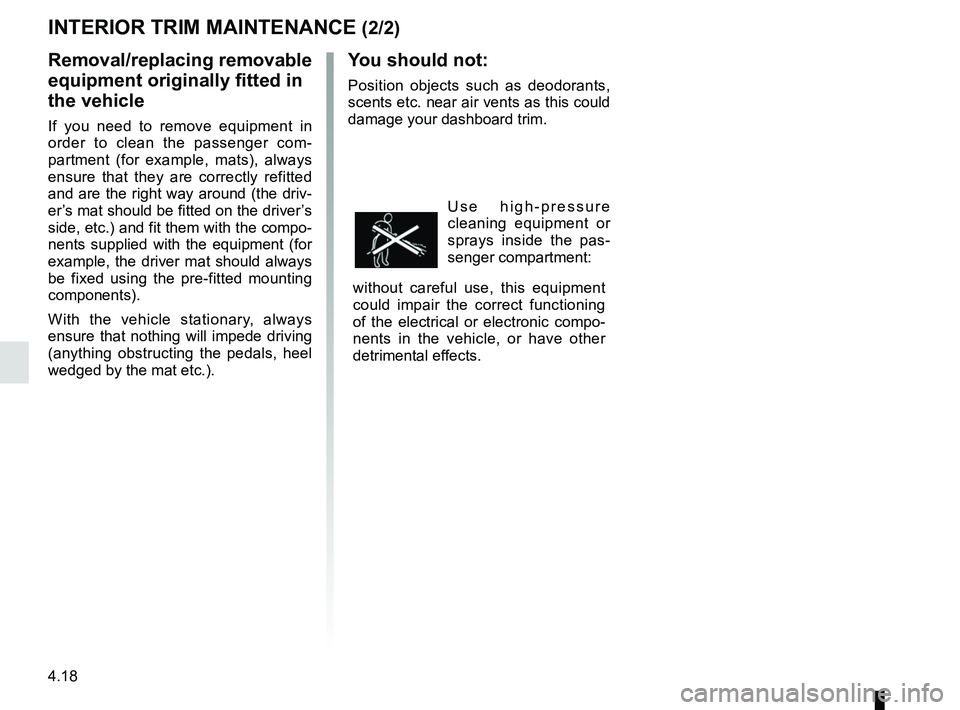
Use high-pressure
cleaning equipment or
sprays inside the pas-
senger compartment:
without careful use, this equipment
could impair the correct functioning
of the electrical or electronic compo-
nents in the vehicle, or have other
detrimental effects.
INTERIOR TRIM MAINTENANCE (2/2)
Removal/replacing removable
equipment originally fitted in
the vehicle
If you need to remove equipment in
order to clean the passenger com-
partment (for example, mats), always
ensure that they are correctly refitted
and are the right way around (the driv-
er’s mat should be fitted on the driver’s
side, etc.) and fit them with the compo-
nents supplied with the equipment (for
example, the driver mat should always
be fixed using the pre-fitted mounting
components).
With the vehicle stationary, always
ensure that nothing will impede driving
(anything obstructing the pedals, heel
wedged by the mat etc.).
Page 222 of 290

5.8
TYRE INFLATION KIT (4/6)
Affix the driving recommendation label
to the dashboard where it can easily be
seen by the driver;
Store the kit underneath the driver’s
seat.
Start the vehicle immediately in order
to the distribute the product in the tyre
and, after 6 miles (10 km) or 10 min-
utes driving, stop to check the pres-
sure. To do this, fit adapter 3 onto the
tyre valve. If the pressure is less than
the recommended pressure, adjust it
(refer to the information on “Tyre pres-
sures”), otherwise contact an approved
dealer: repair is not possible.Precautions when using the
kit
– the kit should not be operated for more than 15 consecutive minutes;
– when driving, vibration may be felt due to the presence of the repair
product injected into the tyre.
Following repair with the kit,
do not travel further than
120 miles (200 km). In addi-
tion, reduce your speed and
under no circumstances exceed
48 mph (80 km/h). The sticker,
which you must affix in a prominent
position on the dashboard, reminds
you of this.
Depending on the country or local
legislation, a tyre repaired with the
inflation kit may need to be replaced.
3
Please be aware that a poorly tightened or missing valve cap can make
the tyres less airtight and lead to pressure loss.
Always use valve caps identical to those fitted originally and tighten t\
hem
fully.
Nothing should be placed
around the driver’s feet
as such objects may slide
under the pedals during
sudden braking manoeuvres and
obstruct their use.
Once the tyre is correctly inflated,
remove the kit: slowly unscrew the in-
flation adapter 3 to prevent any prod-
uct spatter and screw the tyre inflation
hose 4 to the bottle opening 2 to pre-
vent the product from escaping.
4
2
Page 224 of 290

5.10
TYRE INFLATION KIT (6/6)
Once the tyre is correctly inflated,
remove the kit: slowly unscrew the in-
flation adapter 12 to prevent any prod-
uct spatter and store the container in
plastic packaging to prevent product
leaks. – Affix the driving recommendation
label to the dashboard where it can
easily be seen by the driver;
– Put the kit away.
– At the end of this initial inflation op- eration, air will still escape from the
tyre. You must drive a short distance
in order to seal the hole.
– Start immediately and drive at be- tween 12 and 40 mph (20 and
60 km/h) in order to distribute the
product evenly in the tyre and, after
driving for 2 miles (3 km), stop and
check the pressure.
– If the pressure is greater than 1.3 bar but less than the recommended
pressure (refer to the label affixed to
the edge of the driver’s door), read-
just it. Otherwise, please contact an
authorised dealer: the tyre cannot be
repaired.
Precautions when using the
kit
The kit should not be operated for more
than 15 consecutive minutes.
Nothing should be placed
around the driver’s feet
as such objects may slide
under the pedals during
sudden braking manoeuvres and
obstruct their use.
12
Please be aware that a
poorly tightened or miss-
ing valve cap can make the
tyres less airtight and may
lead to pressure loss.
Always use valve caps identical to
those fitted originally and tighten
them fully.
Following repair with the kit,
do not travel further than
120 miles (200 km). In addi-
tion, reduce your speed and
under no circumstances exceed
48 mph (80 km/h). The sticker,
which you must affix in a prominent
position on the dashboard, reminds
you of this.
Depending on the country or local
legislation, a tyre repaired with the
inflation kit may need to be replaced.