2018 RENAULT KOLEOS spare wheel
[x] Cancel search: spare wheelPage 267 of 332
5.3
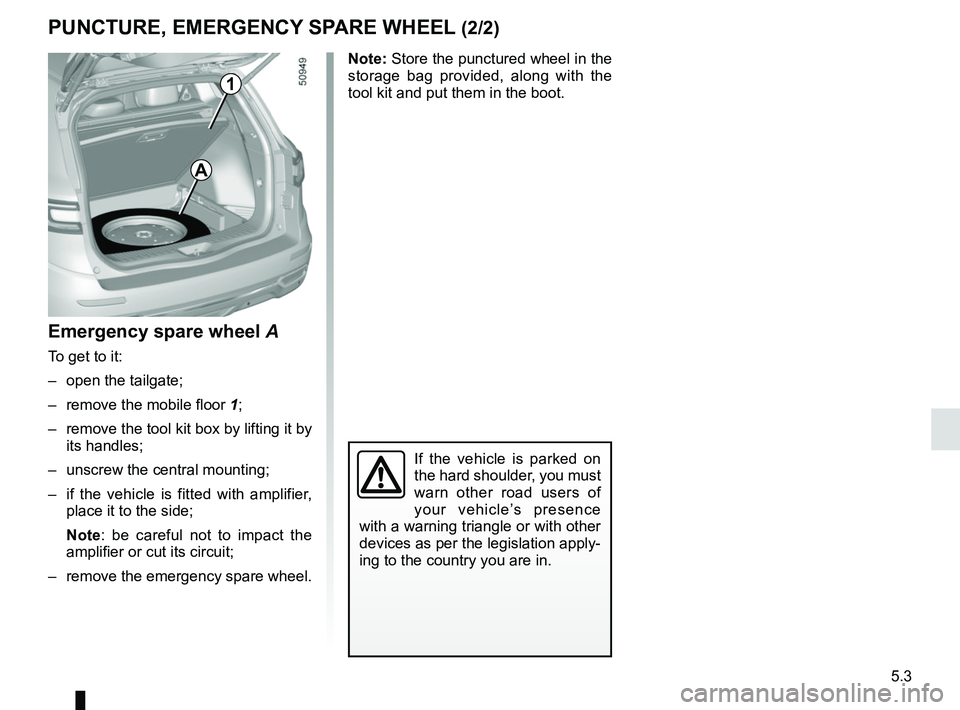
Emergency spare wheel A
To get to it:
– open the tailgate;
– remove the mobile floor 1;
– remove the tool kit box by lifting it by its handles;
– unscrew the central mounting;
– if the vehicle is fitted with amplifier, place it to the side;
Note: be careful not to impact the
amplifier or cut its circuit;
– remove the emergency spare wheel.
PUNCTURE, EMERGENCY SPARE WHEEL (2/2)
If the vehicle is parked on
the hard shoulder, you must
warn other road users of
your vehicle’s presence
with a warning triangle or with other
devices as per the legislation apply-
ing to the country you are in.
A
1
Note: Store the punctured wheel in the
storage bag provided, along with the
tool kit and put them in the boot.
Page 271 of 332
5.7
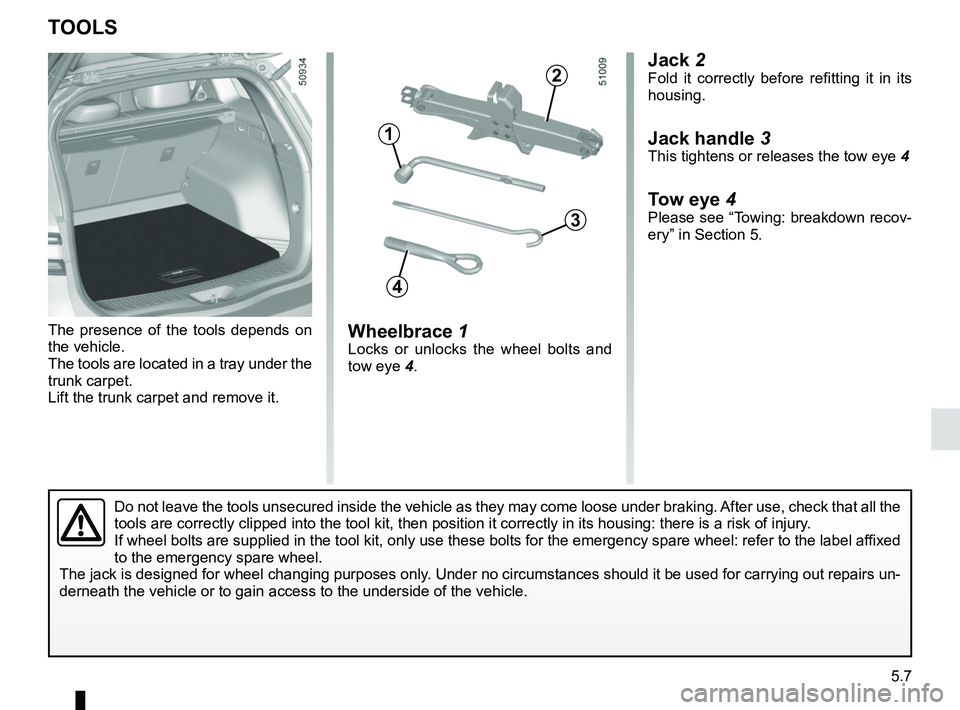
Jack 2Fold it correctly before refitting it in its
housing.
Jack handle 3This tightens or releases the tow eye 4
Tow eye 4Please see “Towing: breakdown recov-
ery” in Section 5.
Wheelbrace 1Locks or unlocks the wheel bolts and
tow eye 4.
The presence of the tools depends on
the vehicle.
The tools are located in a tray under the
trunk carpet.
Lift the trunk carpet and remove it.
TOOLS
Do not leave the tools unsecured inside the vehicle as they may come loo\
se under braking. After use, check that all the
tools are correctly clipped into the tool kit, then position it correctl\
y in its housing: there is a risk of injury.
If wheel bolts are supplied in the tool kit, only use these bolts for th\
e emergency spare wheel: refer to the label affixed
to the emergency spare wheel.
The jack is designed for wheel changing purposes only. Under no circumstances should it be used for carrying out repairs un-
derneath the vehicle or to gain access to the underside of the vehicle.
2
1
3
4
Page 273 of 332
5.9
If you have a puncture, re-
place the wheel as soon as
possible.
A tyre which has been punc-
tured should always be inspected
(and repaired, where possible) by a
specialist.
CHANGING A WHEEL (2/2)
Turn it a few times to lift the wheel off
the ground.
Undo the bolts and take off the wheel.
Fit the emergency spare wheel on the
central hub and turn it to locate the
mounting holes in the wheel and the
hub.
Tighten the bolts, checking that the
wheel is correctly positioned on its hub.
Lower the jack.
With the wheel on the ground, tighten
the bolts fully and have the tightness of
the bolts checked and the emergency
spare wheel pressure checked as soon
as possible.
Do not leave the tools un-
secured inside the vehicle
as they may come loose
under braking. After use,
check that all the tools are correctly
clipped into the tool kit, then posi-
tion it correctly in its housing: risk of
injury.
If wheel bolts are supplied in the
tool kit, only use these bolts for the
emergency spare wheel: refer to the
label affixed to the emergency spare
wheel.
The jack is designed for wheel
changing purposes only. Under no
circumstances should it be used for
carrying out repairs underneath the
vehicle or to gain access to the un-
derside of the vehicle.
Page 275 of 332
5.11
TYRES (2/3)
Tyre pressures
Adhere to the tyre pressures (including
the emergency spare wheel). The tyre
pressures should be checked at least
once a month and additionally before
any long journey (refer to the label af-
fixed to the edge of the driver’s door).The pressures should be checked cold:
ignore higher pressures which may be
reached in hot weather or following a
high speed journey.
If the tyre pressures cannot be checked
when the tyres are
cold, increase the
pressures from 0.2 to 0.3 bar (or 3 PSI).
Never deflate a hot tyre.
Special note
Depending on the vehicle, there may
be an adapter which needs to be posi-
tioned on the valve before air is added. Vehicle fitted with a tyre pressure
monitoring system
In cases of under-inflation (puncture,
low pressure, etc.), warning light
lights up on the instrument panel.
Please refer to the information on the
“Tyre pressure monitoring system” in
Section 2.
Emergency spare wheel
Refer to the information on “Puncture”
and “Changing a wheel” in Section 5.
Incorrect tyre pressures
lead to abnormal tyre wear
and unusually hot running.
These are factors which
may seriously affect safety and lead
to:
– poor road holding,
– risk of bursting or tread separa- tion.
The pressure depends on the load
and the speed of use. Adjust the
pressure according to the condi-
tions of use (refer to the label affixed
to the edge of the driver’s door).
Please be aware that a
poorly tightened or miss-
ing valve cap can make the
tyres less airtight and lead
to pressure loss.
Always use valve caps identical to
those fitted originally and tighten
them fully.
Page 326 of 332
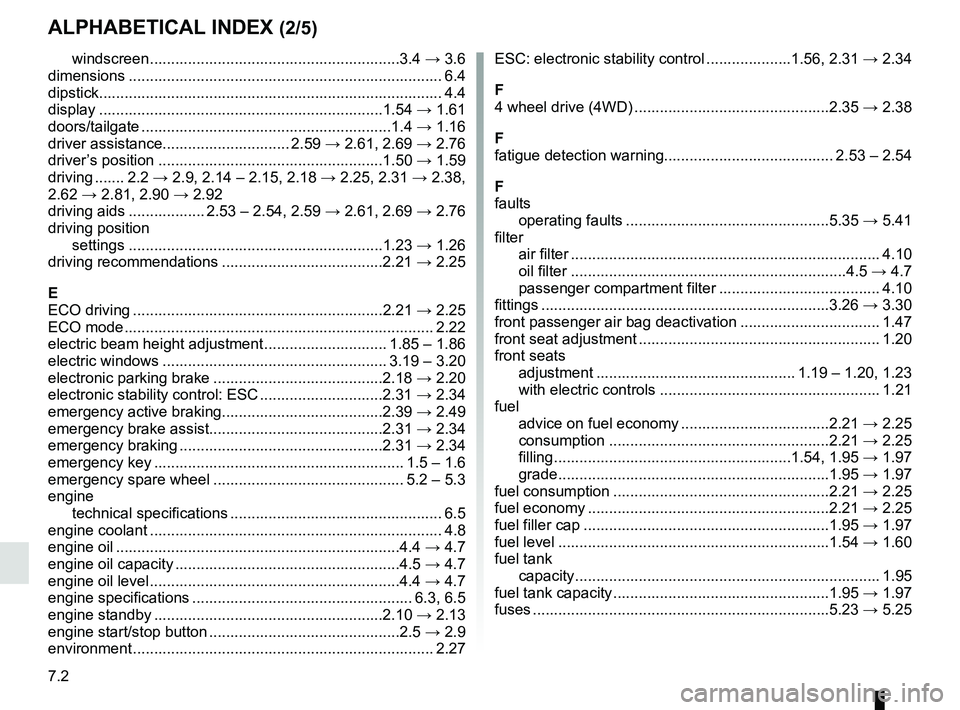
7.2
ALPHABETICAL INDEX (2/5)
windscreen ...........................................................3.4 → 3.6
dimensions .............................................................\
............. 6.4
dipstick................................................................\
................. 4.4
display ................................................................\
...1.54 → 1.61
doors/tailgate .........................................................\
..1.4 → 1.16
driver assistance.............................. 2.59 → 2.61, 2.69 → 2.76
driver’s position .....................................................1.50 → 1.59
driving ....... 2.2 → 2.9, 2.14 – 2.15, 2.18 → 2.25, 2.31 → 2.38,
2.62 → 2.81, 2.90 → 2.92
driving aids .................. 2.53 – 2.54, 2.59 → 2.61, 2.69 → 2.76
driving position settings ............................................................1.23 → 1.26
driving recommendations ......................................2.21 → 2.25
E
ECO driving ...........................................................2.21 → 2.25
ECO mode ........................................................................\
. 2.22
electric beam height adjustment ............................. 1.85 – 1.86
electric windows ..................................................... 3.19 – 3.20
electronic parking brake ........................................2.18 → 2.20
electronic stability control: ESC .............................2.31 → 2.34
emergency active braking......................................2.39 → 2.49
emergency brake assist.........................................2.31 → 2.34
emergency braking ................................................2.31 → 2.34
emergency key ........................................................... 1.5 – 1.6
emergency spare wheel ............................................. 5.2 – 5.3
engine technical specifications .................................................. 6.5
engine coolant ..................................................................... 4.8
engine oil ...................................................................4.4 → 4.7
engine oil capacity .....................................................4.5 → 4.7
engine oil level ...........................................................4.4 → 4.7
engine specifications .................................................... 6.3, 6.5
engine standby ......................................................2.10 → 2.13
engine start/stop button .............................................2.5 → 2.9
environment ............................................................\
........... 2.27 ESC: electronic stability control ....................1.56, 2.31
→ 2.34
F
4 wheel drive (4WD) ..............................................2.35 → 2.38
F
fatigue detection warning........................................ 2.53 – 2.54
F
faults operating faults ................................................5.35 → 5.41
filter air filter ........................................................................\
. 4.10
oil filter .................................................................4.5 → 4.7
passenger compartment filter ...................................... 4.10
fittings ...............................................................\
.....3.26 → 3.30
front passenger air bag deactivation ................................. 1.47
front seat adjustment ......................................................... 1.20
front seats adjustment ............................................... 1.19 – 1.20, 1.23
with electric controls
.................................................... 1.21
fuel advice on fuel economy ...................................2.21 → 2.25
consumption ....................................................2.21 → 2.25
filling ........................................................1.54, 1.95 → 1.97
grade ................................................................1.95 → 1.97
fuel consumption ...................................................2.21 → 2.25
fuel economy .........................................................2.21 → 2.25
fuel filler cap ..........................................................1.95 → 1.97
fuel level ................................................................1.54 → 1.60
fuel tank capacity ...............................................................\
......... 1.95
fuel tank capacity ...................................................1.95 → 1.97
fuses ..................................................................\
....5.23 → 5.25