2018 Ram ProMaster City set
[x] Cancel search: setPage 112 of 180

SCHEDULED SERVICING
Your vehicle is equipped with an automatic
oil change indicator system. The oil change
indicator system will remind you that it is
time to take your vehicle in for scheduled
maintenance.
Based on engine operation conditions, the oil
change indicator message will illuminate.
This means that service is required for your
vehicle. Operating conditions such as fre-
quent short-trips, trailer tow, extended en-
gine idle time, extremely hot or cold ambient
temperatures will influence when the “Oil
Change Required” message is displayed. Se-
vere Operating Conditions can cause the
change oil message to illuminate as early as
3,500 miles (5,600 km) since last reset.
Have your vehicle serviced as soon as pos-
sible, within the next 500 miles (805 km).Your authorized dealer will reset the oil
change indicator message after completing
the scheduled oil change. If a scheduled oil
change is performed by someone other than
your authorized dealer, the message can be
reset by referring to the steps described un-
der “Oil Change Reset” in “Instrument Clus-
ter Display” in “Getting To Know Your Instru-
ment Panel” in the Owner’s Manual at
www.mopar.com/en-us/care/owners-manual.html
(U.S. Residents) or www.owners.mopar.ca
(Canadian Residents) for further information.
NOTE:
Under no circumstances should oil change
intervals exceed 10,000 miles (16,000 km),
350 hours of engine run time or twelve
months, whichever comes first. The 350
hours of engine run or idle time is generally
only a concern for fleet customers.
Severe Duty All Models
Change Engine Oil at 4,000 miles
(6,500 km) or 350 hours of engine run time
if the vehicle is operated in a dusty and off
road environment or is operated predomi-
nantly at idle, or only very low engine RPM’s.
This type of vehicle use is considered Severe
Duty.
SERVICING AND MAINTENANCE
110
Page 127 of 180

WARNING!
High speed driving with your vehicle under
maximum load is dangerous. The added
strain on your tires could cause them to
fail. You could have a serious collision. Do
not drive a vehicle loaded to the maximum
capacity at continuous speeds above
75 mph (120 km/h).
Radial Ply Tires
WARNING!
Combining radial ply tires with other types
of tires on your vehicle will cause your
vehicle to handle poorly. The instability
could cause a collision. Always use radial
ply tires in sets of four. Never combine
them with other types of tires.
Tire Repair
If your tire becomes damaged, it may be
repaired if it meets the following criteria:
• The tire has not been driven on when flat. • The damage is only on the tread section of
your tire (sidewall damage is not repair-
able).
• The puncture is no greater thana¼ofan inch (6 mm).
Consult an authorized tire dealer for tire re-
pairs and additional information.
Damaged Run Flat tires, or Run Flat tires that
have experienced a loss of pressure should be
replaced immediately with another Run Flat
tire of identical size and service description
(Load Index and Speed Symbol).Run Flat Tires — If Equipped
Run Flat tires allow you the capability to drive
50 miles (80 km) at 50 mph (80 km/h) after
a rapid loss of inflation pressure. This rapid
loss of inflation is referred to as the Run Flat
mode. A Run Flat mode occurs when the tire
inflation pressure is of/or below 14 psi
(96 kPa). Once a Run Flat tire reaches the
run flat mode it has limited driving capabili-
ties and needs to be replaced immediately. A
Run Flat tire is not repairable. It is not recommended driving a vehicle
loaded at full capacity or to tow a trailer while
a tire is in the run flat mode.
See the tire pressure monitoring section for
more information.
Tire Spinning
When stuck in mud, sand, snow, or ice con-
ditions, do not spin your vehicle's wheels
above 30 mph (48 km/h) or for longer than
30 seconds continuously without stopping.
Refer to “Freeing A Stuck Vehicle” in “In
Case Of Emergency” for further information.
WARNING!
Fast spinning tires can be dangerous.
Forces generated by excessive wheel
speeds may cause tire damage or failure. A
tire could explode and injure someone. Do
not spin your vehicle's wheels faster than
30 mph (48 km/h) for more than 30 sec-
onds continuously when you are stuck, and
do not let anyone near a spinning wheel,
no matter what the speed.
125
Page 129 of 180

It is recommended you contact your autho-
rized tire dealer or original equipment dealer
with any questions you may have on tire
specifications or capability. Failure to use
equivalent replacement tires may adversely
affect the safety, handling, and ride of your
vehicle.
WARNING!
• Do not use a tire, wheel size, load rating,or speed rating other than that specified
for your vehicle. Some combinations of
unapproved tires and wheels may
change suspension dimensions and per-
formance characteristics, resulting in
changes to steering, handling, and brak-
ing of your vehicle. This can cause un-
predictable handling and stress to steer-
ing and suspension components. You
could lose control and have a collision
resulting in serious injury or death. Use
only the tire and wheel sizes with load
ratings approved for your vehicle.
• Never use a tire with a smaller load index
or capacity, other than what was origi-
nally equipped on your vehicle. Using a
WARNING!
tire with a smaller load index could re-
sult in tire overloading and failure. You
could lose control and have a collision.
• Failure to equip your vehicle with tires
having adequate speed capability can
result in sudden tire failure and loss of
vehicle control.
CAUTION!
Replacing original tires with tires of a
different size may result in false speedom-
eter and odometer readings.
Tire Types
All Season Tires — If Equipped
All Season tires provide traction for all sea-
sons (Spring, Summer, Fall, and Winter).
Traction levels may vary between different all
season tires. All season tires can be identified
by the M+S, M&S, M/S or MS designation on
the tire sidewall. Use all season tires only in
sets of four; failure to do so may adversely
affect the safety and handling of your vehicle.
Summer Or Three Season Tires — If
Equipped
Summer tires provide traction in both wet
and dry conditions, and are not intended to
be driven in snow or on ice. If your vehicle is
equipped with Summer tires, be aware these
tires are not designed for Winter or cold
driving conditions. Install Winter tires on your
vehicle when ambient temperatures are less
than 40°F (5°C) or if roads are covered with
ice or snow. For more information, contact an
authorized dealer.
Summer tires do not contain the all season
designation or mountain/snowflake symbol
on the tire sidewall. Use Summer tires only in
sets of four; failure to do so may adversely
affect the safety and handling of your vehicle.
WARNING!
Do not use Summer tires in snow/ice con-
ditions. You could lose vehicle control,
resulting in severe injury or death. Driving
too fast for conditions also creates the
possibility of loss of vehicle control.
127
Page 130 of 180
Snow Tires
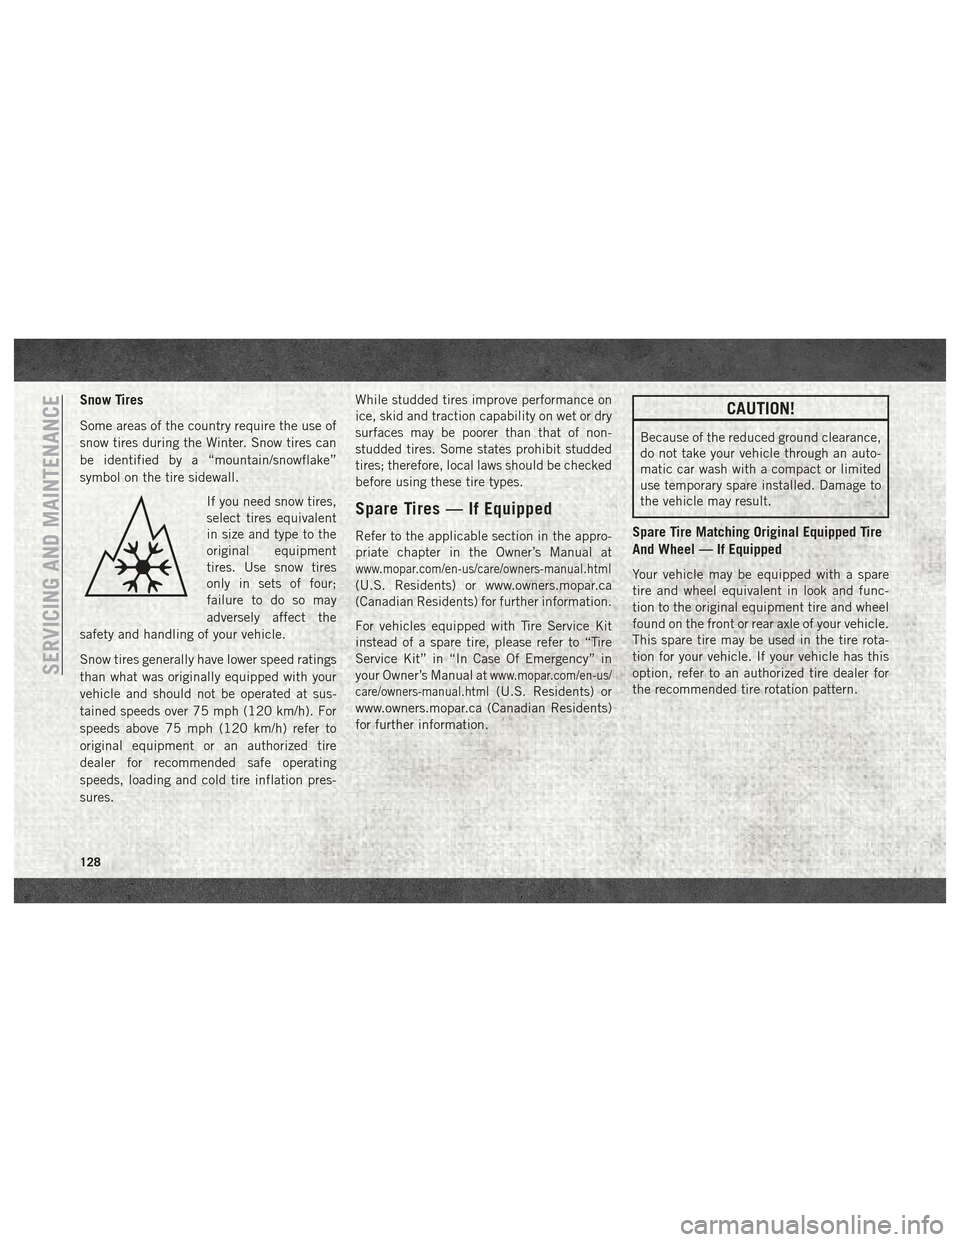
Some areas of the country require the use of
snow tires during the Winter. Snow tires can
be identified by a “mountain/snowflake”
symbol on the tire sidewall.If you need snow tires,
select tires equivalent
in size and type to the
original equipment
tires. Use snow tires
only in sets of four;
failure to do so may
adversely affect the
safety and handling of your vehicle.
Snow tires generally have lower speed ratings
than what was originally equipped with your
vehicle and should not be operated at sus-
tained speeds over 75 mph (120 km/h). For
speeds above 75 mph (120 km/h) refer to
original equipment or an authorized tire
dealer for recommended safe operating
speeds, loading and cold tire inflation pres-
sures. While studded tires improve performance on
ice, skid and traction capability on wet or dry
surfaces may be poorer than that of non-
studded tires. Some states prohibit studded
tires; therefore, local laws should be checked
before using these tire types.
Spare Tires — If Equipped
Refer to the applicable section in the appro-
priate chapter in the Owner’s Manual at
www.mopar.com/en-us/care/owners-manual.html
(U.S. Residents) or www.owners.mopar.ca
(Canadian Residents) for further information.
For vehicles equipped with Tire Service Kit
instead of a spare tire, please refer to “Tire
Service Kit” in “In Case Of Emergency” in
your Owner’s Manual at
www.mopar.com/en-us/
care/owners-manual.html
(U.S. Residents) or
www.owners.mopar.ca (Canadian Residents)
for further information.
CAUTION!
Because of the reduced ground clearance,
do not take your vehicle through an auto-
matic car wash with a compact or limited
use temporary spare installed. Damage to
the vehicle may result.
Spare Tire Matching Original Equipped Tire
And Wheel — If Equipped
Your vehicle may be equipped with a spare
tire and wheel equivalent in look and func-
tion to the original equipment tire and wheel
found on the front or rear axle of your vehicle.
This spare tire may be used in the tire rota-
tion for your vehicle. If your vehicle has this
option, refer to an authorized tire dealer for
the recommended tire rotation pattern.
SERVICING AND MAINTENANCE
128
Page 143 of 180

MULTIMEDIA
CYBERSECURITY..............142
UCONNECT 3/3 NAV WITH 5-INCH
DISPLAY .................. .143
Clock Setting.................144
Equalizer, Balance And Fade .......144
Radio Operation ...............146
USB/Audio Jack (AUX)/Bluetooth
Operation ...................147
Navigation ..................148
UCONNECT SETTINGS ...........148
STEERING WHEEL AUDIO CONTROLS . .149
Left Switch ..................149
Right Switch .................149
UCONNECT PHONE ............150
Uconnect Phone (Bluetooth Hands Free
Calling)....................150 Pairing (Wirelessly Connecting) Your
Mobile Phone To The Uconnect
System
....................151
Common Phone Commands
(Examples) ..................154
Mute (Or Unmute) Microphone
During Call ..................154
Transfer Ongoing Call Between Handset
And Vehicle .................154
Phonebook ..................154
Voice Command Tips ............154
Changing The Volume ............155
Using Do Not Disturb ...........155
Incoming Text Messages ..........156
Helpful Tips And Common Questions To
Improve Bluetooth Performance With
Your Uconnect System ...........157 Regulatory And Safety Information
USA/CANADA
................157
UCONNECT VOICE RECOGNITION
QUICK TIPS................ .158
Introducing Uconnect............158
Get Started ..................159
Basic Voice Commands ...........159
Radio .....................160
Media .....................160
Phone .....................160
Voice Text Reply ...............161
General Information .............162
Additional Information ...........162
MULTIMEDIA
141
Page 145 of 180

UCONNECT 3/3 NAV WITH 5-INCH DISPLAY
Uconnect 3/3 NAV With 5–inch Display
1 — Settings Button
2 — Back Button
3 — Browse/Enter — Tune/Scroll
4 — MORE Button
5 — Uconnect PHONE
6 — COMPASS/NAV — If Equipped7 — MEDIA Button
8 — RADIO Button
9 — On/Off — Volume Knob
10 — Mute Button
11 — SCREEN ON/OFF
143
Page 146 of 180
Clock Setting
1. To start the clock setting procedure, pushthe SETTINGS
button on the right
side of the display, then “Clock” button
on the touchscreen, and then “Set Time &
Format” button on the touchscreen. Se-
lect the up or down arrows as appropriate.
2. Press the up or down arrows to adjust the hours or minutes, next select the AM or
PM button on the touchscreen. You can
also select 12hr or 24hr format by press-
ing the desired button on the
touchscreen.
3. Once the time is set, press the “Done” or “back arrow” button on the touchscreen
to exit the time screen.
NOTE:
Once the time has been set on the radio, the
time will also appear in the instrument clus-
ter display.
Equalizer, Balance And Fade
1. Push the SETTINGSbutton on the
right side of the display.
2. Scroll down and press the “Audio” button on the touchscreen to open the Audio
menu.
3. The Audio Menu shows the following op- tions for you to customize your audio
settings.
Equalizer — If Equipped
• Press the “Equalizer” button on the touch- screen to adjust the Bass, Mid and Treble.
Use the “+” or “-” buttons on the touch-
screen to adjust the equalizer to your de-
sired settings.
Balance/Fade — If Equipped
• Press the “Balance/Fade” button on the touchscreen to adjust the sound from the
speakers. Use the “arrow” buttons on the
touchscreen to adjust the sound level from
the front and rear or right and left side
speakers. Press the Center “C” button on
the touchscreen to reset the balance and
fade to the factory setting. Speed Adjusted Volume — If Equipped
• Press the “Speed Adjusted Volume” button
on the touchscreen to select between OFF,
1, 2 or 3. This decreases the radio volume
relative to a decrease in vehicle speed.
AUX Volume Offset
• Press the “AUX Volume Offset” button on the touchscreen to activate the AUX Vol-
ume Offset screen.
• The AUX Volume Offset is adjusted by pressing of the “+” and “–” buttons. This
alters the AUX input audio volume. The
level value, which spans between plus or
minus three, is displayed above the adjust-
ment bar.
Auto Play
• Press the “Auto Play” button on the touch- screen to activate the Auto Play screen.
• The Auto Play feature begins playing music as soon as a USB Media device is con-
nected to one of the vehicle’s Media USB
ports, when it is turned on. Press “Off” to
turn the setting off.
MULTIMEDIA
144
Page 147 of 180

Loudness — If Equipped
• Press the “Loudness” button on the touch-screen to select the Loudness feature.
When this feature is activated, it improves
sound quality at lower volumes.
Auto-On Radio
• Press the “Auto-On Radio” button on the touchscreen, select On, Off, or Recall Last
followed by pressing “Done” or the “back
arrow” button on the touchscreen. When
this feature is activated, the radio auto-
matically turns on when the vehicle is in
run or recalls whether it was on or off at last
ignition off.
Radio Off Delay
• Press the “Radio Off Delay” button to keep the radio On for a preset amount of time
after the Ignition is switched OFF. Press the
“back arrow” button when completed.
145