2018 Ram 1500 manual radio set
[x] Cancel search: manual radio setPage 309 of 372

WARNING!
ALWAYS drive safely with your hands on
the wheel. You have full responsibility and
assume all risks related to the use of the
Uconnect features, SiriusXM Guardian
services, and applications in this vehicle.
Only use Uconnect features and SiriusXM
Guardian services when it is safe to do so.
Failure to do so may result in an accident
involving serious injury or death.
CAUTION!
Do NOT attach any object to the touch-
screen, doing so can result in damage to
the screen.
NOTE:
Uconnect screen images are for illustration
purposes only and may not reflect exact soft-
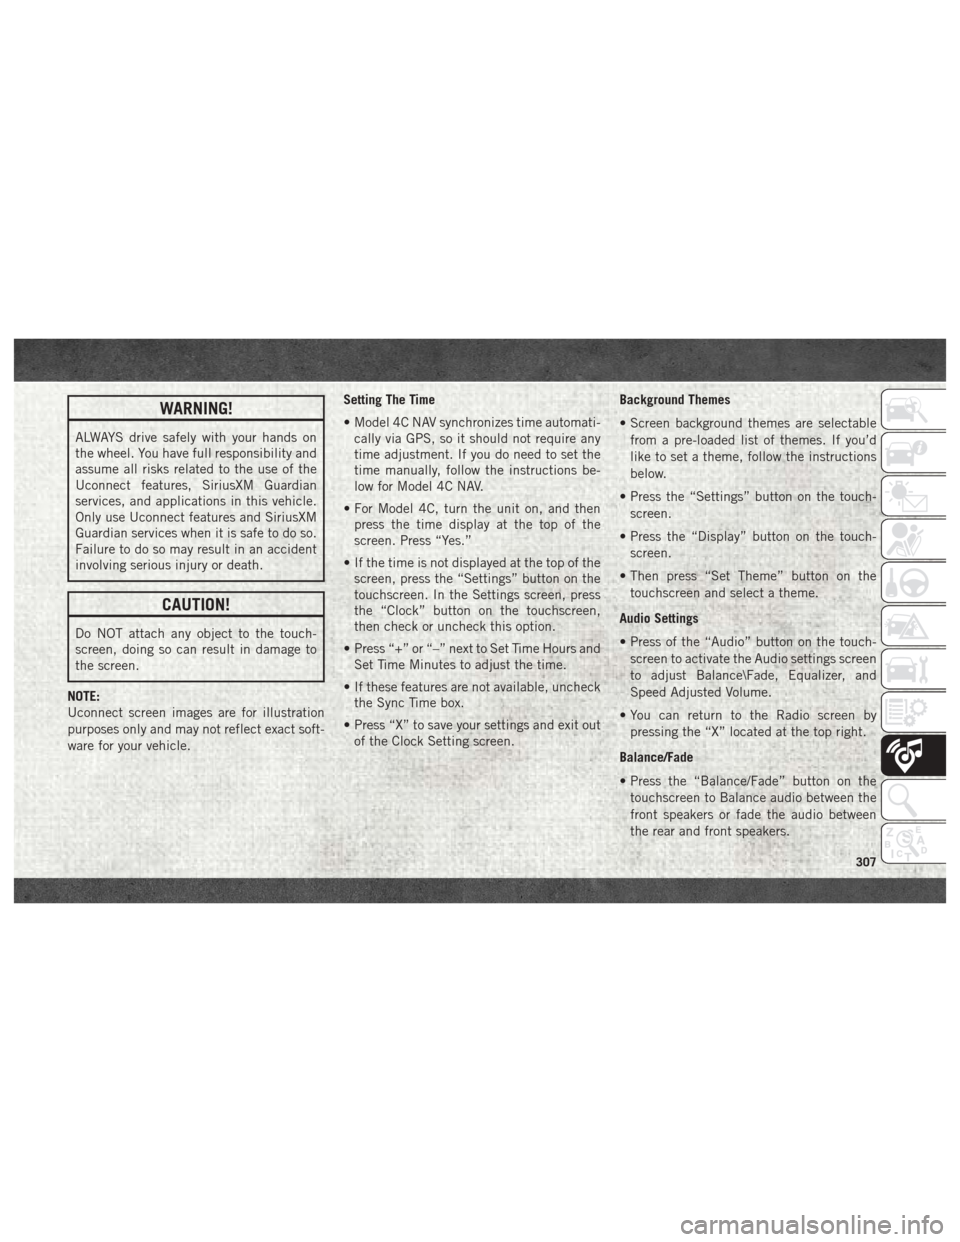
ware for your vehicle. Setting The Time
• Model 4C NAV synchronizes time automati-
cally via GPS, so it should not require any
time adjustment. If you do need to set the
time manually, follow the instructions be-
low for Model 4C NAV.
• For Model 4C, turn the unit on, and then press the time display at the top of the
screen. Press “Yes.”
• If the time is not displayed at the top of the screen, press the “Settings” button on the
touchscreen. In the Settings screen, press
the “Clock” button on the touchscreen,
then check or uncheck this option.
• Press “+” or “–” next to Set Time Hours and Set Time Minutes to adjust the time.
• If these features are not available, uncheck the Sync Time box.
• Press “X” to save your settings and exit out of the Clock Setting screen. Background Themes
• Screen background themes are selectable
from a pre-loaded list of themes. If you’d
like to set a theme, follow the instructions
below.
• Press the “Settings” button on the touch- screen.
• Press the “Display” button on the touch- screen.
• Then press “Set Theme” button on the touchscreen and select a theme.
Audio Settings
• Press of the “Audio” button on the touch- screen to activate the Audio settings screen
to adjust Balance\Fade, Equalizer, and
Speed Adjusted Volume.
• You can return to the Radio screen by pressing the “X” located at the top right.
Balance/Fade
• Press the “Balance/Fade” button on the touchscreen to Balance audio between the
front speakers or fade the audio between
the rear and front speakers.
307
Page 312 of 372

1. Press the “Apps” button to open the
App screen.
2. Press and hold, then drag the selected App to replace an existing shortcut in the
main menu bar.
The new app shortcut, that was dragged
down onto the main menu bar, will now
be an active App/shortcut.
NOTE:
This feature is only available if the vehicle is
in PARK.
Radio
WARNING!
ALWAYS drive safely with your hands on
the wheel. You have full responsibility and
assume all risks related to the use of the
Uconnect features, SiriusXM Guardian
services, and applications in this vehicle.
Only use Uconnect features and SiriusXM
Guardian services when it is safe to do so.
Failure to do so may result in an accident
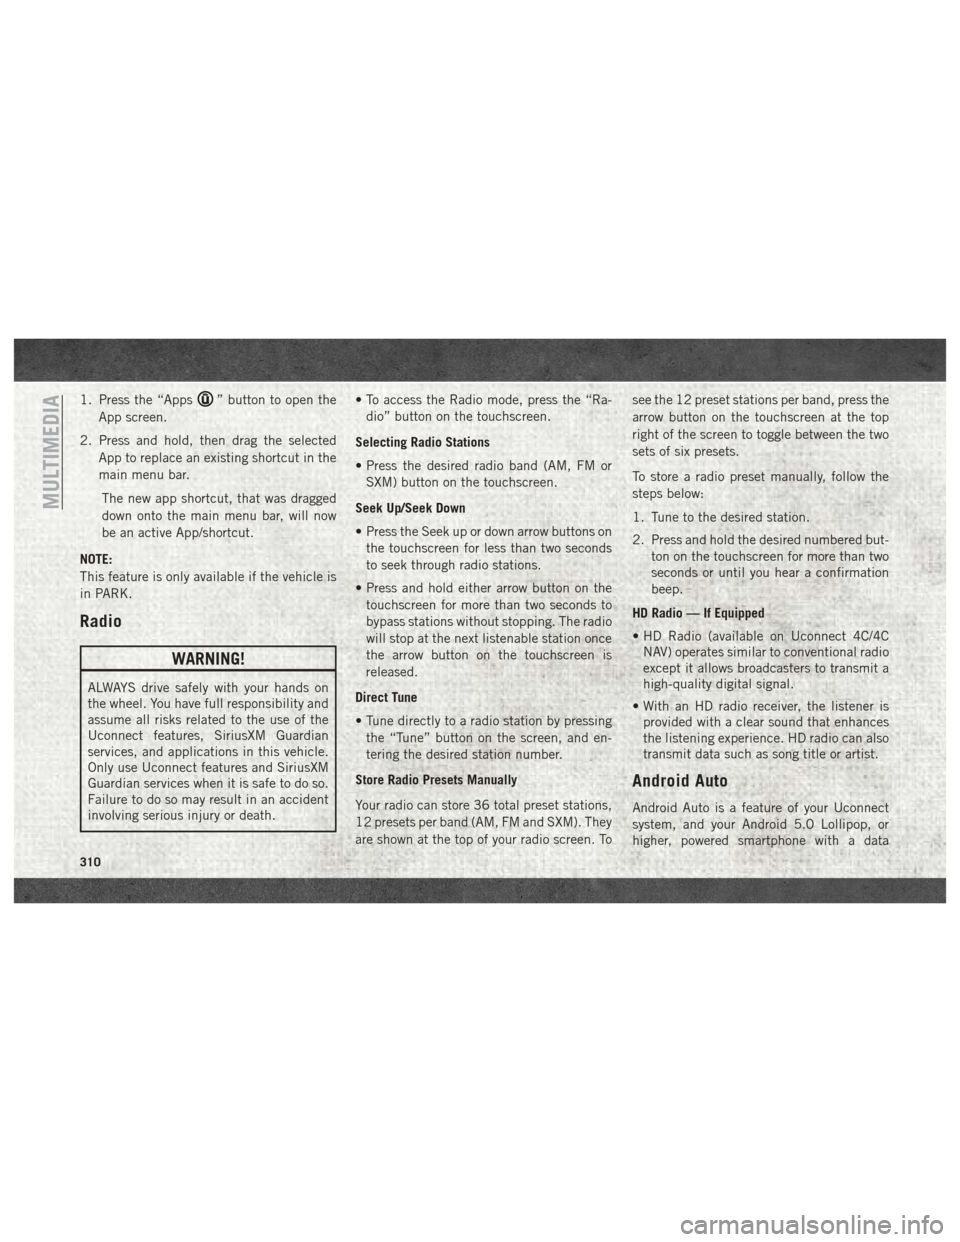
involving serious injury or death. • To access the Radio mode, press the “Ra-
dio” button on the touchscreen.
Selecting Radio Stations
• Press the desired radio band (AM, FM or SXM) button on the touchscreen.
Seek Up/Seek Down
• Press the Seek up or down arrow buttons on the touchscreen for less than two seconds
to seek through radio stations.
• Press and hold either arrow button on the touchscreen for more than two seconds to
bypass stations without stopping. The radio
will stop at the next listenable station once
the arrow button on the touchscreen is
released.
Direct Tune
• Tune directly to a radio station by pressing the “Tune” button on the screen, and en-
tering the desired station number.
Store Radio Presets Manually
Your radio can store 36 total preset stations,
12 presets per band (AM, FM and SXM). They
are shown at the top of your radio screen. To see the 12 preset stations per band, press the
arrow button on the touchscreen at the top
right of the screen to toggle between the two
sets of six presets.
To store a radio preset manually, follow the
steps below:
1. Tune to the desired station.
2. Press and hold the desired numbered but-
ton on the touchscreen for more than two
seconds or until you hear a confirmation
beep.
HD Radio — If Equipped
• HD Radio (available on Uconnect 4C/4C NAV) operates similar to conventional radio
except it allows broadcasters to transmit a
high-quality digital signal.
• With an HD radio receiver, the listener is provided with a clear sound that enhances
the listening experience. HD radio can also
transmit data such as song title or artist.
Android Auto
Android Auto is a feature of your Uconnect
system, and your Android 5.0 Lollipop, or
higher, powered smartphone with a data
MULTIMEDIA
310
Page 316 of 372

Apple CarPlay Integration
Uconnect works seamlessly with Apple Car-
Play, the smarter, more secure way to use
your iPhone in the car, and stay focused on
the road. Use your Uconnect Touchscreen
display, the vehicle's knobs and controls, and
your voice with Siri to get access to Apple
Music, Maps, Messages, and more.
To use CarPlay, make sure you are using
iPhone 5 or later, have Siri enabled in Set-
tings, ensure your iPhone is unlocked for the
very first connection only, and then use the
following procedure:
1. Connect your iPhone to one of the mediaUSB ports in your vehicle.
NOTE:
Be sure to use the factory-provided Light-
ning cable that came with your phone, as
aftermarket cables may not work.
2. Once the device is connected, the system will display the CarPlay home screen.
Apple CarPlay should automatically
launch, but if it does not launch automati-
cally, refer to the Uconnect Owner’s
Manual Supplement for the procedure to enable the feature “AutoShow.” You can
also launch it by pressing the CarPlay
located in the “Apps” menu. If you use
Apple CarPlay frequently you can move
the app to the menu bar at the bottom of
the touchscreen. Press the “Apps” button
and locate the CarPlay app; then press
and drag the selected App to replace an
existing shortcut in the main menu bar.
Once CarPlay is up and running on your
Uconnect radio, the following features can be
utilized using your iPhone’s data plan:
• Phone
• Music
• Messages • Maps
NOTE:
To use CarPlay make sure that cellular data is
turned on, and that you are in an area with
cellular coverage. Your data and cellular cov-
erage is shown on the left side of the radio
screen.
Phone
With CarPlay, press and hold the VR button
on the steering wheel to activate a Siri voice
recognition session. You can also press and
hold the Home button within CarPlay to start
talking to Siri. This will allow you to make
calls or listen to voice mail as you normally
would using Siri on your iPhone.
CarPlay
CarPlay Data And Cellular Coverage
MULTIMEDIA
314
Page 362 of 372

AirBag ............76, 104, 135
Automatic Headlights..........33
Battery Saver ...............32
Brake Warning ..............76
Bulb Replacement ...........202
Cargo ....................34
Cruise .................83, 84
Daytime Running ............32
Dimmer Switch, Headlight .......32
Engine Temperature Warning .....77
Exterior ..................136
Fog .....................82
Hazard Warning Flasher ........202
Headlights .................32
Headlights On Reminder ........32
Headlight Switch .............32
High Beam ................32
High Beam/Low Beam Select .....32
Instrument Cluster ............32
Lights On Reminder ...........32
Low Fuel ..................81
Malfunction Indicator (Check Engine) .78
Park ....................83
Passing ..................32
Seat Belt Reminder ...........76
Security Alarm ..............77
Service ..................202 Tire Pressure Monitoring (TPMS) .79, 88
Turn Signal
.......32, 33, 83, 136
Warning (Instrument Cluster
Description) .............77, 83
Loading Vehicle Tires ...................261
Low Tire Pressure System ..........88
Lug Nuts ...................276
Maintenance Plan ..........235, 239
Maintenance Schedule .......230, 234, 237, 239
Malfunction Indicator Light (Check Engine) ...............78
Manual, Service ...............355
Manual Transmission Lubricant Selection ..........282
Memory Feature (Memory Seat) ......22
Memory Seat ..................22
Memory Seats And Radio ..........22
Mirrors .....................31
Memory ..................22
Monitor, Tire Pressure System .......88
Mopar .....................287
Mopar
Accessories .............287
Multi-Function Control Lever ........32Navigation
...........327, 329, 330
Navigation System (Uconnect GPS) . . .179
New Vehicle Break-In Period . . . .153, 154
Occupant Restraints .............93
Oil Change Indicator ............238
Oil, Engine ...........280, 283, 285
Capacity ..............278, 279
Filter ............280, 283, 285
Pressure Warning Light .........77
Recommendation ...........278
Viscosity .................278
Oil Pressure Light ...............77
Onboard Diagnostic System .........84
Operating Precautions ............84
Overheating, Engine ............220
Owner's Manual (Operator Manual) . . .355
Panic Alarm ..................15
ParkSense System, Rear ..........179
Passive Entry .................19
Pedals, Adjustable ..............30
Perform Service Indicator, Reset .....239
Personalized Menu Bar ...........309
Pets ......................133
Phone, Hands-Free (Uconnect) ......332
Phone (Pairing) ...............334
INDEX
360