2018 PEUGEOT 5008 change wheel
[x] Cancel search: change wheelPage 9 of 364

7
Limit the causes of excess
consumption
Spread loads throughout the vehicle; place
the heaviest items in the bottom of the boot,
as close as possible to the rear seats.
Limit the loads carried in the vehicle and
reduce wind resistance (roof bars, roof rack,
bicycle carrier, trailer, etc.). Preferably, use a
roof box.
Remove roof bars and roof racks after use.
At the end of winter, remove snow tyres and
refit your summer tyres.
Observe the recommendations
on maintenance
Check the tyre pressures regularly, when cold,
referring to the label in the door aperture,
driver's side.
Carry out this check in particular:
-
b
efore a long journey,
-
a
t each change of season,
-
a
fter a long period out of use.
Do not forget the spare wheel and the tyres on
any trailer or caravan. Have your vehicle ser viced regularly (engine
oil, oil filter, air filter, cabin filter, etc.) and
obser ve the schedule of operations in the
manufacturer's service schedule.
When filling the tank, do not continue after the
3
rd cut-off of the nozzle to avoid over flow.
At the wheel of your new vehicle, it is only
after the first 1,900
miles (3,000 kilometres)
that you will see the fuel consumption settle
down to a
consistent average.
With a
BlueHDi Diesel engine, if the SCR
system is faulty, your vehicle becomes
polluting. As soon as possible, visit
a
PEUGEOT dealer or a qualified workshop
to make your vehicle's level of nitrogen oxides
emissions compliant to the standard.
.
Eco-driving
Page 76 of 364
74
Multipoint massage
System with a choice of type of massage and
ad justment of its intensity.
This system operates with the engine running,
as well as in STOP mode of Stop & Start.
Activation/Settings
The massage settings are adjusted in the touch
screen.
The system is switched on, either directly using
the button on the front seat, or by activating
a
personalised ambience with the i-Cockpit
Amplify function.
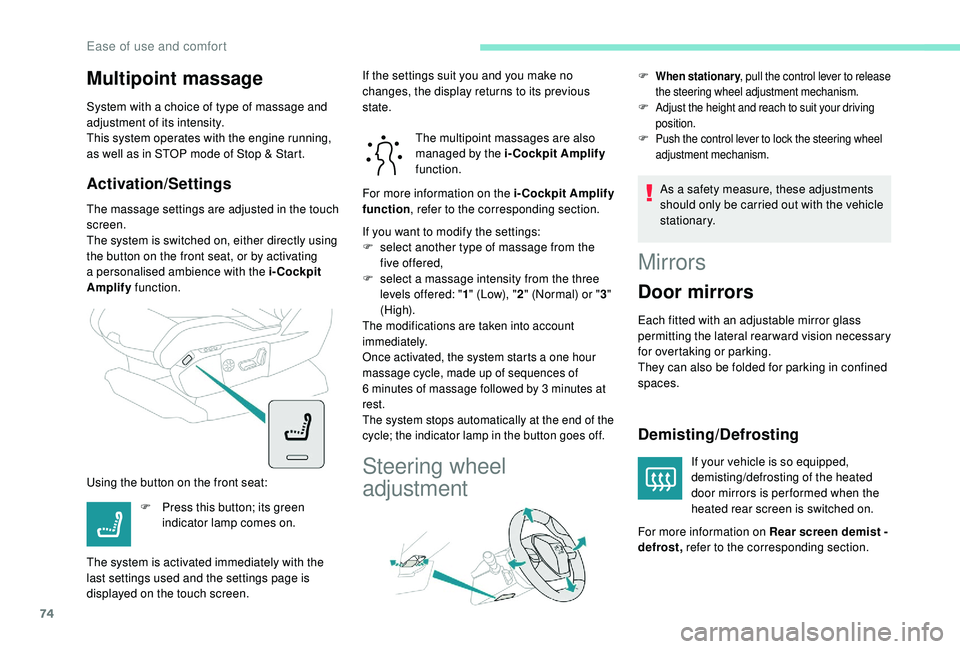
Using the button on the front seat: The multipoint massages are also
managed by the i-Cockpit Amplify
function.
If you want to modify the settings:
F
s
elect another type of massage from the
five offered,
F
s
elect a massage intensity from the three
levels offered: " 1" (Low), " 2" (Normal) or " 3"
(High).
The modifications are taken into account
immediately.
Once activated, the system starts a
one hour
massage cycle, made up of sequences of
6
minutes of massage followed by 3 minutes at
rest.
The system stops automatically at the end of the
cycle; the indicator lamp in the button goes off.
Steering wheel
adjustment
F When stationary , pull the control lever to release
the steering wheel adjustment mechanism.
F Adjust the height and reach to suit your driving position.
F Push the control lever to lock the steering wheel adjustment mechanism.
As a safety measure, these adjustments
s hould only be carried out with the vehicle
stationary.
F
P
ress this button; its green
indicator lamp comes on.
The system is activated immediately with the
last settings used and the settings page is
displayed on the touch screen. If the settings suit you and you make no
changes, the display returns to its previous
state.
For more information on the i-Cockpit Amplify
function
, refer to the corresponding section.
Mirrors
Door mirrors
Each fitted with an adjustable mirror glass
permitting the lateral rearward vision necessary
for overtaking or parking.
They can also be folded for parking in confined
spaces.
Demisting/Defrosting
If your vehicle is so equipped,
demisting/defrosting of the heated
door mirrors is per formed when the
heated rear screen is switched on.
For more information on Rear screen demist -
defrost, refer to the corresponding section.
Ease of use and comfort
Page 167 of 364
165
Only engage reverse gear when the
vehicle is stationary with the engine at
idle.
As a safety precaution and to facilitate
starting of the engine, always select
neutral and depress the clutch pedal.
Engaging 5th or 6th gear
F Move the lever fully to the right to engage 5th
or 6th g e a r.
Failure to follow this advice may cause
permanent damage to the gearbox
(engagement of 3
rd or 4th gear by mistake).
Automatic gearbox (EAT6/
E AT 8)
Six or eight-speed automatic gearbox with push
selector. It also offers a manual mode with gear
changes via steering mounted paddles, located
behind the steering wheel.
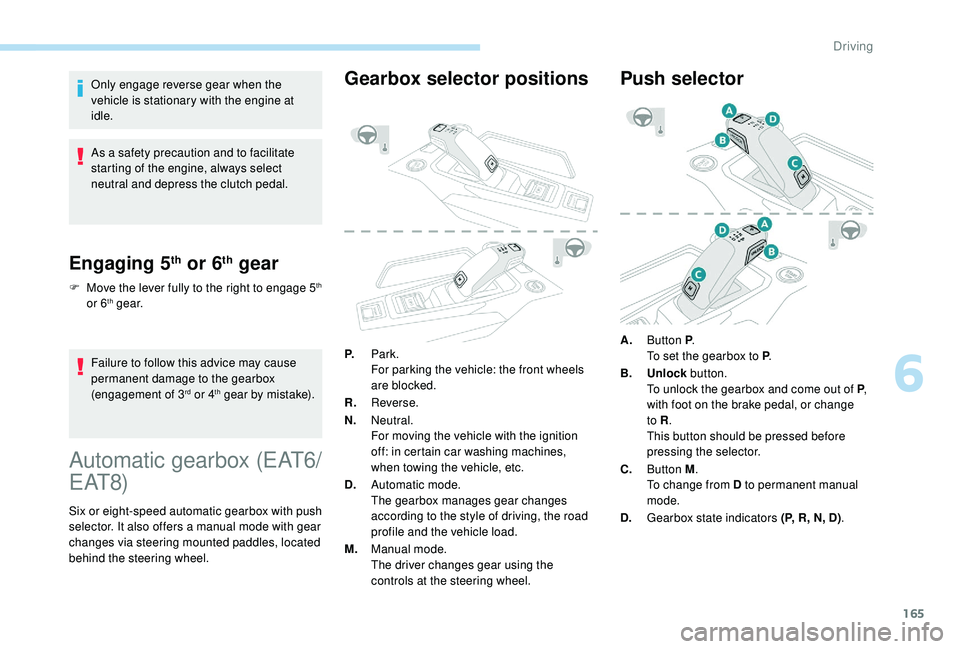
Gearbox selector positions
P. Park.
For parking the vehicle: the front wheels
are blocked.
R. Reverse.
N. Neutral.
For moving the vehicle with the ignition
off: in certain car washing machines,
when towing the vehicle, etc.
D. Automatic mode.
The gearbox manages gear changes
according to the style of driving, the road
profile and the vehicle load.
M. Manual mode.
The driver changes gear using the
controls at the steering wheel.
Push selector
A.Button P .
To set the gearbox to P .
B. Unlock button.
To unlock the gearbox and come out of P ,
with foot on the brake pedal, or change
to R .
This button should be pressed before
pressing the selector.
C. Button M .
To change from D to permanent manual
mode.
D. Gearbox state indicators (P, R, N, D) .
6
Driving
Page 169 of 364
167
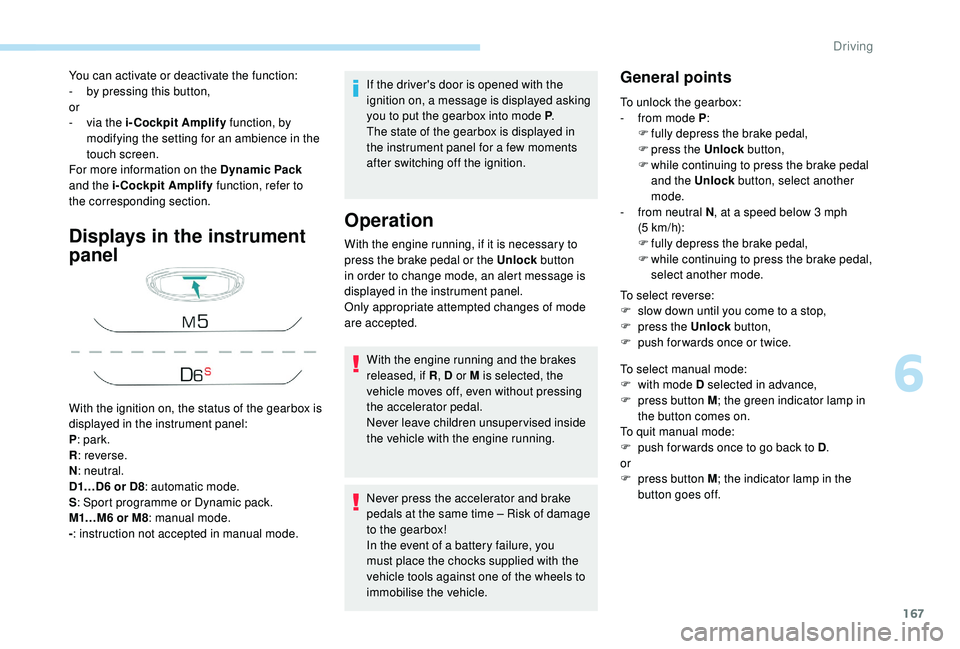
Displays in the instrument
panel
If the driver's door is opened with the
ignition on, a message is displayed asking
you to put the gearbox into mode P.
The state of the gearbox is displayed in
the instrument panel for a
few moments
after switching off the ignition.
Operation
You can activate or deactivate the function:
- b y pressing this button,
or
-
v
ia the i-Cockpit Amplify function, by
modifying the setting for an ambience in the
touch screen.
For more information on the Dynamic Pack
and the i-Cockpit Amplify function, refer to
the corresponding section.
With the ignition on, the status of the gearbox is
displayed in the instrument panel:
P : park.
R : reverse.
N : neutral.
D1…D6
or D8: automatic mode.
S : Sport programme or Dynamic pack.
M1…M6
or M8: manual mode.
- : instruction not accepted in manual mode. With the engine running, if it is necessary to
press the brake pedal or the Unlock
button
in order to change mode, an alert message is
displayed in the instrument panel.
Only appropriate attempted changes of mode
are accepted.
With the engine running and the brakes
released, if R , D or M is selected, the
vehicle moves off, even without pressing
the accelerator pedal.
Never leave children unsuper vised inside
the vehicle with the engine running.
Never press the accelerator and brake
pedals at the same time – Risk of damage
to the gearbox!
In the event of a
battery failure, you
must place the chocks supplied with the
vehicle tools against one of the wheels to
immobilise the vehicle.General points
To unlock the gearbox:
- f rom mode P :
F
f
ully depress the brake pedal,
F
press the Unlock button,
F
w
hile continuing to press the brake pedal
and the Unlock button, select another
mode.
-
f
rom neutral N , at a
speed below 3 mph
(5
km/h):
F
f
ully depress the brake pedal,
F
w
hile continuing to press the brake pedal,
select another mode.
To select reverse:
F
s
low down until you come to a stop,
F
p
ress the Unlock button,
F
p
ush forwards once or twice.
To select manual mode:
F
w
ith mode D selected in advance,
F
p
ress button M ; the green indicator lamp in
the button comes on.
To quit manual mode:
F
p
ush for wards once to go back to D .
or
F
p
ress button M ; the indicator lamp in the
button goes off.
6
Driving
Page 170 of 364
168
To switch off the ignition, the vehicle must be
stationary.
To put the vehicle in free-wheeling mode,
engine off:
F
w
ith the vehicle stationary, engine running,
select N ,
F
s
witch off the engine,
F
w
ithin five seconds, switch the ignition on
again,
F
w
ith your foot on the brake pedal, push the
selector for wards or backwards once to
confirm N and manually release the electric
parking brake,
F
s
witch off the ignition.
If you exceed the time limit of five seconds,
the gearbox engages mode P ; you must then
restart the procedure.
If you open the driver's door when mode N
is engaged, an audible signal will sound. It
will stop when you close the driver's door
again.
Special aspects of automatic
mode
For maximum acceleration without touching
the selector, press the accelerator fully down
(kick-down). The gearbox changes down
automatically or holds the gear selected until
the maximum engine speed is reached.
When braking, the gearbox changes down
automatically to provide effective engine
braking.
The steering mounted controls allow the driver
to temporarily select a
gear, if the road and
engine speed permit.
Special aspects of manual mode
The change from one gear to another takes
place only if the road speed and engine speed
permit.
If the engine speed is too high or too low, the
gear selected flashes for a
few seconds, then
the gear actually engaged is displayed.
Moving off
From mode P:
F P ress the brake pedal firmly.
F
S
tart the engine.
F
M
aintaining pressure on the brake pedal,
press the Unlock button.
F
P
ush once or twice rear ward to select the
automatic mode D, or for ward to engage
reverse R . In severe wintry conditions (temperature
below -23°C), it is recommended that the
engine be allowed to run for a
few minutes
before moving off, to ensure the correct
operation and durability of the engine and
gearbox.
Stopping the vehicle
Whatever the state of the gearbox when the
ignition is switched off, mode P is engaged
automatically, with the exception of N , in which
case mode P will be engaged after a
delay of
5
seconds (allowing the change to free-wheel).
The gearbox selects the gear that offers
optimum per formance, taking account of the
exterior temperature, the profile of the road, the
load on the vehicle and the style of driving. From neutral N
:
F
P
ress the brake pedal firmly.
F
S
tart the engine.
F
M
aintaining pressure on the brake pedal,
push rear ward to select the automatic mode
D, or for ward, while pressing the Unlock
button to engage reverse R .
Then, from P or N :
F
R
elease the brake pedal.
F
A
ccelerate progressively to automatically
release the electric parking brake.
F
W
ith the parking brake released, the vehicle
then moves off.
Driving
Page 176 of 364
174
Under-inflation detection
System which automatically checks the
pressures of the tyres while driving.
The system monitors the pressures in the four
tyres, once the vehicle is moving.
It compares the information given by the wheel
speed sensors with reference values, which
must be reinitialised ever y time the tyre
pressures are adjusted or a wheel changed.
The system triggers an alert as soon as it
detects a
drop in the inflation pressure of one
or more tyres.
The under-inflation detection system does
not replace the need for vigilance on the
part of the driver.
This system does not avoid the need to
check the tyre pressures (including the
spare wheel) every month as well as
before a
long journey.
Driving with under-inflated tyres worsens
road-holding, lengthens braking distances,
causes premature wear of the tyres,
particularly in adverse conditions (heavy
loads, high speeds, long journeys). Driving with under-inflated tyres
increases fuel consumption.
The inflation pressures defined for your
vehicle can be found on the tyre pressure
label.
For more information on the
Identification markings , refer to the
corresponding section.
Checking tyre pressures
This check should be done when the tyres
are "cold" (vehicle stopped for 1
hour or
after a
journey of less than 6 miles (10 km)
at moderate speeds).
Other wise, add 0.3
bar to the pressures
shown on the label.
Snow chains
The system does not have to be
reinitialised after fitting or removing snow
chains.
Under-inflation alert
This warning is indicated by
continuous illumination of this lamp,
an audible signal and, depending on
the equipment installed, a message
displayed on the screen.
F
R
educe speed immediately, avoid excessive
steering movements and sudden braking.
F
S
top the vehicle as soon as it is safe to do
so.
The loss of pressure detected does not
always cause visible bulging of the tyre.
Do not satisfy yourself with just a
visual
check.
F
I
f you have a compressor, such as the one
in the temporary puncture repair kit, check
the pressures of the four tyres when cold.
F
I
f it is not possible to make this check
immediately, drive carefully at reduced
speed.
or
F
I
n case of a puncture, use the temporary
puncture repair kit or the spare wheel
(depending on equipment).
The alert is kept active until the system is
reinitialised.
Driving
Page 185 of 364
183
To modify the cruise speed setting from the
current speed of the vehicle:
F
i
n steps of + or - 1 mph (km/h), make
repeated short presses on button 2
or 3,
F
c
ontinuously, in steps of + or - 5 mph (km/h),
press and hold button 2
or 3.
Take care: pressing and holding button
2
or 3 results in a rapid change in the
speed of your vehicle.
As a
precaution, it is recommended
that the cruise speed chosen be close
to the current speed of your vehicle, so
as to avoid any sudden acceleration or
deceleration of the vehicle.
To modify the cruise speed setting using
memorised speed settings and from the touch
screen:
F
p
ress button 5 to display the six memorised
speed settings,
F
p
ress the button for the desired speed
setting.
This setting becomes the new cruise speed. F
m ake a first press on button 5; a message
is displayed to confirm the memorisation
request,
F
p
ress button 5 again to save the suggested
speed.
The speed displays immediately in the
instrument panel as the new speed setting.
Temporarily exceeding the
programmed speed
If needed (for overtaking, etc.) it is possible to
exceed the programmed speed by pressing the
accelerator pedal.
The cruise control is temporarily overridden
and the programmed speed setting flashes. When descending a
steep hill, the cruise
control system cannot prevent the vehicle
from exceeding the programmed speed.
To modify the cruise speed setting using
the speed suggested by the speed limit sign
recognition system:
F
t
he speed suggested is displayed in the
instrument panel, To return to the programmed speed, simply
release the accelerator pedal.
Once the vehicle has returned to the
programmed speed, the cruise control takes
over again: the display of the programmed
speed setting becomes steady again. You may have to brake to control the speed of
your vehicle. In this case, the cruise control is
automatically paused.
To activate the system again, with the speed
of the vehicle above 25
mph (40 km/h), press
button 4 .
Switching off
F Turn the thumbwheel 1 to the "0" position:
the cruise control information disappears
from the screen.
Malfunction
Flashing dashes indicate a fault with the cruise
c ontrol system.
Have it checked by a
PEUGEOT dealer or
a
qualified workshop.
6
Driving
Page 188 of 364
186
Pause
The adaptive cruise control can be paused
manually by:
-
a
ction by the driver:
•
O
n button 4 (Pause).
•
O
n the brake pedal.
•
O
n the electric parking brake control.
•
B
y changing from mode D to N with an
automatic gearbox.
When the cruise control is paused, it
can only be reactivated when all of the
safety conditions are met. The message
"Activation not possible, conditions
unsuitable" is displayed while reactivation is
not possible.
To reactivate the function, the driver
must accelerate to reach at least 19
mph
(30
km/h), then press one of the
buttons 2 ,
3 or 4.
As a safety measure, wait until the current
speed reaches the speed setting to
reactivate the function by pressing button 4 .
Versions fitted with an automatic
gearbox
Following braking of the vehicle bringing it
to a
complete stop, the system holds the
vehicle stationary; the cruise control is
paused.
The driver should press the accelerator
pedal to move off, then reactivate the
system above 19
mph (30 km/h) by
pressing button 2 , 3
or 4.
If the driver takes no action following
this immobilisation, the electric parking
brake is applied automatically after a
few
minutes.
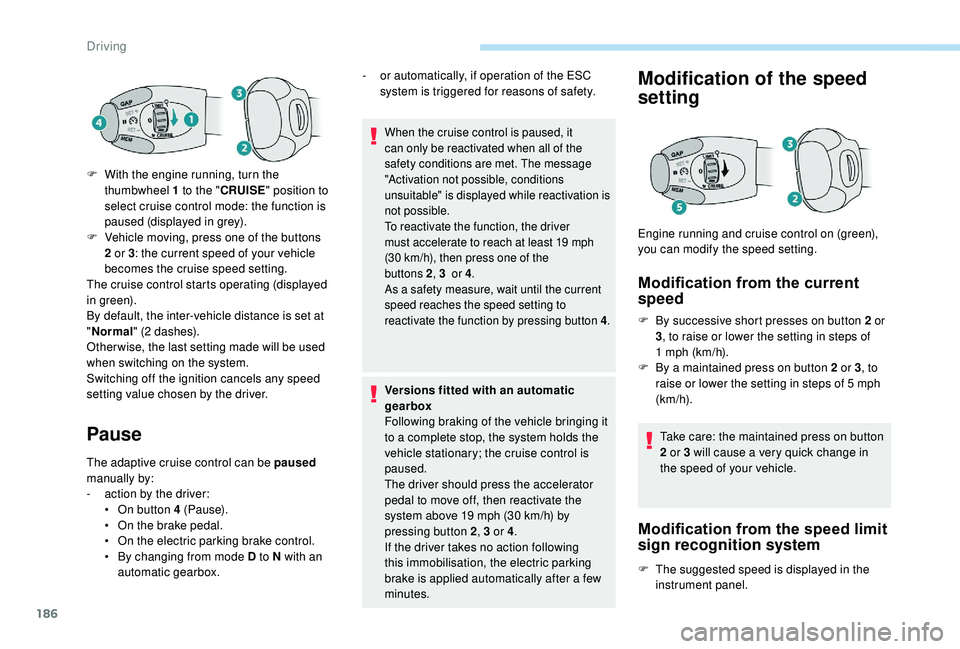
Modification of the speed
setting
Modification from the current
speed
F By successive short presses on button 2 or
3 , to raise or lower the setting in steps of
1
mph (km/h).
F
B
y a maintained press on button 2 or 3, to
raise or lower the setting in steps of 5
mph
(km/h).
Take care: the maintained press on button
2
or 3 will cause a very quick change in
the speed of your vehicle.
Modification from the speed limit
sign recognition system
F The suggested speed is displayed in the instrument panel.
Engine running and cruise control on (green),
you can modify the speed setting.
F
W
ith the engine running, turn the
thumbwheel 1
to the "
CRUISE " position to
select cruise control mode: the function is
paused (displayed in grey).
F
V
ehicle moving, press one of the buttons
2
or 3
: the current speed of your vehicle
becomes the cruise speed setting.
The cruise control starts operating (displayed
in green).
By default, the inter-vehicle distance is set at
" Normal " (2
dashes).
Other wise, the last setting made will be used
when switching on the system.
Switching off the ignition cancels any speed
setting value chosen by the driver. -
o
r automatically, if operation of the ESC
system is triggered for reasons of safety.
Driving