2018 PEUGEOT 5008 start stop button
[x] Cancel search: start stop buttonPage 88 of 364
86
Manual air conditioning
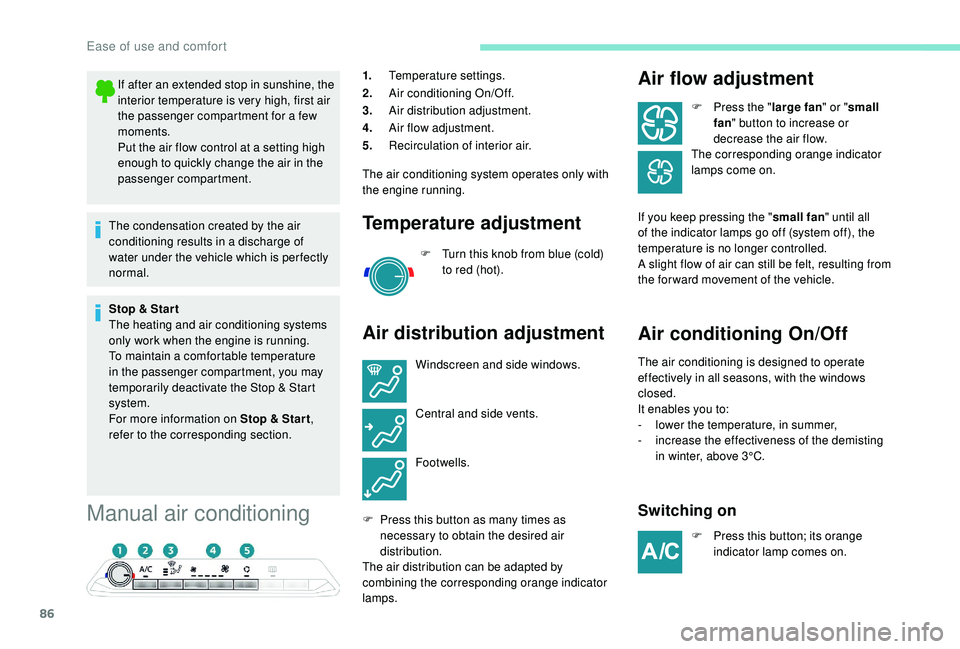
1.Temperature settings.
2. Air conditioning On/Off.
3. Air distribution adjustment.
4. Air flow adjustment.
5. Recirculation of interior air.
The air conditioning system operates only with
the engine running.
Temperature adjustment
F Turn this knob from blue (cold) to red (hot).
Air distribution adjustment Air flow adjustment
F Press the "
large fan" or "small
fan " button to increase or
decrease the air flow.
The corresponding orange indicator
lamps come on.
If you keep pressing the " small fan" until all
of the indicator lamps go off (system off), the
temperature is no longer controlled.
A slight flow of air can still be felt, resulting from
the for ward movement of the vehicle.
Air conditioning On/Off
The air conditioning is designed to operate
effectively in all seasons, with the windows
closed.
It enables you to:
-
l
ower the temperature, in summer,
-
i
ncrease the effectiveness of the demisting
in winter, above 3°C.
Switching on
F Press this button; its orange indicator lamp comes on.
If after an extended stop in sunshine, the
interior temperature is very high, first air
the passenger compartment for a
few
moments.
Put the air flow control at a
setting high
enough to quickly change the air in the
passenger compartment.
The condensation created by the air
conditioning results in a
discharge of
water under the vehicle which is per fectly
normal.
Stop & Star t
The heating and air conditioning systems
only work when the engine is running.
To maintain a
comfortable temperature
in the passenger compartment, you may
temporarily deactivate the Stop & Start
system.
For more information on Stop & Star t ,
refer to the corresponding section. Windscreen and side windows.
Central and side vents.
Footwells.
F
P
ress this button as many times as
necessary to obtain the desired air
distribution.
The air distribution can be adapted by
combining the corresponding orange indicator
lamps.
Ease of use and comfort
Page 94 of 364
92
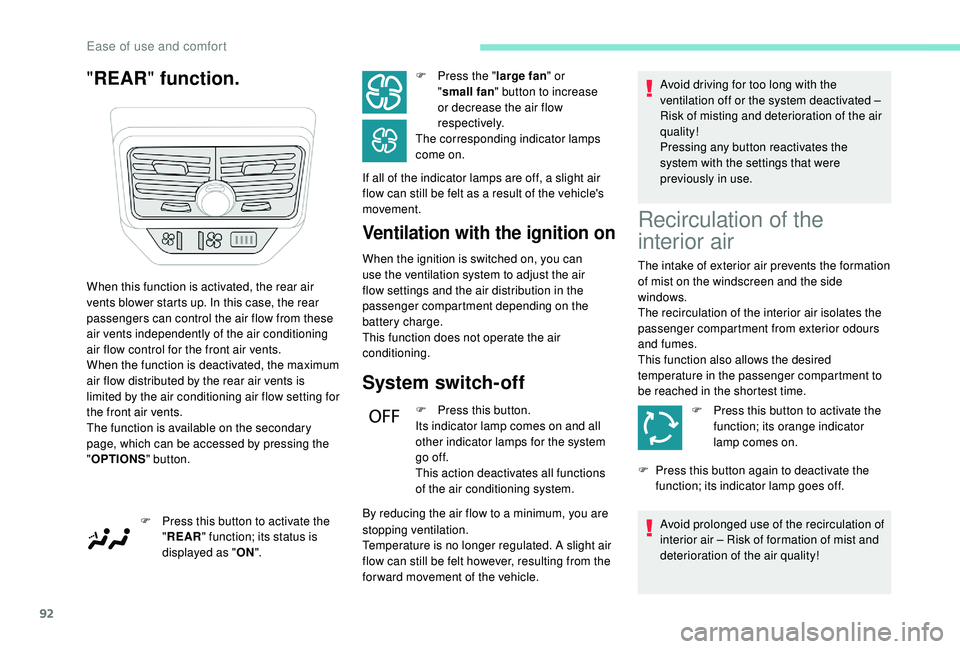
"REAR " function.
Ventilation with the ignition on
When the ignition is switched on, you can
use the ventilation system to adjust the air
flow settings and the air distribution in the
passenger compartment depending on the
battery charge.
This function does not operate the air
conditioning.
System switch-off
F Press this button.
Its indicator lamp comes on and all
other indicator lamps for the system
go of f.
This action deactivates all functions
of the air conditioning system.
By reducing the air flow to a
minimum, you are Avoid driving for too long with the
ventilation off or the system deactivated –
Risk of misting and deterioration of the air
quality!
Pressing any button reactivates the
system with the settings that were
previously in use.
When this function is activated, the rear air
vents blower starts up. In this case, the rear
passengers can control the air flow from these
air vents independently of the air conditioning
air flow control for the front air vents.
When the function is deactivated, the maximum
air flow distributed by the rear air vents is
limited by the air conditioning air flow setting for
the front air vents.
The function is available on the secondary
page, which can be accessed by pressing the
" OPTIONS " button.
F
P
ress this button to activate the
" REAR " function; its status is
displayed as " ON". F
P
ress the "
large fan " or
" small fan " button to increase
or decrease the air flow
respectively.
The corresponding indicator lamps
come on.
If all of the indicator lamps are off, a slight air
flow can still be felt as a result of the vehicle's
movement.
stopping ventilation.
Temperature is no longer regulated. A slight air
flow can still be felt however, resulting from the
for ward movement of the vehicle.
Recirculation of the
interior air
The intake of exterior air prevents the formation
of mist on the windscreen and the side
windows.
The recirculation of the interior air isolates the
passenger compartment from exterior odours
and fumes.
This function also allows the desired
temperature in the passenger compartment to
be reached in the shortest time.
F
P
ress this button to activate the
function; its orange indicator
lamp comes on.
F
P
ress this button again to deactivate the
function; its indicator lamp goes off.
Avoid prolonged use of the recirculation of
interior air – Risk of formation of mist and
deterioration of the air quality!
Ease of use and comfort
Page 95 of 364
93
The system activates automatically when
reverse gear is engaged.
Front demist – defrost
With manual air
conditioning
F Adjust the temperature to maximum (red).
F A djust the air flow to maximum; all of the
orange indicator lamps come on.
F
A
djust the air distribution to the
" Windscreen" position; its associated
orange indicator lamp comes on.
F
C
heck that the recirculation of interior air is
deactivated; its indicator lamp must be off.
F
S
witch on the air conditioning by pressing
the " A/C" button; its orange indicator lamp
comes on.
With Stop & Start, when the demisting,
air conditioning and air flow functions are
activated, STOP mode is not available.
With semi-automatic and
automatic air conditioning
Automatic visibility programme
F Press this button to demist or defrost the windscreen and
side windows more quickly; its
orange indicator lamp comes on.
The system automatically manages the air
conditioning (depending on version), air
flow and air intake, and provides optimum
distribution towards the windscreen and side
windows.
F
T
o switch it off, press this button; its
indicator lamp goes off.
The system allows the manual modification of
air flow without causing automatic deactivation
of the automatic visibility programme.
With Stop & Start, when demisting –
defrosting has been activated, STOP
mode is not available. In wintry conditions, remove all snow or
ice on the camera on the windscreen
before moving off.
Other wise, this can affect the function
of the equipment associated with the
camera.Heated windscreen
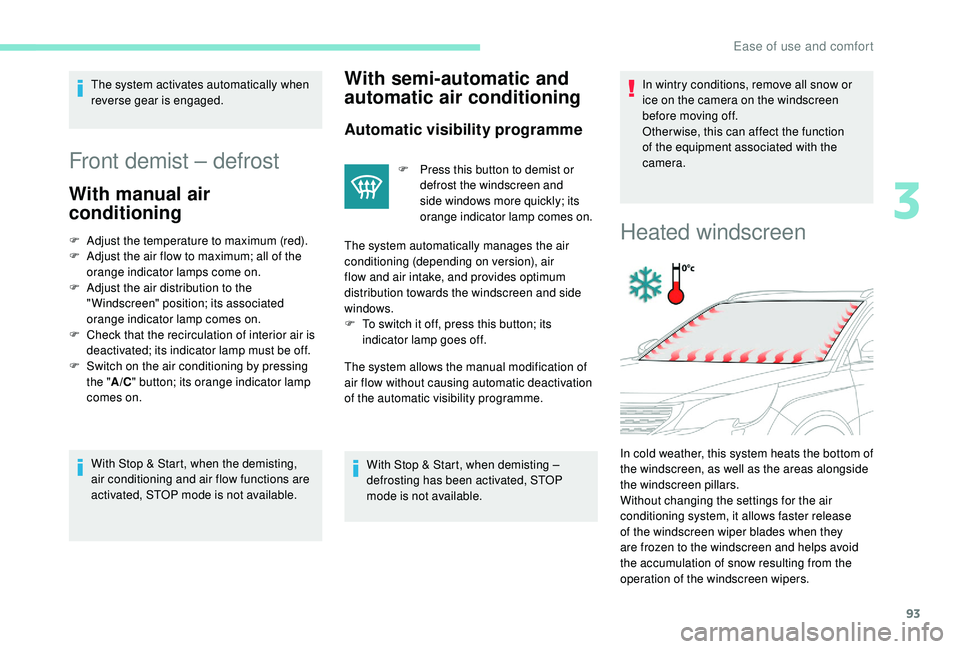
In cold weather, this system heats the bottom of
the windscreen, as well as the areas alongside
the windscreen pillars.
Without changing the settings for the air
conditioning system, it allows faster release
of the windscreen wiper blades when they
are frozen to the windscreen and helps avoid
the accumulation of snow resulting from the
operation of the windscreen wipers.
3
Ease of use and comfort
Page 96 of 364
94
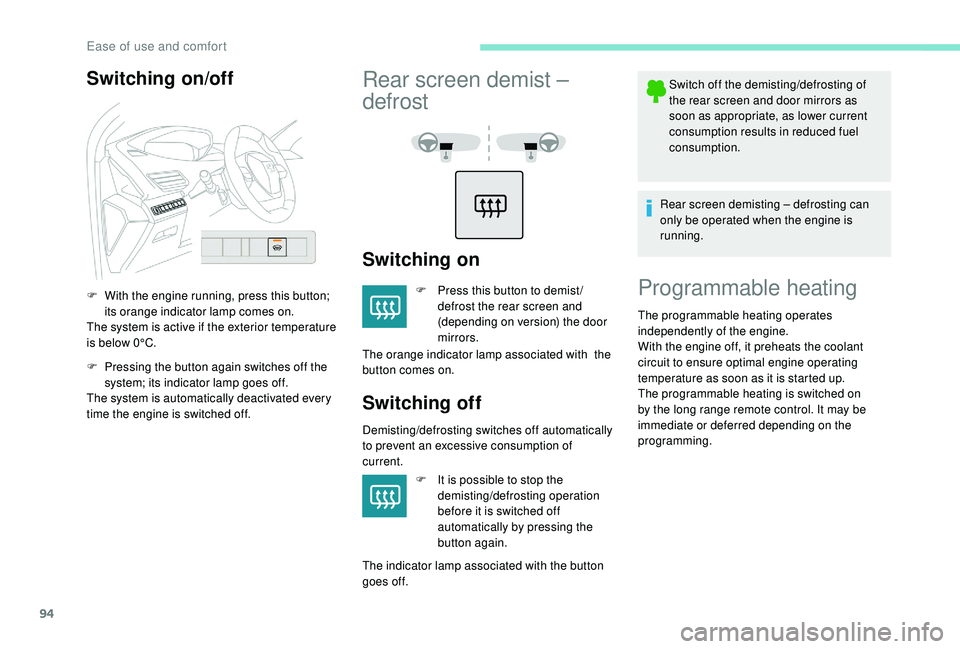
Switching on/off
F With the engine running, press this button; its orange indicator lamp comes on.
The system is active if the exterior temperature
is below 0°C.
F
P
ressing the button again switches off the
system; its indicator lamp goes off.
The system is automatically deactivated every
time the engine is switched off.
Rear screen demist –
defrost
Switching on
F Press this button to demist / defrost the rear screen and
(depending on version) the door
mirrors.
The orange indicator lamp associated with the
button comes on.
Switching off
Demisting/defrosting switches off automatically
to prevent an excessive consumption of
current.
F
I
t is possible to stop the
demisting/defrosting operation
before it is switched off
automatically by pressing the
button again.
The indicator lamp associated with the button
goes off. Switch off the demisting/defrosting of
the rear screen and door mirrors as
soon as appropriate, as lower current
consumption results in reduced fuel
consumption.
Rear screen demisting – defrosting can
only be operated when the engine is
running.
Programmable heating
The programmable heating operates
independently of the engine.
With the engine off, it preheats the coolant
circuit to ensure optimal engine operating
temperature as soon as it is started up.
The programmable heating is switched on
by the long range remote control. It may be
immediate or deferred depending on the
programming.
Ease of use and comfort
Page 100 of 364
98
HTM: Heat Thermo Management
F
T
o deactivate the programming, press
button 4
until the message " OK" is
displayed.
During these operations, if the message
" FA I L " is displayed, it means that the
signal has not been received. Restart the
procedure after having changed position.
Stopping the heating
F Press button 5 .
Changing the heating level
The system has 5 heating levels: C1 ( lowest
level) to C5 (highest level).
F
A
fter having displayed the heating level
using buttons 1 , press simultaneously on
buttons 4
and 5.
The letter " C" will flash.
F
A
djust the heating level by pressing
buttons 1 .
F
S
imultaneously press buttons 4 and 5 to
save the selected level.
The letter " C" will be displayed.
The presets are replaced by the new
entries. The programmed times are
memorised until the next change.
When the start time is activated, it is not
possible to change the heating level. You
must first deactivate the start time.
Operating fault
In the event of a fault with the programmable
h eating, contact a PEUGEOT dealer or
a
qualified workshop.
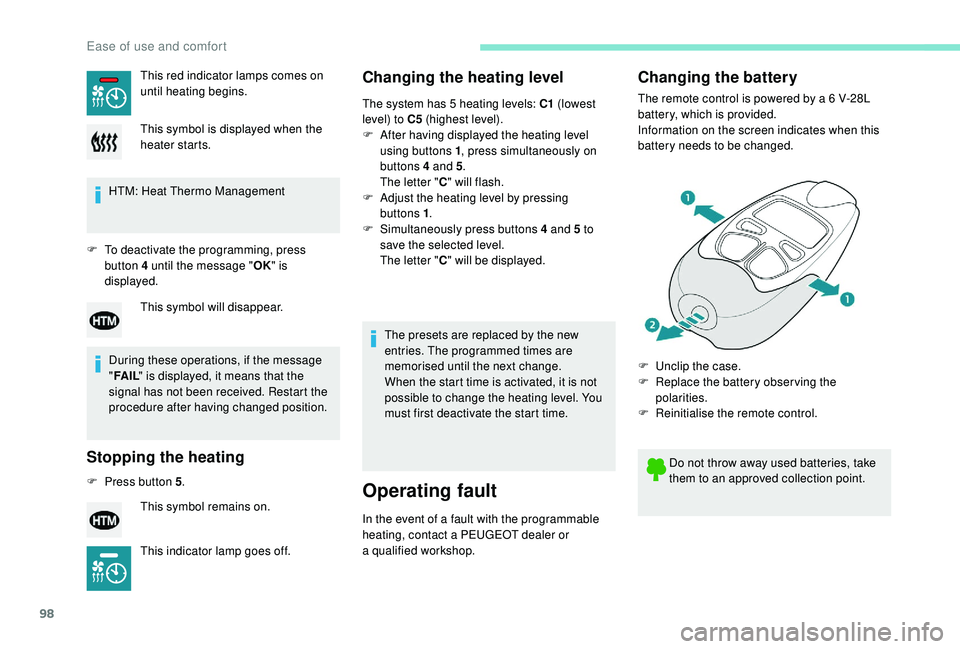
Changing the battery
The remote control is powered by a 6 V-28L
b attery, which is provided.
Information on the screen indicates when this
battery needs to be changed.
This red indicator lamps comes on
until heating begins.
This symbol is displayed when the
heater starts.
This symbol will disappear.
This symbol remains on.
This indicator lamp goes off. Do not throw away used batteries, take
them to an approved collection point.
F
U
nclip the case.
F
R
eplace the battery observing the
polarities.
F
R
einitialise the remote control.
Ease of use and comfort
Page 161 of 364
159
The presence of the Keyless Entry and
Starting electronic key in the recognition
zone is essential.
If the electronic key is not detected in this
zone, a message is displayed.
Move the electronic key into this zone so
that the engine can be started.
If there is still a
problem, refer to the "Key
not detected – Back-up starting" section.
F
P
ress the "START/STOP "
button while maintaining
pressure on the pedal until the
engine starts.
For Diesel engines , when the temperature is
negative and/or the engine is cold, the start
will only take place once the preheater warning
lamp is off. F
W
ith a manual gearbox
, you should keep
the clutch pedal fully depressed until the
warning lamp goes off and not press the
" START/STOP " button again until the
engine is running.
F
W
ith an automatic gearbox, you should
keep the brake pedal fully depressed until
the warning lamp goes off and not press
the " START/STOP " button again until the
engine is running.
If one of the starting conditions is not met,
a reminder message is displayed in the
instrument panel.
In some circumstances, it is necessary to turn
the steering wheel slightly while pressing the
" START/STOP " button to assist unlocking of
the steering column; a message warns you
when this is needed.
or
F
W
ith an automatic gearbox
, place the gear
selector in mode P or N .
F
W
ith the electronic key inside the vehicle,
fully depress the brake pedal.
The steering column unlocks and the engine
starts.
On certain versions with the EAT8 automatic
gearbox, the steering column does not lock. If this warning lamp comes on after
pressing the "
START/STOP " button:
With petrol engines , after a
cold start,
preheating the catalytic converter can
cause clearly-felt engine vibrations for
anything up to 2
minutes while stationary
with the engine running (accelerated idle
speed). As a
safety measure, never leave the
vehicle while the engine is running.Switching off the engine
F Immobilise the vehicle, engine at idle.
F W ith a manual gearbox , put the gear lever
into neutral.
or
F
W
ith an automatic gearbox , place the gear
selector in mode P or N .
F
W
ith the electronic key inside the vehicle,
press the " START/STOP " button.
The engine stops and the steering column
locks.
In some circumstances, it is necessary to turn
the steering wheel to lock the steering column.
On certain versions with the EAT8
automatic
gearbox, the steering column does not lock.
If the vehicle is not immobilised, the
engine will not stop.
Never leave your vehicle with the
electronic key still inside.
Switching off the engine leads to a
loss of
braking assistance.
6
Driving
Page 162 of 364
160
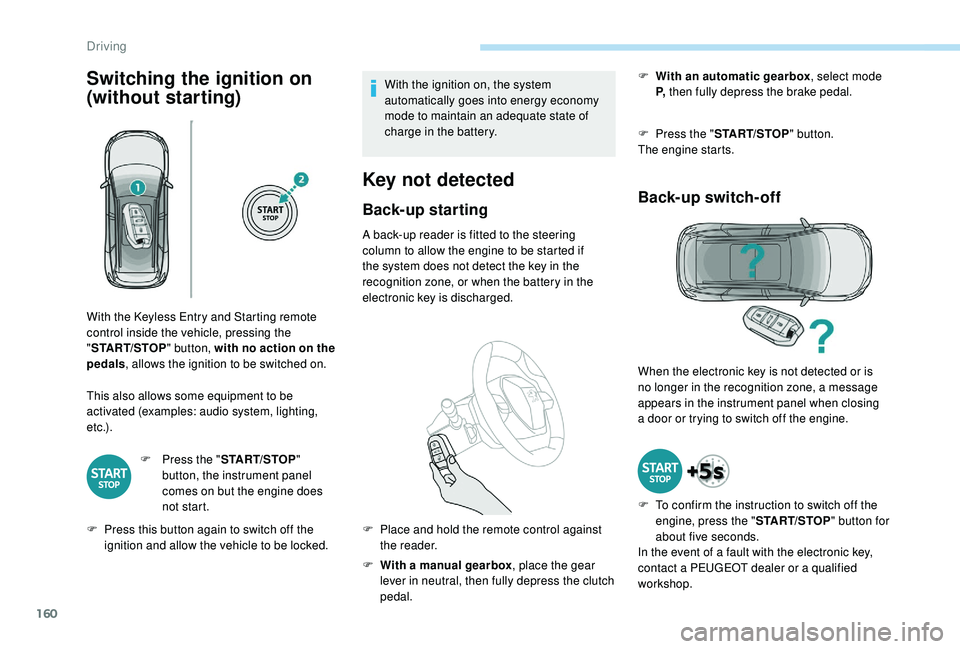
Switching the ignition on
(without starting)
This also allows some equipment to be
activated (examples: audio system, lighting,
e t c .) .F
P
ress the "START/STOP "
button, the instrument panel
comes on but the engine does
not start.
F
P
ress this button again to switch off the
ignition and allow the vehicle to be locked. With the ignition on, the system
automatically goes into energy economy
mode to maintain an adequate state of
charge in the battery.
Key not detected
Back-up starting
A back-up reader is fitted to the steering
column to allow the engine to be started if
the system does not detect the key in the
recognition zone, or when the battery in the
electronic key is discharged.
F
W
ith a manual gearbox , place the gear
lever in neutral, then fully depress the clutch
pedal. F
W
ith an automatic gearbox
, select mode
P, then fully depress the brake pedal.
F
P
ress the "
START/STOP " button.
The engine starts.
Back-up switch-off
With the Keyless Entry and Starting remote
control inside the vehicle, pressing the
" START/STOP " button, with no action on the
pedals , allows the ignition to be switched on.
F
P
lace and hold the remote control against
the reader. When the electronic key is not detected or is
no longer in the recognition zone, a message
appears in the instrument panel when closing
a
door or trying to switch off the engine.
F
T
o confirm the instruction to switch off the
engine, press the " START/STOP" button for
about five seconds.
In the event of a
fault with the electronic key,
contact a
PEUGEOT dealer or a qualified
workshop.
Driving
Page 163 of 364
161
Emergency switch-off
In the event of an emergency only, the engine
can be switched off without conditions (even
when driving).
Press the "START/STOP " button for about five
seconds.
In this case, the steering column locks as soon
as the vehicle stops.
Electric parking brake
The system allows, in automatic operation, the
application of the parking brake on switching
off the engine and release as the vehicle
moves off. F
b
y briefly pulling
the control lever to apply
the brake,
F
b
y briefly pushing
the control lever, while
pressing the brake pedal, to release it.
Automatic mode is activated by default.
The driver can take over at any time to apply
or release the parking brake, by operating the
control lever:
Indicator lamp
This indicator lamp comes on in the
instrument panel and in the control
lever to confirm the application of
the parking brake.
It goes off to confirm the release of the parking
brake.
This indicator lamp flashes on the control lever
when manual parking brake application or
release is performed.
In the event of a
battery failure, the
electric parking brake no longer works.
As a
safety measure with a manual
gearbox, if the parking brake is not
applied, immobilise the vehicle by
engaging a
gear.
As a
safety measure with an automatic
gearbox, if the parking brake is not
applied, immobilise the vehicle by placing
one of the chocks supplied against one of
the wheels.
Call on a
PEUGEOT dealer or a qualified
workshop.
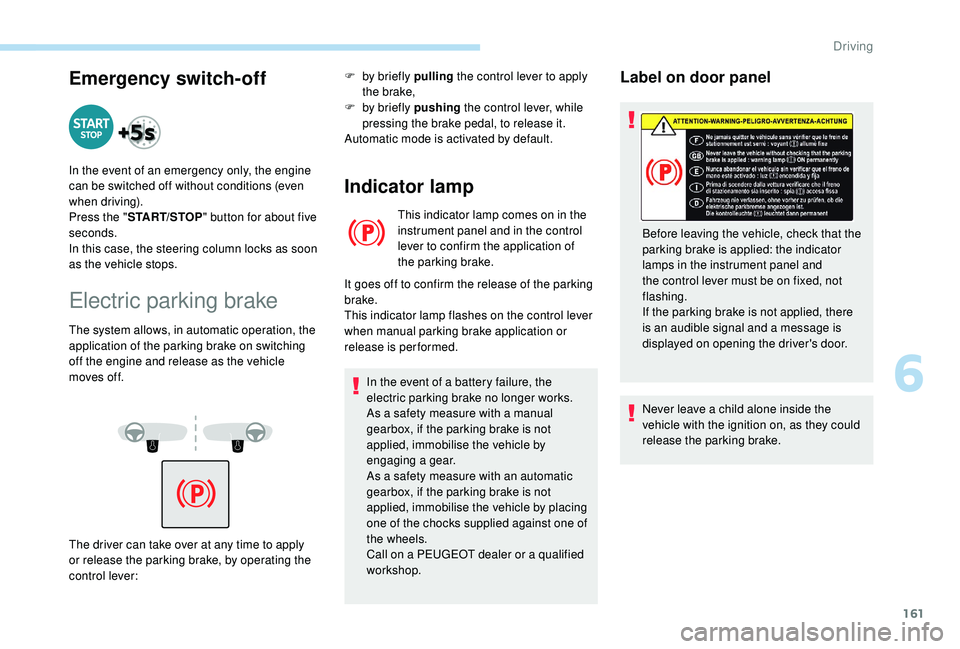
Label on door panel
Before leaving the vehicle, check that the
parking brake is applied: the indicator
lamps in the instrument panel and
the control lever must be on fixed, not
flashing.
If the parking brake is not applied, there
is an audible signal and a
message is
displayed on opening the driver's door.
Never leave a
child alone inside the
vehicle with the ignition on, as they could
release the parking brake.
6
Driving