2018 Peugeot 308 spare wheel
[x] Cancel search: spare wheelPage 194 of 360
192
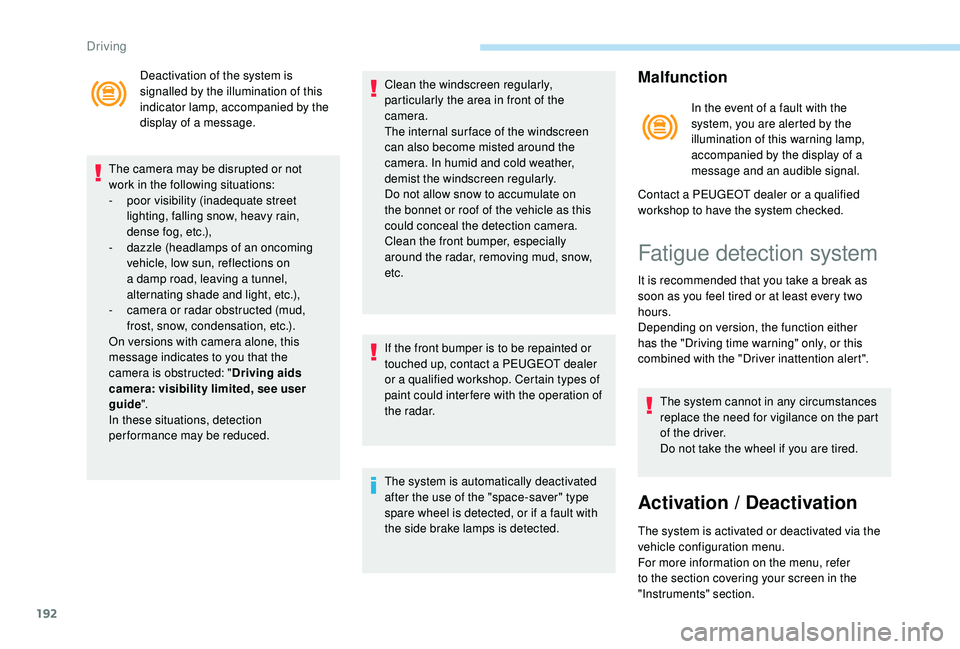
Deactivation of the system is
signalled by the illumination of this
indicator lamp, accompanied by the
display of a message.
The camera may be disrupted or not
work in the following situations:
-
p
oor visibility (inadequate street
lighting, falling snow, heavy rain,
dense fog, etc.),
-
d
azzle (headlamps of an oncoming
vehicle, low sun, reflections on
a damp road, leaving a tunnel,
alternating shade and light, etc.),
-
c
amera or radar obstructed (mud,
frost, snow, condensation, etc.).
On versions with camera alone, this
message indicates to you that the
camera is obstructed: " Driving aids
camera: visibility limited, see user
guide ".
In these situations, detection
performance may be reduced. Clean the windscreen regularly,
particularly the area in front of the
camera.
The internal sur face of the windscreen
can also become misted around the
camera. In humid and cold weather,
demist the windscreen regularly.
Do not allow snow to accumulate on
the bonnet or roof of the vehicle as this
could conceal the detection camera.
Clean the front bumper, especially
around the radar, removing mud, snow,
etc.
If the front bumper is to be repainted or
touched up, contact a PEUGEOT dealer
or a qualified workshop. Certain types of
paint could inter fere with the operation of
the radar.
The system is automatically deactivated
after the use of the "space-saver" type
spare wheel is detected, or if a fault with
the side brake lamps is detected.Malfunction
In the event of a fault with the
system, you are alerted by the
illumination of this warning lamp,
accompanied by the display of a
message and an audible signal.
Contact a PEUGEOT dealer or a qualified
workshop to have the system checked.
Fatigue detection system
It is recommended that you take a break as
soon as you feel tired or at least every two
hours.
Depending on version, the function either
has the "Driving time warning" only, or this
combined with the "Driver inattention alert".
The system cannot in any circumstances
replace the need for vigilance on the part
of the driver.
Do not take the wheel if you are tired.
Activation / Deactivation
The system is activated or deactivated via the
vehicle configuration menu.
For more information on the menu, refer
to the section covering your screen in the
"Instruments" section.
Driving
Page 199 of 360
197
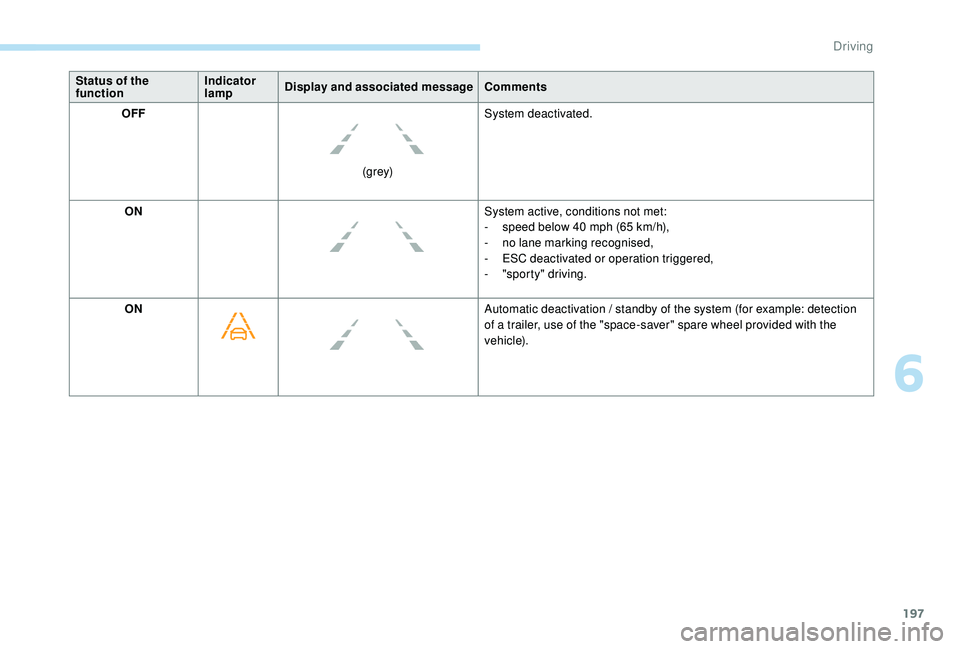
Status of the
functionIndicator
lamp
Display and associated message
Comments
OFF
(grey)System deactivated.
ON System active, conditions not met:
-
s
peed below 40 mph (65 km/h),
-
n
o lane marking recognised,
-
E
SC deactivated or operation triggered,
-
"
sporty" driving.
ON Automatic deactivation / standby of the system (for example: detection
of a trailer, use of the "space-saver" spare wheel provided with the
vehicle).
6
Driving
Page 201 of 360
199
Operating limits
The system goes into standby automatically in
the following cases:
-
E
SC deactivated or operation triggered,
-
S
peed below 40 mph (65 km/h) or greater
than 112
mph (180 km/h),
-
c
onnected electrically to a trailer,
-
u
se of the "space-saver" spare
wheel detected (as detection is not
immediate, deactivation of the system is
recommended),
-
d
ynamic driving style detected, pressure on
the brake or accelerator pedal,
-
d
riving where there are no lane markings,
-
a
ctivation of the direction indicators,
-
c
rossing the inside line on a bend,
-
d
riving in a tight corner,
-
i
nactivity by the driver detected during
correction. The following situations may interfere
with the operation of the system or
prevent it working:
-
c
onditions of poor visibility
(inadequate street lighting, snowfall,
rain, fog),
-
d
azzle (headlamps of an oncoming
vehicle, low sun, reflections on
a damp road, leaving a tunnel,
alternating shade and light),
-
w
indscreen area located in front of
the camera: dirty, misted, frost-
covered, snow-covered, damaged or
covered by a sticker,
-
l
ane markings absent, worn, hidden
(snow, mud) or multiple (roadworks),
-
r
unning close to the vehicle in front
(the lane markings may not be
detected),
-
r
oads that are narrow, winding, etc.
Risk of undesirable operation
Activation / Deactivation
Activation and deactivation of the
system is done in the Vehicle /
Driving menu of the touch screen.
The system state remains in memory when the
ignition is switched off.
Deactivation of the system is recommended in
the following situations:
-
d
riving on a road sur face in poor condition,
-
u
nfavourable climatic conditions,
-
d
riving on slippery sur faces (ice). Select the "
Driving functions " then the "Lane
assist " tab.
Operating fault
In the event of a fault with the system, you are
alerted by the illumination of these warning
lamps in the instrument panel, accompanied by
the display of a message and an audible signal.
Have the system checked by a PEUGEOT
dealer or a qualified workshop. The system is not intended for driving in the
following situations:
-
d
riving on a speed circuit,
-
d
riving with a trailer,
-
d
riving on a rolling stand,
-
d
riving on unstable sur faces.
6
Driving
Page 227 of 360
225
Snow chains
In wintry conditions, snow chains
improve traction as well as the
behaviour of the vehicle when
braking.
Snow chains must be fitted only to the
front wheels. They must never be fitted to
"space-saver" type spare wheels.
Take account of the legislation in force in
your country on the use of snow chains
and the maximum authorised speed.
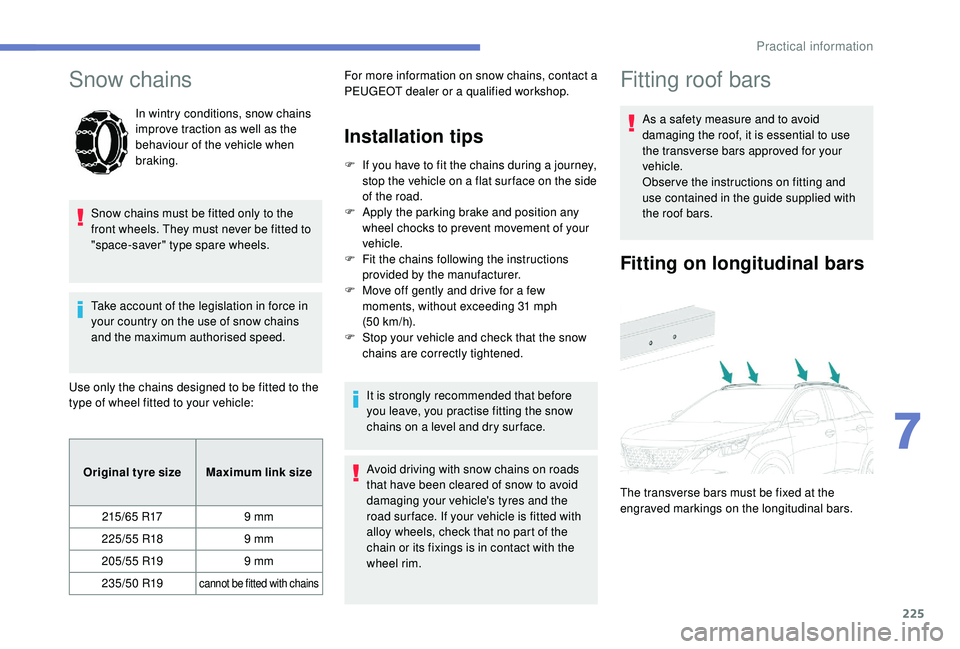
Use only the chains designed to be fitted to the
type of wheel fitted to your vehicle:
Installation tips
F If you have to fit the chains during a journey, stop the vehicle on a flat sur face on the side
of the road.
F
A
pply the parking brake and position any
wheel chocks to prevent movement of your
vehicle.
F
F
it the chains following the instructions
provided by the manufacturer.
F
M
ove off gently and drive for a few
moments, without exceeding 31
mph
(50
km/h).
F
S
top your vehicle and check that the snow
chains are correctly tightened.
It is strongly recommended that before
you leave, you practise fitting the snow
chains on a level and dry sur face.
Original tyre size Maximum link size
215/65
R17 9
mm
225/55
R18 9
mm
205/55
R19 9
mm
235/50
R19
cannot be fitted with chains
For more information on snow chains, contact a
PEUGEOT dealer or a qualified workshop. Avoid driving with snow chains on roads
that have been cleared of snow to avoid
damaging your vehicle's tyres and the
road sur face. If your vehicle is fitted with
alloy wheels, check that no part of the
chain or its fixings is in contact with the
wheel rim.Fitting roof bars
As a safety measure and to avoid
damaging the roof, it is essential to use
the transverse bars approved for your
vehicle.
Obser ve the instructions on fitting and
use contained in the guide supplied with
the roof bars.
Fitting on longitudinal bars
The transverse bars must be fixed at the
engraved markings on the longitudinal bars.
7
Practical information
Page 235 of 360
233
For more information on the Electric
parking brake, refer to the corresponding
section.
Wheels and tyres
The pressure must be checked on
all tyres, including the spare wheel,
when the tyres are "cold", at least
once a month and before a long
j o u r n ey. Using different size wheels and tyres from
those specified can affect the lifetime of tyres,
wheel rotation, ground clearance and the
speedometer reading and have an adverse
effect on road holding.
Fitting different tyres on the front and rear axles
can cause the ESC to mistime.
Only use products recommended by
PEUGEOT or products of equivalent
quality and specification.
In order to optimise the operation of
components as important as those in the
braking system, PEUGEOT selects and
offers very specific products.
After washing the vehicle, dampness, or
in wintry conditions, ice can form on the
brake discs and pads: braking efficiency
may be reduced. Make light brake
applications to dry and defrost the brakes.
The pressures given on the tyre pressure label
are valid for "cold" tyres. If you have driven for
more than 10
minutes or more than 6 miles
(10
kilometres) at more than 31 mph (50 km/h),
0.3
bar (30 kPa) should be added to the values
given on the label.
Under-inflation increases fuel consumption.
Non-compliant tyre pressure causes premature
wear on tyres and has an adverse effect on the
vehicle's road holding
– Risk of an accident!
Driving with worn or damaged tyres reduces
braking efficiency and control of the vehicle's
steering. Regular inspections of the condition
of tyres (tread and sides) and rims are
recommended as well as making sure that
valves are fitted.
7
Practical information
Page 240 of 360
238
With 1.5 BlueHDi and 2.0
BlueHDi 180 S&S engines
F Fill the fuel tank with at least 5 litres of
Diesel.
F
S
witch on the ignition (without starting the
engine).
F
W
ait around 1 minute and switch off the
ignition.
F
O
perate the starter to run the engine.
If the engine does not start, repeat the
procedure.
With 2.0 HDi engines
F Put it back in place, clip in the cover and ensure it is clipped in.
F
C
lose the bonnet.
Tool kit
This is a set of tools provided with the vehicle.
Its content depends on your vehicle's
equipment:
-
t
emporary puncture repair kit,
-
spar
e wheel.
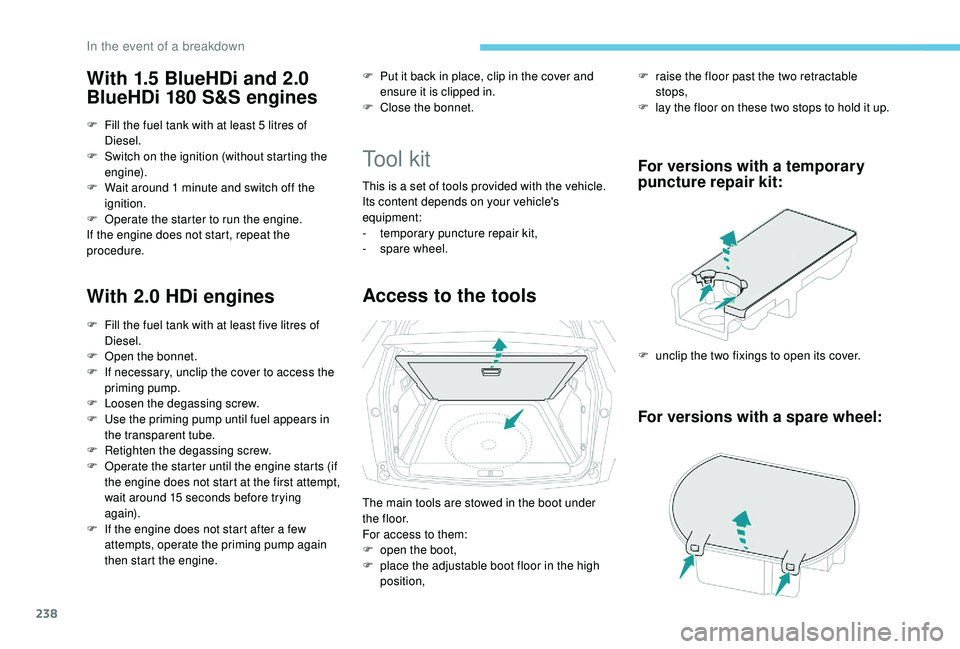
Access to the tools
F raise the floor past the two retractable stops,
F
l
ay the floor on these two stops to hold it up.
For versions with a temporary
puncture repair kit:
F unclip the two fixings to open its cover.
For versions with a spare wheel:
F Fill the fuel tank with at least five litres of Diesel.
F
O
pen the bonnet.
F
I
f necessary, unclip the cover to access the
priming pump.
F
L
oosen the degassing screw.
F
U
se the priming pump until fuel appears in
the transparent tube.
F
R
etighten the degassing screw.
F
O
perate the starter until the engine starts (if
the engine does not start at the first attempt,
wait around 15
seconds before trying
again).
F
I
f the engine does not start after a few
attempts, operate the priming pump again
then start the engine. The main tools are stowed in the boot under
t h e f l o o r.
For access to them:
F
o
pen the boot,
F
p
lace the adjustable boot floor in the high
position,
In the event of a breakdown
Page 242 of 360
240
For more information on the Spare wheel, refer
to the corresponding section.
Temporary puncture
repair kit
Scan the QR code on page 3 to view
explanatory videos.
Comprising a compressor and a sealant
cartridge, it allows the temporary repair of
a tyre so that you can drive to the nearest
garage.
It is designed to repair most punctures which
could affect the tyre, located on the tyre tread
or shoulder.
The vehicle's electric system allows the
connection of the compressor for long
enough to inflate a tyre after a puncture
repair.
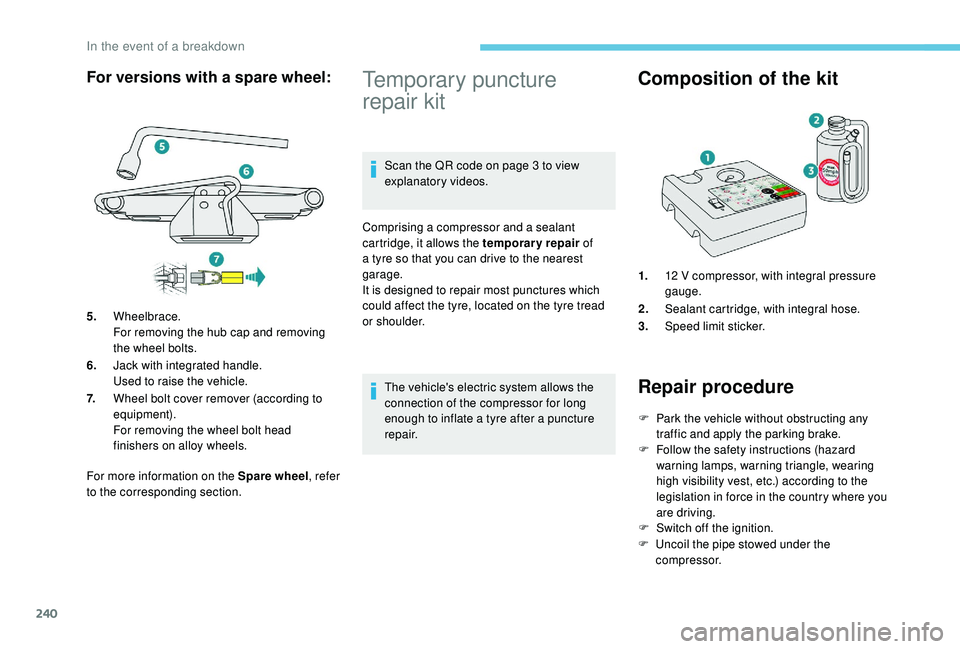
Composition of the kit
1. 12 V compressor, with integral pressure
gauge.
2. Sealant cartridge, with integral hose.
3. Speed limit sticker.
Repair procedure
F Park the vehicle without obstructing any
traffic and apply the parking brake.
F
F
ollow the safety instructions (hazard
warning lamps, warning triangle, wearing
high visibility vest, etc.) according to the
legislation in force in the country where you
are driving.
F
S
witch off the ignition.
F
U
ncoil the pipe stowed under the
compressor.
For versions with a spare wheel:
5. Wheelbrace.
For removing the hub cap and removing
the wheel bolts.
6. Jack with integrated handle.
Used to raise the vehicle.
7. Wheel bolt cover remover (according to
equipment).
For removing the wheel bolt head
finishers on alloy wheels.
In the event of a breakdown
Page 245 of 360
243
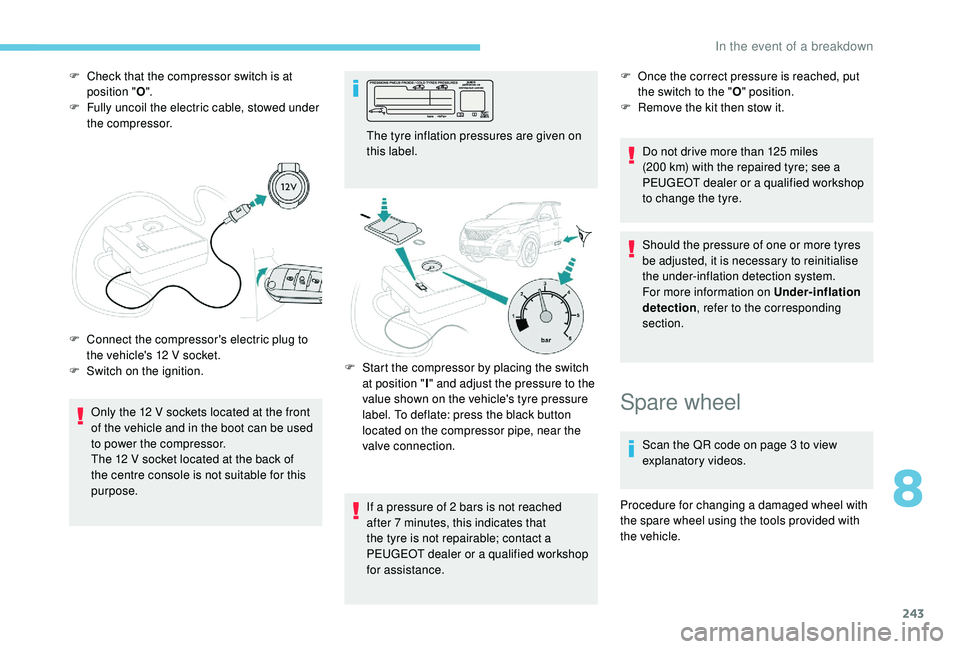
F Check that the compressor switch is at position " O".
F
F
ully uncoil the electric cable, stowed under
the compressor.
Only the 12
V sockets located at the front
of the vehicle and in the boot can be used
to power the compressor.
The 12
V socket located at the back of
the centre console is not suitable for this
purpose.
F
C
onnect the compressor's electric plug to
the vehicle's 12
V socket.
F
S
witch on the ignition. The tyre inflation pressures are given on
this label.
If a pressure of 2
bars is not reached
after 7
minutes, this indicates that
the tyre is not repairable; contact a
PEUGEOT dealer or a qualified workshop
for assistance. F
O nce the correct pressure is reached, put
the switch to the " O" position.
F
R
emove the kit then stow it.
Do not drive more than 125
miles
(200
km) with the repaired tyre; see a
PEUGEOT dealer or a qualified workshop
to change the tyre.
Should the pressure of one or more tyres
be adjusted, it is necessary to reinitialise
the under-inflation detection system.
For more information on Under-inflation
detection , refer to the corresponding
section.
F
S
tart the compressor by placing the switch
at position " I" and adjust the pressure to the
value shown on the vehicle's tyre pressure
label. To deflate: press the black button
located on the compressor pipe, near the
valve connection.
Spare wheel
Scan the QR code on page 3 to view
explanatory videos.
Procedure for changing a damaged wheel with
the spare wheel using the tools provided with
the vehicle.
8
In the event of a breakdown