2018 Peugeot 308 wiper blades
[x] Cancel search: wiper bladesPage 93 of 360
91
Heated windscreenSwitching on / off
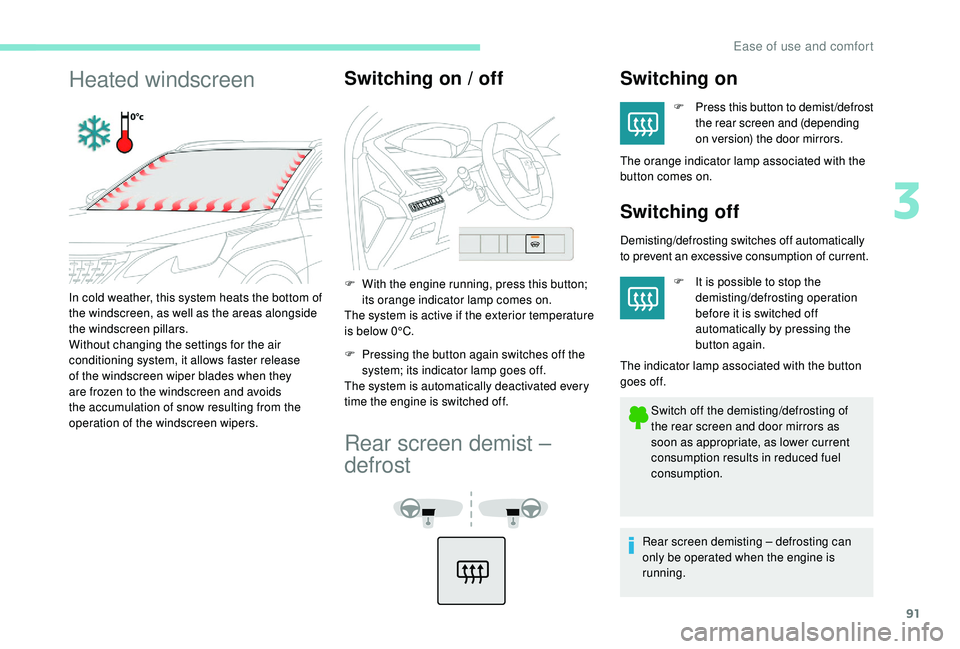
F With the engine running, press this button; its orange indicator lamp comes on.
The system is active if the exterior temperature
is below 0°C.
F
P
ressing the button again switches off the
system; its indicator lamp goes off.
The system is automatically deactivated every
time the engine is switched off.
In cold weather, this system heats the bottom of
the windscreen, as well as the areas alongside
the windscreen pillars.
Without changing the settings for the air
conditioning system, it allows faster release
of the windscreen wiper blades when they
are frozen to the windscreen and avoids
the accumulation of snow resulting from the
operation of the windscreen wipers.
Rear screen demist –
defrost
Switching on
F Press this button to demist /defrost
the rear screen and (depending
on version) the door mirrors.
The orange indicator lamp associated with the
button comes on.
Switching off
Demisting/defrosting switches off automatically
to prevent an excessive consumption of current.
F It is possible to stop the demisting/defrosting operation
before it is switched off
automatically by pressing the
button again.
The indicator lamp associated with the button
goes off.
Switch off the demisting/defrosting of
the rear screen and door mirrors as
soon as appropriate, as lower current
consumption results in reduced fuel
consumption.
Rear screen demisting – defrosting can
only be operated when the engine is
running.
3
Ease of use and comfort
Page 119 of 360
117
Wiper control stalk
Switching on
This system starts:
- w hen the corresponding direction indicator
is switched on,
or
-
f
rom a certain angle of rotation of the
steering wheel.
Switching off
The system does not operate:
- b elow a certain angle of rotation of the
steering wheel,
-
a
bove 25 mph (40 km/h),
-
w
hen reverse gear is engaged.
Programming
Your vehicle may also include some functions
that can be configured:
-
a
utomatic rain sensitive windscreen wipers,
-
r
ear wiping on engaging reverse gear.In wintry conditions, remove snow, ice or
frost present on the windscreen, around
the wiper arms and blades and the
windscreen seal, before operating the
wipers. Do not operate the wipers on a dry
windscreen. Under extremely hot or cold
conditions, ensure that the wiper blades
are not stuck to the windscreen before
operating the wipers.
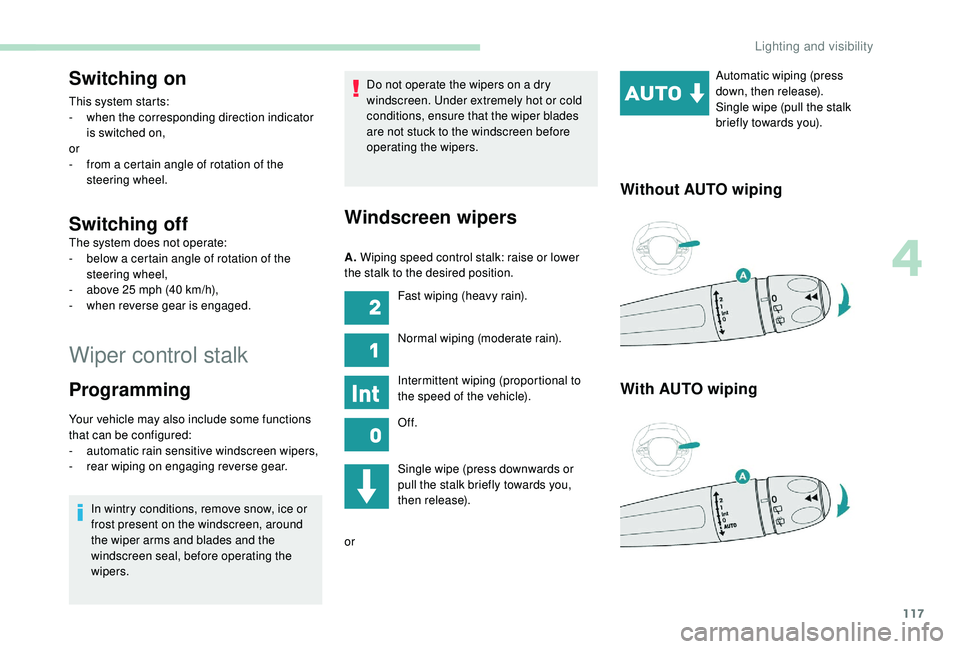
Windscreen wipers
A.
Wiping speed control stalk: raise or lower
the stalk to the desired position.
Single wipe (press downwards or
pull the stalk briefly towards you,
then release).
or Automatic wiping (press
down, then release).
Single wipe (pull the stalk
briefly towards you).
Without AUTO wiping
With AUTO wiping
Fast wiping (heavy rain).
Normal wiping (moderate rain).
Intermittent wiping (proportional to
the speed of the vehicle).
Of f.
4
Lighting and visibility
Page 120 of 360
118
Rear wiper
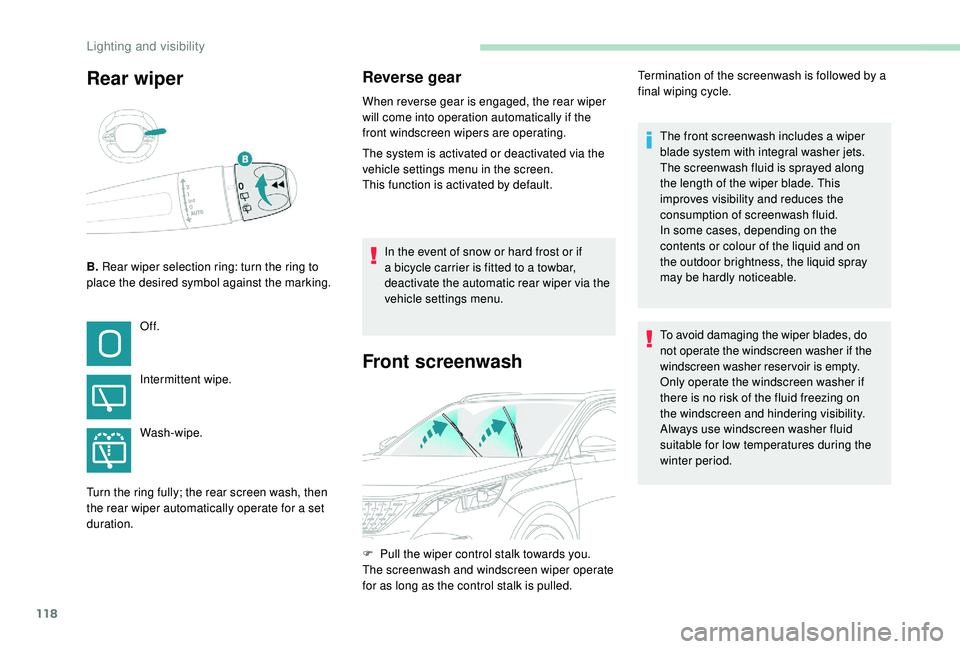
B. Rear wiper selection ring: turn the ring to
place the desired symbol against the marking.
Reverse gear
When reverse gear is engaged, the rear wiper
will come into operation automatically if the
front windscreen wipers are operating.
The system is activated or deactivated via the
vehicle settings menu in the screen.
This function is activated by default.
Of f.
Intermittent wipe.
Wash-wipe.
Turn the ring fully; the rear screen wash, then
the rear wiper automatically operate for a set
duration. In the event of snow or hard frost or if
a bicycle carrier is fitted to a towbar,
deactivate the automatic rear wiper via the
vehicle settings menu.
Front screenwash
F Pull the wiper control stalk towards you.
The screenwash and windscreen wiper operate
for as long as the control stalk is pulled.The front screenwash includes a wiper
blade system with integral washer jets.
The screenwash fluid is sprayed along
the length of the wiper blade. This
improves visibility and reduces the
consumption of screenwash fluid.
In some cases, depending on the
contents or colour of the liquid and on
the outdoor brightness, the liquid spray
may be hardly noticeable.
To avoid damaging the wiper blades, do
not operate the windscreen washer if the
windscreen washer reservoir is empty.
Only operate the windscreen washer if
there is no risk of the fluid freezing on
the windscreen and hindering visibility.
Always use windscreen washer fluid
suitable for low temperatures during the
winter period.
Termination of the screenwash is followed by a
final wiping cycle.
Lighting and visibility
Page 121 of 360
119
Special position of the
windscreen wipers
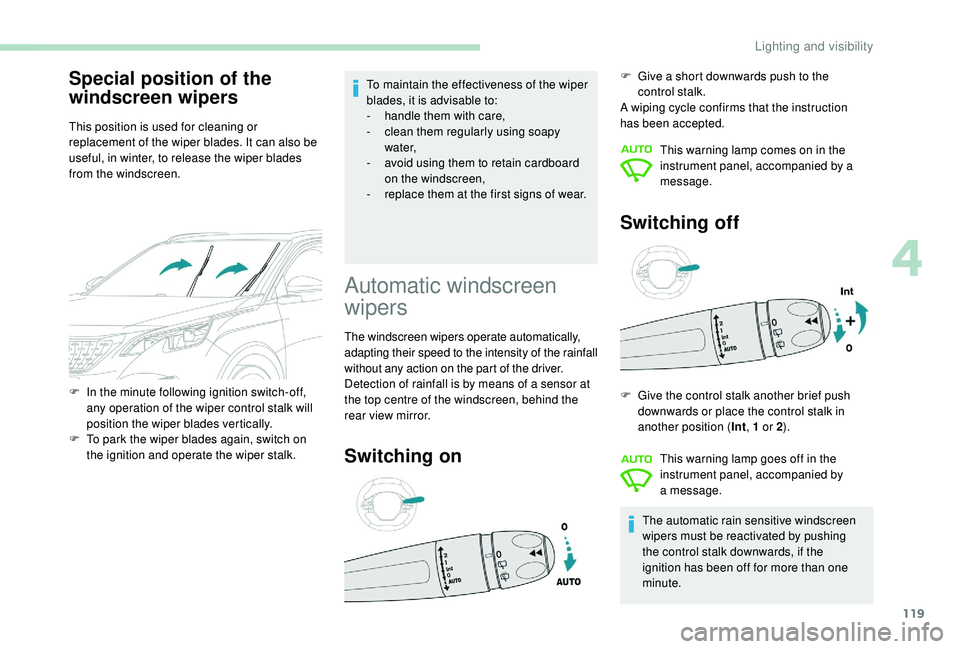
This position is used for cleaning or
replacement of the wiper blades. It can also be
useful, in winter, to release the wiper blades
from the windscreen.To maintain the effectiveness of the wiper
blades, it is advisable to:
-
h andle them with care,
- c lean them regularly using soapy
water,
-
a
void using them to retain cardboard
on the windscreen,
-
r
eplace them at the first signs of wear.
F
I
n the minute following ignition switch-off,
any operation of the wiper control stalk will
position the wiper blades vertically.
F
T
o park the wiper blades again, switch on
the ignition and operate the wiper stalk.
Automatic windscreen
wipers
The windscreen wipers operate automatically,
adapting their speed to the intensity of the rainfall
without any action on the part of the driver.
Detection of rainfall is by means of a sensor at
the top centre of the windscreen, behind the
rear view mirror.
Switching on
F Give a short downwards push to the control stalk.
A wiping cycle confirms that the instruction
has been accepted.
This warning lamp comes on in the
instrument panel, accompanied by a
message.
Switching off
F Give the control stalk another brief push downwards or place the control stalk in
another position ( Int, 1
or 2).
The automatic rain sensitive windscreen
wipers must be reactivated by pushing
the control stalk downwards, if the
ignition has been off for more than one
minute. This warning lamp goes off in the
instrument panel, accompanied by
a message.
4
Lighting and visibility
Page 254 of 360
252
If changing a bulb within a few minutes
of switching off the ignition, take care not
to touch the exhaust – there is a risk of
burns!
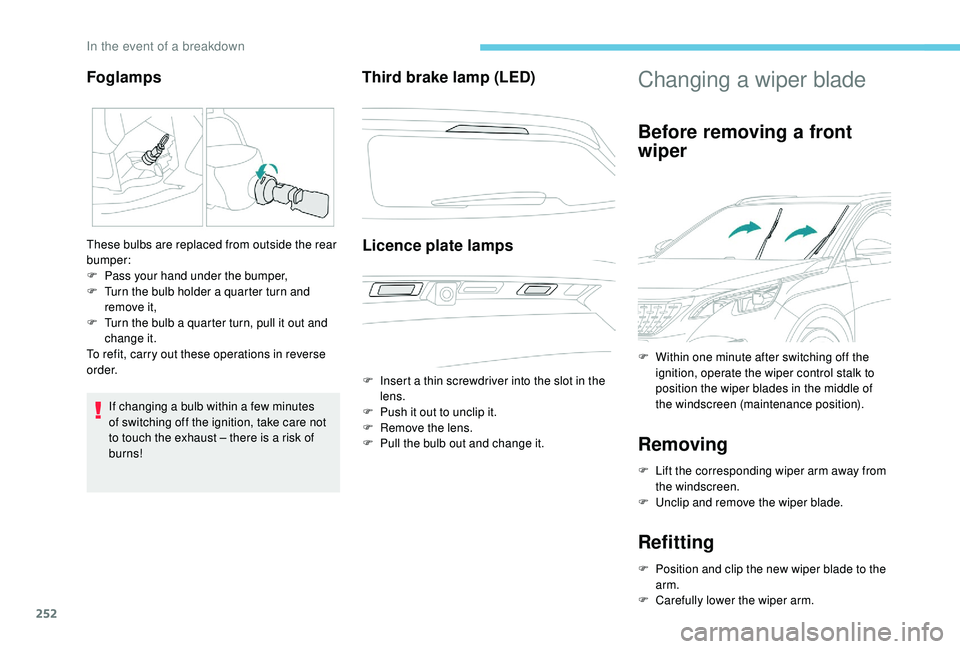
Third brake lamp (LED)
Licence plate lamps
F Insert a thin screwdriver into the slot in the lens.
F
P
ush it out to unclip it.
F
R
emove the lens.
F
P
ull the bulb out and change it.
Changing a wiper blade
Before removing a front
wiper
Removing
F Lift the corresponding wiper arm away from the windscreen.
F
U
nclip and remove the wiper blade.
Refitting
F Position and clip the new wiper blade to the arm.
F
C
arefully lower the wiper arm.
Foglamps
These bulbs are replaced from outside the rear
bumper:
F
P
ass your hand under the bumper,
F
T
urn the bulb holder a quarter turn and
remove it,
F
T
urn the bulb a quarter turn, pull it out and
change it.
To refit, carry out these operations in reverse
o r d e r. F
W
ithin one minute after switching off the
ignition, operate the wiper control stalk to
position the wiper blades in the middle of
the windscreen (maintenance position).
In the event of a breakdown
Page 255 of 360
253
After refitting a front wiper
F Switch on the ignition.
F O perate the wiper control stalk again to
park the wiper blades.
Changing a fuse
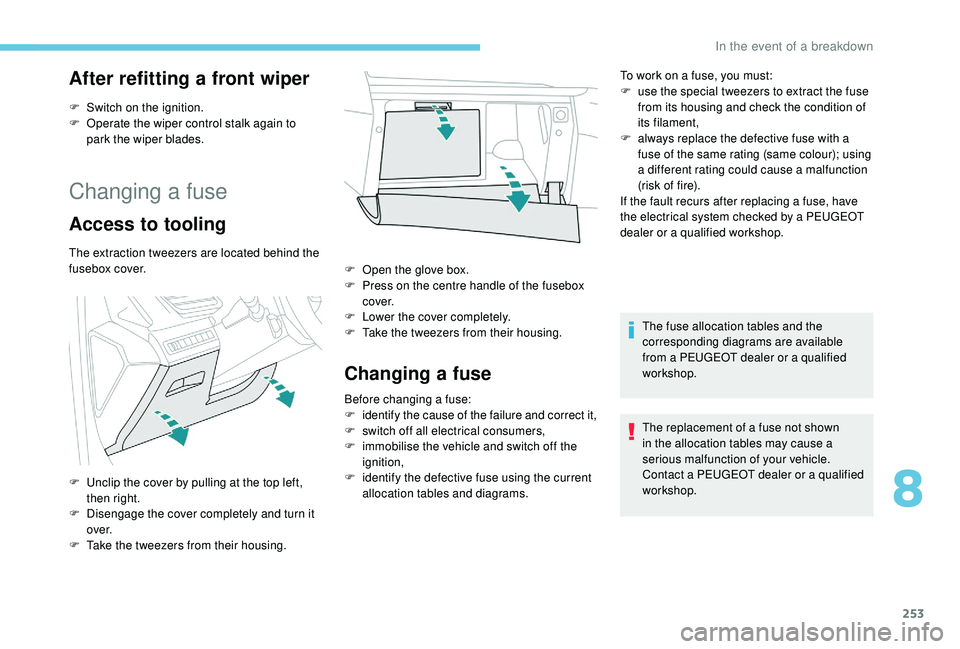
Access to tooling
The extraction tweezers are located behind the
fusebox cover.
F
U
nclip the cover by pulling at the top left,
then right.
F
D
isengage the cover completely and turn it
ove r.
F
T
ake the tweezers from their housing. F
O
pen the glove box.
F
P
ress on the centre handle of the fusebox
c ove r.
F
L
ower the cover completely.
F
T
ake the tweezers from their housing.
Changing a fuse
Before changing a fuse:
F identify the cause of the failure and correct it,
F
s
witch off all electrical consumers,
F
i
mmobilise the vehicle and switch off the
ignition,
F
i
dentify the defective fuse using the current
allocation tables and diagrams. To work on a fuse, you must:
F
u
se the special tweezers to extract the fuse
from its housing and check the condition of
its filament,
F
a
lways replace the defective fuse with a
fuse of the same rating (same colour); using
a different rating could cause a malfunction
(risk of fire).
If the fault recurs after replacing a fuse, have
the electrical system checked by a PEUGEOT
dealer or a qualified workshop.
The fuse allocation tables and the
corresponding diagrams are available
from a PEUGEOT dealer or a qualified
workshop.
The replacement of a fuse not shown
in the allocation tables may cause a
serious malfunction of your vehicle.
Contact a PEUGEOT dealer or a qualified
workshop.
8
In the event of a breakdown
Page 355 of 360
271
W
Warning and indicator lamps ..........................11
W arning lamp, braking system ..................14 -15
Warning lamp, Diesel engine pre-heater
.......23
Warning lamp, driver's seat belt not fastened
...............................
..........13 0
Warning lamps
.................................... 11, 14 , 35
Warning lamp, seat belts
..............................13 0
Warning lamp, Service ....................................16
Weights
...............
..........................263-265, 267
Welcome lighting ..................................... 50, 114
Wheel, spare
................. 23
3, 238-240 , 243 -244
Window controls
............................................. 65
Windscreen, heated
........................................ 91
Wiper blades (changing)
................11 9, 252-253
Wiper, rear ..................................................... 11 8
Wipers
....................................... 24, 117 , 11 9 -12 0
Wipers, automatic rain sensitive
.....117 , 11 9 -12 0Storage wells ........................................ 105, 108
Storing driving positions ............................ 74
-75
Stowing rings
................................................ 105
Sunroof, panoramic
........................................ 67
S
un visor
...............................
..........................97
Switching off the engine
...............................152
Synchronising the remote control
...................56
T
Table position ............................................. 72-73
Tables of fuses .............................................. 256
Tailgate
................
............................................ 61
Ta n k , f u e l
................................................ 216 -217
Technical data
............................... 26
4-265, 267
Telephone
.......... 98
-99, 25 -29 , 13 -16, 1 0 -11, 13
Telephone, Bluetooth with voice recognition
...14
Temperature, coolant
...................................... 32
Third brake lamp
........................................... 252
Three flashes (direction indicators)
.............. 111
T
icket holder
................................................... 96
Time (setting)
................................ 38-40, 31, 17
TMC (Traffic info)
............................................ 13
T
ool box
................
......................................... 108
To o l s
...................................... 238-239, 238-240
Total distance recorder
...................................36
Touch screen ........................................... 98, 1, 1
Touch screen ~ Touch screen tablet
.........................40, 43 , 46
Towball, quickly detachable
..................220-223
To w b a r
...............................
.....126 , 151-152 , 219
Towed loads
.................................. 263-265, 267
Towing another vehicle
.................................261
Traction control (ASR)
...........................124 -128
Traffic information (TA)
.....................................5
Traffic information (TMC)
................................13
Tr a i l e r
...............
......................126, 151-152 , 219
Trailer stability assist (TSA) .......................... 12 6
Trajectory control systems ............................12
4
Triangle, warning ........................................... 237
Trip computer
............................................. 37- 3 8
Trip distance recorder
..................................... 36
T
y r e s
.............................................................. 233
Tyre under-inflation detection
.........18, 170 , 243
U
Under-inflation (detection) ............................170
Unlocking .................................................. 48, 51
Unlocking from the inside
...............................57
Unlocking the boot
...............................
.....5 0 - 51
Unlocking the doors
........................................ 62
U
nlocking the tailgate
............................... 5
0 - 51
Updating the date
...................................... 31,
18
Updating the time
...............................
.......31, 17
USB
................................................... 23 -24, 9, 7
V
Ventilation ........................................... 81- 8 6, 90
Very cold climate screen (snow shield) ........224
Visibility
...............
............................................ 90
Vision, 180° for ward
..................................... 207
Visiopark
....................................................... 20
4
Visiopark 1
– Visiopark 2
..............................2
07
Voice commands
......................................... 5 -10
.
Alphabetical index