2018 Peugeot 308 warning
[x] Cancel search: warningPage 47 of 324
45
Central locking not
functioning
Use these procedures in the following cases:
- c entral locking fault,
-
b
attery disconnected or discharged.
In the event of a malfunction with the
central locking system, the battery must
be disconnected to lock the boot and thus
ensure that the vehicle is locked fully.
Driver's door
F Insert the key in the door lock.
F T urn the key towards the front of the vehicle
to unlock it, or towards the rear to lock it.
If fitted to your vehicle, the alarm is not
activated/deactivated when the vehicle is
locked/unlocked.
Opening a door will trigger the alarm,
which can be stopped by switching the
ignition on.
Passenger doorsF Turn the key towards the rear again within 5 seconds to deadlock the vehicle.
F
O
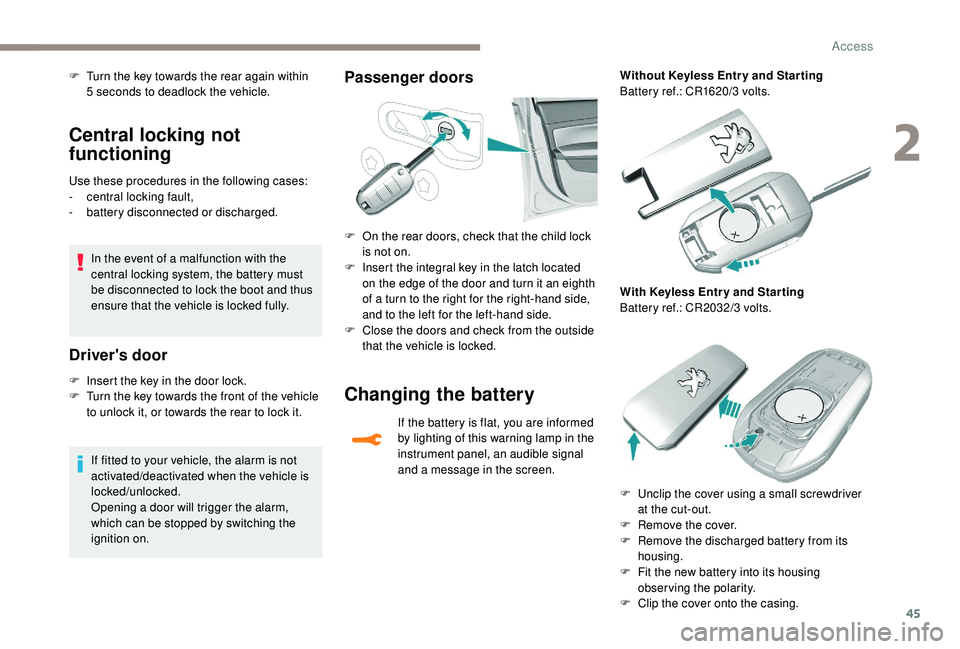
n the rear doors, check that the child lock
is not on.
F
I
nsert the integral key in the latch located
on the edge of the door and turn it an eighth
of a turn to the right for the right-hand side,
and to the left for the left-hand side.
F
C
lose the doors and check from the outside
that the vehicle is locked.
Changing the battery
If the battery is flat, you are informed
by lighting of this warning lamp in the
instrument panel, an audible signal
and a message in the screen. Without Keyless Entr y and Star ting
Battery ref.: CR1620/3 volts.
With Keyless Entr y and Star ting
Battery ref.: CR2032/3 volts.
F
U
nclip the cover using a small screwdriver
at the cut-out.
F
R
emove the cover.
F
R
emove the discharged battery from its
housing.
F
F
it the new battery into its housing
observing the polarity.
F
C
lip the cover onto the casing.
2
Access
Page 52 of 324
50
Electric windows
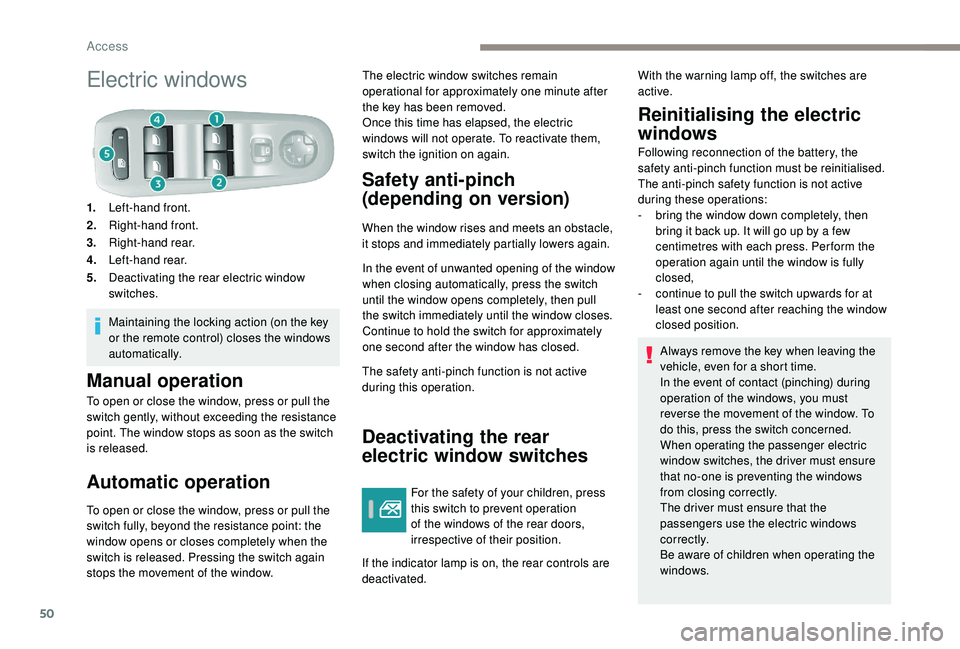
1.Left-hand front.
2. Right-hand front.
3. Right-hand rear.
4. Left-hand rear.
5. Deactivating the rear electric window
switches.
Maintaining the locking action (on the key
or the remote control) closes the windows
automatically.
Manual operation
To open or close the window, press or pull the
switch gently, without exceeding the resistance
point. The window stops as soon as the switch
is released.
Automatic operation
To open or close the window, press or pull the
switch fully, beyond the resistance point: the
window opens or closes completely when the
switch is released. Pressing the switch again
stops the movement of the window. The electric window switches remain
operational for approximately one minute after
the key has been removed.
Once this time has elapsed, the electric
windows will not operate. To reactivate them,
switch the ignition on again.
Safety anti-pinch
(depending on version)
When the window rises and meets an obstacle,
it stops and immediately partially lowers again.
In the event of unwanted opening of the window
when closing automatically, press the switch
until the window opens completely, then pull
the switch immediately until the window closes.
Continue to hold the switch for approximately
one second after the window has closed.
The safety anti-pinch function is not active
during this operation.
Deactivating the rear
electric window switches
For the safety of your children, press
this switch to prevent operation
of the windows of the rear doors,
irrespective of their position.
If the indicator lamp is on, the rear controls are
deactivated.
Reinitialising the electric
windows
Following reconnection of the battery, the
safety anti-pinch function must be reinitialised.
The anti-pinch safety function is not active
during these operations:
-
b
ring the window down completely, then
bring it back up. It will go up by a few
centimetres with each press. Per form the
operation again until the window is fully
closed,
-
c
ontinue to pull the switch upwards for at
least one second after reaching the window
closed position.
Always remove the key when leaving the
vehicle, even for a short time.
In the event of contact (pinching) during
operation of the windows, you must
reverse the movement of the window. To
do this, press the switch concerned.
When operating the passenger electric
window switches, the driver must ensure
that no-one is preventing the windows
from closing correctly.
The driver must ensure that the
passengers use the electric windows
c o r r e c t l y.
Be aware of children when operating the
windows.
With the warning lamp off, the switches are
active.
Access
Page 64 of 324
62
Boot fittings (hatchback)
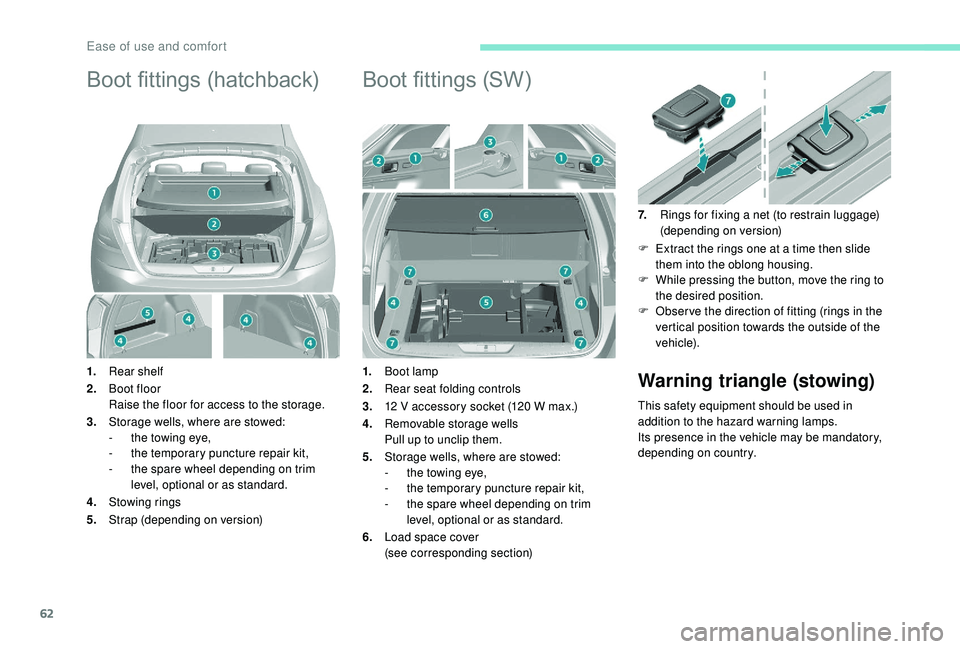
1.Rear shelf
2. Boot floor
Raise the floor for access to the storage.
3. Storage wells, where are stowed:
-
t
he towing eye,
-
t
he temporary puncture repair kit,
-
t
he spare wheel depending on trim
level, optional or as standard.
4. Stowing rings
5. Strap (depending on version)
Boot fittings (SW)
1.Boot lamp
2. Rear seat folding controls
3. 12 V accessory socket (120 W max.)
4. Removable storage wells
Pull up to unclip them.
5. Storage wells, where are stowed:
-
t
he towing eye,
-
t
he temporary puncture repair kit,
-
t
he spare wheel depending on trim
level, optional or as standard.
6. Load space cover
(see corresponding section) 7.
Rings for fixing a net (to restrain luggage)
(depending on version)
F
E
xtract the rings one at a time then slide
them into the oblong housing.
F
W
hile pressing the button, move the ring to
the desired position.
F
O
bser ve the direction of fitting (rings in the
vertical position towards the outside of the
vehicle).Warning triangle (stowing)
This safety equipment should be used in
addition to the hazard warning lamps.
Its presence in the vehicle may be mandatory,
depending on country.
Ease of use and comfort
Page 78 of 324

76
Daytime running lamps/
Sidelamps
These lamps light up automatically when the
engine starts.
Automatic illumination of
headlamps
When a low level of ambient light is detected
by the sunshine sensor, the number plate
lamps,
sidelamps and dipped beam headlamps
are switched on automatically, without any
action on the part of the driver. They may also
Switching on
Switching off
F Turn the ring to another position. Deactivation of the function is accompanied
by the display of a message.
Operating fault
In the event of a malfunction of the
sunshine sensor, the lighting comes
on, this warning lamp is displayed in
the instrument panel, accompanied
by an audible signal and/or a
message.
Contact a PEUGEOT dealer or a qualified
workshop. In fog or snow, the sunshine sensor may
detect sufficient light. In this case, the
lighting will not come on automatically.
Do not cover the sunshine sensor,
integrated with the rain sensor and located
at the top of the windscreen behind the
rear view mirror; the associated functions
would no longer be controlled.
They provide the following functions:
-
D
aytime running lamps (lighting control
stalk at position " 0" or " AUTO " with
adequate light level).
-
S
idelamps (lighting control stalk at position
" AUTO " with low light levels or "Sidelamps
only" or "Dipped/main beam headlamps"). F
T
urn the ring to the AUTO position.
Activation of the function is accompanied by
the display of a message.
Automatic headlamp
dipping
System which automatically changes between
dipped and main beam according to the
exterior light level and the driving conditions,
using a camera located at the top of the
windscreen.
This system is a driving aid.
The driver remains responsible for the
vehicle's lighting, its correct use for the
prevailing conditions of light, visibility,
traffic and obser vation of driving and
vehicle regulations.
The system will be operational as soon as
you exceed 16
mph (25 km/h).
If the speed drops below 9
mph (15 km/h),
the system no longer operates.
come on if rain is detected, at the same time as
automatic operation of the windscreen wipers.
As soon as the light returns to a sufficient level
or after the windscreen wipers are switched off,
the lamps are switched off automatically.
Lighting and visibility
Page 82 of 324
80
Automatic adjustment of
"Full LED" technology
headlamps
This system automatically adjusts the height
of the beams from this type of headlamp,
according to the load in the vehicle, to avoid
causing a nuisance to other road users.If a fault occurs, this warning lamp
comes on in the instrument panel,
accompanied by a message and an
audible signal.
Do not touch the "Full LED" technology
headlamps. Risk of electrocution!
The system then places the headlamp beams
in the lowest position.
Have the system checked by a PEUGEOT
dealer or a qualified workshop.
Wiper control stalk
Programming
Your vehicle may also include some functions
that can be configured:
-
a
utomatic windscreen wipers,
-
r
ear wiping on engaging reverse gear.
In wintry conditions, remove snow, ice or
frost present on the windscreen, around
the wiper arms and blades and the
windscreen seal, before operating the
wipers.
Do not operate the wipers on a dry
windscreen. Under extremely hot or cold
conditions, ensure that the wiper blades
are not stuck to the windscreen before
operating the wipers.
Manual controls
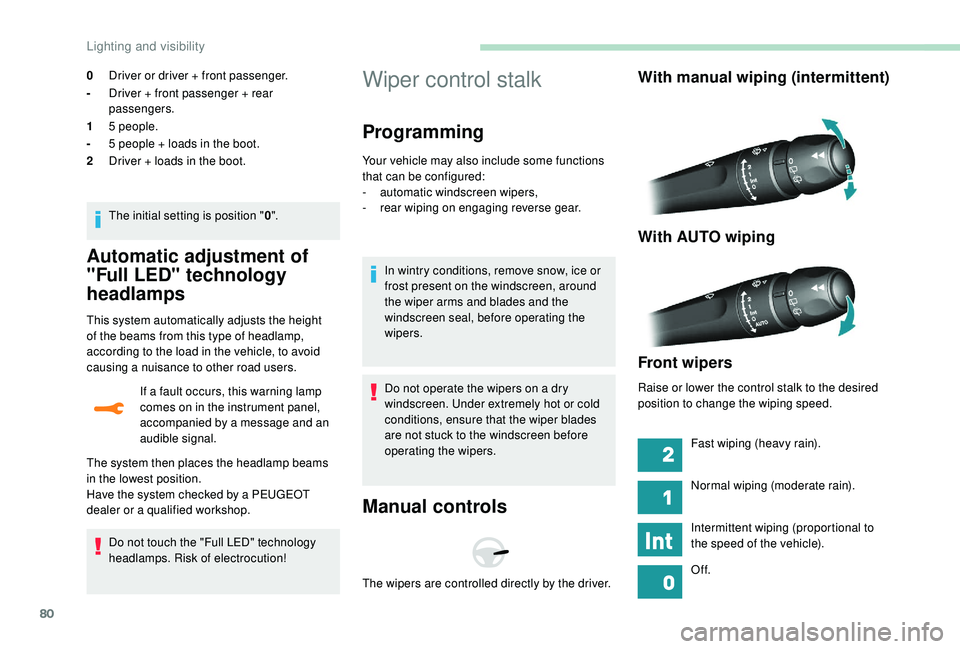
With manual wiping (intermittent)
With AUTO wiping
Front wipers
Raise or lower the control stalk to the desired
position to change the wiping speed.
The wipers are controlled directly by the driver. Fast wiping (heavy rain).
Normal wiping (moderate rain).
Intermittent wiping (proportional to
the speed of the vehicle).
Of f.
0
Driver or driver + front passenger.
- Driver + front passenger + rear
passengers.
1 5 people.
- 5 people + loads in the boot.
2 Driver + loads in the boot.
The initial setting is position " 0".
Lighting and visibility
Page 83 of 324
81
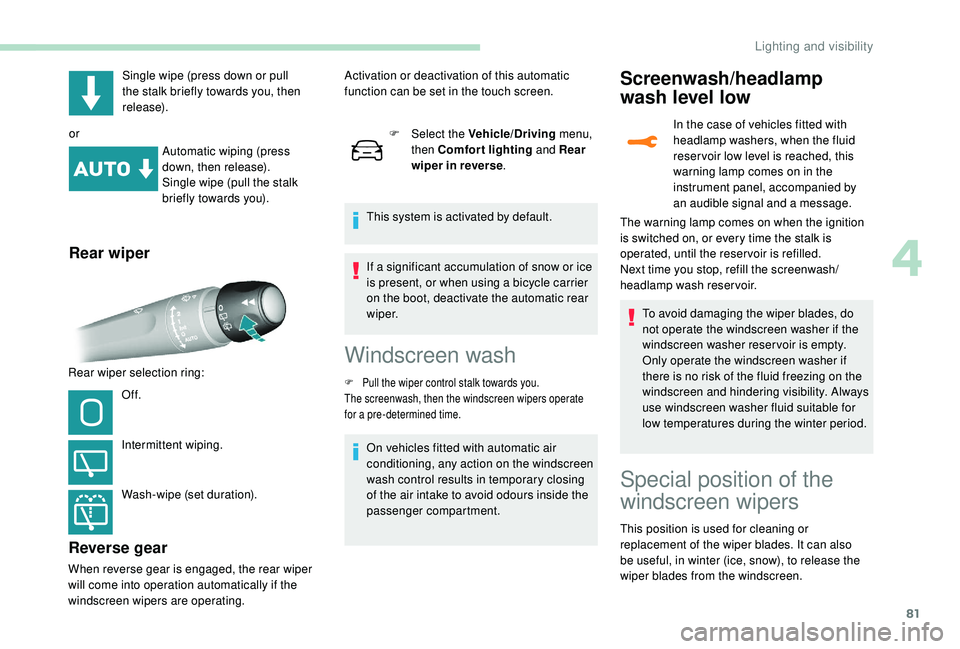
Single wipe (press down or pull
the stalk briefly towards you, then
release).
or Automatic wiping (press
down, then release).
Single wipe (pull the stalk
briefly towards you).
Rear wiper
Rear wiper selection ring:
Of f.
Intermittent wiping.
Wash-wipe (set duration).
Reverse gear
When reverse gear is engaged, the rear wiper
will come into operation automatically if the
windscreen wipers are operating. F
Sel
ect the Vehicle/Driving
menu,
then Comfort lighting and Rear
wiper in reverse .
This system is activated by default.
Activation or deactivation of this automatic
function can be set in the touch screen.
If a significant accumulation of snow or ice
is present, or when using a bicycle carrier
on the boot, deactivate the automatic rear
w i p e r.
Windscreen wash
F Pull the wiper control stalk towards you.
The screenwash, then the windscreen wipers operate
for a pre-determined time.
On vehicles fitted with automatic air
conditioning, any action on the windscreen
wash control results in temporary closing
of the air intake to avoid odours inside the
passenger compartment.
Screenwash/headlamp
wash level low
In the case of vehicles fitted with
headlamp washers, when the fluid
reser voir low level is reached, this
warning lamp comes on in the
instrument panel, accompanied by
an audible signal and a message.
To avoid damaging the wiper blades, do
not operate the windscreen washer if the
windscreen washer reservoir is empty.
Only operate the windscreen washer if
there is no risk of the fluid freezing on the
windscreen and hindering visibility. Always
use windscreen washer fluid suitable for
low temperatures during the winter period.
The warning lamp comes on when the ignition
is switched on, or every time the stalk is
operated, until the reser voir is refilled.
Next time you stop, refill the screenwash/
headlamp wash reservoir.
Special position of the
windscreen wipers
This position is used for cleaning or
replacement of the wiper blades. It can also
be useful, in winter (ice, snow), to release the
wiper blades from the windscreen.
4
Lighting and visibility
Page 85 of 324
83
Automatic windscreen
wipers
The windscreen wipers operate automatically
once rain is detected (sensor behind the
rear view mirror), adapting their speed to the
intensity of the rain without any action on the
part of the driver.
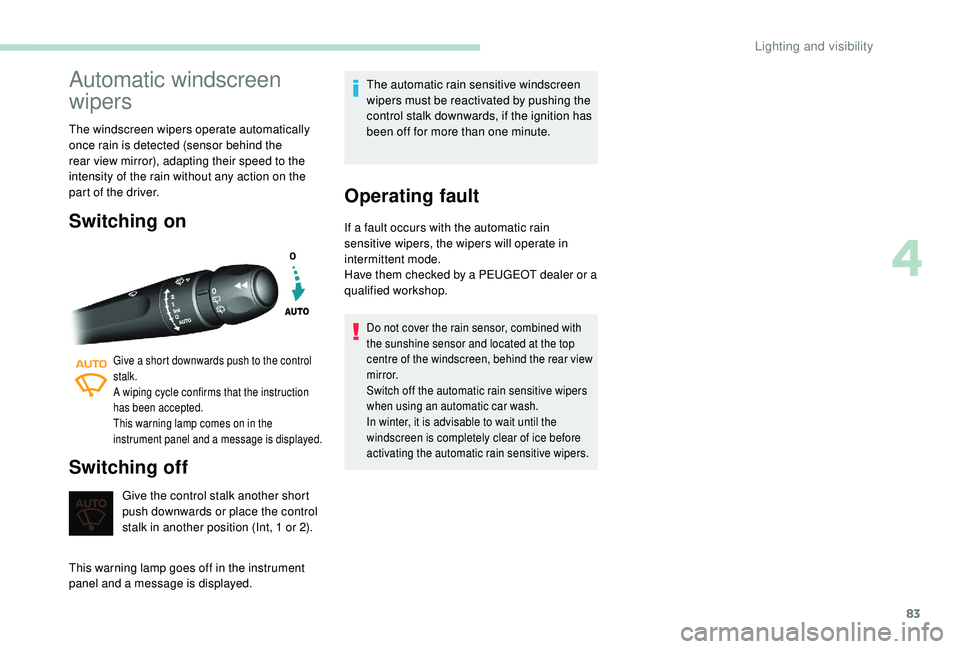
Switching on
Give a short downwards push to the control
stalk.
A wiping cycle confirms that the instruction
has been accepted.
This warning lamp comes on in the
instrument panel and a message is displayed.
Switching off
Give the control stalk another short
push downwards or place the control
stalk in another position (Int, 1 or 2).
This warning lamp goes off in the instrument
panel and a message is displayed. The automatic rain sensitive windscreen
wipers must be reactivated by pushing the
control stalk downwards, if the ignition has
been off for more than one minute.
Operating fault
If a fault occurs with the automatic rain
sensitive wipers, the wipers will operate in
intermittent mode.
Have them checked by a PEUGEOT dealer or a
qualified workshop.
Do not cover the rain sensor, combined with
the sunshine sensor and located at the top
centre of the windscreen, behind the rear view
m i r r o r.
Switch off the automatic rain sensitive wipers
when using an automatic car wash.
In winter, it is advisable to wait until the
windscreen is completely clear of ice before
activating the automatic rain sensitive wipers.
4
Lighting and visibility
Page 86 of 324
84
General safety
recommendations
Labels are affixed in different locations on
your vehicle. They include safety warnings
and vehicle identification information. Do
not remove them: they are an integral part
of your vehicle.
For any work on your vehicle, use a
qualified workshop that has the technical
information, skills and equipment required,
all of which a PEUGEOT dealer is able to
provide.
Depending on country regulations, some
safety equipment may be compulsory:
high visibility safety vests, warning
triangles, breathalysers, spare bulbs,
spare fuses, fire extinguisher, first aid kit,
mud flaps at the rear of the vehicle, etc.We draw your attention to the following
points:
-
T
he fitting of electrical equipment
or accessories not approved by
PEUGEOT may cause excessive
current consumption and faults and
failures with the electrical system of
your vehicle. Contact a PEUGEOT
dealer for information on the range of
recommended accessories.
-
A
s a safety measure, access to
the diagnostic socket, used for the
vehicle's electronic systems, is
reser ved strictly for PEUGEOT dealers
or qualified workshops, equipped
with the special tools required (risk
of malfunctions of the vehicle's
electronic systems that could cause
breakdowns or serious accidents).
The manufacturer cannot be held
responsible if this advice is not
followed.
-
A
ny modification or adaptation not
intended or authorised by PEUGEOT
or carried out without meeting the
technical requirements defined by
the manufacturer will result in the
suspension of the legal and contractual
warranties. Installation of accessory radio
communication transmitters
Before installing a radio communication
transmitter, you must contact a PEUGEOT
dealer for the specifications of compatible
transmitters (frequency, maximum power,
aerial position, specific installation
requirements), in line with the Vehicle
Electromagnetic Compatibility Directive
(2004/104/EC).
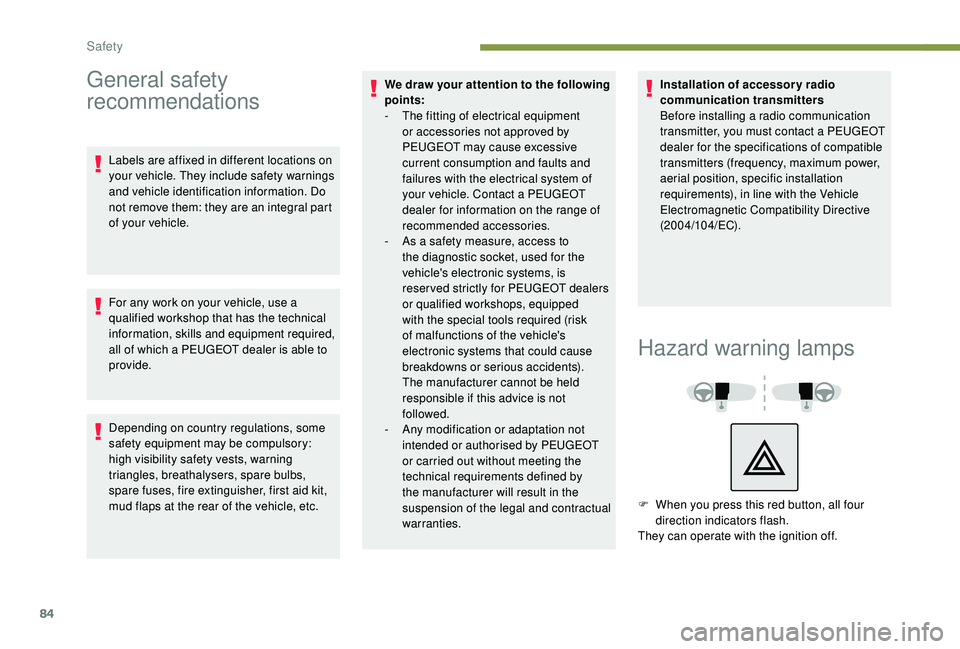
Hazard warning lamps
F When you press this red button, all four
direction indicators flash.
They can operate with the ignition off.
Safety