2018 PEUGEOT 3008 engine
[x] Cancel search: enginePage 101 of 360
99
This system allows the wireless charging of a
portable device, such as a smartphone, using
the principle of magnetic induction, based on
the Qi 1.1 standard.
The portable device to be charged must be
compatible with the Qi standard, either by
design or by using a compatible holder or shell.
The charging zone is identified by the Qi symbol.
Operation
The charger works with the engine running and
in STOP mode of Stop & Start.
Charging is managed by the smartphone.
For versions with
K
eyless Entry and Starting,
operation of the charger may be interrupted
when opening a door or switching off the
ignition.
Charging
F First ensure that the charging zone is clear of other articles.
F
P
lace a portable device in the middle of the
charging zone.
F
O
nce the portable device is detected, the
charge indicator lamp comes on in green. The system only supports charging one
portable device at a time.
Do not leave any metal objects (coins,
keys, vehicle remote control, etc.) in
the charging area while a device is
being charged – risk of overheating or
interrupting the charging process!
Checking operation
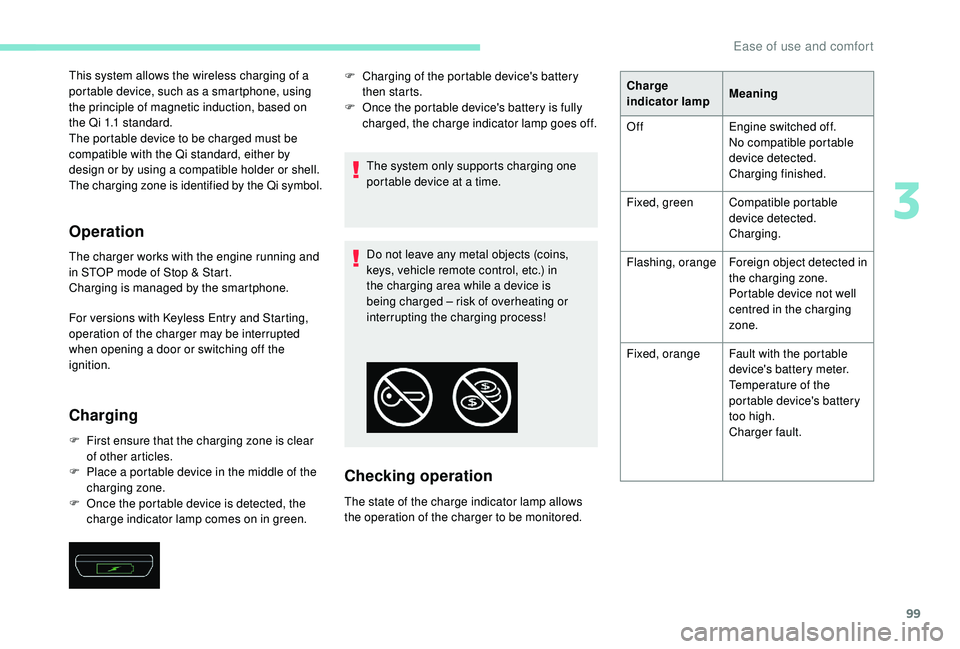
The state of the charge indicator lamp allows
the operation of the charger to be monitored. F
C
harging of the portable device's battery
then starts.
F
O
nce the portable device's battery is fully
charged, the charge indicator lamp goes off. Charge
indicator lamp
Meaning
Off Engine switched off.
No compatible portable
device detected.
Charging finished.
Fixed, green Compatible portable
device detected.
Charging.
Flashing, orange Foreign object detected in
the charging zone.
Portable device not well
centred in the charging
zone.
Fixed, orange Fault with the portable
device's battery meter.
Temperature of the
portable device's battery
too high.
Charger fault.
3
Ease of use and comfort
Page 102 of 360
100
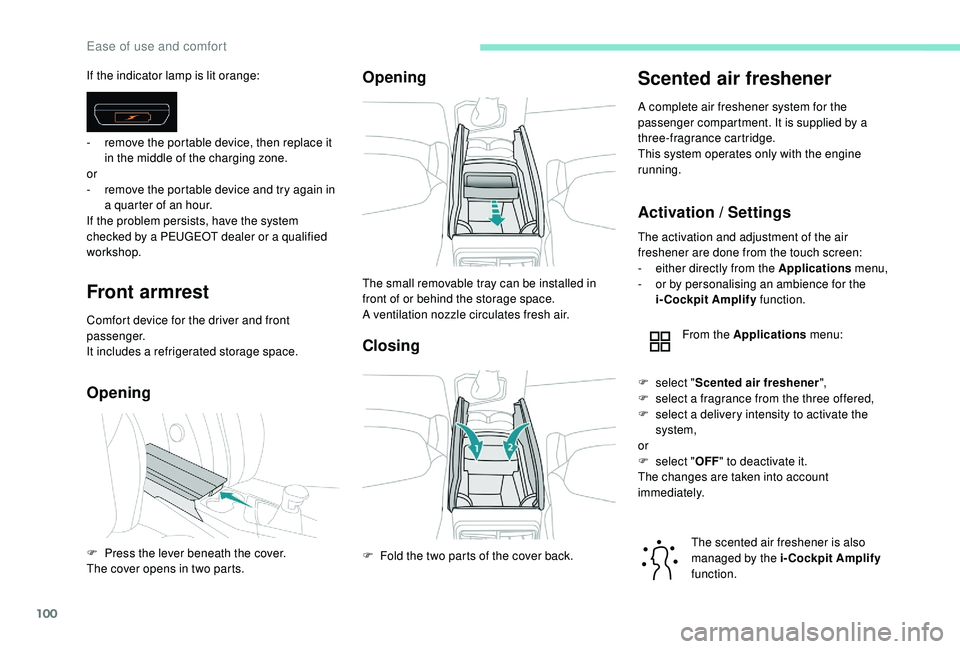
Front armrest
Comfort device for the driver and front
passenger.
It includes a refrigerated storage space.
OpeningOpening
Closing
Scented air freshener
A complete air freshener system for the
passenger compartment. It is supplied by a
three-fragrance cartridge.
This system operates only with the engine
running.
Activation / Settings
If the indicator lamp is lit orange:
-
r
emove the portable device, then replace it
in the middle of the charging zone.
or
-
r
emove the portable device and try again in
a quarter of an hour.
If the problem persists, have the system
checked by a PEUGEOT dealer or a qualified
workshop.
F
P
ress the lever beneath the cover.
The cover opens in two parts. The small removable tray can be installed in
front of or behind the storage space.
A ventilation nozzle circulates fresh air.
F
F
old the two parts of the cover back.The activation and adjustment of the air
freshener are done from the touch screen:
-
e
ither directly from the Applications menu,
-
o
r by personalising an ambience for the
i-Cockpit Amplify function.
From the Applications menu:
The scented air freshener is also
managed by the i-Cockpit Amplify
function.
F
s
elect "Scented air freshener ",
F
s
elect a fragrance from the three offered,
F
s
elect a delivery intensity to activate the
system,
or
F
s
elect "OFF" to deactivate it.
The changes are taken into account
immediately.
Ease of use and comfort
Page 104 of 360
102
Refitting
To refit the mat on the driver's side:
F p osition the mat correctly,
F
r
eattach the fixings by pressing,
F
c
heck that the mat is secured correctly.
To avoid any risk of jamming of the pedals:
-
o
nly use mats which are suited to the
fixings already present in the vehicle;
these fixings must be used,
-
n
ever place one mat on top of another.
The use of mats not approved by
PEUGEOT may inter fere with access to
the pedals and hinder the operation of the
cruise control / speed limiter.
The mats approved by PEUGEOT have
two fixings located below the seat.
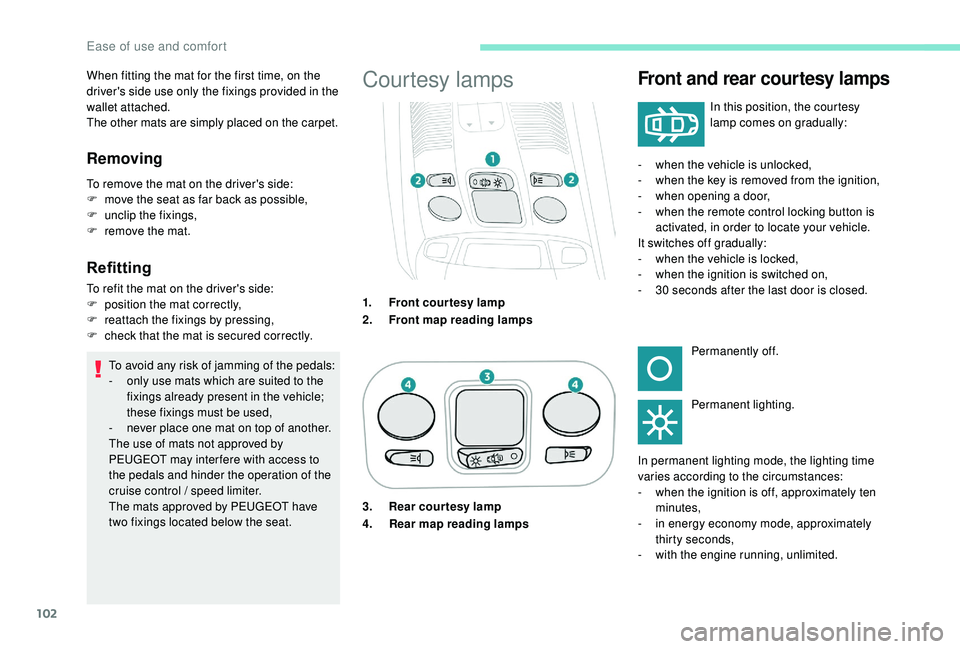
Courtesy lampsFront and rear courtesy lamps
In this position, the courtesy
lamp comes on gradually:
When fitting the mat for the first time, on the
driver's side use only the fixings provided in the
wallet attached.
The other mats are simply placed on the carpet.
Removing
To remove the mat on the driver's side:
F
m ove the seat as far back as possible,
F
un
clip the fixings,
F
r
emove the mat.
1.Front courtesy lamp
2. Front map reading lamps -
w
hen the vehicle is unlocked,
- w hen the key is removed from the ignition,
- w hen opening a door,
-
w
hen the remote control locking button is
activated, in order to locate your vehicle.
It switches off gradually:
-
w
hen the vehicle is locked,
-
w
hen the ignition is switched on,
-
3
0 seconds after the last door is closed.Permanently off.
Permanent lighting.
In permanent lighting mode, the lighting time
varies according to the circumstances:
-
w
hen the ignition is off, approximately ten
minutes,
-
i
n energy economy mode, approximately
thirty seconds,
-
w
ith the engine running, unlimited.
3. Rear courtesy lamp
4.
Rear map reading lamps
Ease of use and comfort
Page 106 of 360
104
- illuminated bezels for the front cup holders,
- a l ight source for each of the front door
pockets,
-
i
lluminated rails along the panoramic
sunroof blind.
The ambient lighting switches off automatically
when the sidelamps are switched off. The interior ambient lighting can
be activated or deactivated and its
brightness adjusted in the Vehicle /
Driving menu of the touch screen.
The interior ambient lighting is also
managed by the i- Cockpit Amplify
function.
For more information on the
i-Cockpit Amplify function , refer
to the corresponding section.Rear fittings
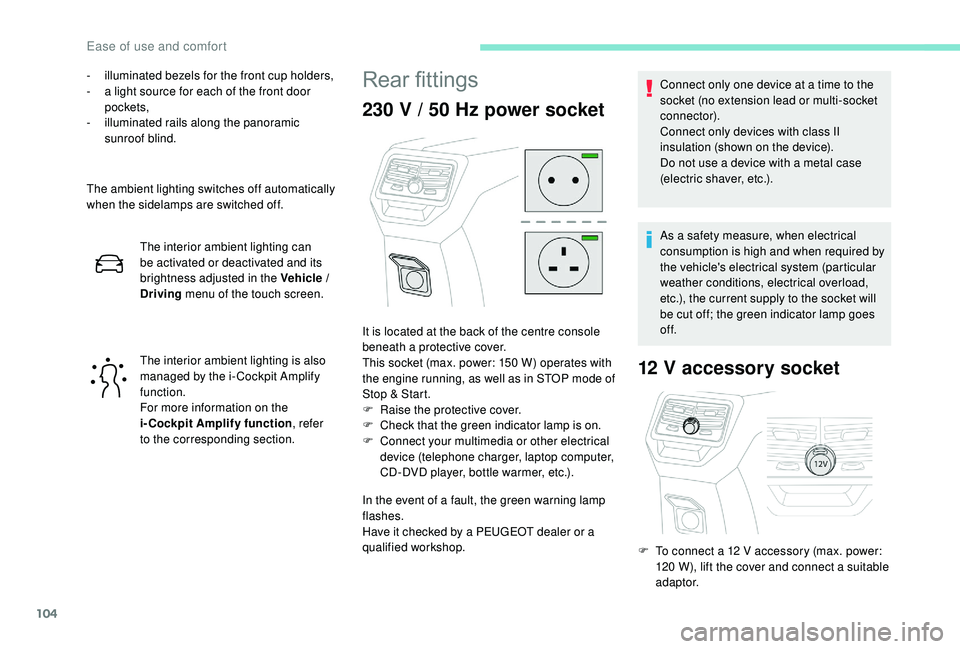
230 V / 50 Hz power socket
In the event of a fault, the green warning lamp
flashes.
Have it checked by a PEUGEOT dealer or a
qualified workshop.
12 V accessory socket
It is located at the back of the centre console
beneath a protective cover.
This socket (max. power: 150
W) operates with
the engine running, as well as in STOP mode of
Stop & Start.
F
Ra
ise the protective cover.
F
C
heck that the green indicator lamp is on.
F
C
onnect your multimedia or other electrical
device (telephone charger, laptop computer,
CD-DVD player, bottle warmer, etc.). Connect only one device at a time to the
socket (no extension lead or multi-socket
connector).
Connect only devices with class II
insulation (shown on the device).
Do not use a device with a metal case
(electric shaver, etc.).
As a safety measure, when electrical
consumption is high and when required by
the vehicle's electrical system (particular
weather conditions, electrical overload,
etc.), the current supply to the socket will
be cut off; the green indicator lamp goes
of f.
F
T
o connect a 12 V accessory (max. power:
120
W), lift the cover and connect a suitable
adaptor.
Ease of use and comfort
Page 110 of 360
108
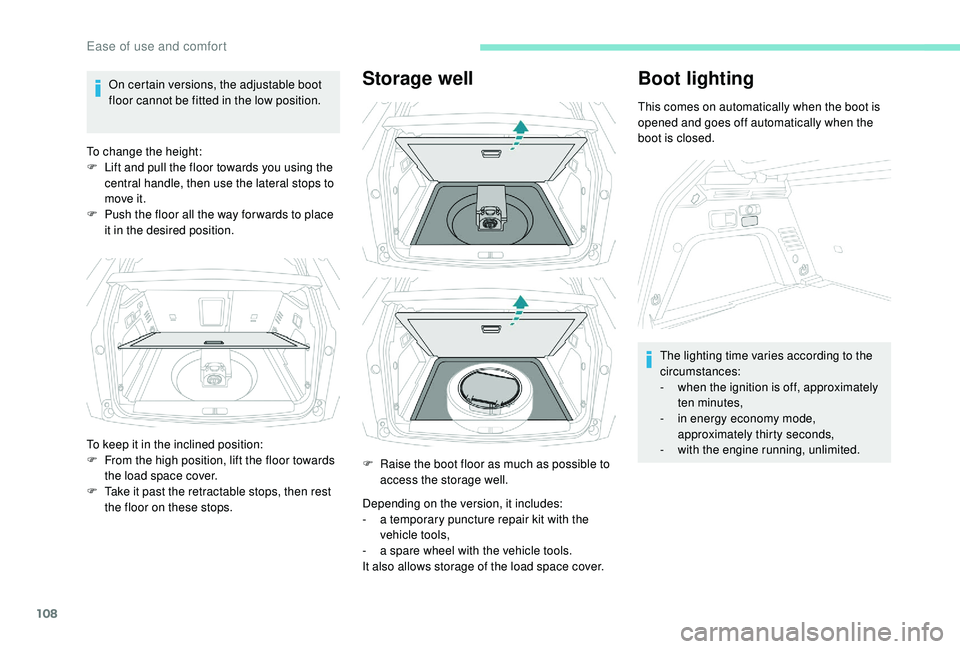
On certain versions, the adjustable boot
floor cannot be fitted in the low position.
To change the height:
F
L
ift and pull the floor towards you using the
central handle, then use the lateral stops to
move it.
F
P
ush the floor all the way for wards to place
it in the desired position.Storage well
Depending on the version, it includes:
- a t emporary puncture repair kit with the
vehicle tools,
-
a s
pare wheel with the vehicle tools.
It also allows storage of the load space cover.
Boot lighting
This comes on automatically when the boot is
opened and goes off automatically when the
boot is closed.
The lighting time varies according to the
circumstances:
-
w
hen the ignition is off, approximately
ten minutes,
-
i
n energy economy mode,
approximately thirty seconds,
-
w
ith the engine running, unlimited.
To keep it in the inclined position:
F
F
rom the high position, lift the floor towards
the load space cover.
F
T
ake it past the retractable stops, then rest
the floor on these stops. F
R
aise the boot floor as much as possible to
access the storage well.
Ease of use and comfort
Page 111 of 360
109
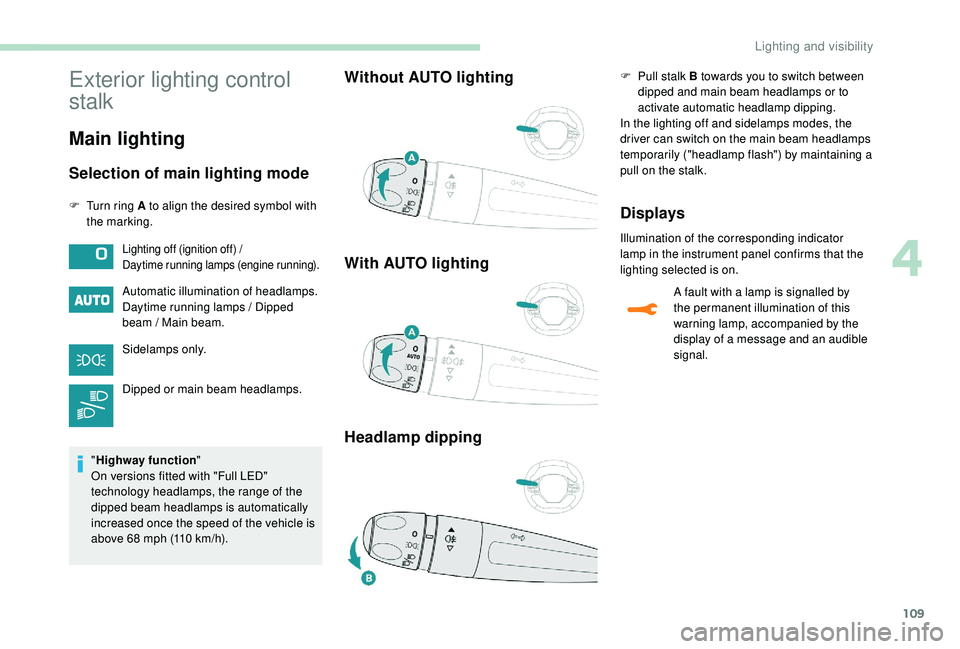
Exterior lighting control
stalk
Main lighting
Selection of main lighting mode
F Turn ring A to align the desired symbol with the marking.
Automatic illumination of headlamps.
Daytime running lamps / Dipped
beam / Main beam.
Sidelamps only.
Dipped or main beam headlamps.
" Highway function "
On versions fitted with "Full LED"
technology headlamps, the range of the
dipped beam headlamps is automatically
increased once the speed of the vehicle is
above 68
mph (110 km/h).
Without AUTO lighting
With AUTO lighting
Headlamp dippingF Pull stalk B towards you to switch between dipped and main beam headlamps or to
activate automatic headlamp dipping.
In the lighting off and sidelamps modes, the
driver can switch on the main beam headlamps
temporarily ("headlamp flash") by maintaining a
pull on the stalk.
Displays
Illumination of the corresponding indicator
lamp in the instrument panel confirms that the
lighting selected is on.Lighting off (ignition off) /
Daytime running lamps (engine running).
A fault with a lamp is signalled by
the permanent illumination of this
warning lamp, accompanied by the
display of a message and an audible
signal.
4
Lighting and visibility
Page 113 of 360
111
Never look too closely at the luminous
beam of "Full LED" headlamps: risk of
serious eye injury.
Travelling abroad
If using your vehicle in a country that
drives on the other side of the road, the
headlamps must be adjusted to avoid
dazzling oncoming drivers.
Contact a PEUGEOT dealer or a qualified
workshop.
Daytime running lamps /
Sidelamps
The LEDs of these lamps light up automatically
when the engine starts, at the front and back of
the vehicle.They provide the following functions:
-
D
aytime running lamps (lighting control
stalk at position " 0" or " AUTO " with
adequate light level).
-
S
idelamps (lighting control stalk at position
" AUTO " with low light levels or "Sidelamps
only" or "Dipped/main beam headlamps").
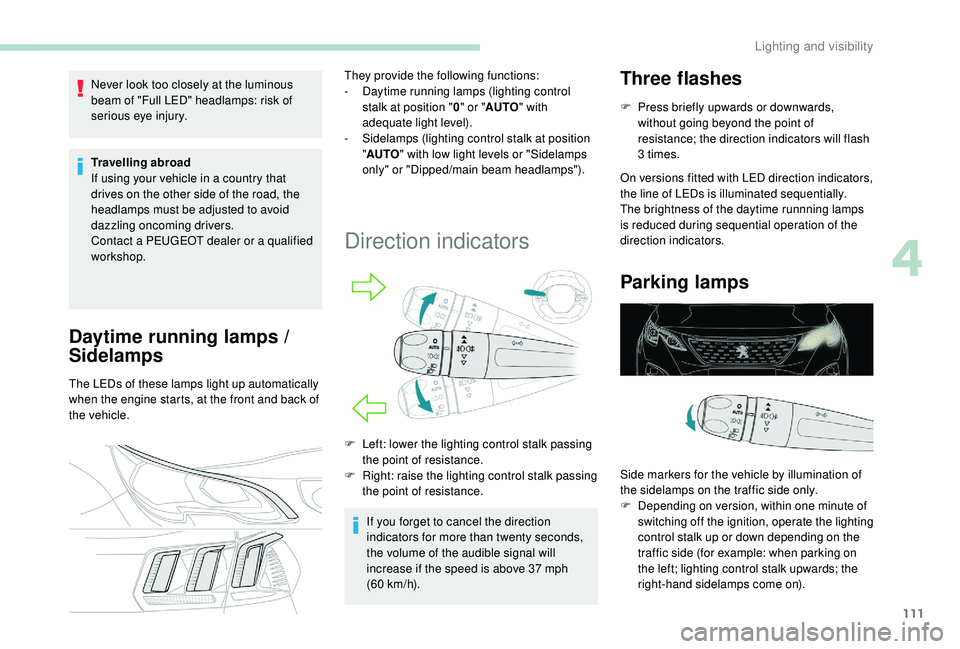
Direction indicators
F Left: lower the lighting control stalk passing the point of resistance.
F
R
ight: raise the lighting control stalk passing
the point of resistance.
If you forget to cancel the direction
indicators for more than twenty seconds,
the volume of the audible signal will
increase if the speed is above 37
mph
(60
km/h).
Three flashes
F Press briefly upwards or downwards, without going beyond the point of
resistance; the direction indicators will flash
3
times.
On versions fitted with LED direction indicators,
the line of LEDs is illuminated sequentially.
The brightness of the daytime runnning lamps
is reduced during sequential operation of the
direction indicators.
Parking lamps
Side markers for the vehicle by illumination of
the sidelamps on the traffic side only.
F
D
epending on version, within one minute of
switching off the ignition, operate the lighting
control stalk up or down depending on the
traffic side (for example: when parking on
the left; lighting control stalk upwards; the
right-hand sidelamps come on).
4
Lighting and visibility
Page 126 of 360
124
Electronic stability control
(ESC)
A set of the following Electronic Stability
systems:
-
a
nti-lock braking system (ABS) and
electronic brake force distribution (EBFD),
-
em
ergency braking assistance (EBA),
-
w
heel anti-slip regulation (ASR) or traction
control,
-
d
ynamic stability control (DSC).
-
t
railer stability assist (TSA).
Definitions
Anti-lock braking system (ABS)
and electronic brake force
distribution (EBFD)
The ABS prevents wheel lock in the event of
emergency braking.
The electronic brake force distribution system
manages the braking pressure wheel by wheel.
Emergency braking assistance
In an emergency, this system enables you to
reach the optimum braking pressure more
quickly and therefore reduce the stopping
distance.
It is triggered in relation to the speed at which
the brake pedal is pressed. This is felt by a
reduction in the resistance of the pedal and an
increase in braking efficiency.
Anti-slip regulation (ASR)
This system optimises traction in order to
avoid wheel slip by acting on the brakes of
the driving wheels and on the engine. It also
improves the directional stability of the vehicle
on acceleration.
Dynamic stability control (DSC)
If there is a difference between the path
followed by the vehicle and that required by the
driver, this system monitors each wheel and
automatically acts on the brake of one or more
wheels and on the engine to return the vehicle
to the required path, within the limits of the laws
of physics.
Trailer stability assist (TSA)
This system allows control of the vehicle to be
retained when towing a trailer, so as to avoid
the risk of snaking.
Anti-lock braking system
(ABS) and electronic brake
force distribution (EBFD)
The fixed illumination of this warning
lamp signals that there is a fault with
the ABS.
Illumination of this warning lamp,
linked with the STOP and ABS
warning lamps, accompanied by
the display of a message and an
audible signal, signals that there is a
fault with the electronic brake force
distribution (EBFD).
For technical reasons and, in particular,
to improve the quality of PEUGEOT
CONNECT ser vices ser vices to
customers, the manufacturer reserves the
right to carry out updates to the vehicle's
on-board telematic system.
These systems improve the stability and
manoeuvrability of your vehicle when braking
and contribute towards improved control in
corners, in particular on poor or slippery road
surfaces. The vehicle retains conventional braking.
Drive carefully at moderate speed.
Contact a PEUGEOT dealer or a qualified
workshop as soon as possible.
You must stop as soon as it is safe to do so.
Call on a PEUGEOT dealer or a qualified
workshop.
Safety