2018 PEUGEOT 3008 buttons
[x] Cancel search: buttonsPage 96 of 360
94
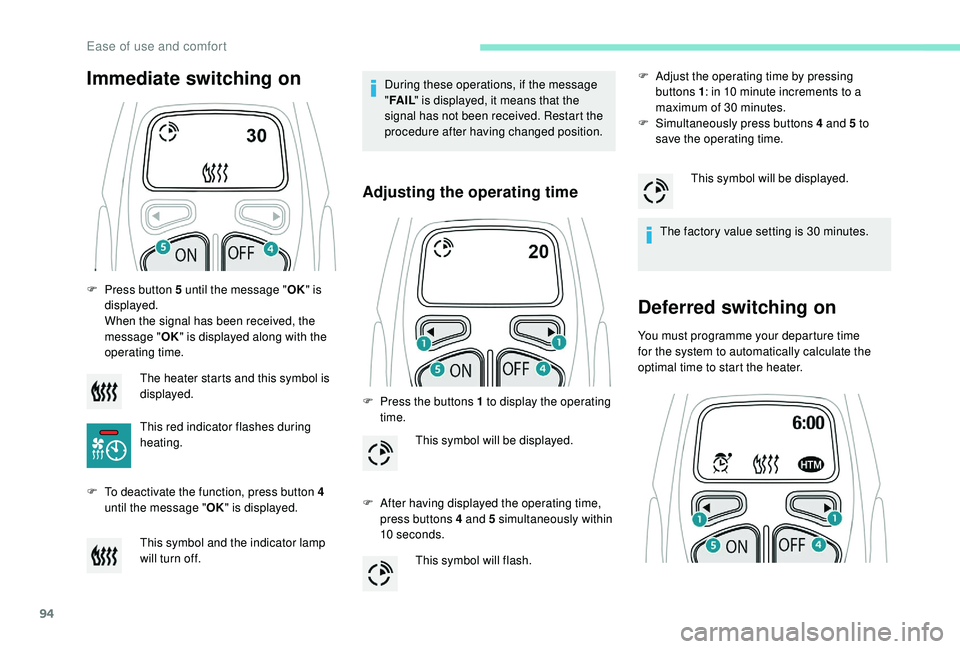
F Press button 5 until the message "OK" is
displayed.
When the signal has been received, the
message " OK" is displayed along with the
operating time.
F
T
o deactivate the function, press button 4
until the message " OK" is displayed. During these operations, if the message
"
FA I L " is displayed, it means that the
signal has not been received. Restart the
procedure after having changed position.
Adjusting the operating time
F Press the buttons 1 to display the operating time.
F
A
fter having displayed the operating time,
press buttons 4 and 5 simultaneously within
10
seconds. F
A
djust the operating time by pressing
buttons 1 : in 10 minute increments to a
maximum of 30
minutes.
F
S
imultaneously press buttons 4 and 5 to
save the operating time.
The factory value setting is 30 minutes.
Deferred switching on
You must programme your departure time
for the system to automatically calculate the
optimal time to start the heater.
Immediate switching on
The heater starts and this symbol is
displayed.
This red indicator flashes during
heating.
This symbol and the indicator lamp
will turn off.
This symbol will be displayed.
This symbol will flash.This symbol will be displayed.
Ease of use and comfort
Page 97 of 360
95
Programming the departure
time
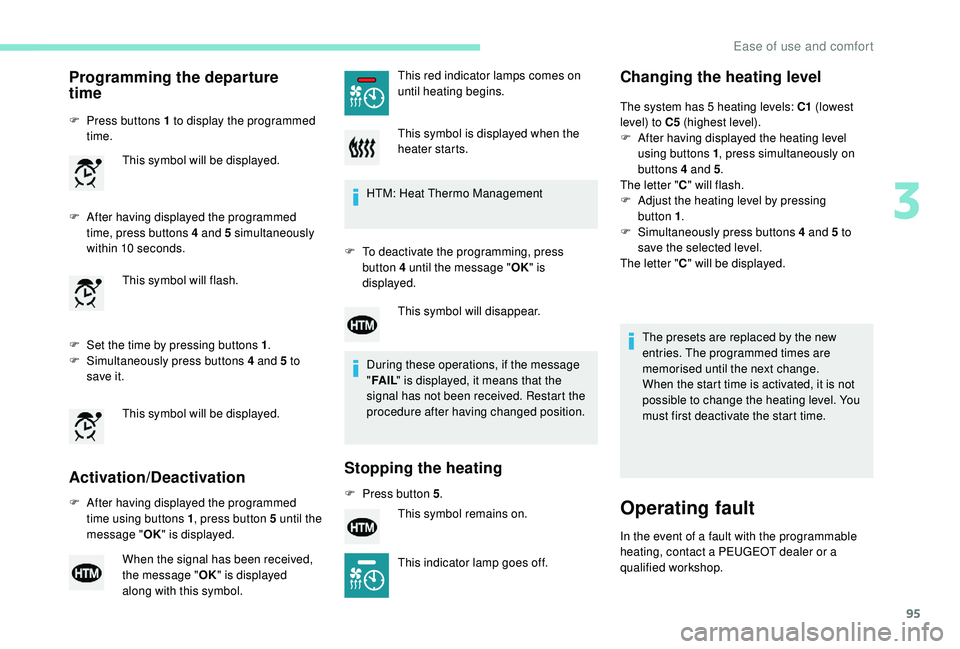
F Press buttons 1 to display the programmed time.
F
A
fter having displayed the programmed
time, press buttons 4 and 5 simultaneously
within 10
seconds.
F
S
et the time by pressing buttons 1 .
F
S
imultaneously press buttons 4 and 5 to
save it.
Activation/Deactivation
F After having displayed the programmed time using buttons 1 , press button 5 until the
message " OK" is displayed. HTM: Heat Thermo Management
F
T
o deactivate the programming, press
button 4 until the message " OK" is
displayed.
During these operations, if the message
" FA I L " is displayed, it means that the
signal has not been received. Restart the
procedure after having changed position.
Stopping the heating
F Press button 5 .
Changing the heating level
The system has 5 heating levels: C1 (lowest
level) to C5 (highest level).
F
A
fter having displayed the heating level
using buttons 1 , press simultaneously on
buttons 4 and 5 .
The letter " C" will flash.
F
A
djust the heating level by pressing
button
1.
F
S
imultaneously press buttons 4 and 5 to
save the selected level.
The letter " C" will be displayed.
This symbol will be displayed.
This symbol will flash.
This symbol will be displayed.
When the signal has been received,
the message "
OK" is displayed
along with this symbol. This red indicator lamps comes on
until heating begins.
This symbol is displayed when the
heater starts.
This symbol will disappear.
This symbol remains on.
This indicator lamp goes off.
The presets are replaced by the new
entries. The programmed times are
memorised until the next change.
When the start time is activated, it is not
possible to change the heating level. You
must first deactivate the start time.
Operating fault
In the event of a fault with the programmable
heating, contact a PEUGEOT dealer or a
qualified workshop.
3
Ease of use and comfort
Page 125 of 360
123
If an impact is detected by the airbag
control unit, an emergency call is made
automatically and independently of the
deployment of any airbags.
If you benefit from the Peugeot Connect
Packs offer with the SOS and assistance
pack included, there are additional
ser vices available to you in your personal
space, via the website for your country.
Operation of the system
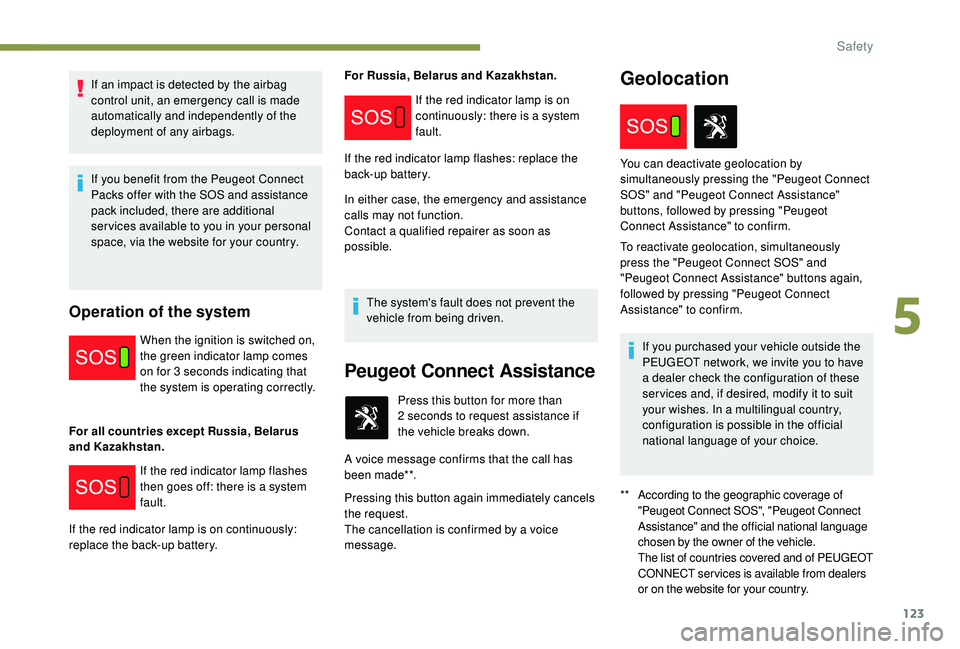
When the ignition is switched on,
the green indicator lamp comes
on for 3 seconds indicating that
the system is operating correctly.
For all countries except Russia, Belarus
and Kazakhstan. For Russia, Belarus and Kazakhstan.
In either case, the emergency and assistance
calls may not function.
Contact a qualified repairer as soon as
possible.
The system's fault does not prevent the
vehicle from being driven.
If the red indicator lamp flashes
then goes off: there is a system
fault.
If the red indicator lamp is on continuously:
replace the back-up battery. If the red indicator lamp is on
continuously: there is a system
fault.
If the red indicator lamp flashes: replace the
back-up battery.
Peugeot Connect Assistance
** According to the geographic coverage of "Peugeot Connect SOS", "Peugeot Connect
Assistance" and the official national language
chosen by the owner of the vehicle.
The list of countries covered and of PEUGEOT
CONNECT services is available from dealers
or on the website for your country.
Press this button for more than
2 seconds to request assistance if
the vehicle breaks down.
A voice message confirms that the call has
been made**.
Pressing this button again immediately cancels
the request.
The cancellation is confirmed by a voice
message.
Geolocation
You can deactivate geolocation by
simultaneously pressing the "Peugeot Connect
SOS" and "Peugeot Connect Assistance"
buttons, followed by pressing "Peugeot
Connect Assistance" to confirm.
To reactivate geolocation, simultaneously
press the "Peugeot Connect SOS" and
"Peugeot Connect Assistance" buttons again,
followed by pressing "Peugeot Connect
Assistance" to confirm.
If you purchased your vehicle outside the
PEUGEOT network, we invite you to have
a dealer check the configuration of these
ser vices and, if desired, modify it to suit
your wishes. In a multilingual country,
configuration is possible in the official
national language of your choice.
5
Safety
Page 184 of 360
182
Displays on the instrument panel
Switching on
The cruise control is switched on manually.
The speed of the vehicle must be between 19
and 112
mph (30 and 180 km/h).
With an automatic gearbox: in mode D or M .
Pause
The adaptive cruise control can be paused
manually by:
-
a
ction by the driver:
•
O
n button 4 (Pause).
•
O
n the brake pedal.
•
O
n the electric parking brake control.
•
B
y changing from mode D to N with an
automatic gearbox.
-
o
r automatically, if operation of the ESC
system is triggered for reasons of safety.
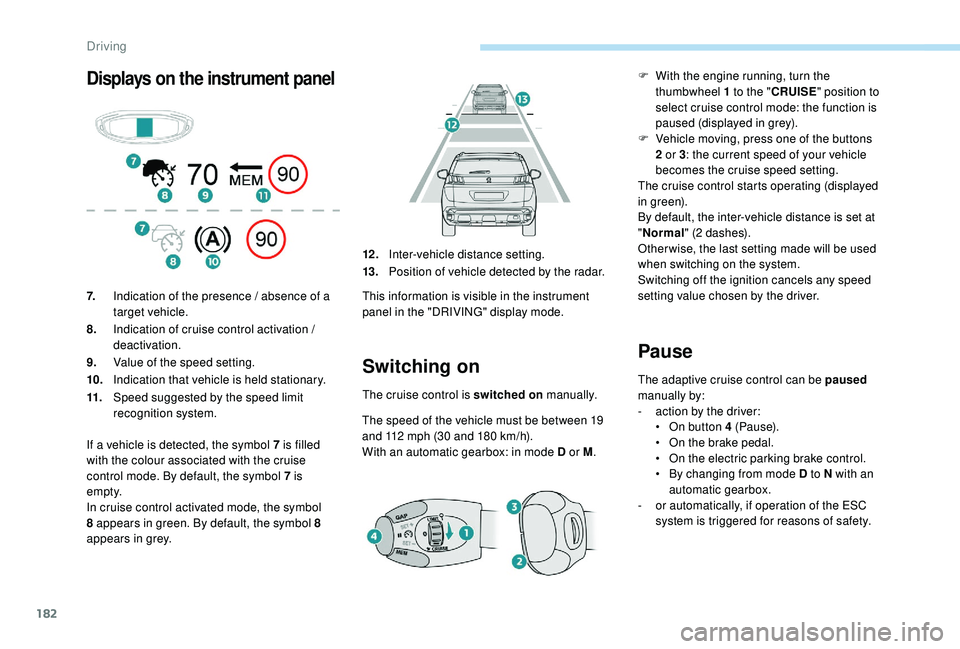
7.
Indication of the presence / absence of a
target vehicle.
8. Indication of cruise control activation /
deactivation.
9. Value of the speed setting.
10. Indication that vehicle is held stationary.
11. Speed suggested by the speed limit
recognition system. 12 .
Inter-vehicle distance setting.
13. Position of vehicle detected by the radar.
This information is visible in the instrument
panel in the "DRIVING" display mode.
If a vehicle is detected, the symbol 7
is filled
with the colour associated with the cruise
control mode. By default, the symbol 7 is
e m pt y.
In cruise control activated mode, the symbol
8 appears in green. By default, the symbol 8
appears in grey. F
W
ith the engine running, turn the
thumbwheel 1 to the " CRUISE" position to
select cruise control mode: the function is
paused (displayed in grey).
F
V
ehicle moving, press one of the buttons
2 or 3 : the current speed of your vehicle
becomes the cruise speed setting.
The cruise control starts operating (displayed
in green).
By default, the inter-vehicle distance is set at
" Normal " (2 dashes).
Other wise, the last setting made will be used
when switching on the system.
Switching off the ignition cancels any speed
setting value chosen by the driver.
Driving
Page 185 of 360
183
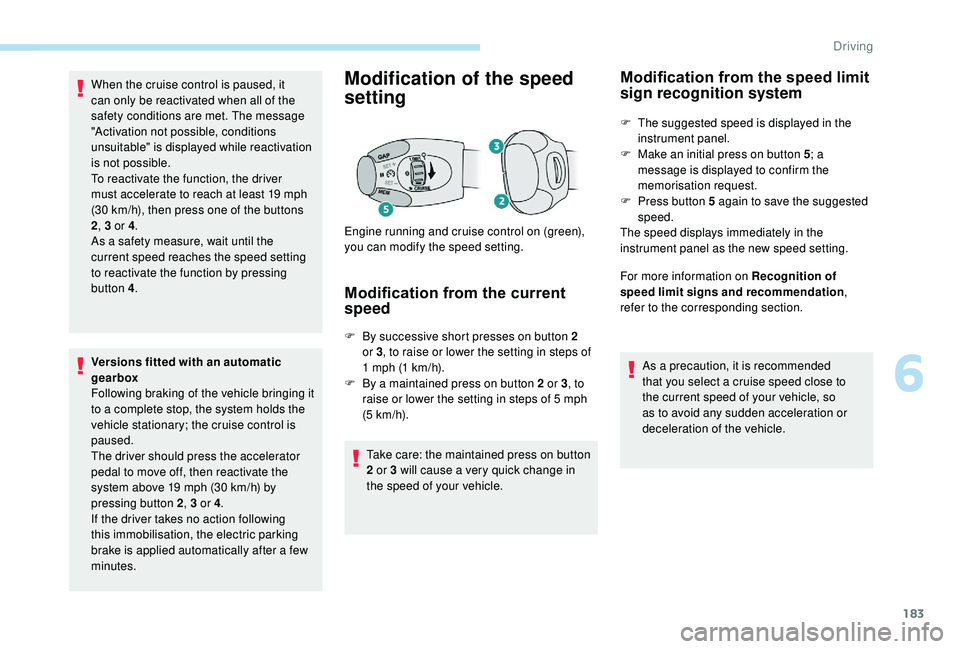
When the cruise control is paused, it
can only be reactivated when all of the
safety conditions are met. The message
"Activation not possible, conditions
unsuitable" is displayed while reactivation
is not possible.
To reactivate the function, the driver
must accelerate to reach at least 19 mph
(30
km/h), then press one of the buttons
2 , 3 or 4 .
As a safety measure, wait until the
current speed reaches the speed setting
to reactivate the function by pressing
button
4.
Versions fitted with an automatic
gearbox
Following braking of the vehicle bringing it
to a complete stop, the system holds the
vehicle stationary; the cruise control is
paused.
The driver should press the accelerator
pedal to move off, then reactivate the
system above 19
mph (30 km/h) by
pressing button 2 , 3 or 4.
If the driver takes no action following
this immobilisation, the electric parking
brake is applied automatically after a few
minutes.Modification of the speed
setting
Modification from the current
speed
F By successive short presses on button 2 or 3 , to raise or lower the setting in steps of
1
mph (1 km/h).
F
B
y a maintained press on button 2 or 3 , to
raise or lower the setting in steps of 5
mph
(5
km/h).
Take care: the maintained press on button
2 or 3 will cause a very quick change in
the speed of your vehicle.
Engine running and cruise control on (green),
you can modify the speed setting.
Modification from the speed limit
sign recognition system
F The suggested speed is displayed in the
instrument panel.
F
M
ake an initial press on button 5 ; a
message is displayed to confirm the
memorisation request.
F
P
ress button 5 again to save the suggested
speed.
The speed displays immediately in the
instrument panel as the new speed setting.
For more information on Recognition of
speed limit signs and recommendation ,
refer to the corresponding section.
As a precaution, it is recommended
that you select a cruise speed close to
the current speed of your vehicle, so
as to avoid any sudden acceleration or
deceleration of the vehicle.
6
Driving
Page 274 of 360
2
12:13
18,5 21,5
23 °CFirst steps
With the engine running, a press
mutes the sound.
With the ignition off, a press turns
the system on.
Adjustment of the volume.
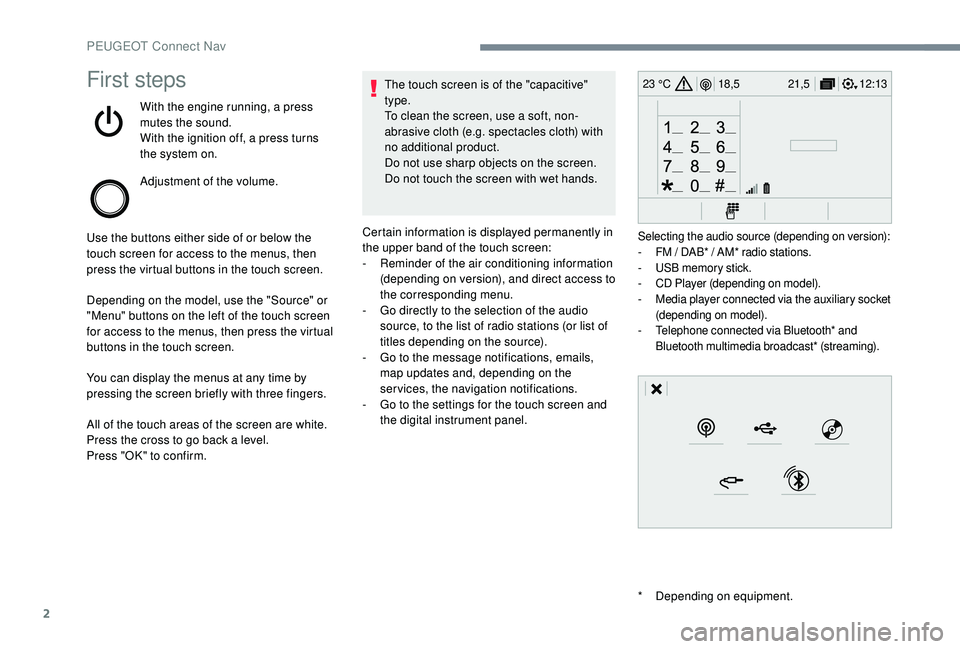
Use the buttons either side of or below the
touch screen for access to the menus, then
press the virtual buttons in the touch screen.
Depending on the model, use the "Source" or
"Menu" buttons on the left of the touch screen
for access to the menus, then press the virtual
buttons in the touch screen.
You can display the menus at any time by
pressing the screen briefly with three fingers.
All of the touch areas of the screen are white.
Press the cross to go back a level.
Press "OK" to confirm. The touch screen is of the "capacitive"
type.
To clean the screen, use a soft, non-
abrasive cloth (e.g. spectacles cloth) with
no additional product.
Do not use sharp objects on the screen.
Do not touch the screen with wet hands.
*
D
epending on equipment.
Certain information is displayed permanently in
the upper band of the touch screen:
-
R
eminder of the air conditioning information
(depending on version), and direct access to
the corresponding menu.
-
G
o directly to the selection of the audio
source, to the list of radio stations (or list of
titles depending on the source).
-
G
o to the message notifications, emails,
map updates and, depending on the
services, the navigation notifications.
-
G
o to the settings for the touch screen and
the digital instrument panel.
Selecting the audio source (depending on version):
- F M / DAB* / AM* radio stations.
-
U
SB memory stick.
-
C
D Player (depending on model).
-
M
edia player connected via the auxiliary socket
(depending on model).
-
T
elephone connected via Bluetooth* and
Bluetooth multimedia broadcast* (streaming).
PEUGEOT Connect Nav
Page 275 of 360
3
21,518,5
12:1323 °C
In the "Settings" menu you can create
a profile for just one person or a group
of people with common points, with the
possibility of entering a multitude of
settings (radio presets, audio settings,
navigation history, contact favourites,
etc.); these settings are taken into
account automatically.
In very hot conditions, the volume may
be limited to protect the system. It may go
into standby (screen and sound off) for at
least 5
minutes.
The return to normal takes place after
the temperature in the passenger
compartment drops.
Steering mounted controls
Depending on model
Voice commands :
This control is located on the
steering wheel or at the end of the
lighting control stalk (depending on
model).
Short press, system voice
commands.
Long press, smartphone voice
commands via the system. or
Increase volume.
or Mute / Restore the sound.
Or
Mute by pressing the volume
increase and decrease buttons
simultaneously.
Restore the sound by pressing one
of the two volume buttons.
or Decrease volume.
or Media
(short press): change the
multimedia source.
Telephone (short press): start
telephone call.
Call in progress (short press):
access telephone menu.
Telephone (long press): reject an
incoming call, end call; when no call
is in progress, access telephone
menu. or
Radio
(rotate): automatic search for
the previous / next station.
Media (rotate): previous / next track,
move in a list.
Short press : confirm a selection; if
nothing selected, access to presets.
Radio : display the list of stations.
Media : display the list of tracks.
Radio (press and hold): update the
list of stations received.
Menus
Depending on model / Depending on version
Air conditioning
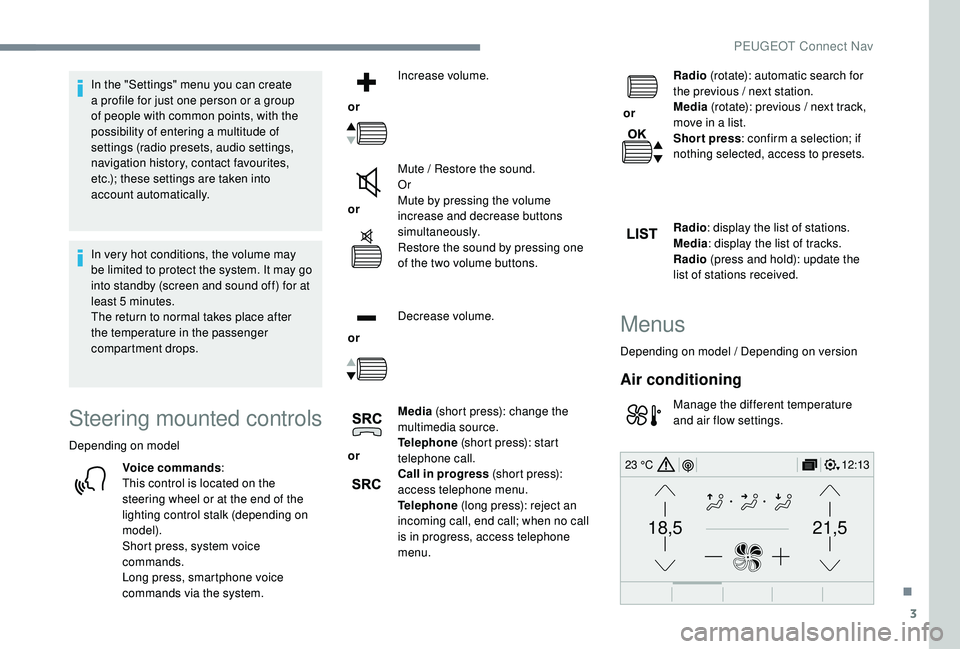
Manage the different temperature
and air flow settings.
.
PEUGEOT Connect Nav
Page 283 of 360

11
Navigation
Choice of a destination
To a new destination
or Press Navigation
to display the
primary page.
Press the " MENU" button to go to the
secondary page.
Select "Enter address ".
Select the " Country".
Enter the " City", the " Street " and the
" Number " and confirm by pressing
on the suggestions displayed.
Press " OK" to select the " Guidance
criteria ".
And / Or Select "See on map " to select the
" Guidance criteria ".
Press " OK" to start navigation. Zoom out / zoom in using the touch
buttons or with two fingers on the screen.
In order to be able to use the navigation,
it is necessary to fill in the "
City", the
" Street " and the " Number" on the
virtual keyboard or take it from the list in
" Contact " or in the " History" of addresses.
Without confirmation of the street number,
you will be guided to one end of the street.
To a recent destination
or Press Navigation
to display the
primary page.
Press the " MENU" button to go to the
secondary page.
Select "My destinations ".
Select the " Recent" tab.
Select the address chosen in the list to display
the " Guidance criteria . Press "
OK" to start navigation.
Select " Position " to visualise the arrival
point geographically.
To "My home" or "My work"
or Press Navigation
to display the
primary page.
Press the " MENU" button to go to the
secondary page.
Select "My destinations ".
Select the " Preferred" tab.
Select " My home ".
Or Select "My work ".
Or
Select a preset favourite destination.
.
PEUGEOT Connect Nav