2018 NISSAN SENTRA climate settings
[x] Cancel search: climate settingsPage 213 of 507

For vehicles with navigation system:1. Firmly apply the brake and place the shif t lever in R (Reverse).
2. Press the
button on the control
panel.
3. The screen will display the Night set- tings.
4. Turn the TUNE knob to adjust the set- ting up or down.
5. Press the
button again to access
the Auto settings.
6. Turn the TUNE knob to adjust the set- ting up or down.
NOTE:
Do not adjust any of the display settings
of the RearView Monitor while the ve-
hicle is moving. Make sure the parking
brake is firmly applied.
REARVIEW MONITOR SYSTEM
LIMITATIONS
WARNING
Listed below are the system limitations
for RearView Monitor. Failure to operate
the vehicle in accordance with these
system limitations could result in seri-
ous injury or death.
∙ The system cannot completely elimi- nate blind spots and may not show
every object.
∙ Underneath the bumper and the cor- ner areas of the bumper cannot be
viewed on the RearView Monitor be-
cause of its monitoring range limita-
tion. The system will not show small
objects below the bumper, and may
not show objects close to the bumper
or on the ground.
∙ Objects viewed in the RearView Moni- tor differ from actual distance be-
cause a wide-angle lens is used.
∙ Objects in the RearView Monitor will appear visually opposite compared to
when viewed in the rearview and out-
side mirrors. ∙ Use the displayed lines as a reference.
The lines are highly affected by the
number of occupants, fuel level, ve-
hicle position, road conditions and
road grade.
∙ Make sure that the trunk is securely closed when backing up.
∙ Do not put anything on the rearview camera. The rearview camera is in-
stalled above the license plate.
∙ When washing the vehicle with high pressure water, be sure not to spray it
around the camera. Otherwise, water
may enter the camera unit causing
water condensation on the lens, a
malfunction, fire or an electric shock.
∙ Do not strike the camera. It is a preci- sion instrument. Otherwise, it may
malfunction or cause damage result-
ing in a fire or an electric shock.
The following are operating limitations and
do not represent a system malfunction: ∙ When the temperature is extremely high or low, the screen may not clearly
display objects.
Monitor, climate, audio, phone and voice recognition systems4-15
Page 242 of 507

To turn the system off, press the VOL (vol-
ume) knob /
(power) button.
Turn the VOL (volume) knob /
(power)
to adjust the volume. ENTER/SETTING button
Press the ENTER/SETTING button to show
the Settings screen on the display. Turn the
TUNE/FOLDER knob to navigate the op-
tions and then press the ENTER/SETTING
button to make a selection.
Audio
Bass Adjusts the bass to the desired level.
Treble Adjusts the treble to the desired level.
Balance Adjusts the balance to the desired level. Balance adjusts the sound level between the lef t and right speakers.
Fade Adjusts the fade to the desired level. Fade adjusts the sound level between the front and rear
speakers.
Speed Sens Vol. (Speed Sensitive Volume) Adjusts the speed sensitive volume function, which increases the volume of the audio system as
the speed of the vehicle increases. Set to “OFF” to disable the feature. The higher the setting, the
more the volume increases in relation to vehicle speed.
AUX Vol. Choose a setting from 0 to +3 to control the boost of incoming auxiliary device volume. A setting
of 0 provides no additional boost in volume. A setting of +3 provides the greatest boost in volume.
Brightness and Contrast Adjust the brightness or contrast to adjust the appearance of the display screen.
Clock Allows the user to set time manually.
On-Screen Clock Toggles ON or OFF the clock display on the upper right corner of the display screen.
RDS Display Toggles ON or OFF the RDS information displayed on the screen while the radio is playing.
Language Select the desired language for the system from the available options.
Bass, treble, balance and fade can also be adjusted by pressing the ENTER/SETTING button and turning the TUNE/FOLDER control knob
to select the item to adjust. When the desired item is shown on the display, turn the tuning to adjust and then press the ENTER/SETTING
button until the display returns to the main audio screen. If the button is not pressed for approximately 10 seconds, the radio or CD display
will automatically reappear.
4-44Monitor, climate, audio, phone and voice recognition systems
Page 247 of 507

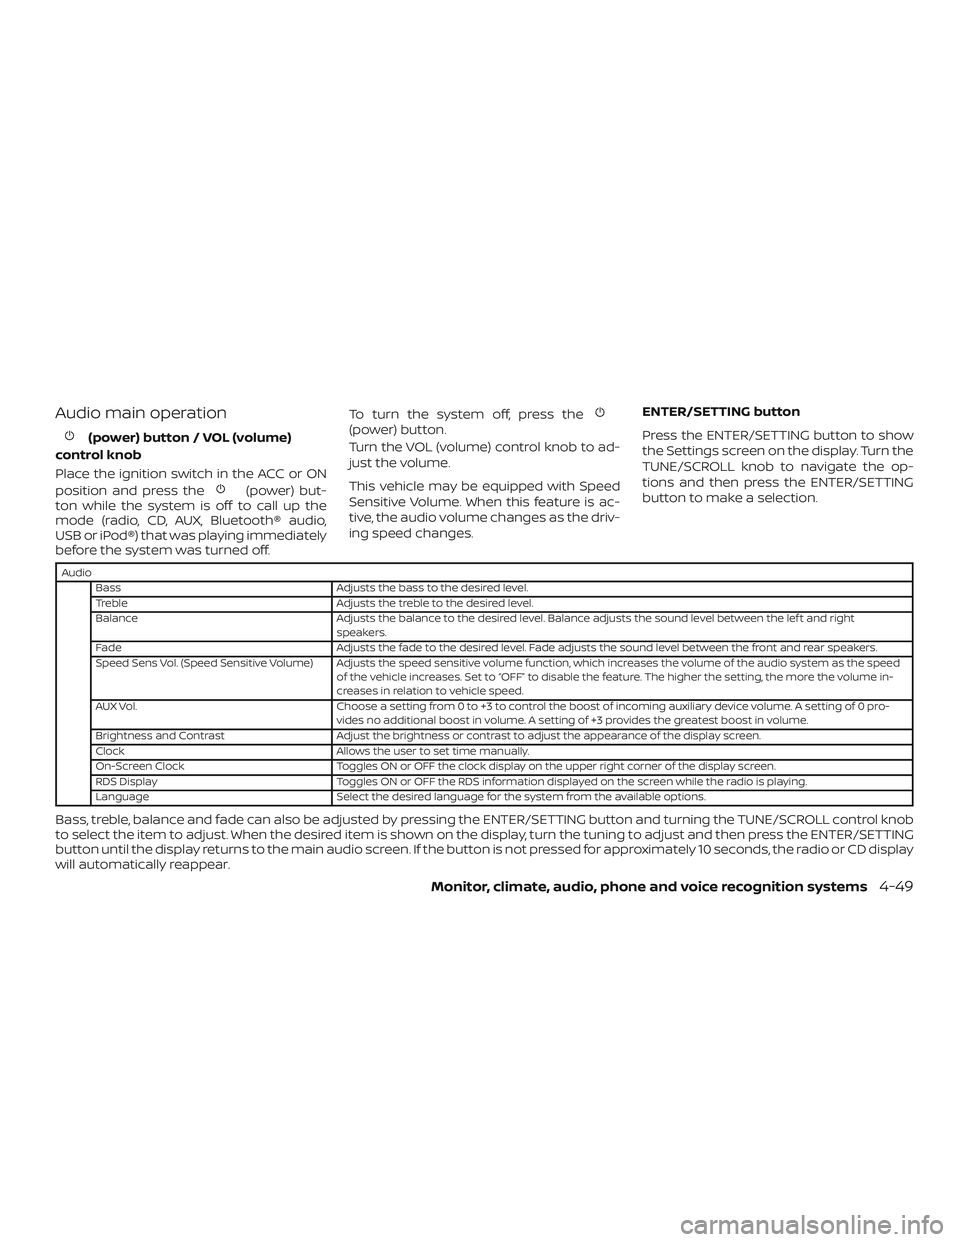
Audio main operation
(power) button / VOL (volume)
control knob
Place the ignition switch in the ACC or ON
position and press the
(power) but-
ton while the system is off to call up the
mode (radio, CD, AUX, Bluetooth® audio,
USB or iPod®) that was playing immediately
before the system was turned off. To turn the system off, press the
(power) button.
Turn the VOL (volume) control knob to ad-
just the volume.
This vehicle may be equipped with Speed
Sensitive Volume. When this feature is ac-
tive, the audio volume changes as the driv-
ing speed changes.
ENTER/SETTING button
Press the ENTER/SETTING button to show
the Settings screen on the display. Turn the
TUNE/SCROLL knob to navigate the op-
tions and then press the ENTER/SETTING
button to make a selection.
Audio
Bass Adjusts the bass to the desired level.
Treble Adjusts the treble to the desired level.
Balance Adjusts the balance to the desired level. Balance adjusts the sound level between the lef t and right speakers.
Fade Adjusts the fade to the desired level. Fade adjusts the sound level between the front and rear speakers.
Speed Sens Vol. (Speed Sensitive Volume) Adjusts the speed sensitive volume function, which increases the volume of the audio system as the speed of the vehicle increases. Set to “OFF” to disable the feature. The higher the setting, the more the volume in-
creases in relation to vehicle speed.
AUX Vol. Choose a setting from 0 to +3 to control the boost of incoming auxiliary device volume. A setting of 0 pro-
vides no additional boost in volume. A setting of +3 provides the greatest boost in volume.
Brightness and Contrast Adjust the brightness or contrast to adjust the appearance of the display screen.
Clock Allows the user to set time manually.
On-Screen Clock Toggles ON or OFF the clock display on the upper right corner of the display screen.
RDS Display Toggles ON or OFF the RDS information displayed on the screen while the radio is playing.
Language Select the desired language for the system from the available options.
Bass, treble, balance and fade can also be adjusted by pressing the ENTER/SETTING button and turning the TUNE/SCROLL control knob
to select the item to adjust. When the desired item is shown on the display, turn the tuning to adjust and then press the ENTER/SETTING
button until the display returns to the main audio screen. If the button is not pressed for approximately 10 seconds, the radio or CD display
will automatically reappear.
Monitor, climate, audio, phone and voice recognition systems4-49
Page 253 of 507
![NISSAN SENTRA 2018 Owner´s Manual BACK button
Pressing the BACK button will return the
user to the previous menu.
SXM settings
To view the SXM settings:1. Press the [
] button.
2. Touch the “Settings” key.
3. Touch the “SXM” k NISSAN SENTRA 2018 Owner´s Manual BACK button
Pressing the BACK button will return the
user to the previous menu.
SXM settings
To view the SXM settings:1. Press the [
] button.
2. Touch the “Settings” key.
3. Touch the “SXM” k](/manual-img/5/40329/w960_40329-252.png)
BACK button
Pressing the BACK button will return the
user to the previous menu.
SXM settings
To view the SXM settings:1. Press the [
] button.
2. Touch the “Settings” key.
3. Touch the “SXM” key.
The signal strength, activation status and
other information are displayed on the
screen.
FM/AM/SAT radio operation
FM·AM button
Press the FM·AM button to change the
band as follows:
AM →FM1 →FM2 →AM
If another audio source is playing when the
FM·AM button is pressed, the audio source
playing will automatically be turned off and
the last radio station played will begin playing.
The FM stereo indicator (ST) is shown on
the screen during FM stereo reception.
When the stereo broadcast signal is weak,
the radio automatically changes from ste-
reo to monaural reception. SXM band select
Pressing the SXM button will change the
band as follows:
SXM1*
→SXM2* →SXM3* →SXM1* (satellite,
if so equipped)
When the SXM button is pressed while the
ignition switch is in the ACC or ON position,
the radio will come on at the last station
played.
The last station played will also come on
when the ON-OFF button is pressed to turn
the radio on.
*When the SXM button is pressed, the sat-
ellite radio mode will be skipped unless an
optional satellite receiver and antenna are
installed and a SiriusXM® Satellite Radio
service subscription is active. Satellite radio
is not available in Alaska, Hawaii and Guam.
If a compact disc is playing when the SXM
button is pressed, the compact disc will
automatically be turned off and the last
radio station played will come on.
While the radio is in SXM mode, the opera-
tion can be controlled through the touch-
screen. Touch the “Categories” key to dis-
play a list of categories. Touch a category
displayed on the list to display options
within that category. Tuning with the touch-screen
When in AM or FM mode, the radio can be
tuned using the touch-screen. To bring up
the visual tuner, touch the “Tune” key on the
lower right corner of the screen. A screen
appears with a bar running from low fre-
quencies on the lef t to high frequencies on
the right. Touch the screen at the location
of the frequency you wish to tune and the
station will change to that frequency. To
return to the regular radio display screen,
touch the “OK” key.
Tuning with the TUNE knob
The radio can also be manually tuned us-
ing the TUNE knob. When in FM or AM mode,
turn the TUNE knob to the lef t for lower
frequencies or to the right for higher fre-
quencies. When in SXM mode, turn the
TUNE knob to change the channel.
SEEK tuning
When in FM or AM mode, press the seek
buttons
orto tune from low to
high or high to low frequencies and to stop
at the next broadcasting station.
When in SXM mode, press the seek
buttons
orto change the cat-
egory.
Monitor, climate, audio, phone and voice recognition systems4-55
Page 268 of 507

4. The system acknowledges the com-mand and asks you to initiate connect-
ing from the phone handset. The con-
necting procedure of the cellular
phone varies according to each cellular
phone model. For additional informa-
tion, refer to the cellular phone Owner’s
Manual.
Audio main operation
To switch to the Bluetooth® audio mode,
press the MEDIA button repeatedly until the
Bluetooth® audio mode is displayed on the
screen.
Press the MEDIA button repeatedly to
toggle through the following menu op-
tions;
∙ Title
∙ Artist
∙ Album
BLUETOOTH® STREAMING AUDIO
WITH NAVIGATION SYSTEM (if so
equipped)
If you have a compatible Bluetooth® audio
device that is capable of playing audio files,
the device can be connected to the vehi-
cle’s audio system so that the audio files on
the device play through the vehicle’s
speakers.
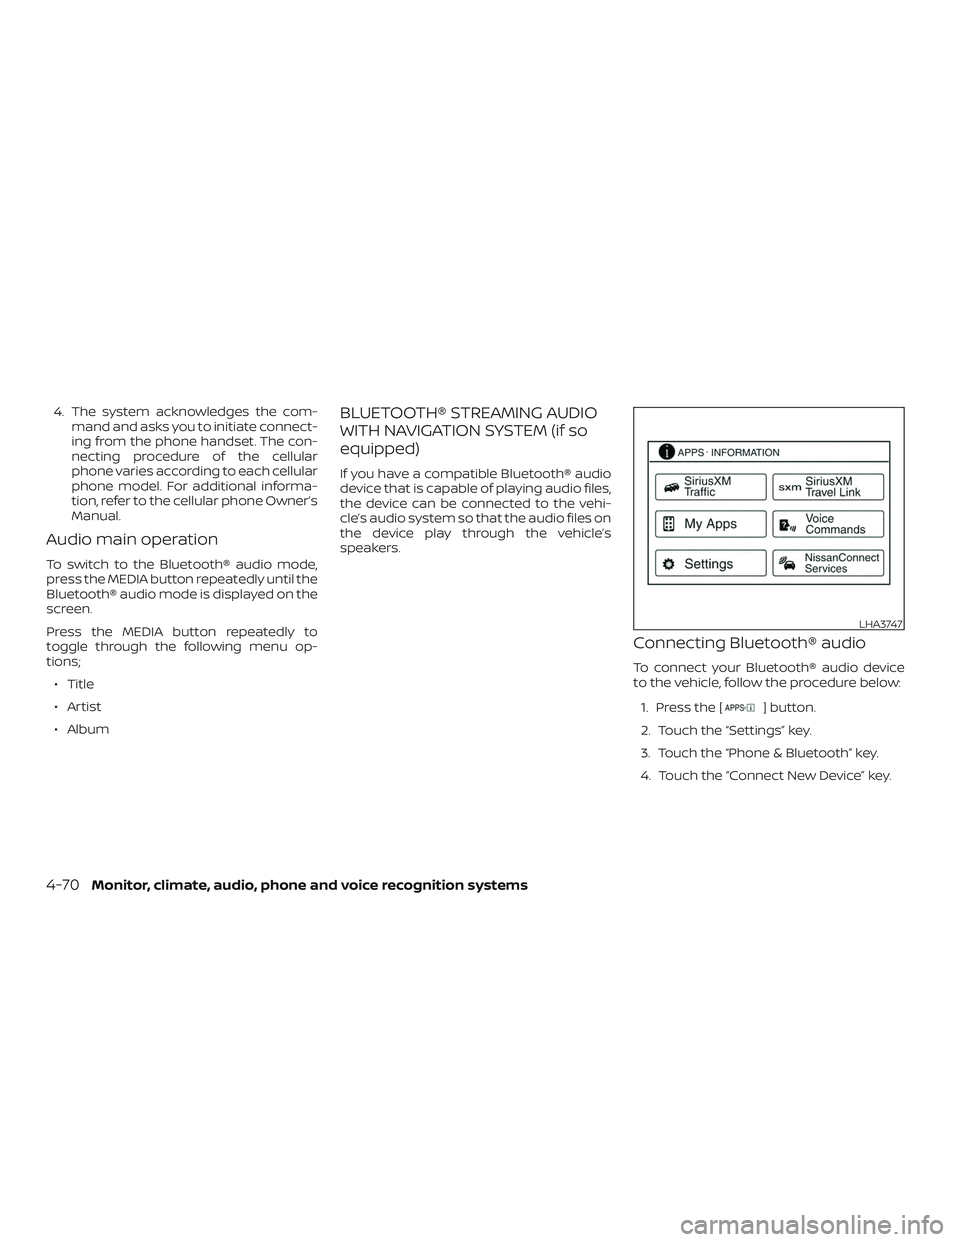
Connecting Bluetooth® audio
To connect your Bluetooth® audio device
to the vehicle, follow the procedure below:
1. Press the [
] button.
2. Touch the “Settings” key.
3. Touch the “Phone & Bluetooth” key.
4. Touch the “Connect New Device” key.
LHA3747
4-70Monitor, climate, audio, phone and voice recognition systems
Page 273 of 507

NissanConnect® Services is a suite of tele-
matics tools that provide emergency pre-
paredness, remote access, customizable
alerts and convenience services. This fea-
ture is an option on navigation system
equipped vehicles. For additional informa-
tion, refer to the separate NissanConnect®
Owner’s Manual.Apple Siri® Eyes Free personal assistant
can be accessed from the vehicle. Siri Eyes
Free can be accessed in Siri Eyes Free
mode to reduce user distraction. In this
mode, Siri Eyes Free is available for interac-
tion by voice control. Af ter connecting a
compatible Apple device by using
Bluetooth®, Siri Eyes Free can be activated
from the
/TALK switch on the
steering wheel.
Siri® is a trademark of Apple Inc., registered
in the U.S. and other countries.
∙ Some Siri Eyes Free functions, such as displaying pictures or opening apps,
may not be available while driving.
∙ For best results, always update your de- vice to the latest sof tware version.
∙ Keep the interior of the vehicle as quiet as possible. Close the windows to elimi-
nate the surrounding noises (traffic
noises, vibration sounds, etc.), which
may prevent the system from recogniz-
ing the voice commands correctly.
∙ For functions that can be used in Siri Eyes Free, please refer to the Apple
website.
REQUIREMENTS
Siri is only available on the iPhone® 4S or
later. Devices released before iPhone® 4S
are not supported by the Siri Eyes Free sys-
tem. Visit www.apple.com/ios/siri for de-
tails about device compatibility.
Siri must be enabled on the phone. Please
check phone settings.
If the device has a lock screen, Siri must be
accessible from the lock screen. Please
check phone settings.
For best results, always update your device
to the latest sof tware version.
NISSANCONNECT® SERVICES (if so
equipped) SIRI® EYES FREE
Monitor, climate, audio, phone and voice recognition systems4-75
Page 274 of 507

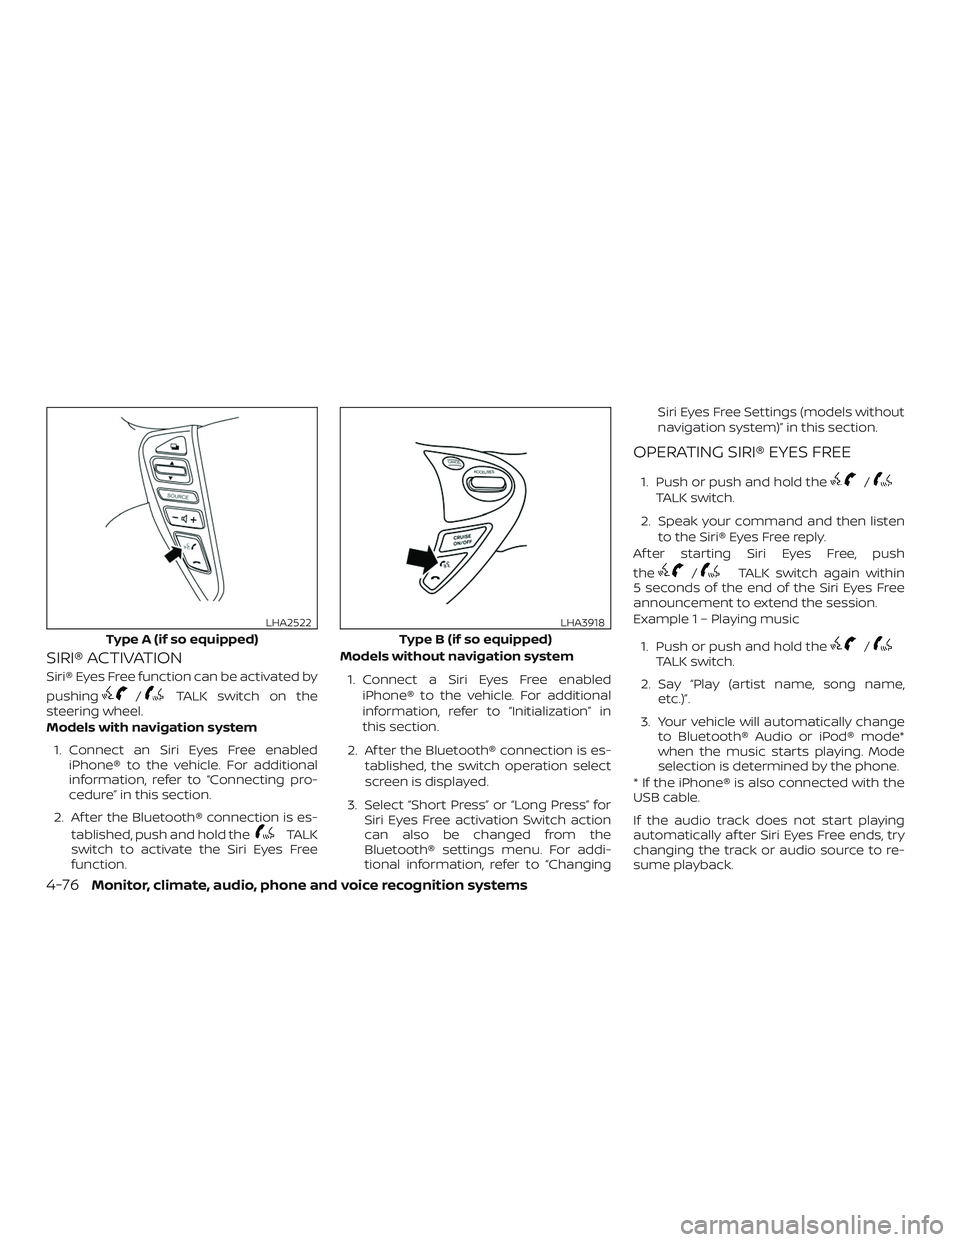
SIRI® ACTIVATION
Siri® Eyes Free function can be activated by
pushing
/TALK switch on the
steering wheel.
Models with navigation system
1. Connect an Siri Eyes Free enabled iPhone® to the vehicle. For additional
information, refer to “Connecting pro-
cedure” in this section.
2. Af ter the Bluetooth® connection is es- tablished, push and hold the
TALK
switch to activate the Siri Eyes Free
function. Models without navigation system
1. Connect a Siri Eyes Free enabled iPhone® to the vehicle. For additional
information, refer to “Initialization” in
this section.
2. Af ter the Bluetooth® connection is es- tablished, the switch operation select
screen is displayed.
3. Select “Short Press” or “Long Press” for Siri Eyes Free activation Switch action
can also be changed from the
Bluetooth® settings menu. For addi-
tional information, refer to “Changing Siri Eyes Free Settings (models without
navigation system)” in this section.
OPERATING SIRI® EYES FREE
1. Push or push and hold the/TALK switch.
2. Speak your command and then listen to the Siri® Eyes Free reply.
Af ter starting Siri Eyes Free, push
the
/TALK switch again within
5 seconds of the end of the Siri Eyes Free
announcement to extend the session.
Example 1 – Playing music
1. Push or push and hold the
/TALK switch.
2. Say “Play (artist name, song name, etc.)”.
3. Your vehicle will automatically change to Bluetooth® Audio or iPod® mode*
when the music starts playing. Mode
selection is determined by the phone.
* If the iPhone® is also connected with the
USB cable.
If the audio track does not start playing
automatically af ter Siri Eyes Free ends, try
changing the track or audio source to re-
sume playback.
Type A (if so equipped)
LHA2522
Type B (if so equipped)
LHA3918
4-76Monitor, climate, audio, phone and voice recognition systems
Page 275 of 507

NOTE:
For best results, use the native music
app. Performance of music control func-
tion while using Podcasts, Audiobook or
other 3rd party music apps may vary and
is controlled by the iPhone®.
Example2–Replying to text messages
1. If a compatible iPhone® is connected and “Show Notifications” of the iPhone®
settings is enabled, the vehicle will dis-
play a notification for new incoming
text messages.
2. Af ter reading the message, push the
switch to go back to the pre-
vious screen then push or push and
hold the
/TALK switch to re-
ply using Siri Eyes Free.
3. Af ter a beep sounds, say “Text mes- sage” or a similar command to reply
using Siri Eyes Free.
CHANGING SIRI® EYES FREE
SETTINGS (models without
navigation system)
Settings for Siri® Eyes Free can be found in
the Bluetooth® settings menu. For addi-
tional information, refer to “Bluetooth® set-
tings” in this section.
1. Press the ENTER/SETTING button.
2. Use the TUNE/SCROLL knob to select “Bluetooth” and then press the
ENTER/SETTING button.
3. Use the TUNE/SCROLL knob to select “Siri” and then press the
ENTER/SETTING button.
4. Select “Short Press” or “Long Press” us- ing the TUNE/SCROLL knob and then
press the ENTER/SETTING button.
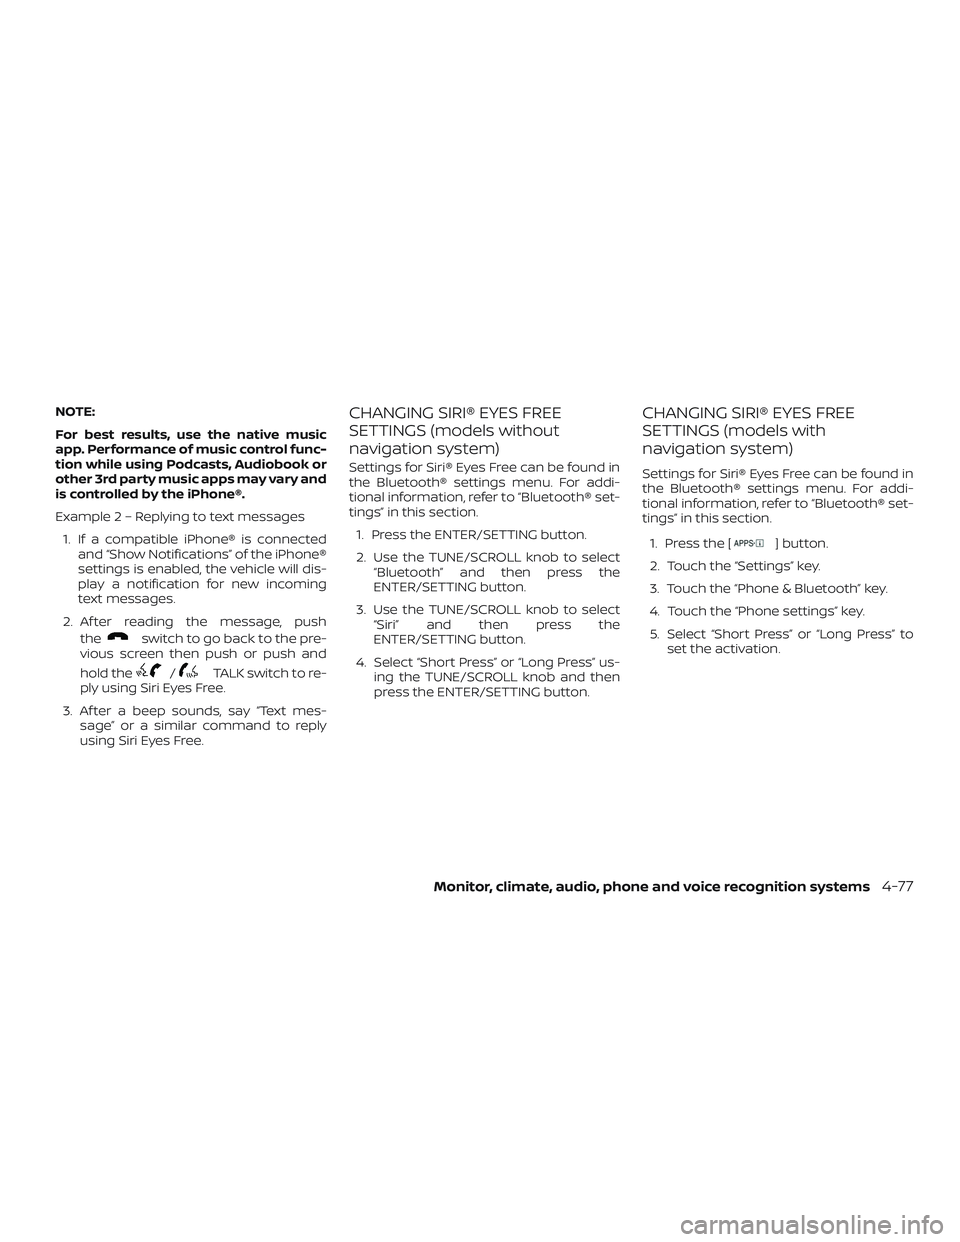
CHANGING SIRI® EYES FREE
SETTINGS (models with
navigation system)
Settings for Siri® Eyes Free can be found in
the Bluetooth® settings menu. For addi-
tional information, refer to “Bluetooth® set-
tings” in this section.
1. Press the [
] button.
2. Touch the “Settings” key.
3. Touch the “Phone & Bluetooth” key.
4. Touch the “Phone settings” key.
5. Select “Short Press” or “Long Press” to set the activation.
Monitor, climate, audio, phone and voice recognition systems4-77