2018 NISSAN ROGUE SPORT display
[x] Cancel search: displayPage 206 of 512

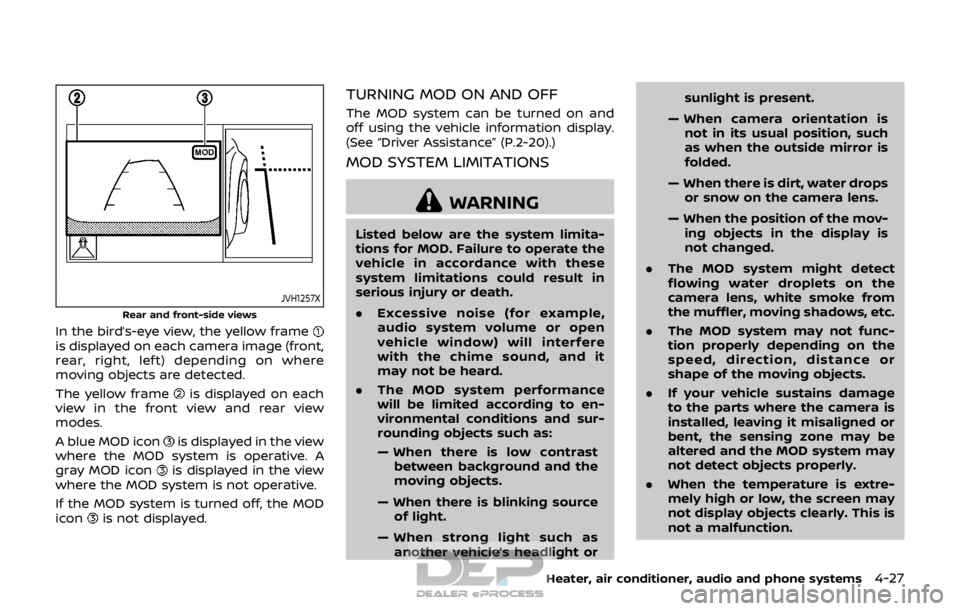
JVH1257X
Rear and front-side views
In the bird’s-eye view, the yellow frameis displayed on each camera image (front,
rear, right, left) depending on where
moving objects are detected.
The yellow frame
is displayed on each
view in the front view and rear view
modes.
A blue MOD icon
is displayed in the view
where the MOD system is operative. A
gray MOD icon
is displayed in the view
where the MOD system is not operative.
If the MOD system is turned off, the MOD
icon
is not displayed.
TURNING MOD ON AND OFF
The MOD system can be turned on and
off using the vehicle information display.
(See “Driver Assistance” (P.2-20).)
MOD SYSTEM LIMITATIONS
WARNING
Listed below are the system limita-
tions for MOD. Failure to operate the
vehicle in accordance with these
system limitations could result in
serious injury or death.
. Excessive noise (for example,
audio system volume or open
vehicle window) will interfere
with the chime sound, and it
may not be heard.
. The MOD system performance
will be limited according to en-
vironmental conditions and sur-
rounding objects such as:
— When there is low contrast
between background and the
moving objects.
— When there is blinking source of light.
— When strong light such as another vehicle’s headlight or sunlight is present.
— When camera orientation is not in its usual position, such
as when the outside mirror is
folded.
— When there is dirt, water drops or snow on the camera lens.
— When the position of the mov- ing objects in the display is
not changed.
. The MOD system might detect
flowing water droplets on the
camera lens, white smoke from
the muffler, moving shadows, etc.
. The MOD system may not func-
tion properly depending on the
speed, direction, distance or
shape of the moving objects.
. If your vehicle sustains damage
to the parts where the camera is
installed, leaving it misaligned or
bent, the sensing zone may be
altered and the MOD system may
not detect objects properly.
. When the temperature is extre-
mely high or low, the screen may
not display objects clearly. This is
not a malfunction.
Heater, air conditioner, audio and phone systems4-27
Page 214 of 512

JVH0665X
1. Front defrosterbutton
2. ON·OFF button/Temperature control dial (driver side)
3. MODE button
4. Display screen
5. A/C (Air Conditioner) button
6. DUAL button/Temperature control dial (passenger side)
7. Rear defroster
button (See “Rear
window and outside mirror defroster
switch” (P.2-42).)
8. Air recirculation
button
9. Fan speed controlbutton
10. AUTO button
11. Outside air circulation
button
AUTOMATIC AIR CONDITIONER AND
HEATER
Automatic operation (AUTO)
The AUTO mode may be used year-round
as the system automatically controls the
air conditioner to a constant tempera-
ture, air flow distribution and fan speed
after the desired temperature is set
manually.
Cooling and dehumidified heating:
1. Push the AUTO button (the indicator light will turn on).
2. Turn the temperature control dial to set the desired temperature.
.When the DUAL indicator light is notilluminated, pushing the DUAL but-
ton (the indicator light will turn on)
allows the user to independently
change the driver and passenger
side temperatures with the corre-
sponding temperature control dial.
.To cancel the separate tempera-ture setting, push the DUAL button
(the indicator light will turn off) and
the driver’s side temperature
setting will be applied to both the
driver and passenger sides.
The temperature of the passenger
compartment will be maintained
automatically. Air flow distribution
and fan speed are also controlled
automatically.
A visible mist may be seen coming
from the ventilators in hot and humid
conditions as the air is cooled rapidly.
This does not indicate a malfunction.
Dehumidified defrosting/defogging:
1. Push the front defroster
button
(The indicator light on the front
defroster
button will illuminate).
2. Turn the temperature control dial to set the desired temperature.
. To quickly remove frost from the out-
side surface of the windshield, set the
temperature and the fan speed to the
Heater, air conditioner, audio and phone systems4-35
Page 215 of 512

4-36Heater, air conditioner, audio and phone systems
maximum levels.
. After the windshield is cleared, push
the AUTO button (the AUTO indicator
light will turn on).
. When the front defroster
button is
pushed, the air conditioner will turn on
when the outside air temperature is
above approximately 36°F (2°C) to
defog the windshield. The air recircu-
lation mode will automatically turn off.
The outside air circulation mode will
be selected to improve the defogging
performance.
Do not set the temperature too low when
the front defroster mode is on (the
indicator light is illuminated), because
doing so may fog up the windshield.
Manual operation
The manual mode can be used to control
the heater and air conditioner to your
desired settings.
Fan speed control:
Push the fan speed control button (
side orside) to manually control the
fan speed.
Push the AUTO button to change the fan
speed to the automatic mode.
Air flow control:
Push the MODE button to select the
desired mode:
— Air flows mainly from the center and
side ventilators.
— Air flows mainly from the center andside ventilators and foot outlets.
— Air flows mainly from the foot outletand partly from the defroster.
— Air flows mainly from the frontdefroster outlets and foot outlets.
Temperature control:
Turn the temperature control dial to set
the desired temperature.
.When the DUAL indicator light is not
illuminated, pushing the DUAL button
(the indicator light will turn on) allows
the user to independently change the
driver and passenger side tempera-
tures with the corresponding tem-
perature control dial.
Also turning the passenger’s side
temperature control dial changes only
the front passenger’s side tempera-
ture. (The DUAL indicator light will
illuminate and DUAL will appear on
the display.)
. To cancel the separate temperature
setting, push the DUAL button (the
indicator light will turn off) and the
driver’s side temperature setting will
be applied to both the driver and
passenger sides. Air intake control:
.
Push the air recirculation
button
to recirculate interior air inside the
vehicle. The indicator light on the
button will come on.
The air recirculation cannot be acti-
vated when the air conditioner is in
the front defrosting mode.
. Push the outside air circulation
button to draw outside air into the
passenger compartment. The indica-
tor light on the button will come on.
. To control the air intake automatically,
push and hold either the air recircula-
tion
button or the outside air
circulationbutton (whichever but-
ton with the indicator light illumi-
nated). The indicator lights (both air
recirculation
and outside air cir-
culationbuttons) will flash twice,
and then the air intake will switch to
automatic control. When the auto-
matic control is set, the system auto-
matically alternates between the
outside air circulation and the air
recirculation modes. (The indicator
light of the active mode will turn on.)
NOTE:
Even if the system is manually set to the
air recirculation mode, when both out-
side temperature and coolant tempera-
ture are low, the system may
Page 216 of 512

automatically switch to the outside air
circulation mode.
To turn the system off:
To turn off the heater and air conditioner,
push the ON·OFF button.
Push the ON·OFF button again, the sys-
tem will turn on in the mode which was
used immediately before the system was
turned off.
Remote engine start logic (if so
equipped)
When the remote engine start function is
activated, the vehicles equipped with the
automatic air conditioner and heater may
go into automatic heating or cooling
mode depending on the outside and
cabin temperatures. During this period,
the display and the buttons will be
inoperable until the ignition switch is
placed in the ON position. When the
temperature is low, the rear defroster
and the heated steering wheel (if so
equipped) may also be activated auto-
matically with the activation of the re-
mote engine start function. (See “Remote
engine start” (P.3-22).)
JVH0727X
JVH0728X
OPERATING TIPS (for automatic air
conditioner)
When the engine coolant temperature
and outside air temperature are low, the
air flow from the foot outlets may not
operate for a maximum of 150 seconds.
However, this is not a malfunction. After
the coolant temperature warms up, air
flow from the foot outlets will operate
normally.
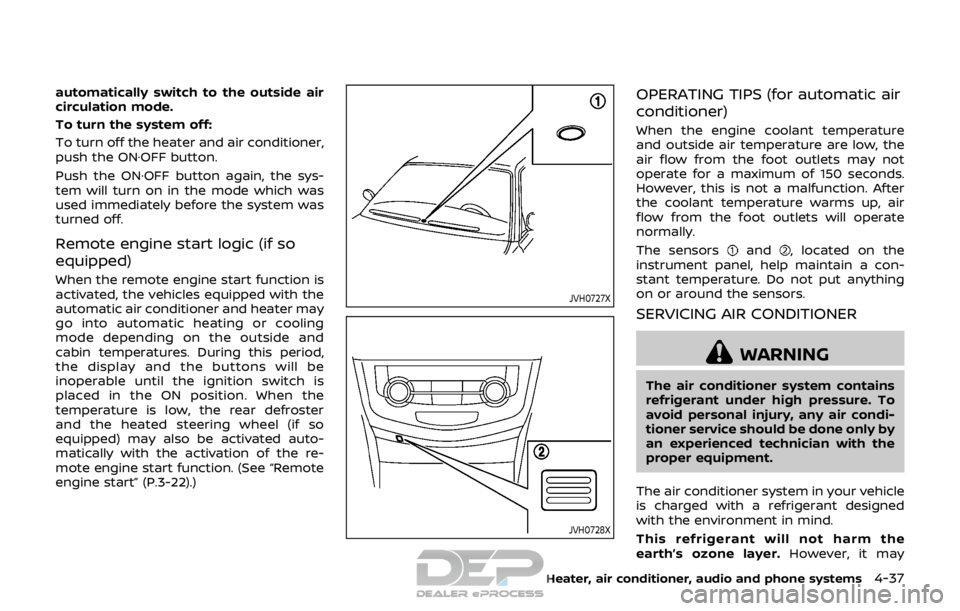
The sensors
and, located on the
instrument panel, help maintain a con-
stant temperature. Do not put anything
on or around the sensors.
SERVICING AIR CONDITIONER
WARNING
The air conditioner system contains
refrigerant under high pressure. To
avoid personal injury, any air condi-
tioner service should be done only by
an experienced technician with the
proper equipment.
The air conditioner system in your vehicle
is charged with a refrigerant designed
with the environment in mind.
This refrigerant will not harm the
earth’s ozone layer. However, it may
Heater, air conditioner, audio and phone systems4-37
Page 219 of 512

4-40Heater, air conditioner, audio and phone systems
SAA0480
Compact Disc (CD) player
.Do not force a Compact Disc (CD)
into the CD insert slot. This could
damage the CD and/or CD player.
. During cold weather or rainy days,
the player may malfunction due to
the humidity. If this occurs, remove the CD and dehumidify or ventilate
the player completely.
. The player may skip while driving on
rough roads.
. The CD player sometimes cannot
function when the passenger com-
partment temperature is extremely
high. Decrease the temperature be-
fore use.
. Only use high quality 4.7 in (12 cm)
round discs that have the “COMPACT
disc DIGITAL AUDIO” logo on the disc
or packaging.
. Do not expose the CD to direct sun-
light.
. CDs that are of poor quality, dirty,
scratched, covered with fingerprints,
or that have pin holes may not work
properly.
. The following CDs may not work
properly:
—Copy Control Compact Discs
(CCCD)
— Recordable Compact Discs (CD-R)
— Rewritable Compact Discs (CD-
RW)
. Do not use the following CDs as they
may cause the CD player to mal-
function.
—3.1 in (8 cm) discs —
CDs that are not round
— CDs with a paper label
— CDs that are warped, scratched, or
have abnormal edges
. This audio system can only play
prerecorded CDs. It has no capabil-
ities to record or burn CDs.
. If the CD cannot be played, error
messages as the following examples
will be displayed.
Check Disc:
—Confirm that the CD is inserted
correctly (the label side is facing
up, etc.).
— Confirm that the CD is not bent or
warped and it is free of scratches.
Push Eject:
This is an error due to the tempera-
ture inside the player is too high.
Remove the CD by pushing the
(CD eject) button, and after a short
time reinsert the CD. The CD can be
played when the temperature of the
player returns to normal.
Unplayable Track:
The file is unplayable in this audio
system (only MP3 or WMA CD).
Page 220 of 512

USB (Universal Serial Bus) Connec-
tion Port
WARNING
Do not connect, disconnect or oper-
ate the USB device while driving.
Doing so can be a distraction. If
distracted you could lose control of
your vehicle and cause an accident
or serious injury.
CAUTION
.Do not force the USB device into
the USB connection port. Insert-
ing the USB device tilted or up-
side-down into the port may da-
mage the port. Make sure that
the USB device is connected cor-
rectly into the USB connection
port.
. Do not grab the USB connection
port cover (if so equipped) when
pulling the USB device out of the
port. This could damage the port
and the cover.
. Do not leave the USB cable in a
place where it can be pulled unintentionally. Pulling the cable
may damage the port.
The vehicle is not equipped with a USB
device. USB devices should be purchased
separately as necessary.
This system cannot be used to format
USB devices. To format a USB device, use
a personal computer.
In some states/area, the USB device for
the front seats plays only sound without
images for regulatory reasons, even when
the vehicle is parked.
This system supports various USB mem-
ory devices, USB hard drives and iPod®
players. Some USB devices may not be
supported by this system.
. Partitioned USB devices may not be
played correctly.
. Some characters used in other lan-
guages (Chinese, Japanese, etc.) are
not displayed properly on display.
Using English language characters
with a USB device is recommended.
General notes for USB use:
Refer to your device manufacturer’s own-
er information regarding the proper use
and care of the device. Notes for iPod® use:
“Made for iPod®”, “Made for iPhone®”, and
“Made for iPad®” mean that an electronic
accessory has been designed to connect
specifically to iPod®, iPhone®, or iPad®,
respectively, and has been certified by the
developer to meet Apple performance
standards.
Apple is not responsible for the operation
of this device or its compliance with
safety and regulatory standards.
Please note that the use of this accessory
with iPod®, iPhone®, or iPad® may affect
wireless performance.
iPad®, iPhone®, iPod®, iPod classic®, iPod
nano®, iPod shuffle®, and iPod touch® are
trademarks of Apple Inc., registered in the
U.S. and other countries. Lightning is a
trademark of Apple Inc.
.
Improperly plugging in the iPod® may
cause a checkmark to be displayed on
and off (flickering). Always make sure
that the iPod® is connected properly.
. An iPod nano® (1st Generation) may
remain in fast forward or rewind mode
if it is connected during a seek opera-
tion. In this case, please manually
reset the iPod®.
. An iPod nano® (2nd Generation) will
continue to fast-forward or rewind if it
is disconnected during a seek opera-
Heater, air conditioner, audio and phone systems4-41
Page 221 of 512

4-42Heater, air conditioner, audio and phone systems
tion.
. An incorrect song title may appear
when the Play Mode is changed while
using an iPod nano® (2nd Generation)
. Audiobooks may not play in the same
order as they appear on an iPod®.
. Large video files cause slow responses
in an iPod®. The display may momen-
tarily black out, but will soon recover.
. If an iPod® automatically selects large
video files while in the shuffle mode,
the display may momentarily black
out, but will soon recover.
Compressed Audio Files (MP3/
WMA)
Explanation of terms:
.MP3 — MP3 is short for Moving Pic-
tures Experts Group Audio Layer 3.
MP3 is the most well known com-
pressed digital audio file format. This
format allows for near “CD quality”
sound, but at a fraction of the size of
normal audio files. MP3 conversion of
an audio track can reduce the file size
by approximately a 10:1 ratio (Sam-
pling: 44.1 kHz, Bit rate: 128 kbps) with
virtually no perceptible loss in quality.
The compression reduces certain
parts of sound that seem inaudible
to most people. .
WMA — Windows Media Audio (WMA) is
a compressed audio format created
by Microsoft as an alternative to MP3.
The WMA codec offers greater file
compression than the MP3 codec,
enabling storage of more digital audio
tracks in the same amount of space
when compared to MP3s at the same
level of quality.
This product is protected by certain
intellectual property rights of Micro-
soft Corporation and third parties. Use
or distribution of such technology
outside of this product is prohibited
without a license from Microsoft or an
authorized Microsoft subsidiary and
third parties.
. Bit rate — Bit rate denotes the number
of bits per second used by a digital
music file. The size and quality of a
compressed digital audio file is deter-
mined by the bit rate used when
encoding the file.
. Sampling frequency — Sampling fre-
quency is the rate at which the
samples of a signal are converted
from analog to digital (A/D conver-
sion) per second.
. Multisession — Multisession is one of
the methods for writing data to med-
ia. Writing data once to the media is
called a single session, and writing more than once is called a multises-
sion.
. ID3/WMA Tag — The ID3/WMA tag is
the part of the encoded MP3 or WMA
file that contains information about
the digital music file such as song title,
artist, album title, encoding bit rate,
track time duration, etc. ID3 tag in-
formation is displayed on the Album/
Artist/Track title line on the display.
* Windows® and Windows Media® are
registered trademarks or trademarks of
Microsoft Corporation in the United
States of America and/or other countries.
Page 222 of 512

SAA1025Playback order chart
Playback order:
Music playback order of a CD with MP3 or
WMA files is as illustrated.
.The names of folders not containing
MP3 or WMA files are not shown in the
display. .
If there is a file in the top level of the
disc, “Root Folder” is displayed.
. The playback order is the order in
which the files were written by the
writing software. Therefore, the files
might not play in the desired order.
Heater, air conditioner, audio and phone systems4-43