Page 291 of 474
WARNING
∙ Be sure the parking brake is fully re-leased before driving. Failure to do so
can cause brake failure and lead to an
accident.
∙ Do not release the parking brake from outside the vehicle.
∙ Do not use the shif t lever in place of the parking brake. When parking, be
sure the parking brake is fully
engaged.
∙ To help avoid risk of injury or death through unintended operation of the
vehicle and/or its systems, do not
leave children, people who require the
assistance of others or pets unat-
tended in your vehicle. Additionally,
the temperature inside a closed ve-
hicle on a warm day can quickly be-
come high enough to cause a signifi-
cant risk of injury or death to people
and pets. To engage:
Firmly depress the parking
brake.
To release:
1. Firmly apply the foot brake.
2. Move the shif t lever to the P (Park) po- sition.
3. Firmly depress the parking brake pedal and it will release.
4. Before driving, be sure the brake warn- ing light goes out.
Page 312 of 474
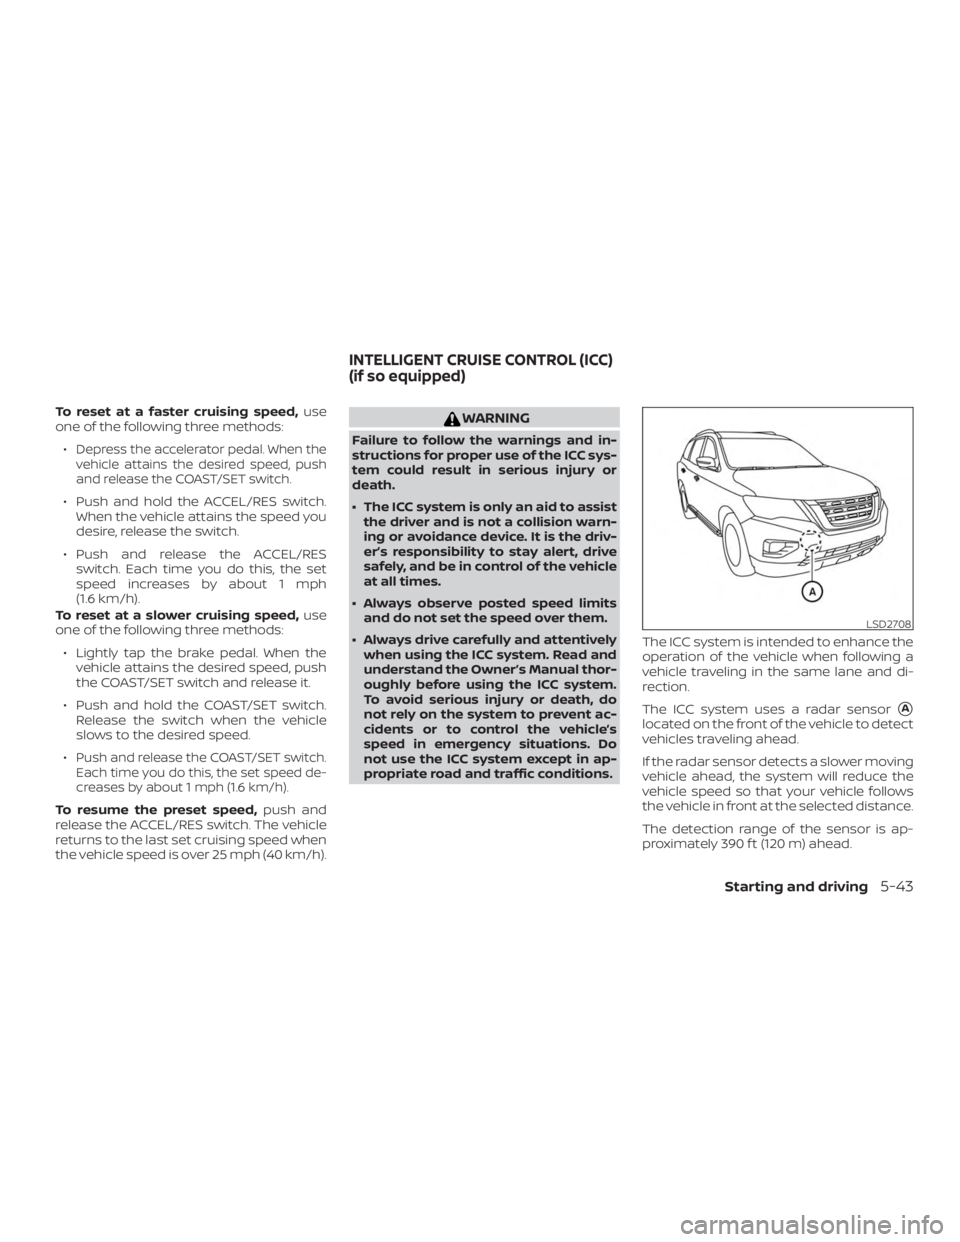
To reset at a faster cruising speed,use
one of the following three methods:
∙
Depress the accelerator pedal. When the
vehicle attains the desired speed, push
and release the COAST/SET switch.
∙ Push and hold the ACCEL/RES switch. When the vehicle attains the speed you
desire, release the switch.
∙ Push and release the ACCEL/RES switch. Each time you do this, the set
speed increases by about 1 mph
(1.6 km/h).
To reset at a slower cruising speed, use
one of the following three methods:
∙ Lightly tap the brake pedal. When the vehicle attains the desired speed, push
the COAST/SET switch and release it.
∙ Push and hold the COAST/SET switch. Release the switch when the vehicle
slows to the desired speed.
∙
Push and release the COAST/SET switch.
Each time you do this, the set speed de-
creases by about 1 mph (1.6 km/h).
To resume the preset speed, push and
release the ACCEL/RES switch. The vehicle
returns to the last set cruising speed when
the vehicle speed is over 25 mph (40 km/h).
Page 334 of 474
CAUTION
During the first 1,200 miles (2,000 km),
follow these recommendations to ob-
tain maximum engine performance
and ensure the future reliability and
economy of your new vehicle. Failure to
follow these recommendations may re-
sult in shortened engine life and re-
duced engine performance.∙ Avoid driving for long periods at con- stant speed, either fast or slow, and do
not run the engine over 4,000 RPM.
∙ Do not accelerate at full throttle in any gear.
∙ Avoid quick starts.
∙ Avoid hard braking as much as pos- sible.
∙ Do not tow a trailer for the first 500 miles (805 kilometers). Your engine, axle or
other parts could be damaged. Follow these easy-to-use Fuel Efficient
Driving Tips to help you achieve the most
fuel economy from your vehicle.
1. Use Smooth Accelerator and Brake
Pedal Application
∙ Avoid rapid starts and stops.
∙ Use smooth, gentle accelerator and brake application whenever possible.
∙ Maintain constant speed while com- muting and coast whenever pos-
sible.
2. Maintain Constant Speed
∙ Look ahead to try and anticipate and minimize stops.
∙ Synchronizing your speed with traffic lights allows you to reduce your num-
ber of stops.
∙ Maintaining a steady speed can mini- mize red light stops and improve fuel
efficiency.
3. Use Air Conditioning (A/C) at Higher
Vehicle Speeds
∙ Below 40 mph (64 km/h), it is more efficient to open windows to cool the
vehicle due to reduced engine load. ∙ Above 40 mph (64 km/h), it is more
efficient to use A/C to cool the vehicle
due to increased aerodynamic drag.
∙ Recirculating the cool air in the cabin when the A/C is on reduces cooling
load.
4. Drive at Economical Speeds and Dis-
tances
∙ Observing the speed limit and not exceeding 60 mph (97 km/h) (where
legally allowed) can improve fuel effi-
ciency due to reduced aerodynamic
drag.
∙ Maintaining a safe following distance behind other vehicles reduces un-
necessary braking.
∙ Safely monitoring traffic to anticipate changes in speed permits reduced
braking and smooth acceleration
changes.
∙ Select a gear range suitable to road conditions.
BREAK-IN SCHEDULE FUEL EFFICIENT DRIVING TIPS
Starting and driving5-65
Page 339 of 474
CAUTION
∙ Depending on the driving condition,the 4WD mode may automatically
change from 2WD to 4WD even when
the 2WD mode is selected. If this oc-
curs while driving, the 4WD mode indi-
cator light will not illuminate.
∙ Do not start the engine with the 4WD mode switch in any mode in the fol-
lowing cases:
– When the vehicle is placed on a fre- eroller or jacking up the vehicle
with the front tires raised and the
rear tires on the ground.
– When towing the vehicle with the rear tires raised from the ground.
∙ Operate the 4WD mode switch only when driving straight. Do not operate
the 4WD mode switch when making a
turn or backing up.
∙ Do not operate the 4WD mode switch with the front wheel spinning.
∙ Engine idling speed is high while warming up the engine. Be especially
careful when starting or driving on
slippery surfaces with the 4WD mode
switch set in the AUTO mode.
4WD mode indicator lights
The 2WD, 4WD AUTO and LOCK mode indi-
cator lights are located in the vehicle infor-
mation display.
The 4WD mode indicator lights will display
the mode selected by the 4WD mode
switch while the engine is running.
The 4WD AUTO indicator light illuminates
when selecting the AUTO mode.
The 4WD LOCK indicator light illuminates
when selecting the LOCK mode and the
2WD indicator light illuminates when se-
lecting the 2WD mode.
5-70Starting and driving
Page 347 of 474
WARNING
∙ Never rely solely on the hill descentcontrol system to control vehicle
speed when driving on steep downhill
grades. Always drive carefully and at-
tentively when using the hill descent
control system and decelerate the ve-
hicle speed by depressing the brake
pedal if necessary. Be especially care-
ful when driving on frozen, muddy or
extremely steep downhill roads. Fail-
ure to control vehicle speed may re-
sult in a loss of control of the vehicle
and possible serious injury or death.
∙ The hill descent control may not con- trol the vehicle speed on a hill under
all load or road conditions. Always be
prepared to depress the brake pedal
to control vehicle speed. Failure to do
so may result in a collision or serious
personal injury.
The hill descent control system can only be
activated when the 4WD LOCK switch is
engaged.
The hill descent control system helps
maintain vehicle speed when driving under
15 mph (25 km/h) on steeper downhill
grades. Hill descent control is useful when
engine braking alone cannot control ve- hicle speed. Hill descent control applies the
vehicle brakes to control vehicle speed al-
lowing the driver to concentrate on steer-
ing while reducing the burden of brake and
accelerator operation.
If the hill descent control light is blinking,
the hill descent control is engaged; how-
ever, the hill descent control will not control
the vehicle speed.
∙ Once the system is activated, the indi- cator light will remain on in the instru-
ment panel. For additional information,
refer to “Hill descent control system ON
indicator light” in the “Instruments and
controls” section of this manual.
If the accelerator or brake pedal is de-
pressed while the hill descent control sys-
tem is on, the system will stop operating
temporarily. As soon as the accelerator or
brake pedal is released, the hill descent
control system begins to function again if
the hill descent control operating condi-
tions are fulfilled.
For the best results, when descending
steep downhill grades, the hill descent con-
trol switch should be on and the shif t lever
in L (Low gear) for engine braking.
Page 353 of 474
Push the switch on to warn other drivers
when you must stop or park under emer-
gency conditions. All turn signal lights flash.
Page 354 of 474

TIRE PRESSURE MONITORING
SYSTEM (TPMS)
This vehicle is equipped with Tire Pressure
Monitoring System (TPMS). It monitors tire
pressure of all tires except the spare. When
the low tire pressure warning light is lit, and
the “Tire Pressure Low - Add Air” warning
appears in the vehicle information display,
one or more of your tires is significantly
under-inflated. If equipped, the system also
displays pressure of all tires (except the
spare tire) on the display screen by sending
a signal from a sensor that is installed in
each wheel. If the vehicle is being driven
with low tire pressure, the TPMS will acti-
vate and warn you of it by the low tire pres-
sure warning light. This system will activate
only when the vehicle is driven at speeds
above 16 mph (25 km/h). For additional in-
formation, refer to “Warning lights, indicator
lights and audible reminders” in “Instru-
ments and controls” section and the “Tire
Pressure Monitoring System (TPMS)” in the
“Starting and driving” sections of this
manual.
Page 371 of 474
If you choose to use a tire dressing, take the
following precautions:∙ Use a water-based tire dressing. The coating on the tire dissolves more easily
than with an oil-based tire dressing.
∙ Apply a light coat of tire dressing to help prevent it from entering the tire
tread/grooves (where it would be diffi-
cult to remove).
∙ Wipe off excess tire dressing using a dry towel. Make sure the tire dressing is
completely removed from the tire
tread/grooves.
∙ Allow the tire dressing to dry as recom- mended by the tire dressing manufac-
turer. Occasionally remove loose dust from the
interior trim, plastic parts and seats using a
vacuum cleaner or sof t bristled brush. Wipe
the vinyl and leather (if so equipped) sur-
faces with a clean, sof t cloth dampened in
mild soap solution, then wipe clean with a
dry, sof t cloth.
Regular care and cleaning is required in
order to maintain the appearance of the
leather (if so equipped).
Before using any fabric protector, read the
manufacturer’s recommendations. Some
fabric protectors contain chemicals that
may stain or bleach the seat material.
Use a cloth dampened only with water to
clean the meter and gauge lens.