Page 13 of 426
1. Rear window and outside mirror(if so equipped) defroster switch
(P. 2-30)
2. Trailer hitch/towing (P. 10-18)
3. Rearview monitor (P. 4-11)
4. Replacing bulbs (P. 8-28)
5. Fuel-filler cap (P. 3-13) Fuel recommendation (P. 10-2)
Fuel-filler door (P. 3-13)
6. Vehicle loading (P. 10-14)
Refer to the page number indicated in
parentheses for operating details.
LIC3774
EXTERIOR REAR
0-4Illustrated table of contents
Page 16 of 426
17. Rear Sonar System (RSS)OFF switch (if so equipped) (P. 2-37)
Front and rear sonar system
OFF switch (if so equipped) (P. 2-37)
Power inverter switch
(if so equipped) (P. 2-36)
Heated seat switch
(if so equipped) (P. 2-34)
Tow mode switch (if so equipped)
(P. 2-38)
USB connection port (P. 4-60)
AUX IN jack (P. 4-60)
18. 12v power outlet (P. 2-39)
19. Ignition switch (P. 5-8)
20. Tilt steering wheel control (P. 3-16)
21. Hood release switch (P. 3-13)
22. Fuse box (P. 8-22)
23. Outside power mirror switch
(P. 3-17)
Vehicle Dynamic Control (VDC)
OFF switch (P. 2-35)
*: Refer to the separate NissanConnect®
Owner’s Manual (if so equipped).
Refer to the page number indicated in
parentheses for operating details.
Illustrated table of contents0-7
Page 20 of 426
Indicatorlight Name Page
Malfunction
Indicator Light
(MIL) 2-24
Security indicator
light (if so
equipped) 2-25
Slip indicator light 2-25
TOW mode ON
indicator light
(if so equipped)2-25
Turn signal/
hazard indicator
lights2-25
Vehicle Dynamic
Control (VDC) OFF
indicator light2-25
Illustrated table of contents0-11
Page 27 of 426

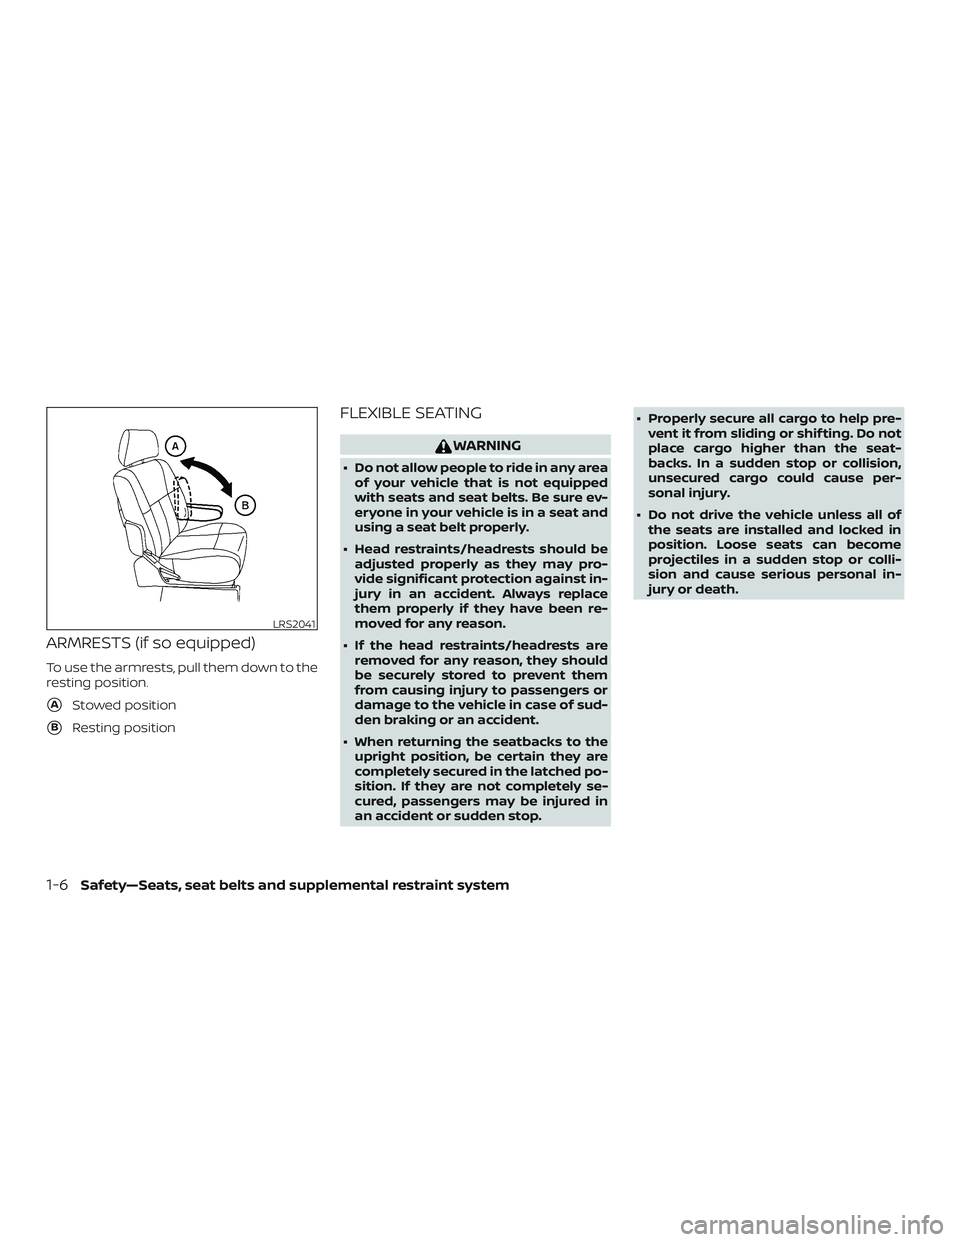
ARMRESTS (if so equipped)
To use the armrests, pull them down to the
resting position.
�AStowed position
�BResting position
FLEXIBLE SEATING
WARNING
∙ Do not allow people to ride in any areaof your vehicle that is not equipped
with seats and seat belts. Be sure ev-
eryone in your vehicle is in a seat and
using a seat belt properly.
∙ Head restraints/headrests should be adjusted properly as they may pro-
vide significant protection against in-
jury in an accident. Always replace
them properly if they have been re-
moved for any reason.
∙ If the head restraints/headrests are removed for any reason, they should
be securely stored to prevent them
from causing injury to passengers or
damage to the vehicle in case of sud-
den braking or an accident.
∙ When returning the seatbacks to the upright position, be certain they are
completely secured in the latched po-
sition. If they are not completely se-
cured, passengers may be injured in
an accident or sudden stop. ∙ Properly secure all cargo to help pre-
vent it from sliding or shif ting. Do not
place cargo higher than the seat-
backs. In a sudden stop or collision,
unsecured cargo could cause per-
sonal injury.
∙ Do not drive the vehicle unless all of the seats are installed and locked in
position. Loose seats can become
projectiles in a sudden stop or colli-
sion and cause serious personal in-
jury or death.
LRS2041
1-6Safety—Seats, seat belts and supplemental restraint system
Page 28 of 426

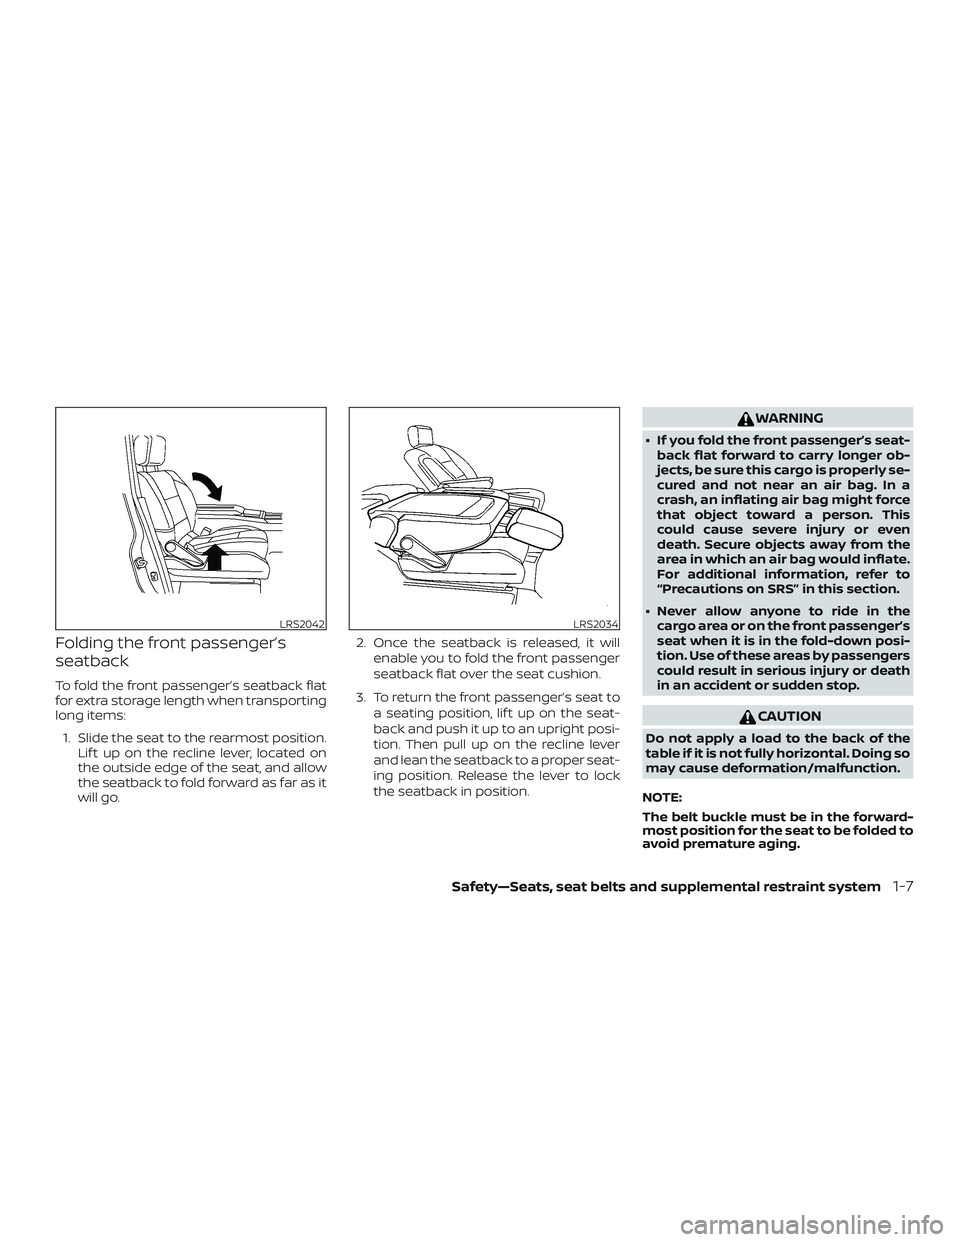
Folding the front passenger’s
seatback
To fold the front passenger’s seatback flat
for extra storage length when transporting
long items:1. Slide the seat to the rearmost position. Lif t up on the recline lever, located on
the outside edge of the seat, and allow
the seatback to fold forward as far as it
will go. 2. Once the seatback is released, it will
enable you to fold the front passenger
seatback flat over the seat cushion.
3. To return the front passenger’s seat to a seating position, lif t up on the seat-
back and push it up to an upright posi-
tion. Then pull up on the recline lever
and lean the seatback to a proper seat-
ing position. Release the lever to lock
the seatback in position.
WARNING
∙ If you fold the front passenger’s seat-back flat forward to carry longer ob-
jects, be sure this cargo is properly se-
cured and not near an air bag. In a
crash, an inflating air bag might force
that object toward a person. This
could cause severe injury or even
death. Secure objects away from the
area in which an air bag would inflate.
For additional information, refer to
“Precautions on SRS” in this section.
∙ Never allow anyone to ride in the cargo area or on the front passenger’s
seat when it is in the fold-down posi-
tion. Use of these areas by passengers
could result in serious injury or death
in an accident or sudden stop.
CAUTION
Do not apply a load to the back of the
table if it is not fully horizontal. Doing so
may cause deformation/malfunction.
NOTE:
The belt buckle must be in the forward-
most position for the seat to be folded to
avoid premature aging.
LRS2042LRS2034
Safety—Seats, seat belts and supplemental restraint system1-7
Page 29 of 426

REMOVING THE 2ND, 3RD AND 4TH
ROW SEATS
WARNING
∙ Do not remove or install the seatswhile the vehicle is moving.
∙ Do not drive the vehicle unless all of the seats are installed and locked in
position. Loose seats can become
projectiles in a sudden stop or colli-
sion and cause serious personal in-
jury or death.
∙ Do not sit in the seats that have been removed from the vehicle. The seats
may tip over and cause personal
injury.
∙ When adjusting or moving the seats in your vehicle, do not use any of the
seat belt buckles, tongues or webbing
to carry or move the seats. Lif ting the
seats by any of the seat belts can
damage the seat belts. Damaged seat
belts should be replaced. It is recom-
mended that you visit a NISSAN dealer
for this service. Failure to follow these
instructions could increase the
chance or severity of an injury in a col-
lision or sudden stop.
CAUTION
∙ Do not drag the seats on the carpet toprevent damage to the carpet.
∙ The seats are heavy. To prevent per- sonal injury, two people should re-
move or install the seat.
NOTE: ∙ When removing the 4th row seats, the driver’s side seat should be removed
before removing the passenger’s side
seat.
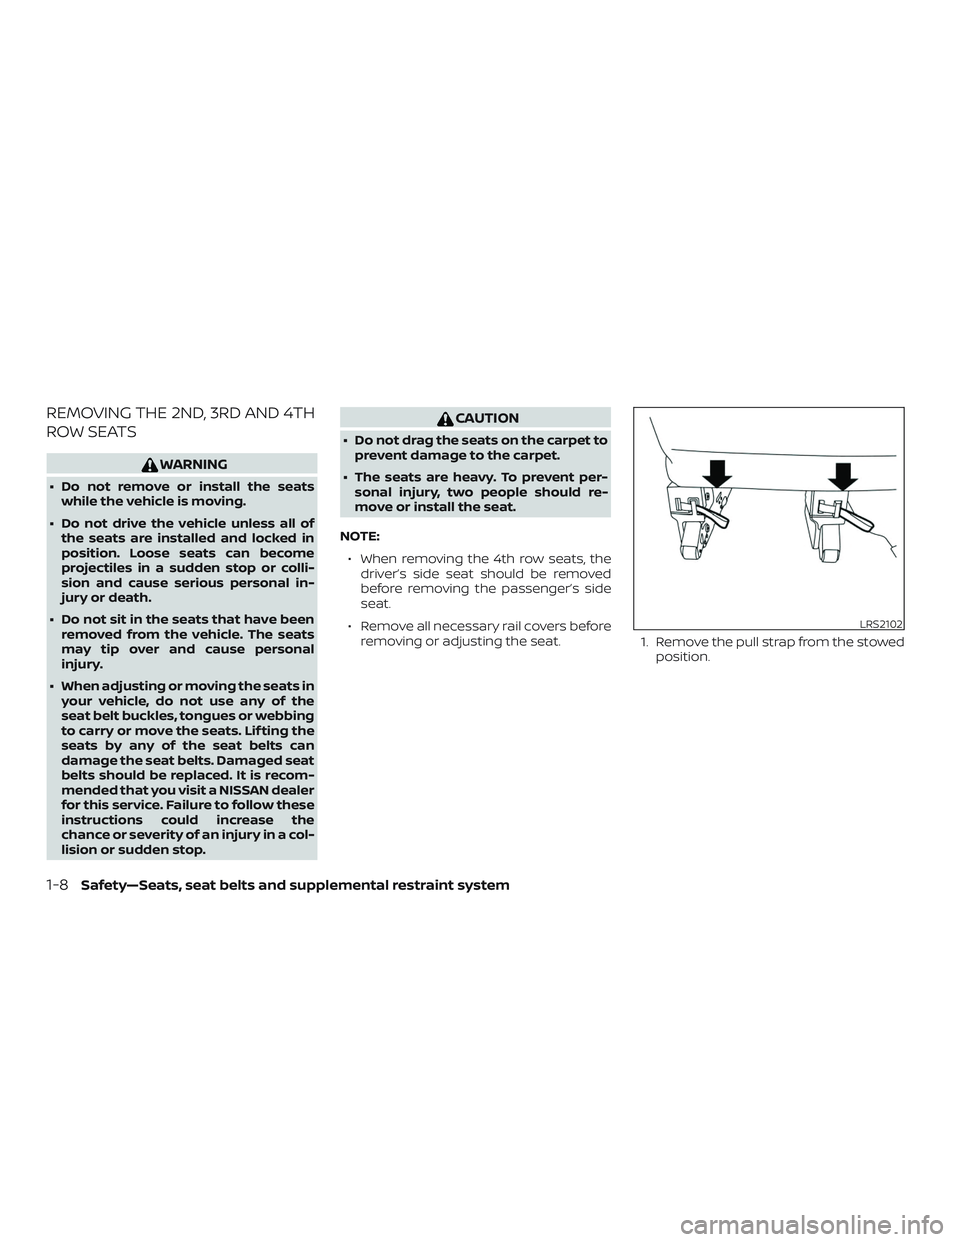
∙ Remove all necessary rail covers before removing or adjusting the seat. 1. Remove the pull strap from the stowed
position.
LRS2102
1-8Safety—Seats, seat belts and supplemental restraint system
Page 32 of 426
6. Push up on the rear of the seat so therear latches are 4 inches (100 mm)
above the floor. Make sure that the
area beneath the seat is clear. Re-
lease the seat so the rear latches drop
into the mounting location and lock.
7. Check front hook and rear latch to make sure the latches are locked into
the mounting location. 8. Push and pull each seat to make sure
the seat is properly engaged. Make
sure that the latch indicator does not
show more than 50% red. Pull the
straps and relatch the seats as neces-
sary. 9. Stow the pull straps behind the storage
clip.
WARNING
Failure to stow the pull straps correctly
may allow the straps to be accidently
pulled (by a person or cargo) releasing
the latch and potentially resulting in in-
jury in a crash.
LRS2647
Latch indicator
LRS2151LRS2102
Safety—Seats, seat belts and supplemental restraint system1-11
Page 33 of 426

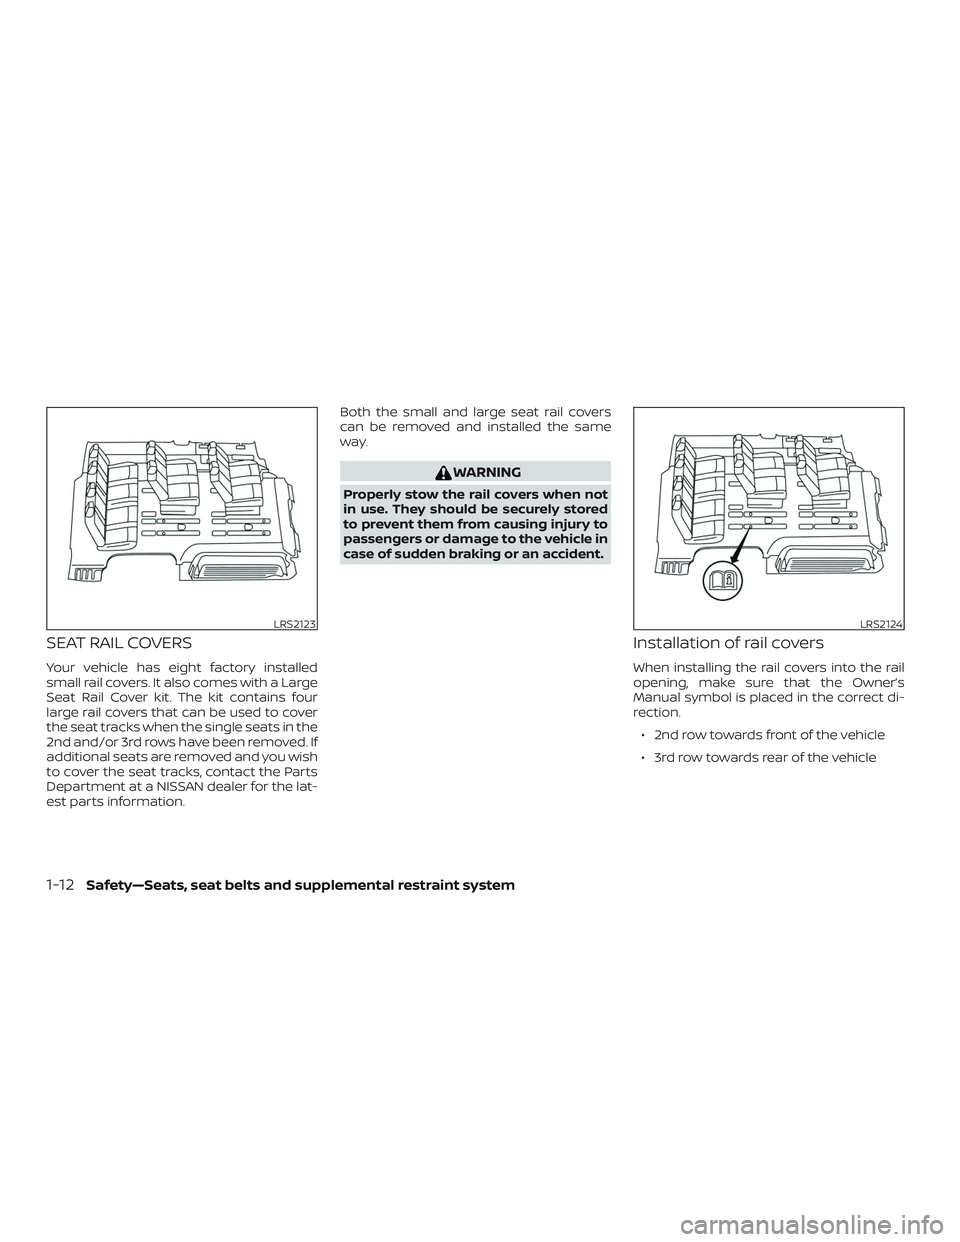
SEAT RAIL COVERS
Your vehicle has eight factory installed
small rail covers. It also comes with a Large
Seat Rail Cover kit. The kit contains four
large rail covers that can be used to cover
the seat tracks when the single seats in the
2nd and/or 3rd rows have been removed. If
additional seats are removed and you wish
to cover the seat tracks, contact the Parts
Department at a NISSAN dealer for the lat-
est parts information.Both the small and large seat rail covers
can be removed and installed the same
way.
WARNING
Properly stow the rail covers when not
in use. They should be securely stored
to prevent them from causing injury to
passengers or damage to the vehicle in
case of sudden braking or an accident.
Installation of rail covers
When installing the rail covers into the rail
opening, make sure that the Owner’s
Manual symbol is placed in the correct di-
rection.
∙ 2nd row towards front of the vehicle
∙ 3rd row towards rear of the vehicle
LRS2123LRS2124
1-12Safety—Seats, seat belts and supplemental restraint system