2018 NISSAN MICRA ignition
[x] Cancel search: ignitionPage 163 of 330

SCAN (tuning) button
Press the SCAN button. SCAN illuminates in
the display window. Scan tuning begins
from low to high frequencies. Scan tuning
stops for 5 seconds at each broadcasting
station that has sufficient signal strength.
When scanning, SCAN blinks in the display.
Pressing the SCAN button again during this
5 second period stops scan tuning and the
radio remains tuned to that station.
1 to 6 Station memory operations
Twelve stations can be set for the FM band
(six for FM1, six for FM2) and six stations can
be set for the AM band.1. Choose the radio band AM, FM1 or FM2 using the AM or FM button.
2. Tune to the desired station using manual, SEEK or SCAN tuning. Press
and hold any of the desired station
memory buttons (1 – 6) until a beep is
heard.
3. The channel indicator will then come on and the sound will resume. Pro-
gramming is now complete. 4. Other buttons can be set in the same
manner.
If the battery cable is disconnected or if the
fuse opens, the radio memory will be can-
celed. In that case, reset the desired sta-
tions.
Compact disc (CD) player
operation
Place the ignition switch in the ACC or ON
position, and carefully insert the compact
disc into the slot with the label side up. The
compact disc is automatically pulled into
the slot and starts to play.
If the radio is already operating, it automati-
cally turns off and the compact disc begins
to play.
CD button
When the CD button is pressed with a com-
pact disc loaded and the radio playing, the
radio turns off and the last used compact
disc starts to play.
SEEK and TRACK (Fast Forward, Rewind)
buttons:
When the
SEEK button orTRACK button is pressed while the com-
pact disc is playing, the compact disc plays
at an increased speed while fast forward-
ing or rewinding. When the button is re-
leased, the compact disc returns to normal
play speed.
SEEK and TRACK buttons
When the
SEEK button is pressed
while the compact disc is playing, the next
track following the present one starts to
play from the beginning. Press the
SEEK button several times to skip several
tracks. Each time the button is pressed, the
CD advances one additional track. The
track number appears in the display win-
dow. (When the last track on the compact
disc is skipped, the first track is played.)
When the
TRACK button is pressed,
the track being played returns to the be-
ginning. Press the
TRACK button sev-
eral times to skip back several tracks. Each
time the button is pressed the CD moves
back one track.
4-34Heater, air conditioner, audio and phone systems
Page 166 of 330

Audio main operation
VOL (volume) control knob / PWR
(power) button
Place the ignition switch in the ACC or ON
position and press the PWR (power) button
while the system is off to call up the mode
that was playing immediately before the
system was turned off.To turn the system off, press the PWR but-
ton.
Turn the VOL (volume) control knob to ad-
just the volume.
ENTER/SETTING button
Press the ENTER/SETTING button to show
the Settings screen on the display. Turn the
TUNE/FOLDER knob to navigate the op-
tions and then press the ENTER/SETTING
button to make a selection.
Audio
Bass Adjusts the bass to the desired level.
Treble Adjusts the treble to the desired level.
Balance Adjusts the balance to the desired level. Balance adjusts the sound level between the lef t and right speakers.
Fade Adjusts the fade to the desired level. Fade adjusts the sound level between the front and rear speakers.
Speed Sens Vol. (Speed Sensitive Volume) Adjusts the speed sensitive volume function, which increases the volume of the audio system as the speed of the vehicle increases. Set to “OFF” to disable the feature. The higher the setting, the more the volume
increases in relation to vehicle speed.
AUX Vol. Choose a setting from 0 to +3 to control the boost of incoming auxiliary device volume. A setting of 0 provides no additional boost in volume. A setting of +3 provides the greatest boost in volume.
Brightness and Contrast Adjust the brightness or contrast to adjust the appearance of the display screen.
Clock adjust Press the ENTER/SETTING button to highlight the hours or minutes and then use the TUNE/FOLDER knob to adjust the value. Press the ENTER/SETTING button again to set the value.
On-Screen Clock Toggles ON or OFF the clock display on the upper right corner of the display screen.
RDS Display Toggles ON or OFF the RDS information displayed on the screen while the radio is playing.
iPod Menu Language Select the desired language for the system from the available options.
Heater, air conditioner, audio and phone systems4-37
Page 170 of 330
CAUTION
∙ To avoid damage and loss of functionwhen using a USB device, note the fol-
lowing precautions.
∙ Do not force the USB device into the USB port. Inserting the USB device
tilted or up-side-down into the port
may damage the port. Make sure that
the USB device is connected correctly
into the USB port.
∙ Do not grab the USB port cover (if so equipped) when pulling the USB de-
vice out of the port. This could dam-
age the port and the cover.
∙ Do not leave the USB cable in a place where it can be pulled unintentionally.
Pulling the cable may damage the
port.
For additional information, refer to your de-
vice manufacturer’s owner information re-
garding the proper use and care of the
device.
The USB port is located in the center con-
sole. Insert the USB device into the connec-
tion port.
When a compatible storage device is
plugged into the connection port, compat- ible audio files on the storage device can be
played through the vehicle’s audio system.Audio file operation
AUX button
Place the ignition switch in the ON or ACC
position and press the AUX button to
switch to the USB input mode.
Play information
Information about the audio files being
played can be displayed on the display
screen of the vehicle’s audio system. De-
pending on how the audio files are en-
coded, information such as Folder, Song
and Artist will be displayed.
The track number and number of total
tracks in the folder are displayed on the
screen as well.
SEEK/TRACK (Reverse or
Fast Forward) buttons
Press and hold the
orSEEK/TRACK buttons for 1.5 sec-
onds while an audio file on the USB device
is playing to reverse or fast forward the
track being played. The track plays at an
increased speed while reversing or fast for-
warding. When the button is released, the
audio file returns to normal play speed.
SEEK/TRACK buttons
Press the
SEEK/TRACK button while
an audio file on the USB device is playing to
return to the beginning of the current track.
Press the
SEEK/TRACK button several
times to skip backward several tracks.
Press the
SEEK/TRACK button while
an audio file on the USB device is playing to
advance one track. Press
the
SEEK/TRACK button several times
to skip forward several tracks. If the last
track in a folder on the USB device is
skipped, the first track of the next folder is
played.
RDM (random) button
When the RDM button is pressed while an
audio file on the USB device is playing, the
play pattern can be changed as follows:
All Random →1 Folder Random →OFF
All Random: all tracks on the USB device will
be played randomly.
1 Folder Random: all tracks in the current
folder will be played randomly.
OFF: No random play pattern is applied. The
indicator on the display will turn off.
Heater, air conditioner, audio and phone systems4-41
Page 172 of 330
CAUTION
∙ Do not force the USB device into theUSB port. Inserting the USB device
tilted or up-side-down into the port
may damage the port. Make sure that
the USB device is connected correctly
into the USB port.
∙ Do not grab the USB port cover (if so equipped) when pulling the USB de-
vice out of the port. This could dam-
age the port and the cover.
∙ Do not leave the USB cable in a place where it can be pulled unintentionally.
Pulling the cable may damage the
port.
For additional information, refer to your de-
vice manufacturer’s owner information re-
garding the proper use and care of the
device.
To connect an iPod® to the vehicle so that
the iPod® can be controlled with the audio
system controls and display screen, use
the USB port located in the center console.
Connect the iPod®-specific end of the
cable to the iPod® and the USB end of the
cable to the USB connection port on the
vehicle. If your iPod® supports charging via
a USB connection, its battery will be charged while connected to the vehicle
with the ignition switch in the ACC or ON
position.
While connected to the vehicle, the iPod®
can only be operated by the vehicle audio
controls.
To disconnect the iPod® from the vehicle,
remove the USB end of the cable from the
USB connection port on the vehicle, then
remove the cable from the iPod®.
* iPod® is a trademark of Apple Inc., regis-
tered in the U.S. and other countries.
Compatibility
The following models are compatible:
∙ iPod® Classic - 1st through 6th genera- tion
∙ iPod® Mini - 1st and 2nd generation
∙ iPod® Nano - 1st through 3rd generation
∙ iPod® Touch - 1st generation
∙ iPhone® - 1st generation
Make sure that your iPod® firmware is up-
dated to the version indicated above.
Audio main operation
iPod MENU button
Place the ignition switch in the ACC or ON
position and press the iPod MENU button
to switch to the iPod® mode.
If another audio source is playing and the
iPod® is connected, press the iPod MENU
button to switch to the iPod® mode.
If the system is turned off while the iPod® is
playing, the iPod® will start when the PWR
button is pressed.
Top menu item selecting
Press the iPod MENU button while the
iPod® is connected to show the interface
for iPod® operation on the audio display.
The items can be chosen from the menu
list screen by pressing the
orSEEK button while the iPod® is operational.
The display pattern can be changed as fol-
lows:
Playlists →Artists →Albums →Songs →
Podcasts →Genres →Composers →
Audiobooks
For additional information, refer to the
iPod® owner’s manual.
Heater, air conditioner, audio and phone systems4-43
Page 174 of 330
∙ A new disc may be rough on the innerand outer edges. Remove the rough
edges by rubbing the inner and outer
edges with the side of a pen or pencil as
illustrated.
STEERING WHEEL SWITCH FOR
AUDIO CONTROL (if so equipped)
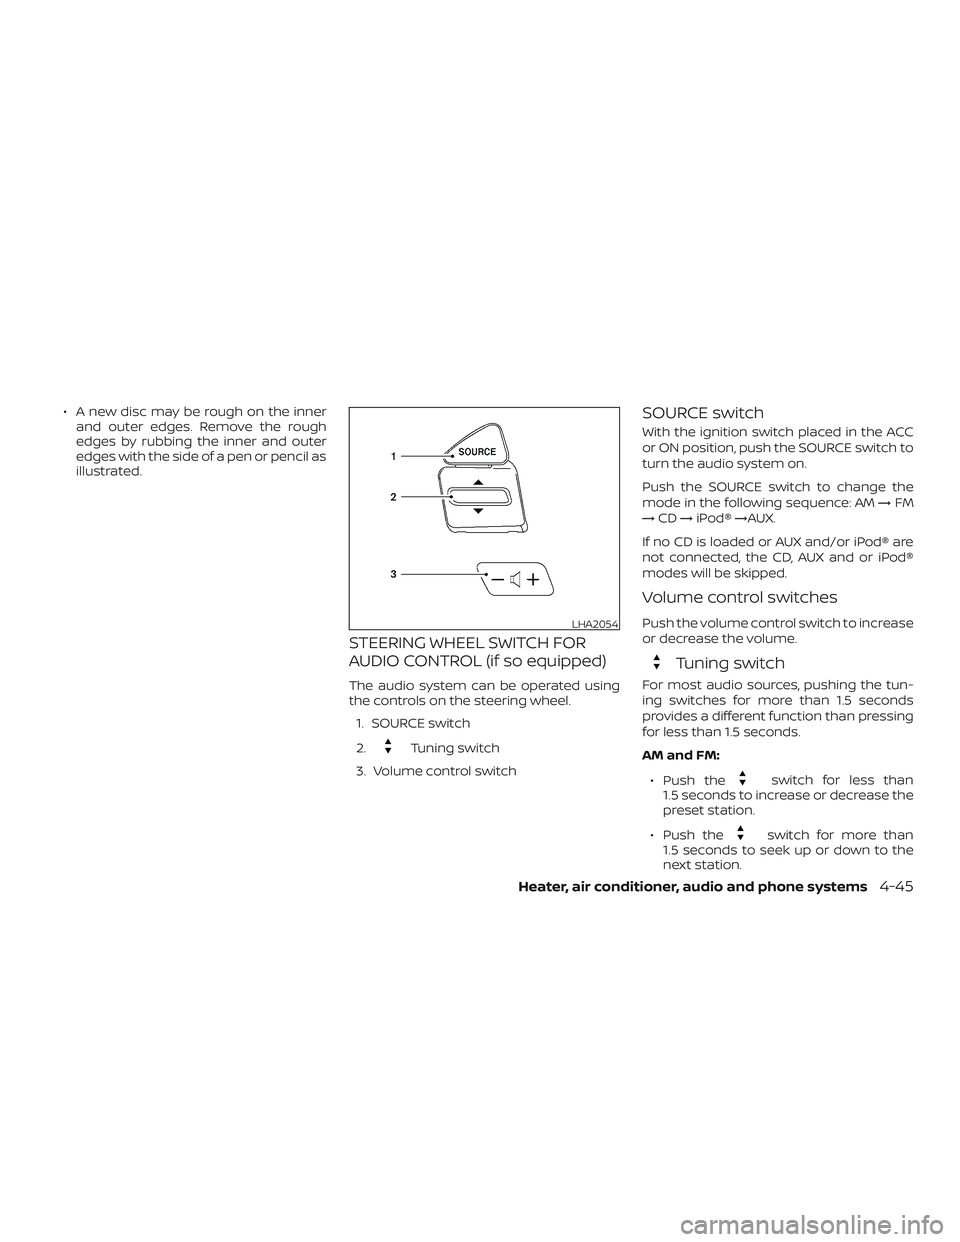
The audio system can be operated using
the controls on the steering wheel.
1. SOURCE switch
2.
Tuning switch
3. Volume control switch
SOURCE switch
With the ignition switch placed in the ACC
or ON position, push the SOURCE switch to
turn the audio system on.
Push the SOURCE switch to change the
mode in the following sequence: AM →FM
→ CD →iPod® →AUX.
If no CD is loaded or AUX and/or iPod® are
not connected, the CD, AUX and or iPod®
modes will be skipped.
Volume control switches
Push the volume control switch to increase
or decrease the volume.
Tuning switch
For most audio sources, pushing the tun-
ing switches for more than 1.5 seconds
provides a different function than pressing
for less than 1.5 seconds.
AM and FM:
∙ Push the
switch for less than
1.5 seconds to increase or decrease the
preset station.
∙ Push the
switch for more than
1.5 seconds to seek up or down to the
next station.
LHA2054
Heater, air conditioner, audio and phone systems4-45
Page 177 of 330
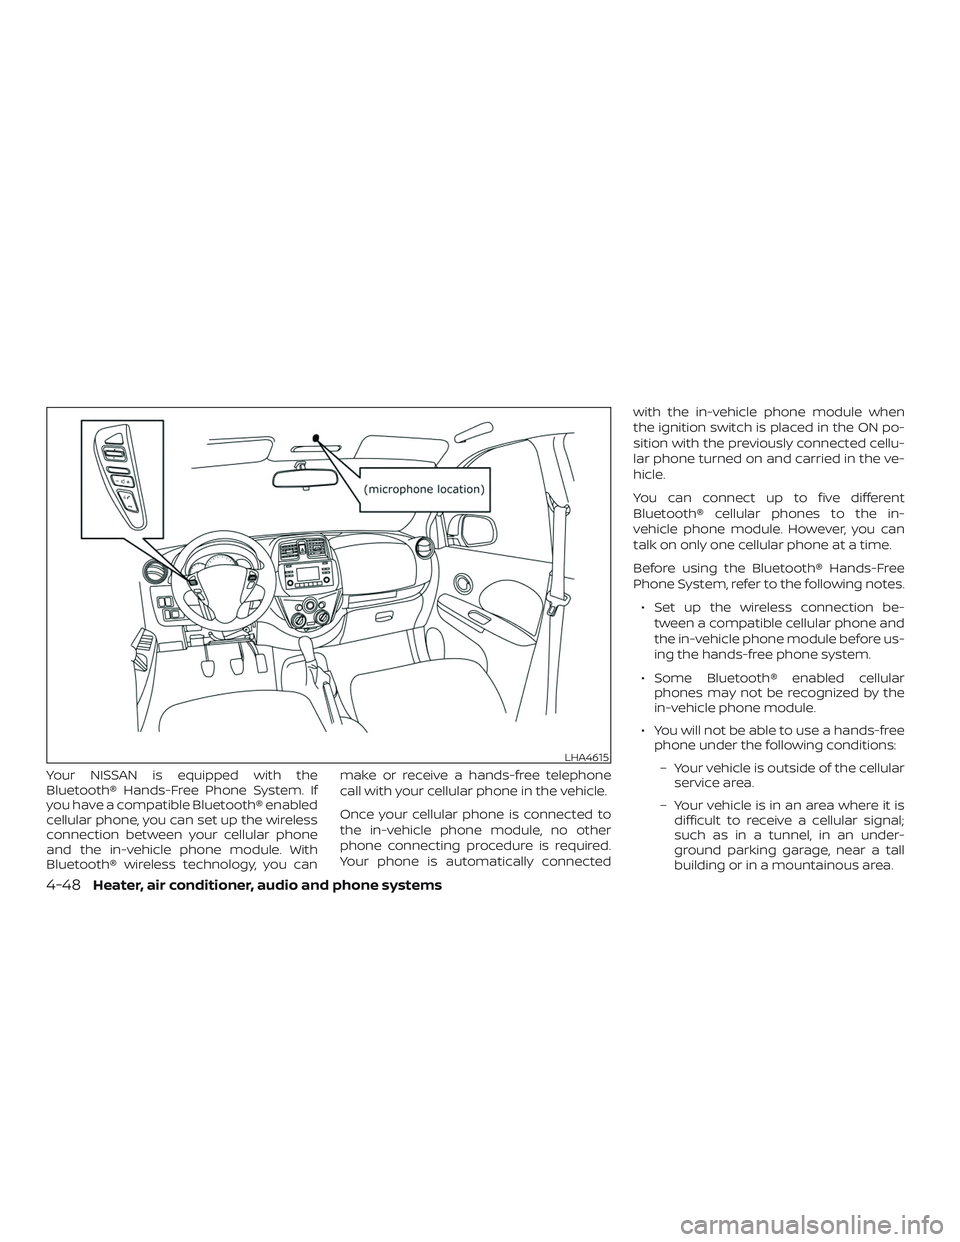
Your NISSAN is equipped with the
Bluetooth® Hands-Free Phone System. If
you have a compatible Bluetooth® enabled
cellular phone, you can set up the wireless
connection between your cellular phone
and the in-vehicle phone module. With
Bluetooth® wireless technology, you canmake or receive a hands-free telephone
call with your cellular phone in the vehicle.
Once your cellular phone is connected to
the in-vehicle phone module, no other
phone connecting procedure is required.
Your phone is automatically connectedwith the in-vehicle phone module when
the ignition switch is placed in the ON po-
sition with the previously connected cellu-
lar phone turned on and carried in the ve-
hicle.
You can connect up to five different
Bluetooth® cellular phones to the in-
vehicle phone module. However, you can
talk on only one cellular phone at a time.
Before using the Bluetooth® Hands-Free
Phone System, refer to the following notes.
∙ Set up the wireless connection be- tween a compatible cellular phone and
the in-vehicle phone module before us-
ing the hands-free phone system.
∙ Some Bluetooth® enabled cellular phones may not be recognized by the
in-vehicle phone module.
∙ You will not be able to use a hands-free phone under the following conditions:
– Your vehicle is outside of the cellular service area.
– Your vehicle is in an area where it is difficult to receive a cellular signal;
such as in a tunnel, in an under-
ground parking garage, near a tall
building or in a mountainous area.
LHA4615
4-48Heater, air conditioner, audio and phone systems
Page 179 of 330
Initialization
When the ignition switch is placed in the ON
position, NISSAN Voice Recognition is initial-
ized, which takes a few seconds. If the
button is pressed before the initialization
completes, the system will announce
“Hands-free phone system not ready” and
will not react to voice commands.
Operating tips
To get the best performance out of the
system, observe the following:∙ Keep the interior of the vehicle as quiet as possible. Close the windows to elimi-
nate surrounding noises (traffic noises,
vibration sounds, etc.), which may pre-
vent the system from recognizing voice
commands correctly.
Giving voice commands (if so
equipped)
To operate NISSAN Voice Recognition,
press and release the
button located
on the steering wheel. Af ter the tone
sounds, speak a command.
The command given is picked up by the
microphone, and voice feedback is given
when the command is accepted. ∙ If you need to hear the available com-
mands for the current menu again, say
“Help” and the system will repeat them.
∙ If a command is not recognized, the system announces, “Command not
recognized. Please try again.” Make sure
the command is said exactly as
prompted by the system and repeat
the command in a clear voice.
∙ If you want to go back to the previous command, you can say “Go back” or
“Correction” any time the system is
waiting for a response.
∙ You can cancel a command when the system is waiting for a response by say-
ing, “Cancel” or “Quit.” The system an-
nounces “Cancel” and ends the Voice
Recognition session. You can also press
and hold the
button on the steer-
ing wheel for 5 seconds at any time to
end the Voice Recognition session.
Whenever the Voice Recognition ses-
sion is canceled, a double beep is
played to indicate you have exited the
system. ∙ If you want to adjust the volume of the
voice feedback, push the volume con-
trol switches (+ or -) on the steering
wheel while being provided with feed-
back. You can also use the radio volume
control knob.
Voice Prompt Interrupt
In most cases you can interrupt the voice
feedback to speak the next command by
pressing the
button on the steering
wheel. Af ter interrupting the system, wait
for a beep before speaking your command.
One Shot Call
To use the system faster, you may speak
the second level commands with the main
menu command on the main menu. For
example, press the
button and af ter
the tone say, “Call Redial”.
4-50Heater, air conditioner, audio and phone systems
Page 188 of 330
5 Starting and driving
Precautions when starting and driving..........5-2
Exhaust gas (carbon monoxide) ..............5-2
Three-way catalyst ...........................5-2
Avoiding collision and rollover ................5-3
Off-roadrecovery ............................5-3
Rapid air pressure loss .......................5-4
Drinking alcohol/drugs and driving ...........5-5
Ignition switch ...................................5-5
Automatic transmission
(if so equipped) ...............................5-5
Manual transmission (if so equipped) .........5-6
Ignition switch positions ......................5-7
NISSAN Vehicle Immobilizer System ..........5-7
Before starting the engine .......................5-7
Starting the engine ..............................5-8
Driving the vehicle ...............................5-9
Automatic transmission
(if so equipped) ...............................5-9
Manual transmission (if so equipped) ........5-13
Parking brake .................................. 5-15
Cruise control (if so equipped) ..................5-16
Precautions on cruise control ................5-16Cruise control operations
....................5-16
Break-in schedule .............................. 5-17
Fuel efficient driving tips ........................5-18
Increasing fuel economy .......................5-19
Parking/parking on hills ........................5-20
Power steering ................................. 5-21
Brake system ................................... 5-22
Brake precautions ........................... 5-22
Anti-lock Braking System (ABS) ..............5-22
Brake assist ................................. 5-24
Vehicle Dynamic Control (VDC) system .........5-24
Brake force distribution ......................5-25
Cold weather driving ........................... 5-26
Freeing a frozen door lock ...................5-26
Antifreeze ................................... 5-26
Battery...................................... 5-26
Draining of coolant water ....................5-27
Tire equipment .............................. 5-27
Special winter equipment ...................5-27
Driving on snow or ice .......................5-27
Engine block
heater ......................... 5-28