Page 177 of 467
NOTE:
Request switches for all doors and trunk
can be deactivated when the I-Key Door
Lock setting is switched to OFF in the
“Vehicle Settings” of the vehicle informa-
tion display. For additional information,
refer to “Vehicle information display ” in
the “Instruments and controls” section
of the manual.
INTERIOR TRUNK LID RELEASE
Page 180 of 467
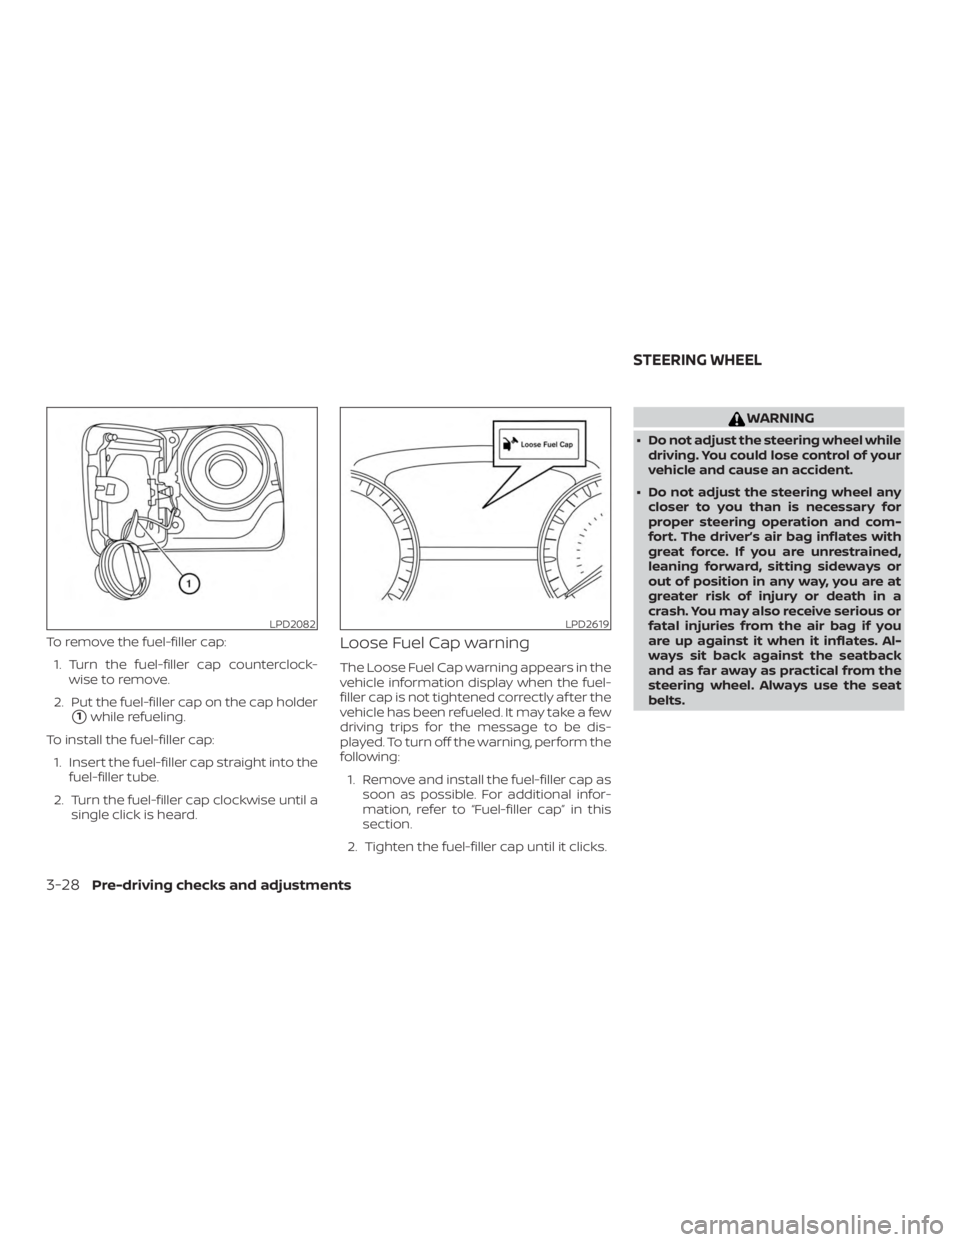
To remove the fuel-filler cap:1. Turn the fuel-filler cap counterclock- wise to remove.
2. Put the fuel-filler cap on the cap holder
�1while refueling.
To install the fuel-filler cap: 1. Insert the fuel-filler cap straight into the fuel-filler tube.
2. Turn the fuel-filler cap clockwise until a single click is heard.
Loose Fuel Cap warning
The Loose Fuel Cap warning appears in the
vehicle information display when the fuel-
filler cap is not tightened correctly af ter the
vehicle has been refueled. It may take a few
driving trips for the message to be dis-
played. To turn off the warning, perform the
following:
1. Remove and install the fuel-filler cap as soon as possible. For additional infor-
mation, refer to “Fuel-filler cap” in this
section.
2. Tighten the fuel-filler cap until it clicks.
Page 190 of 467
∙ RearView Monitor is a conveniencefeature and is not a substitute for
proper backing. Always turn and look
out the windows and check mirrors to
be sure that it is safe to move before
operating the vehicle. Always back up
slowly.
∙ The system is designed as an aid to the driver in showing large stationary
objects directly behind the vehicle, to
help avoid damaging the vehicle.
∙ The distance guide line and the ve- hicle width line should be used as a
reference only when the vehicle is on a
level paved surface. The distance
viewed on the monitor is for reference
only and may be different than the
actual distance between the vehicle
and displayed objects.
Page 193 of 467
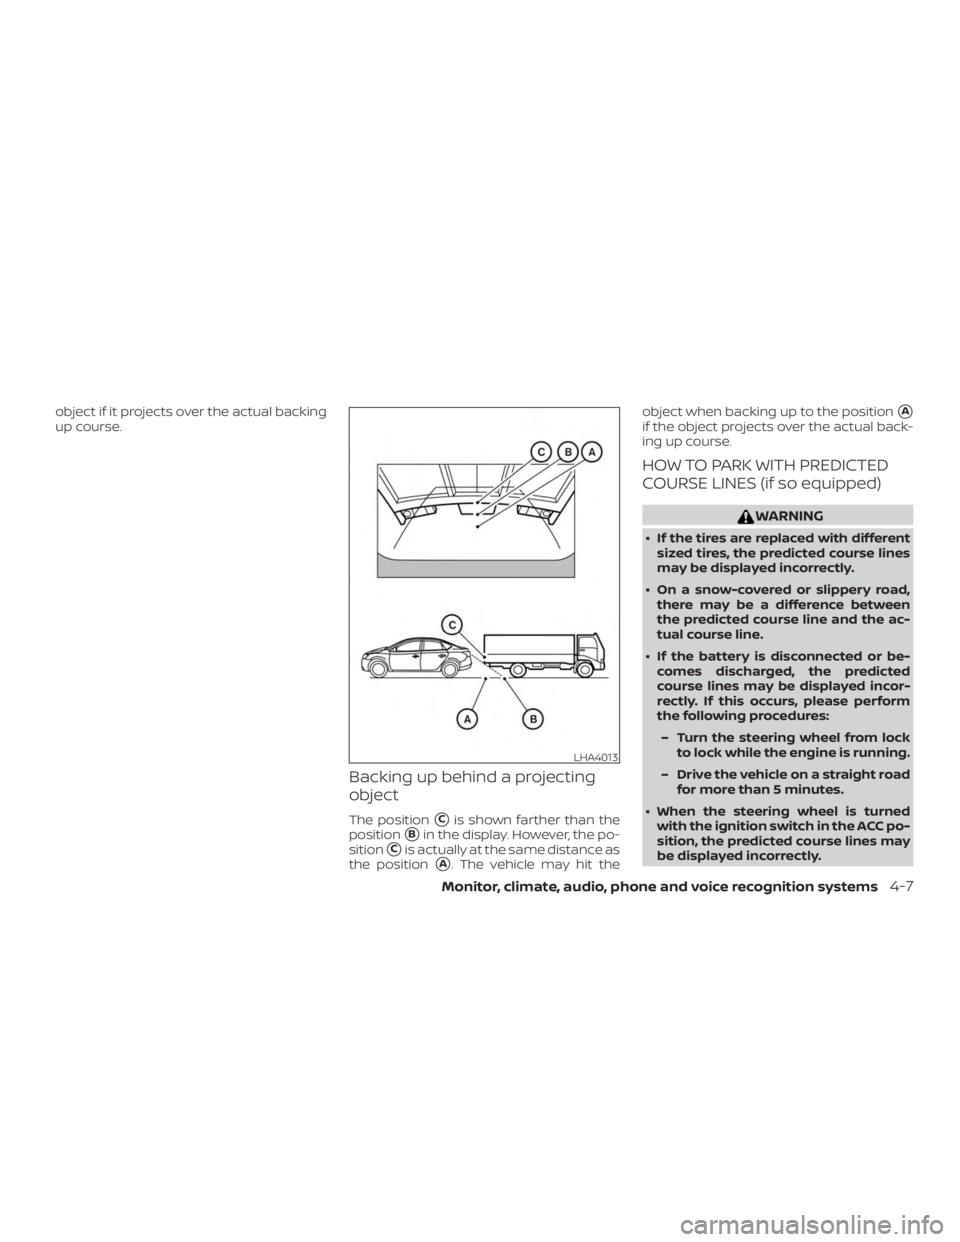
object if it projects over the actual backing
up course.
Backing up behind a projecting
object
The position�Cis shown farther than the
position
�Bin the display. However, the po-
sition
�Cis actually at the same distance as
the position
�A. The vehicle may hit the object when backing up to the position
�A
if the object projects over the actual back-
ing up course.
HOW TO PARK WITH PREDICTED
COURSE LINES (if so equipped)
Page 228 of 467
The current play pattern of the CD is dis-
played on the screen unless no pattern is
applied.
RDM (random) button
When the RDM button is pressed while a
compact disc is playing, the play pattern
can be changed as follows:
CD:
1 Disc Random←→OFF
CD with MP3 or WMA:
1 Disc Random →1 Folder Random →OFF
1 Disc Random: all tracks on the disc will be
played randomly.
1 Folder Random: all tracks in the current
folder will be played randomly.
OFF: No random play pattern is applied. The
indicator on the display will turn off.
The current play pattern of the CD is dis-
played on the screen unless no pattern is
applied.
Page 229 of 467

CAUTION
∙ Do not force the USB device into theUSB connection port. Inserting the
USB device tilted or up-side-down
into the port may damage the port.
Make sure that the USB device is con-
nected correctly into the USB connec-
tion port.
∙ Do not grab the USB port cover (if so equipped) when pulling the USB de-
vice out of the port. This could dam-
age the port and the cover.
∙ Do not leave the USB cable in a place where it can be pulled unintentionally.
Pulling the cable may damage the
port.
For additional information, refer to your de-
vice manufacturer’s owner information re-
garding the proper use and care of the
device.
The USB port is located in the center con-
sole. Insert the USB device into the connec-
tion port.
When a compatible storage device is
plugged into the connection port, compat-
ible audio files on the storage device can be
played through the vehicle’s audio system.
Audio file operation
MEDIA button
Place the ignition switch in the ON or ACC
position and press the MEDIA button to
switch to the USB input mode. If a CD is
playing or another audio source is plugged
in through the AUX IN jack, the MEDIA but-
ton toggles between the three sources.
Play information
Information about the audio files being
played can be displayed on the display
screen of the vehicle’s audio system. De-
pending on how the audio files are en-
coded, information such as Folder, Song
and Artist will be displayed.
The track number and number of total
tracks in the folder are displayed on the
screen as well.
Page 230 of 467
 b")
OFF: No random play pattern is applied. The
indicator on the display will turn off.
The current play pattern of the USB device
is displayed on the screen unless no pat-
tern is applied.
RPT (repeat) button
When the RPT button is pressed while an
audio file on the USB device is playing, the
play pattern can be changed as follows:
1 Folder Repeat→1 Track Repeat →OFF
1 Track Repeat: the current track will be
repeated.
1 Folder Repeat: the current folder will be
repeated.
OFF: No repeat play pattern is applied. The
indicator on the display will turn off.
The current play pattern of the USB device
is displayed on the screen unless no pat-
tern is applied. TUNE/FOLDER or TUNE/SCROLL knob
If there are multiple folders with audio files
on the USB device, turn the TUNE/FOLDER
or TUNE/SCROLL knob to change folders.
Turn the knob to the lef t to skip back a
folder. Turn the knob to the right to skip
ahead a folder. If there is only one folder of
audio files on the USB device, turning the
TUNE/FOLDER or TUNE/SCROLL knob in ei-
ther direction will return to the first track on
the USB device.
iPod®* PLAYER OPERATION
WITHOUT NAVIGATION SYSTEM (if
so equipped)
Connecting iPod®
Page 231 of 467

CAUTION
∙ Do not force the USB device into theUSB port. Inserting the USB device
tilted or up-side-down into the port
may damage the port. Make sure that
the USB device is connected correctly
into the USB connection port.
∙ Do not grab the USB port cover (if so equipped) when pulling the USB de-
vice out of the port. This could dam-
age the port and the cover.
∙ Do not leave the USB cable in a place where it can be pulled unintentionally.
Pulling the cable may damage the
port.
For additional information, refer to your de-
vice manufacturer’s owner information re-
garding the proper use and care of the
device.
To connect an iPod® to the vehicle so that
the iPod® can be controlled with the audio
system controls and display screen, use
the USB connection port located in the
center console. Connect the iPod®-specific
end of the cable to the iPod® and the USB
end of the cable to the USB connection
port. on the vehicle. If your iPod® supports
charging via a USB connection, its battery will be charged while connected to the ve-
hicle with the ignition switch in the ACC or
ON position.
While connected to the vehicle, the iPod®
can only be operated by the vehicle audio
controls.
To disconnect the iPod® from the vehicle,
remove the USB end of the cable from the
USB connection port. on the vehicle, then
remove the cable from the iPod®.
* iPod® is a trademark of Apple Inc., regis-
tered in the U.S. and other countries.
Compatibility
The following models are compatible:
∙ iPod® Classic - 5th Generation (firmware version 1.3.0 or later)
∙ iPod® Classic - 6th Generation (firm- ware version 2.0.1 or later)
∙ iPod® Classic - 7th Generation (firmware version 2.0.4 or later)
∙ iPod® nano - 1st generation (firmware version 1.3.1 or later)
∙ iPod® nano - 2nd generation (firmware version 1.1.3 or later) ∙ iPod® nano - 3rd generation (firmware
version 1.1.3 or later)
∙ iPod® nano - 4th generation (firmware version 1.0.4 or later)
∙ iPod® nano - 5th generation (firmware version 1.0.2 or later)
∙ iPod® nano - 6th generation (firmware version 1.1 or later)
∙ iPod® Touch - 2nd generation (firmware version 4.2.1 or later)
∙ iPod® Touch - 3rd generation (firmware version 5.1 or later) (minimum iOS 5.0
required for smartphone integration)
∙ iPod® Touch - 4th generation (firmware version 5.1 or later) (minimum iOS 5.0
required for smartphone integration)
∙ iPhone® 3G (firmware version 4.2.1 or later)
∙ iPhone® 3GS (firmware version 5.1 or later) (minimum iOS 5.0 required for
smartphone integration)
∙ iPhone® 4 (firmware version 5.1 or later) (minimum iOS 5.0 required for smart-
phone integration)
Monitor, climate, audio, phone and voice recognition systems4-45


 button
When the RDM button is pressed while a
compact disc is playing, the play pattern
can b")