Page 17 of 467
Table of
ContentsIllustrated table of contents
Safety—Seats, seat belts and supplemental restraint system
Instruments and controls
Pre-driving checks and adjustments
Monitor, climate, audio, phone and voice recognition systems
Starting and driving
In case of emergency
Appearance and care
Do-it-yourself
Maintenance and schedules
Technical and consumer information
Index
0
1
2
3
4
5
6
7
8
9
10
11
Page 25 of 467
15. Shif t lever (P. 5-14)
16. USB connection port(if so equipped) (P. 4-24)
Aux jack (P. 4-24)
17. Push-button ignition switch
(P. 5-9)
18. Cruise control main/set switches
(if so equipped) (P. 5-41)
Intelligent Cruise Control (ICC)
switches (if so equipped) (P. 5-43)
Bluetooth® Hands-free Phone
System (P. 4-2, 4-54)
19. Tilt/telescopic steering wheel
controls (P. 3-28)
20. Vehicle information display
controls (P. 2-18)
Steering wheel switch for audio
control (P. 4-48)
21. Hood release (P. 3-23)
22. Trunk opener (P. 3-24) Vehicle Dynamic Control (VDC) OFF
switch (P. 2-42)
Heated steering wheel switch
(if so equipped) (P. 2-42)
*: For additional information, refer to the
separate NissanConnect® Owner’s Manual. Refer to the page number indicated in
parentheses for operating details.
Illustrated table of contents0-7
Page 95 of 467
15. Shif t lever (P. 5-14)
16. USB connection port(if so equipped) (P. 4-24)
Aux jack (P. 4-24)
17. Push-button ignition switch
(P. 5-9)
18. Cruise control main/set switches
(if so equipped) (P. 5-41)
Intelligent Cruise Control (ICC)
switches (if so equipped) (P. 5-43)
Bluetooth® Hands-free Phone
System (P. 4-2, 4-54)
19. Tilt/telescopic steering wheel
controls (P. 3-28)
20. Vehicle information display
controls (P. 2-18)
Steering wheel switch for audio
control (P. 4-48)
21. Hood release (P. 3-23)
22. Trunk opener (P. 3-24) Vehicle Dynamic Control (VDC) OFF
switch (P. 2-42)
Heated steering wheel switch
(if so equipped) (P. 2-42)
*: For additional information, refer to the
separate NissanConnect® Owner’s Manual.
Refer to the page number indicated in
parentheses for operating details.
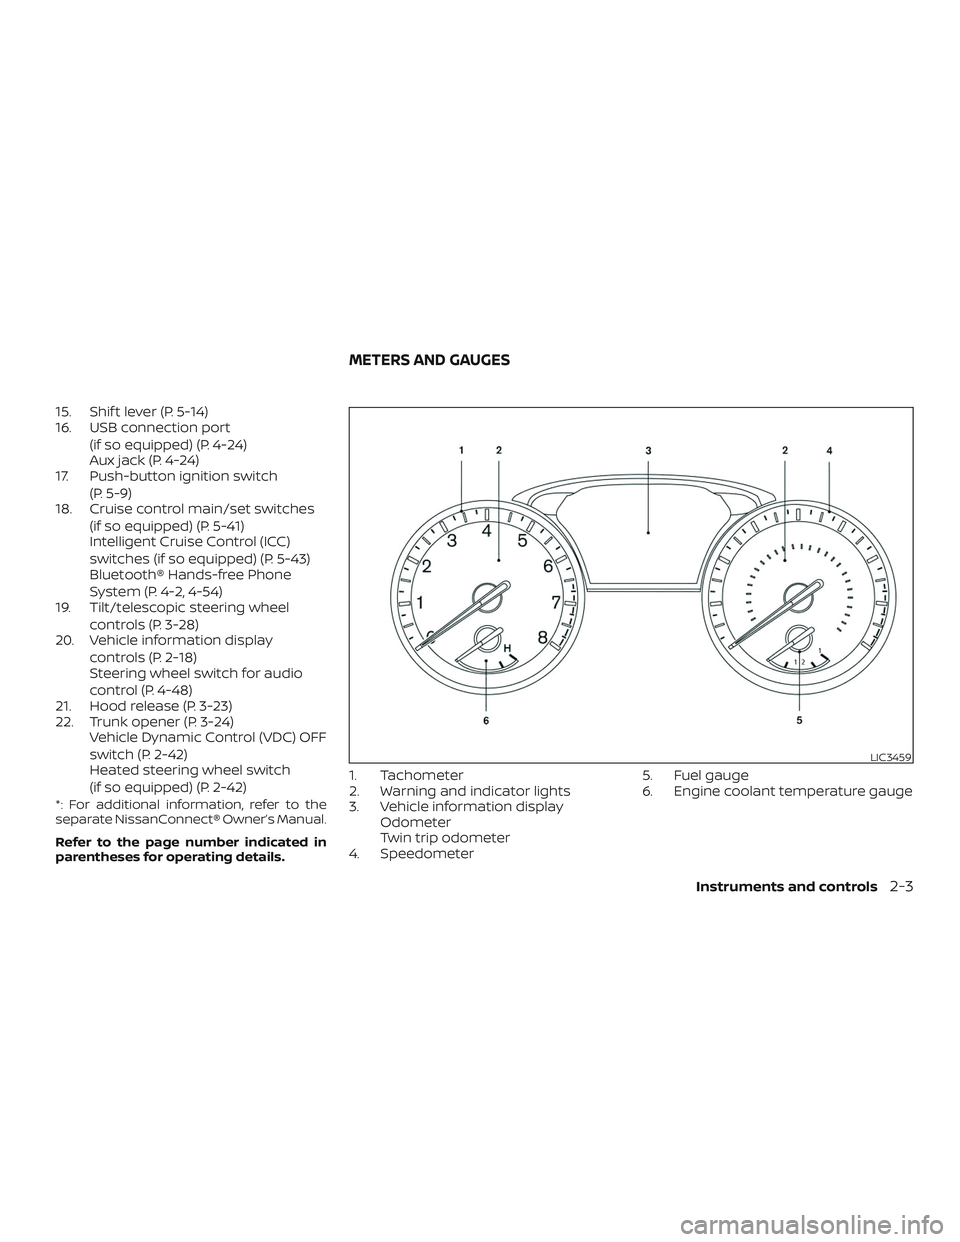
1. Tachometer
2. Warning and indicator lights
3. Vehicle information displayOdometer
Twin trip odometer
4. Speedometer 5. Fuel gauge
6. Engine coolant temperature gauge
LIC3459
METERS AND GAUGES
Instruments and controls2-3
Page 110 of 467
Light reminder chime
With the ignition switch placed in the OFF
position, a chime sounds when the driver’s
door is opened if the headlights or parking
lights are on.
Turn the headlight control switch off before
leaving the vehicle.
NISSAN Intelligent Key® door
buzzer
The Intelligent Key door buzzer sounds if
the Intelligent Key is lef t inside the vehicle
when locking the doors. When the buzzer
sounds, be sure to check both the vehicle
and the Intelligent Key. For additional infor-
mation, refer to “NISSAN Intelligent Key®” in
the “Pre-driving checks and adjustments”
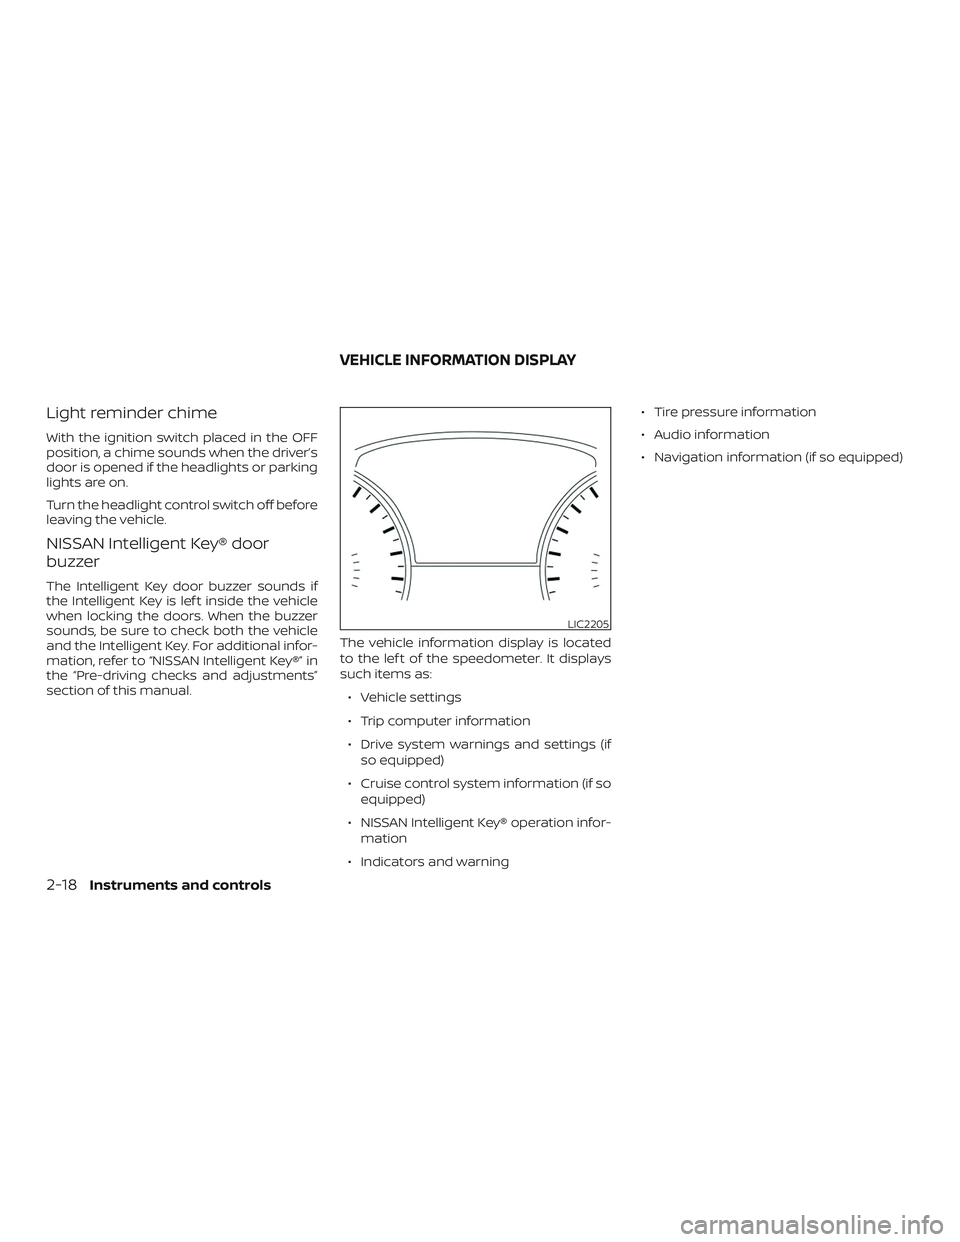
section of this manual.The vehicle information display is located
to the lef t of the speedometer. It displays
such items as:
∙ Vehicle settings
∙ Trip computer information
∙ Drive system warnings and settings (if so equipped)
∙ Cruise control system information (if so equipped)
∙ NISSAN Intelligent Key® operation infor- mation
∙ Indicators and warning ∙ Tire pressure information
∙ Audio information
∙ Navigation information (if so equipped)
LIC2205
VEHICLE INFORMATION DISPLAY
2-18Instruments and controls
Page 111 of 467
HOW TO USE THE VEHICLE
INFORMATION DISPLAY
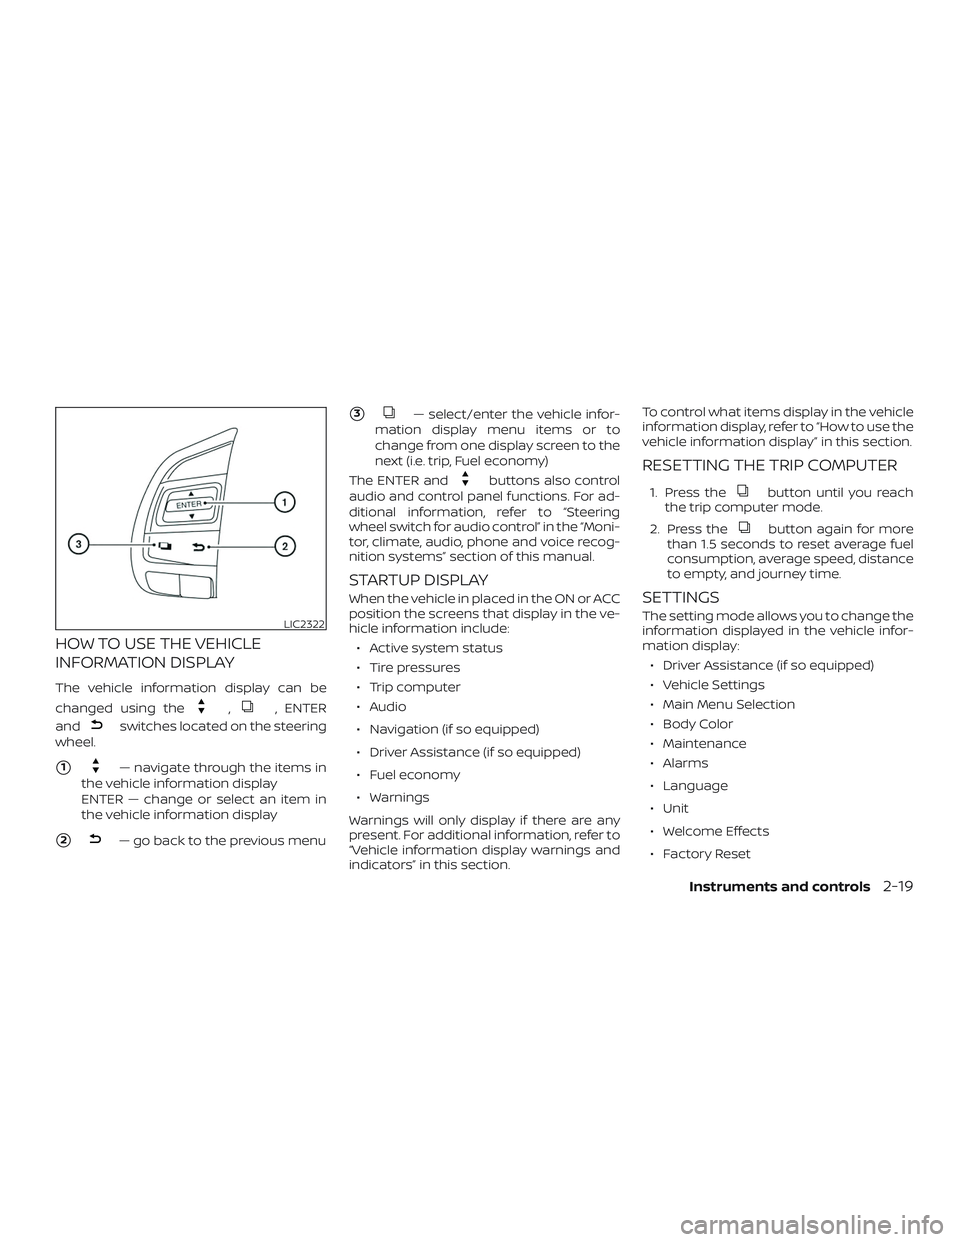
The vehicle information display can be
changed using the
,, ENTER
and
switches located on the steering
wheel.
�1— navigate through the items in
the vehicle information display
ENTER — change or select an item in
the vehicle information display
�2— go back to the previous menu
�3— select/enter the vehicle infor-
mation display menu items or to
change from one display screen to the
next (i.e. trip, Fuel economy)
The ENTER and
buttons also control
audio and control panel functions. For ad-
ditional information, refer to “Steering
wheel switch for audio control” in the “Moni-
tor, climate, audio, phone and voice recog-
nition systems” section of this manual.
STARTUP DISPLAY
When the vehicle in placed in the ON or ACC
position the screens that display in the ve-
hicle information include:
∙ Active system status
∙ Tire pressures
∙ Trip computer
∙ Audio
∙ Navigation (if so equipped)
∙ Driver Assistance (if so equipped)
∙ Fuel economy
∙ Warnings
Warnings will only display if there are any
present. For additional information, refer to
“Vehicle information display warnings and
indicators” in this section. To control what items display in the vehicle
information display, refer to “How to use the
vehicle information display” in this section.
RESETTING THE TRIP COMPUTER
1. Press thebutton until you reach
the trip computer mode.
2. Press the
button again for more
than 1.5 seconds to reset average fuel
consumption, average speed, distance
to empty, and journey time.
SETTINGS
The setting mode allows you to change the
information displayed in the vehicle infor-
mation display:
∙ Driver Assistance (if so equipped)
∙ Vehicle Settings
∙ Main Menu Selection
∙ Body Color
∙ Maintenance
∙ Alarms
∙ Language
∙ Unit
∙ Welcome Effects
∙ Factory ResetLIC2322
Instruments and controls2-19
Page 114 of 467
Main Menu Selection
The main menu selection menu allows the
user to customize the information that ap-
pears in the vehicle information display.
Menu itemResult
Tire Pressures Allows user to turn the tire pressures display on or off.
Trip Computer Allows user to turn the trip computer display on or off.
Audio Allows user to turn the audio display on or off.
Navigation (if so equipped) Allows user to turn the navigation display on or off.
Driver Assistance (if so equipped) Allows user turn the driver assistance display on or off.
Fuel Economy Allows user to turn the fuel economy display on or off.
Body Color
The body color menu allows the user to
customize the information that appears in
the vehicle information display.
Menu item Result
Body Color Allows user to select the color of the vehicle that appears in the vehicle information display.
2-22Instruments and controls
Page 127 of 467
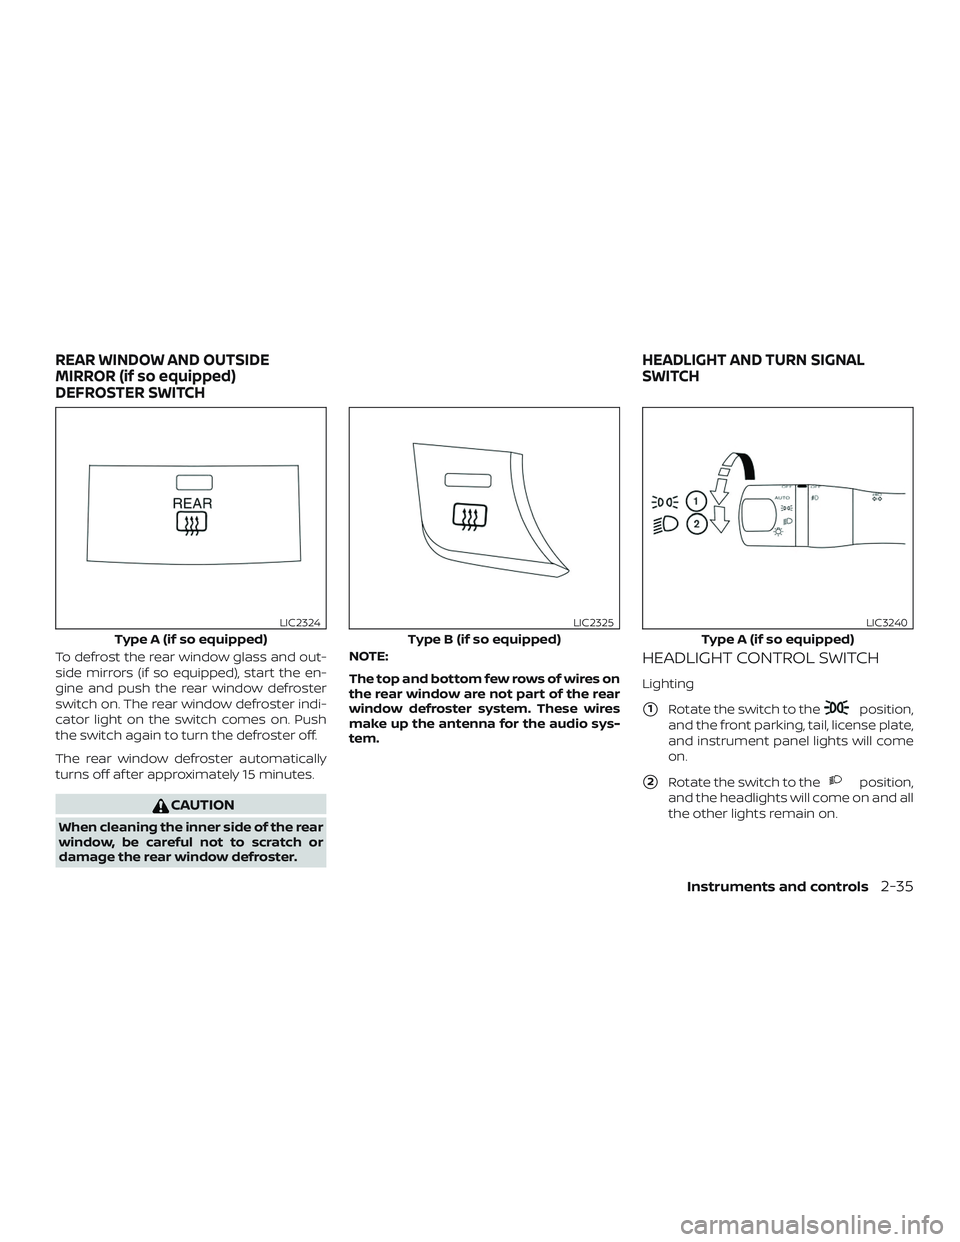
To defrost the rear window glass and out-
side mirrors (if so equipped), start the en-
gine and push the rear window defroster
switch on. The rear window defroster indi-
cator light on the switch comes on. Push
the switch again to turn the defroster off.
The rear window defroster automatically
turns off af ter approximately 15 minutes.
CAUTION
When cleaning the inner side of the rear
window, be careful not to scratch or
damage the rear window defroster.NOTE:
The top and bottom few rows of wires on
the rear window are not part of the rear
window defroster system. These wires
make up the antenna for the audio sys-
tem.
HEADLIGHT CONTROL SWITCH
Lighting
�1Rotate the switch to theposition,
and the front parking, tail, license plate,
and instrument panel lights will come
on.
�2Rotate the switch to theposition,
and the headlights will come on and all
the other lights remain on.
Type A (if so equipped)
LIC2324
Type B (if so equipped)
LIC2325
Type A (if so equipped)
LIC3240
REAR WINDOW AND OUTSIDE
MIRROR (if so equipped)
DEFROSTER SWITCH HEADLIGHT AND TURN SIGNAL
SWITCH
Instruments and controls2-35
Page 155 of 467
∙ Wetting may damage the IntelligentKey. If the Intelligent Key gets wet, im-
mediately wipe until it is completely
dry.
∙ Do not place the Intelligent Key for an extended period in an area where
temperatures exceed 140°F (60°C).
∙ Do not attach the Intelligent Key with a key holder that contains a magnet.
∙ Do not place the Intelligent Key near equipment that produces a magnetic
field, such as a TV, audio equipment
and personal computers.
If an Intelligent Key is lost or stolen, NISSAN
recommends erasing the ID code of that
Intelligent Key from the vehicle. This may
prevent the unauthorized use of the Intelli-
gent Key to operate the vehicle. For infor-
mation regarding the erasing procedure, it
is recommended that you visit a NISSAN
dealer.
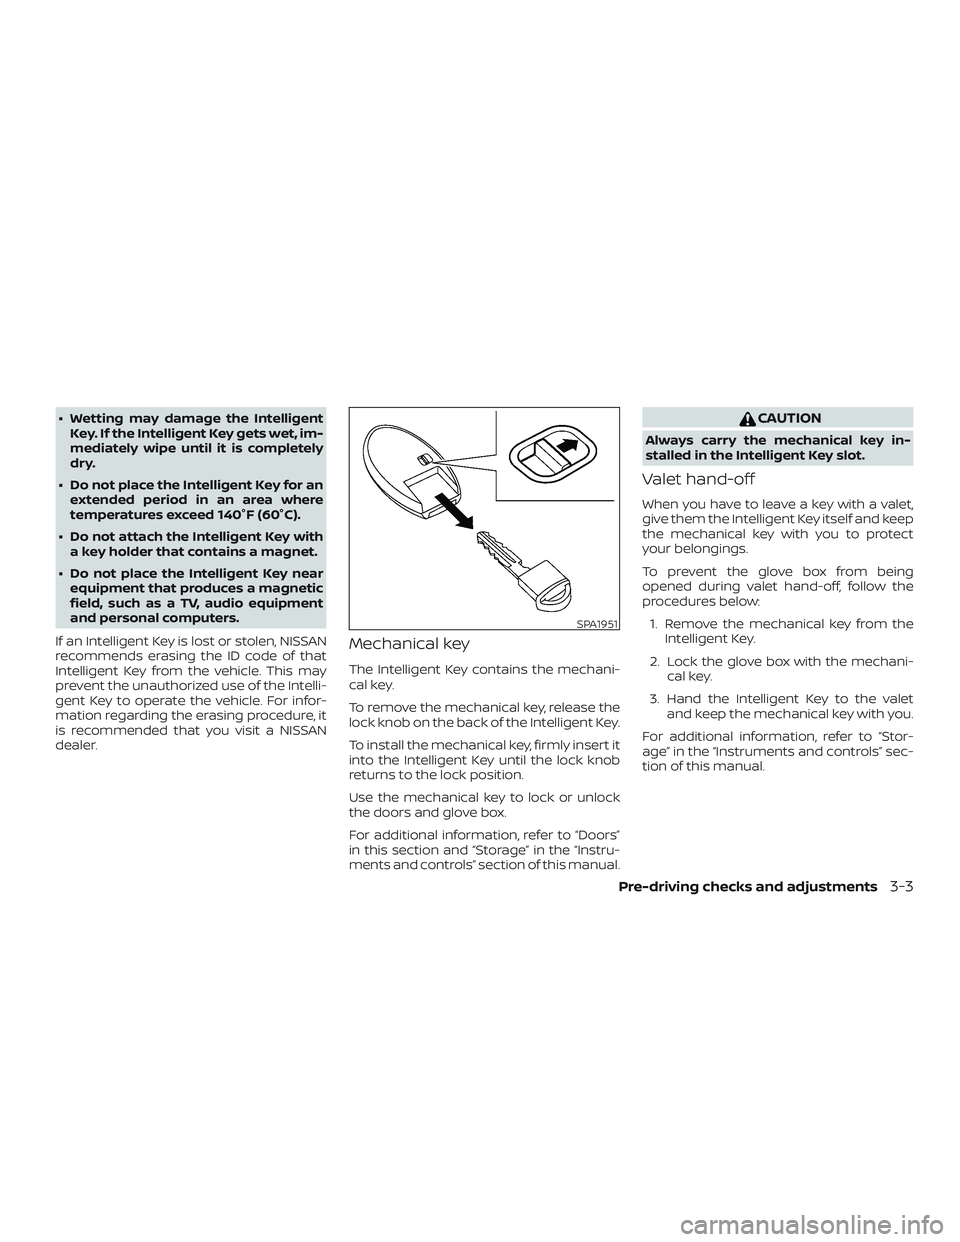
Mechanical key
The Intelligent Key contains the mechani-
cal key.
To remove the mechanical key, release the
lock knob on the back of the Intelligent Key.
To install the mechanical key, firmly insert it
into the Intelligent Key until the lock knob
returns to the lock position.
Use the mechanical key to lock or unlock
the doors and glove box.
For additional information, refer to “Doors”
in this section and “Storage” in the “Instru-
ments and controls” section of this manual.
CAUTION
Always carry the mechanical key in-
stalled in the Intelligent Key slot.
Valet hand-off
When you have to leave a key with a valet,
give them the Intelligent Key itself and keep
the mechanical key with you to protect
your belongings.
To prevent the glove box from being
opened during valet hand-off, follow the
procedures below: 1. Remove the mechanical key from the Intelligent Key.
2. Lock the glove box with the mechani- cal key.
3. Hand the Intelligent Key to the valet and keep the mechanical key with you.
For additional information, refer to “Stor-
age” in the “Instruments and controls” sec-
tion of this manual.
SPA1951
Pre-driving checks and adjustments3-3