Page 430 of 538

NOTElSimply putting sealant and air into the tyre
using the tyre repair kit does not seal the
puncture hole. Air will leak through the puncture hole until the emergency repair procedure is completed (through step 19 or
step 20 of these instructions).
17. Affix the speed restriction sticker (Q) to
the three-diamond mark on the steering wheel.
CAUTIONl Do not affix the sticker anywhere except the
specified position on the pad of the steeringwheel. Affixing the sticker in an incorrect
position could prevent the SRS airbag from working normally.
18. When you have inflated the tyre to the
specified pressure, stow the compressor,
bottle, and other items in the vehicle and
promptly start driving the vehicle so that the tyre sealant can spread evenly in the
tyre. Drive with great care. Do not ex- ceed a speed of 80 km/h (50 mph). Ob-
serve local speed limits.CAUTIONl If you sense any abnormality while driving,
stop the vehicle and contact a MITSUBISHI
MOTORS Authorized Service Point or an-
other specialist. Otherwise the tyre pressure
may drop before the emergency repair pro- cedure is completed, rendering the vehicle
unsafe.NOTEl Driving faster than 80 km/h (50 mph)
can
make the vehicle vibrate.
19. After driving for 10 minutes or 5 km ,
check the tyre pressure using the air
pressure gauge on the compressor. If the
tyre pressure has apparently not drop- ped, the emergency repair procedure iscomplete. Continue the process from
step 21.
If the tyre pressure is not sufficient, in- flate the tyre to the specified pressure
again and drive the vehicle carefully
without exceeding a speed of 80 km/h.
CAUTIONl If the tyre pressure is lower than the mini-
mum permitted pressure (1.3 bar {130 kPa}), the tyre cannot successfully be re-
paired with the tyre sealant. Do not drive the vehicle any further. Contact a MITSUBISHI
MOTORS Authorized Service Point or an-
other specialist.
20. After driving for 10 minutes or 5 km ,
check the tyre pressure using the air
pressure gauge on the compressor. If the
tyre pressure has apparently not drop- ped, the emergency repair procedure iscomplete. You must still not exceed a speed of 80 km/h. Observe local speed
limits.
NOTEl If the tyre pressure has dropped below the
specified level when you check it at the end
of the repair procedure, do not drive the ve- hicle any further. Contact a MITSUBISHI
MOTORS Authorized Service Point or an-
other specialist.
Tyre repair kit
9-12OGGE18E1For emergencies9
Page 435 of 538

CAUTIONlAfter changing the tyre and driving the vehi-
cle about 1,000 km (620 miles), retighten the
wheel nuts to make sure that they have not come loose.
l If the steering wheel vibrates when driving
after changing the tyre, we recommend you to have the tyres checked for balance.
l Do not mix one type of tyre with another or
use a different size from the one listed. This
would cause early wear and poor handling.To store the tools and jack
E00803800037
Reverse the removing procedure when stor-
ing the jack, jack bar and wheel nut wrench.
Refer to “Tools and jack” on page 9-06.
Towing
E00801504953
If your vehicle needs to be tow-
ed
If you need to tow your vehicle, we recom- mend that you contact a MITSUBISHI
MOTORS Authorized Service Point or a
commercial tow truck service.
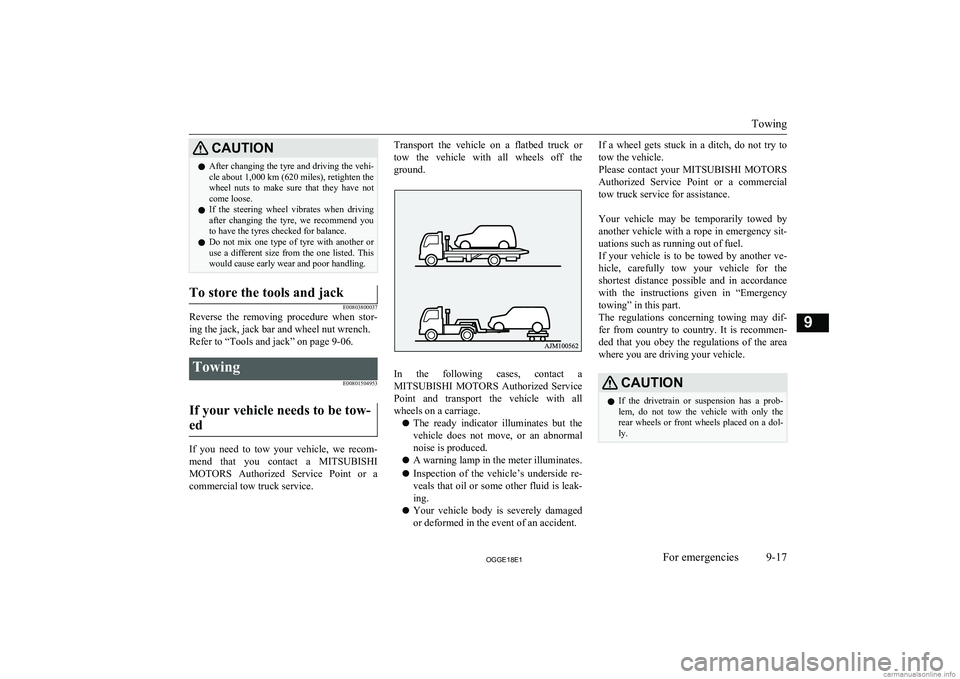
Transport the vehicle on a flatbed truck or
tow the vehicle with all wheels off the
ground.
In the following cases, contact a MITSUBISHI MOTORS Authorized Service
Point and transport the vehicle with all wheels on a carriage.
l The ready indicator illuminates but the
vehicle does not move, or an abnormal
noise is produced.
l A warning lamp in the meter illuminates.
l Inspection of the vehicle’s underside re-
veals that oil or some other fluid is leak- ing.
l Your vehicle body is severely damaged
or deformed in the event of an accident.
If a wheel gets stuck in a ditch, do not try to
tow the vehicle.
Please contact your MITSUBISHI MOTORS
Authorized Service Point or a commercial tow truck service for assistance.
Your vehicle may be temporarily towed by
another vehicle with a rope in emergency sit- uations such as running out of fuel.
If your vehicle is to be towed by another ve-
hicle, carefully tow your vehicle for the shortest distance possible and in accordance
with the instructions given in “Emergency
towing” in this part.
The regulations concerning towing may dif-
fer from country to country. It is recommen-
ded that you obey the regulations of the area where you are driving your vehicle.CAUTIONl If the drivetrain or suspension has a prob-
lem, do not tow the vehicle with only the
rear wheels or front wheels placed on a dol- ly.
Towing
9-17OGGE18E1For emergencies9
Page 450 of 538
BonnetE01000304487
To open
1. Pull the release lever towards you to un-
lock the bonnet.
2. Raise the bonnet while pressing the safe-
ty lock.NOTEl Only open the bonnet when the wipers are in
the original position. In any other position,the wipers could damage the paint or bonnet.3. Support the bonnet by inserting the sup-
port bar in its slot.CAUTIONl Note that the support bar may disengage the
bonnet if the open bonnet is lifted by astrong wind.
l After inserting the support bar into the slot,
make sure the bar supports the bonnet se-
curely from falling down on to your head or body.
To close
1. Unlatch the support bar and clip it in its
holder.
2. Slowly lower the bonnet to a position
about 20 cm above the closed position,
then let it drop.
Bonnet
11-04OGGE18E1Maintenance11