2018 MITSUBISHI OUTLANDER PHEV brake
[x] Cancel search: brakePage 444 of 538

CAUTIONlAs your vehicle is equipped with the rain
sensor, place the wiper switch lever in the“OFF” position to deactivate the rain sensor
before washing the vehicle. Otherwise, the wipers will operate in the presence of waterspray on the windscreen and may get dam-
aged as a result.
l Refrain from excessively using a car wash as
its brushes may scratch the paint surface,
causing it to lose its gloss. Scratches will be
especially visible on darker coloured vehi-
cles.
l Never spray or splash water on the electrical
components in the engine compartment. Do- ing so could have an adverse effect on the
Plug-in Hybrid EV system startability.
Exercise caution also when washing the un-
derbody; be careful not to spray water into the engine compartment.
l Some types of hot water washing equipment
apply high pressure and heat to the vehicle. They may cause heat distortion and damage
to the vehicle resin parts and may result in flooding of the vehicle interior.
Therefore:
• Maintain a distance of approx. 70 cm or
more between the vehicle body and the washing nozzle.
• When washing around the door glass,
hold the nozzle at a distance of more than
70 cm and at right angles to the glass sur- face.CAUTIONl After washing the vehicle, drive the vehicle
slowly while lightly depressing the brake
pedal several times in order to dry out the
brakes.
Leaving the brakes wet could result in re- duced braking performance. Also, there is a possibility that they could freeze up or be-
come inoperative due to rust, rendering the vehicle unable to move.
l When using an automatic car wash, pay at-
tention to the following items, referring to the operation manual or consulting a car
wash operator. If the following procedure is not followed, it could result in damage to
your vehicle.
• The outside mirrors are retracted.
• The wiper arms are secured in place with
tape.
• As your vehicle is equipped with roof
rails, consult a car wash operator before using a car wash.
• As your vehicle is equipped with the rain
sensor, place the wiper switch lever in the“OFF” position to deactivate the rain sen-
sor.
• Make sure that the charging lid and the
fuel lid are completely closed.
• If your vehicle is equipped with the Ultra-
sonic misacceleration Mitigation System
(UMS), turn the system off by using “FCM and UMS ON/OFF switch” on page 7-68.During cold weather
Salt and other chemicals spread on the roads
in some areas in winter can have a harmful effect on the vehicle body. You should there-
fore wash the vehicle as often as possible in accordance with our care-instructions. It is
recommended to have a preservative applied
and the underfloor protection checked before and after the cold weather season.
After washing your vehicle, wipe off all wa- terdrops from the rubber parts around the
doors to prevent the doors from freezing.
NOTEl To prevent freezing of the weatherstripping
on the doors, bonnet, etc., they should be treated with silicone spray.Waxing
E00901000919
Waxing the vehicle will help prevent the ad-
herence of dust and road chemicals to the paintwork. Apply a wax solution after wash- ing the vehicle, or at least once every three
months to assist displacing of water.
Do not wax your vehicle in direct sunlight.
You should wax after the surfaces have
cooled.
For information on how to use wax refer to the instruction manual of the wax.
Cleaning the exterior of your vehicle
10-04OGGE18E1Vehicle care10
Page 445 of 538

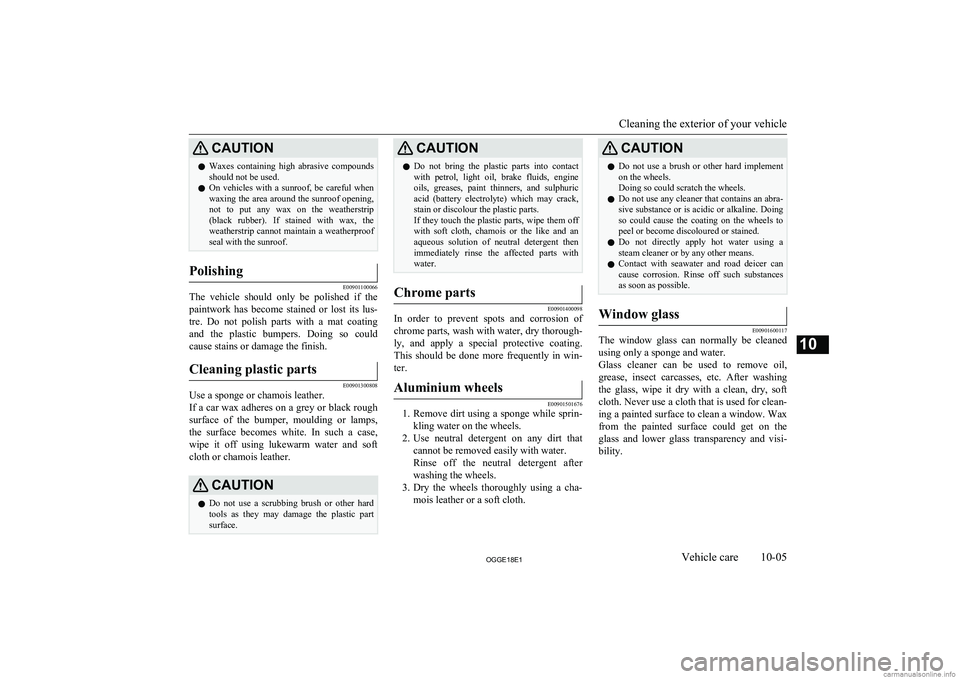
CAUTIONlWaxes containing high abrasive compounds
should not be used.
l On vehicles with a sunroof, be careful when
waxing the area around the sunroof opening, not to put any wax on the weatherstrip
(black rubber). If stained with wax, the
weatherstrip cannot maintain a weatherproof seal with the sunroof.Polishing
E00901100066
The vehicle should only be polished if the
paintwork has become stained or lost its lus- tre. Do not polish parts with a mat coating
and the plastic bumpers. Doing so could cause stains or damage the finish.
Cleaning plastic parts
E00901300808
Use a sponge or chamois leather.
If a car wax adheres on a grey or black rough surface of the bumper, moulding or lamps,
the surface becomes white. In such a case,
wipe it off using lukewarm water and soft cloth or chamois leather.
CAUTIONl Do not use a scrubbing brush or other hard
tools as they may damage the plastic part surface.CAUTIONl Do not bring the plastic parts into contact
with petrol, light oil, brake fluids, engine
oils, greases, paint thinners, and sulphuric acid (battery electrolyte) which may crack,stain or discolour the plastic parts.
If they touch the plastic parts, wipe them off
with soft cloth, chamois or the like and an aqueous solution of neutral detergent thenimmediately rinse the affected parts with
water.Chrome parts
E00901400098
In order to prevent spots and corrosion of
chrome parts, wash with water, dry thorough-
ly, and apply a special protective coating.
This should be done more frequently in win- ter.
Aluminium wheels
E00901501676
1. Remove dirt using a sponge while sprin-
kling water on the wheels.
2. Use neutral detergent on any dirt that
cannot be removed easily with water.
Rinse off the neutral detergent after
washing the wheels.
3. Dry the wheels thoroughly using a cha-
mois leather or a soft cloth.
CAUTIONl Do not use a brush or other hard implement
on the wheels.
Doing so could scratch the wheels.
l Do not use any cleaner that contains an abra-
sive substance or is acidic or alkaline. Doing
so could cause the coating on the wheels to peel or become discoloured or stained.
l Do not directly apply hot water using a
steam cleaner or by any other means.
l Contact with seawater and road deicer can
cause corrosion. Rinse off such substances as soon as possible.Window glass
E00901600117
The window glass can normally be cleaned
using only a sponge and water.
Glass cleaner can be used to remove oil, grease, insect carcasses, etc. After washing
the glass, wipe it dry with a clean, dry, soft cloth. Never use a cloth that is used for clean-ing a painted surface to clean a window. Waxfrom the painted surface could get on the
glass and lower glass transparency and visi-
bility.
Cleaning the exterior of your vehicle
10-05OGGE18E1Vehicle care10
Page 447 of 538

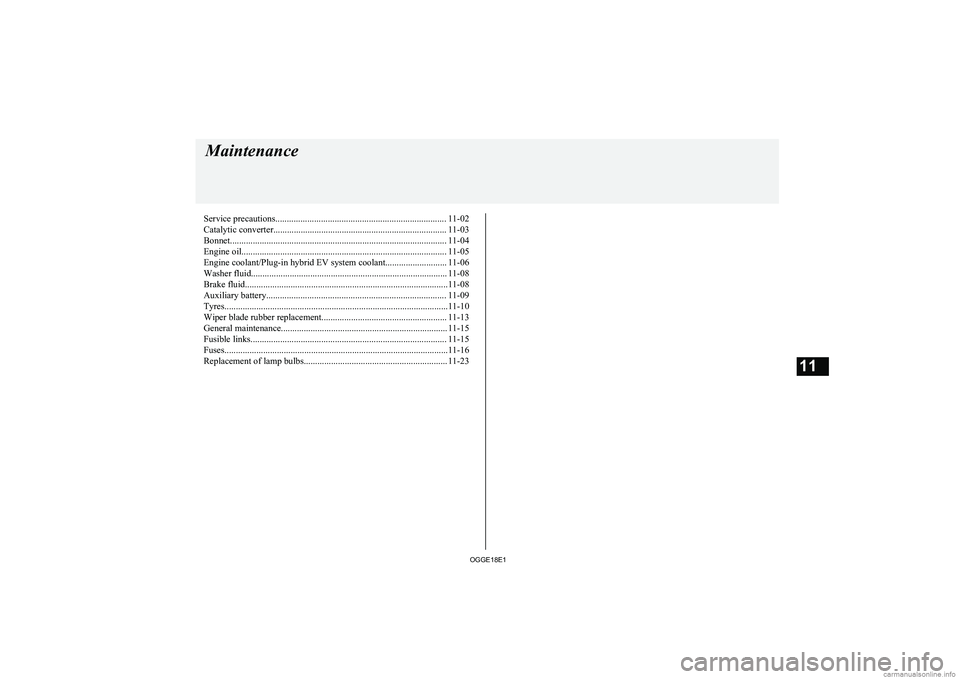
Service precautions........................................................................... 11-02
Catalytic converter............................................................................ 11-03
Bonnet............................................................................................... 11-04
Engine oil.......................................................................................... 11-05 Engine coolant/Plug-in hybrid EV system coolant........................... 11-06
Washer fluid...................................................................................... 11-08
Brake fluid.........................................................................................11-08
Auxiliary battery............................................................................... 11-09
Tyres..................................................................................................11-10 Wiper blade rubber replacement....................................................... 11-13
General maintenance......................................................................... 11-15
Fusible links...................................................................................... 11-15
Fuses..................................................................................................11-16
Replacement of lamp bulbs............................................................... 11-23Maintenance
OGGE18E111
Page 449 of 538

WARNINGlIf it is necessary to do work in the engine
compartment with the plug-in hybrid EV
system starting, be especially careful that
your clothing, hair, etc., does not become caught by the cooling fans, drive belts, orother moving parts.
l After performing the maintenance, make
sure that no tools or cloths are left behind in the engine compartment. If they are left
behind, a fire or damage to the vehicle
may occur.
l The cooling fans can turn on automatical-
ly even if the plug-in hybrid EV system is
stopping. Put the operation mode of the
power switch in OFF to be safe while you work in the engine compartment.
l Make sure that the engine and Plug-in
Hybrid EV system has cooled down be- fore removing the radiator cap and EV cooling system reserve tank cap, because
hot steam or boiling water will otherwise
gush from the filler port and may scald you.
l Do not smoke, cause sparks or allow open
flames around fuel or auxiliary battery.
The fumes are flammable.
l Be extremely cautious when working
around the auxiliary battery. It contains
poisonous and corrosive sulphuric acid.
l Do not get under your vehicle with just
the body jack supporting it. Always use
automotive jack stands.WARNINGl Improper handling of components and
materials used in the vehicle can endangeryour personal safety. We recommend you to consult a specialist for necessary infor- mation.
l The components inside the engine room
might be very hot to the touch.
To avoid being burnt, make sure all com- ponents have sufficiently cooled before beginning an inspection. These compo-
nents are affixed with the label indicating precautions for handling. Follow the in-
structions on the label.
1- Brake fluid reservoir (RHD)
2- Engine oil level dipstick
3- Engine oil cap
4- Brake fluid reservoir (LHD)
5- Washer fluid reservoir
6- EV cooling system reservoir
7- Engine coolant reservoir
Catalytic converter
E01000202495
The exhaust gas scavenging devices used with the catalytic converter are extremely ef- ficient for the reduction of noxious gases.
The catalytic converter is installed in the ex- haust system.
It is important to keep the engine properly
tuned to ensure proper catalyst operation and prevent possible catalyst damage.WARNINGl As with any vehicle, do not park or oper-
ate this vehicle in areas where combusti- ble materials such as dry grass or leaves
can come in contact with a hot exhaust
since a fire could occur.
l Paint should not be applied to the catalyt-
ic converter.NOTEl Use fuel of the type recommended in
“Fuel
selection” on page 2-13.
Catalytic converter
11-03OGGE18E1Maintenance11
Page 454 of 538

The concentration should be checked beforethe start of cold weather and anti-freeze add-
ed to the system if necessary.Washer fluid
E01000702214
Open the washer fluid reservoir cap andcheck the level of washer fluid with the dip- stick.
If the level is low, replenish the container with washer fluid.
NOTEl The washer fluid container serves the wind-
screen, rear window and headlamps.During cold weather
To ensure proper operation of the washers at
low temperatures, use a fluid containing ananti-freezing agent.
Brake fluid
E01000801827
To check the fluid level
The fluid level must be between the “MAX”
and “MIN” marks on the reservoir.The fluid level is monitored by a float. When
the fluid level falls below the “MIN” mark, the brake fluid warning lamp lights up.The fluid level falls slightly with wear of the brake pads, but this does not indicate any ab-
normality.
The fluid in the master cylinder should be checked when doing other work under thebonnet. The brake system should also be checked for leakage at the same time.
If the fluid level falls markedly in a short length of time, it indicates leaks from the
brake system.
If this occurs, we recommend you to have the
vehicle checked.
Washer fluid
11-08OGGE18E1Maintenance11FULL
EMPTY
Page 455 of 538

Fluid type
Use brake fluid conforming to DOT3 or
DOT4 from a sealed container. The brake fluid is hygroscopic. Too much moisture in
the brake fluid will adversely affect the brake system, reducing the performance.
WARNINGl Take care in handling brake fluid as it is
harmful to the eyes, may irritate your
skin and will damage painted surfaces. Wipe up any spills immediately.
If brake fluid gets on your hand or in
your eyes, flush immediately with clean water. Follow up with a doctor as necessa-
ry.CAUTIONl Use only the specified brake fluid.
Do not mix or add different brands of brake fluid to prevent chemical reactions.
Do not let any petroleum-based fluid touch, mix with, or get into the brake fluid.
This will damage the seals.
l Keep the reservoir tank cap closed to pre-
vent the brake fluid from deteriorating ex- cept maintenance.
l Clean the filler cap before removing and
close the cap securely after maintenance.Auxiliary battery
E01001203705
The condition of the auxiliary battery is very
important for quick starting of the plug-in hy-
brid EV system and proper functioning of the vehicle’s electrical system. Regular inspec- tion is especially important in cold weather.
Be sure to have a MITSUBISHI MOTORS
Authorized Service Point check the auxiliary battery.WARNINGl Be sure to have a
MITSUBISHI
MOTORS Authorized Service Point
charge the battery. Do not charge the bat- tery yourself. Flammable gases may leak
and explode.CAUTIONl There is a type of auxiliary battery is not
properly installed in the vehicle, even if thesame specification.
When replacing the auxiliary battery, please
contact a MITSUBISHI MOTORS Author-
ized Service Point.NOTEl When the auxiliary battery is removed, the
controlling timer for forcibly starting the en-
gine may be reset.
Since a fuel injection device may cause a clogging if the state where the engine does
not operate continues after reset of the timer,
please press the battery charge switch in or-
der to start the engine. However, when the drive battery is near full charge, even if the
battery charge switch is pressed, the engine
may not start. In that case, press the battery charge switch again after the drive battery
quantity decreases. Refer to “Battery charge
mode switch” on page 7-28.
l When the auxiliary battery is removed, since
the timer control of the MITSUBISHI Re-
mote Control is reset and the drive battery temperature control cannot be used, commu-
nicate the wireless LAN device and your ve-
hicle again.
l When the auxiliary battery is removed, the
timer control of the MITSUBISHI Remote
Control is reset and each function of the MITSUBISHI Remote Control cannot be
used. Also the drive battery cannot be
warmed up.
Communicate the wireless LAN device and your vehicle again.
Auxiliary battery
11-09OGGE18E1Maintenance11
Page 457 of 538

Wheel condition
E01001801970
1- Location of the tread wear indicator
2- Tread wear indicator
Check the tyres for cuts, cracks and other damage. Replace the tyres if there are deep
cuts or cracks. Also check each tyre for pieces of metal or pebbles.
The use of worn tyres can be very dangerous
because of the greater chance of skidding or
hydroplaning. The tread depth of the tyres
must exceed 1.6 mm in order for the tyres to meet the minimum requirement for use.
Tread wear indicators will appear on the sur-
face of the tyre as the tyre wears, thereby in-
dicating that the tyre no longer meets the
minimum requirement for use. When these wear indicators appear, the tyres must be re-
placed with new ones.
When replacement of any of the tyres is nec-
essary, replace all of them.CAUTIONl Always use tyres of the same size, same
type, and same brand, and which have no wear differences. Using tyres of differentsize, type, brands or degree of wear, will in-
crease the differential oil temperature, result-
ing in possible damage to the driving sys-
tem. Further, the drive train will be subjec- ted to excessive loading, possibly leading tooil leakage, component seizure, or other seri-
ous faults.Replacing tyres and wheels
E01007201820
CAUTIONl Avoid using different size tyres from the one
listed and the combined use of different
types of tyres, as this can affect driving safe- ty.
Refer to “Tyres and wheels” on page
12-08.
l Even if a wheel has the same rim size and
offset as the specified type of wheel, its
shape may prevent it from being fitted cor- rectly. We recommend you to consult a spe-
cialist before using wheels that you have.CAUTIONl As your vehicle is equipped with a tyre pres-
sure monitoring system, only MITSUBISHI
MOTORS GENUINE wheels should be
used. Use of another type of wheel risks air leaks and sensor damage, as it will not be
possible to install the tyre pressure sensor properly.
Refer to “Tyre pressure monitoring system
(TPMS)” on page 7-89.NOTEl A steel wheel with diameter of 16 inches
cannot be used on your vehicle because it in- terferes with brake parts.
Additionally, an aluminium wheel with di- ameter of 16 inches may not be used on your
vehicle depending on its type, even if a MITSUBISHI MOTORS GENUINE wheel.
Consult a MITSUBISHI MOTORS Author-
ized Service Point before using wheels that you have.Tyre rotation
E01001902516
Tyre wear varies with vehicle conditions,
road surface conditions and individual driv- er’s driving habits. To equalize the wear andhelp extend tyre life, it is recommended to ro-
tate the tyres immediately after discovery of
abnormal wear, or whenever the wear differ- ence between the front and rear tyres is rec-
ognizable.
Tyres
11-11OGGE18E1Maintenance11
Page 465 of 538

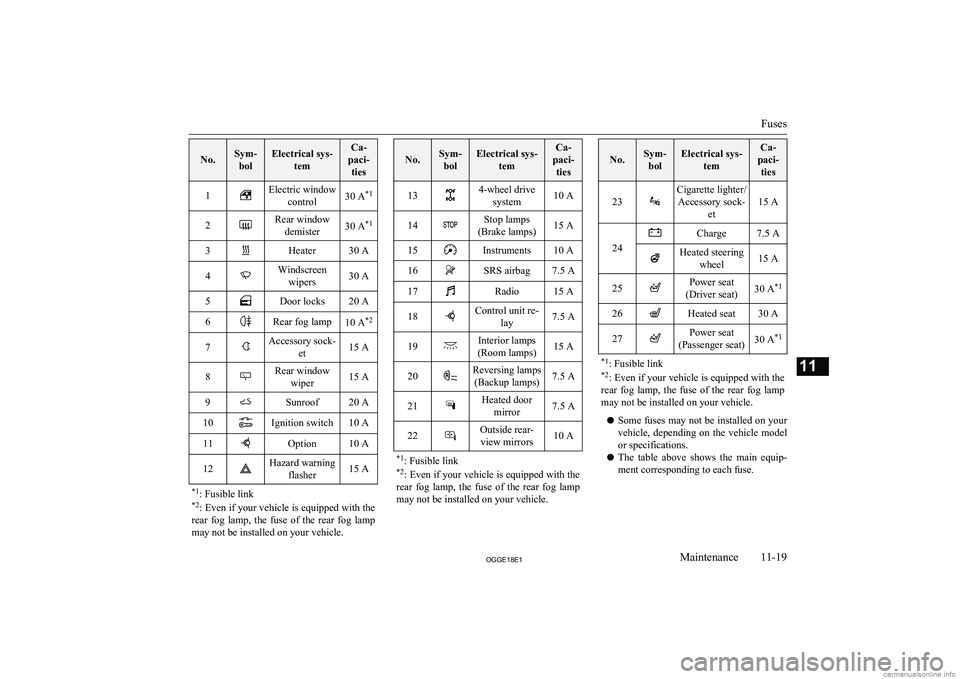
No.Sym-bolElectrical sys- temCa-
paci- ties1Electric window control30 A *12Rear window
demister30 A *13Heater30 A4Windscreen
wipers30 A5Door locks20 A6Rear fog lamp10 A *27Accessory sock-
et15 A8Rear windowwiper15 A9Sunroof20 A10Ignition switch10 A11Option10 A12Hazard warning flasher15 A*1: Fusible link
*2 : Even if your vehicle is equipped with the
rear fog lamp, the fuse of the rear fog lamp
may not be installed on your vehicle.
No.Sym- bolElectrical sys- temCa-
paci- ties134-wheel drive system10 A14Stop lamps
(Brake lamps)15 A15Instruments10 A16SRS airbag7.5 A17Radio15 A18Control unit re- lay7.5 A19Interior lamps
(Room lamps)15 A20Reversing lamps (Backup lamps)7.5 A21Heated door mirror7.5 A22Outside rear-view mirrors10 A*1 : Fusible link
*2 : Even if your vehicle is equipped with the
rear fog lamp, the fuse of the rear fog lamp
may not be installed on your vehicle.
No.Sym- bolElectrical sys- temCa-
paci- ties
23
Cigarette lighter/Accessory sock- et
15 A24
Charge7.5 AHeated steeringwheel15 A25Power seat
(Driver seat)30 A *126Heated seat30 A27Power seat
(Passenger seat)30 A *1*1
: Fusible link
*2 : Even if your vehicle is equipped with the
rear fog lamp, the fuse of the rear fog lamp
may not be installed on your vehicle.
l Some fuses may not be installed on your
vehicle, depending on the vehicle model
or specifications.
l The table above shows the main equip-
ment corresponding to each fuse.
Fuses
11-19OGGE18E1Maintenance11