2018 MITSUBISHI OUTLANDER III ESP
[x] Cancel search: ESPPage 246 of 441
Multi Information display - Type 1
Features and controls 5-165
5
N00575201026
Shows the approximate driving range (howmany more miles or
kilometers you can
drive). When this driving range falls below30 miles (50 km),
“---” is displayed.
Refuel as soon as possible.
N00575301027
This displays the average fuel consumptionfrom the last reset to the present.There are 2 types of mode settings of manualreset and automatic reset.Refer to “Changing the reset mode for aver-age fuel consumption and average speed” onpage 5-168.For information on how to change the aver-age fuel consumption di
splay setting, refer to
“Changing the function settings” on page5-167.
N00578500023
This displays the average speed from the lastreset to the present.There are 2 types of mode setting of manualreset and automatic reset.Refer to “Changing the
reset mode for aver-
age fuel consumption
and average speed” on
page 5-168.For the method for changing the averagespeed display setting, refer to “Changing thefunction settings
” on page 5-167.
Driving range display
NOTE
The driving range is determined based on thefuel consumption da
ta. This may vary
depending on the drivi
ng conditions and hab-
its. Treat the distance displayed as just arough guideline.When you refuel, the driving range display isupdated.However, if you only add a small amount offuel, the correct value
will not be displayed.
Fill to a full tank whenever possible.When your vehicle is stopped on anextremely steep hill, the driving range valuemay, change. This is due to the movement offuel in the tank and does not indicate anybreakdown.The display setting ca
n be changed to the
preferred units (miles or km).Refer to “Changing the
function settings” on
page 5-167.
Average fuel consumption dis-play
NOTE
The average fuel cons
umption display can be
reset separately in both auto reset mode andmanual reset mode.“---” is displayed when the average fuel con-sumption cannot be measured.The initial (default) setting is “Auto resetmode”.Average fuel consumption may vary depend-ing on the driving conditions (road condi-tions, how you drive, etc.) The actual fuelconsumption may differ from the fuel con-sumption displayed, so
treat the fuel con-
sumption displayed as
just a rough guideline.
Disconnecting the batter
y cable wi
ll erase
from memory the manual reset mode or autoreset mode setting for the average fuel con-sumption display.The display setting ca
n be changed to the
preferred units {mpg (US), mpg (UK),L/100km or km/L}.Refer to “Changing the function settings” onpage 5-167.
Average speed display
NOTE
The average speed display can be reset sepa-rately in both auto reset mode and manualreset mode.“---” is displayed when the average speedcannot be measured.The initial (default) setting is “Auto resetmode”.NOTE
BK0249100US.book 165 ページ 2017年5月10日 水曜日 午前8時49分
Page 248 of 441
![MITSUBISHI OUTLANDER III 2018 Owners Manual Multi Information display - Type 1
Features and controls 5-167
5
[When the ignition switch is turned to the“OFF” or “LOCK” position or the operationmode is put in OFF]The display shows the ove MITSUBISHI OUTLANDER III 2018 Owners Manual Multi Information display - Type 1
Features and controls 5-167
5
[When the ignition switch is turned to the“OFF” or “LOCK” position or the operationmode is put in OFF]The display shows the ove](/manual-img/19/58144/w960_58144-247.png)
Multi Information display - Type 1
Features and controls 5-167
5
[When the ignition switch is turned to the“OFF” or “LOCK” position or the operationmode is put in OFF]The display shows the overall ECO score thefunction has counted from the time when theignition switch is turn
ed to the “ON” position
to the time when it is turned to the “OFF” or“LOCK” or “ACC” position, or from the timewhen the operation mode is set to “ON” tothe time when it is set to “OFF”.
N00556801270
1. Park your vehicle in a safe place.Firmly apply the parking brake and movethe selector lever into the “P” (PARK)position.
2. When you lightly press the multi informa-tion meter switch, the information screenswitches to the function setting screen.Refer to “Information screen” on page5-159.3. Press and hold the multi information dis-play switch (for about 2 seconds or more)to switch from the setting mode screen tothe menu screen.
4. Select the item to change on the menuscreen and change to
the desired setting.
For further details on the operation meth-ods, refer to the following sections.Refer to “Changing the reset mode foraverage fuel consumption and averagespeed” on page 5-168.Refer to “Changing the fuel consumptiondisplay unit” on page 5-169.Refer to “Changing the temperature unit”on page 5-170.Refer to “Changing the display language”on page 5-170.Refer to “Changing the language on othersystem to match the multi informationdisplay” on page 5-171.Refer to “Operation
sound setting” on
page 5-171.
Changing the function settings
ECO drive level
Low High
CAUTIONFor safety, stop the vehicle before operating.While driving, even if you operate the multiinformation display switch, the function set-ting screen is not displayed.
NOTE
To return the menu screen to the function set-ting screen, press and hold the multi infor-mation display switch
(for about 2 seconds
or more).If no operations are made within about 30seconds of the menu screen being displayed,the display returns to the function settingscreen.
BK0249100US.book 167 ページ 2017年5月10日 水曜日 午前8時49分
Page 254 of 441

Multi Information display - Type 2
Features and controls 5-173
5
1. Press and hold the mu
lti information dis-
play switch (for about 2 seconds or more)to switch from the setting mode screen tothe menu screen.Refer to “Changing th
e function settings”
on page 5-167.2. Lightly press the multi information dis-play switch to select “RESET” (return tothe factory settings).3. Press and hold the mu
lti information dis-
play switch (for about 5 seconds or more),the buzzer sounds and all of the functionsettings are returned to the factory set-tings.
N00555001291
The multi information display displays theodometer, trip odometer, service reminder,fuel remaining, outside
temperature, selector
lever position, averag
e fuel consumption,
driving range, etc.It is also possible to change elements such asthe units used on the multi information dis-play.
NOTE
The factory settings are as follows.• Average fuel consumption and averagespeed reset mode: A (Auto reset)• Fuel consumption di
splay unit: mpg (US)
or (L/100 km)• Temperature unit: °F (Fahrenheit) or {°C(Celsius)}• Display language: ENGLISH• Cooperative language
setting: A (language
cooperation: enabled)• Operation sounds: ON (Operation soundon)• “REST REMINDER” display: OFF• Turn signal sound: Turn signal sound 1• Momentary fuel consumption with thegreen bar graph: ON
The tire ID set cannot be returned to the fac-tory settings.
Multi Information display - Type 2 1- Frozen road warning
P.5-176
2- Information display
P.5-174
NOTE
3- Selector lever position display
P.5-70, 5-77
4- Service reminder
P.5-177
5- Fuel remaining display
P.5-177
NOTE
When the ignition switch is in the “OFF”
lever position display,
fuel remaining display and frozen road warn-ing are not displayed.
BK0249100US.book 173 ページ 2017年5月10日 水曜日 午前8時49分
Page 256 of 441
Multi Information display - Type 2
Features and controls 5-175
5
N00574901039
The odometer indicates the total distance thevehicle has traveled.
N00575001037
The trip odometer indicates the distance trav-eled between two points.To return the display to 0, hold down themulti information display switch for about 2seconds or more. Only the currently dis-played value wi
ll be reset.
ExampleIf trip odometer is displayed, only tripodometer will be reset.
Both trip odometers and cancount up to 9999.9 m
iles/kilometers.
When a trip odometer goes past 9999.9miles/kilometers, it returns to 0.0 miles/kilometers.When disconnecting th
e battery terminal,
the memories of trip odometer displays
and are cleared, and their displays
return to “0.0 miles/kilometers”.
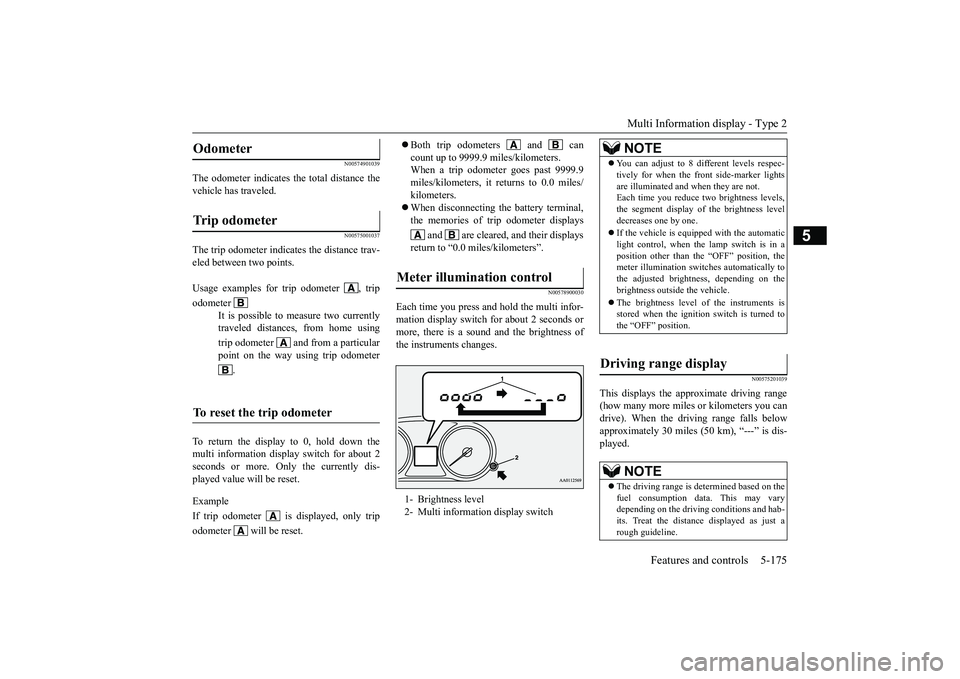
N00578900030
Each time you press a
nd hold the multi infor-
mation display switch for about 2 seconds ormore, there is a sound and the brightness ofthe instruments changes.
N00575201039
This displays the approximate driving range(how many more miles or
kilometers you can
drive). When the driving range falls belowapproximately 30 miles (
50 km), “---” is dis-
played.
Odometer Trip odometer Usage examples for trip odometer , tripodometer
It is possible to
measure two currently
traveled distances, from home usingtrip odometer and from a particularpoint on the way using trip odometer
.
To reset the trip odometer
Meter illumination control 1- Brightness level2- Multi information display switch
NOTE
You can adjust to 8 di
fferent levels respec-
tively for when the front side-marker lightsare illuminated and when they are not.Each time you reduce tw
o brightness levels,
the segment display of
the brightness level
decreases one by one.If the vehicle is equi
pped with the automatic
light control, when the lamp switch is in aposition other than the
“OFF” position, the
meter illumination switches automatically tothe adjusted bright
ness, depending on the
brightness outsi
de the vehicle.
The brightness level of the instruments isstored when the ignition switch is turned tothe “OFF” position.
Driving range display
NOTE
The driving range is determined based on thefuel consumption data. This may varydepending on the drivi
ng conditions and hab-
its. Treat the distance displayed as just arough guideline.
BK0249100US.book 175 ページ 2017年5月10日 水曜日 午前8時49分
Page 259 of 441
Multi Information display - Type 25-178 Features and controls
5
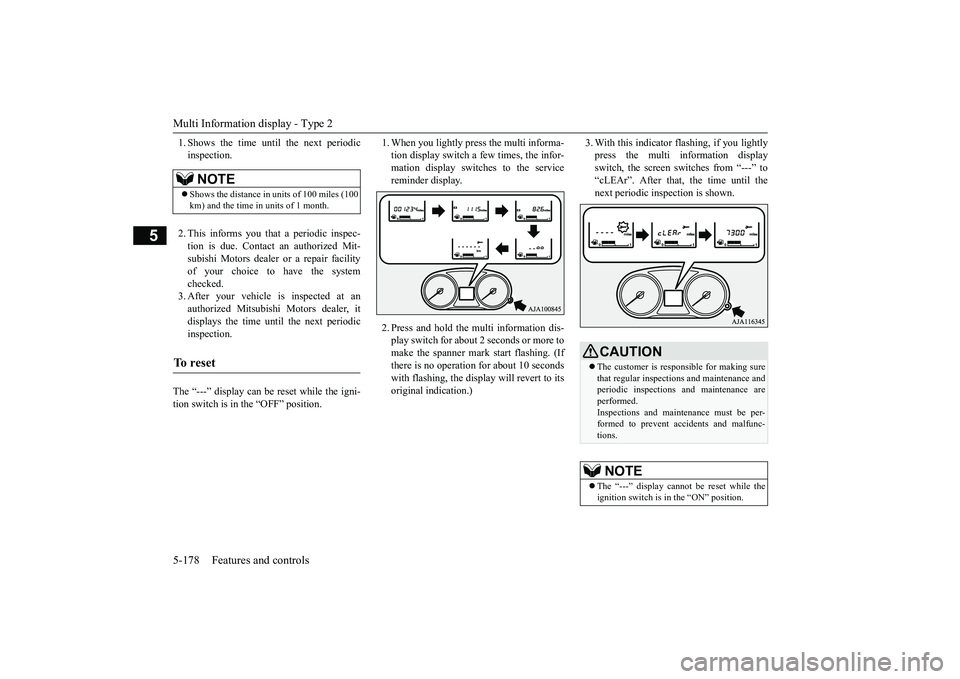
1. Shows the time until the next periodicinspection.2. This informs you that a periodic inspec-tion is due. Contact
an authorized Mit-
subishi Motors dealer or a repair facilityof your choice to have the systemchecked.3. After your vehicle is inspected at anauthorized Mitsubishi Motors dealer, itdisplays the time until the next periodicinspection.
The “---” display can be reset while the igni-tion switch is in the “OFF” position.
1. When you lightly press the multi informa-tion display switch a few times, the infor-mation display switches to the servicereminder display.2. Press and hold the mu
lti information dis-
play switch for about 2 seconds or more tomake the spanner mark start flashing. (Ifthere is no operation for about 10 secondswith flashing, the display will revert to itsoriginal indication.)
3. With this indicator flashing, if you lightlypress the multi information displayswitch, the screen sw
itches from “---” to
“cLEAr”. After that, the time until thenext periodic inspection is shown.
NOTE
Shows the distance in units of 100 miles (100km) and the time in units of 1 month.
To r e s e t
CAUTIONThe customer is responsible for making surethat regular inspections
and maintenance and
periodic inspections
and maintenance are
performed.Inspections and mainte
nance must be per-
formed to prevent accidents and malfunc-tions.NOTE
The “---” display cannot
be reset while the
ignition switch is in the “ON” position.
BK0249100US.book 178 ページ 2017年5月10日 水曜日 午前8時49分
Page 285 of 441
Warning lights5-204 Features and controls
5
N00520501814
This indicator is a pa
rt of the onboard diag-
nostic (OBD) system which monitors theemissions, engine control system or auto-matic transaxle control system/continuouslyvariable transmission (CVT) control system.If a problem is detected in one of these sys-tems, this indicator illuminates or flashes.When the ignition switch is turned to the“ON” position or the ope
ration mode is put in
ON, this indicator
normally comes on and
goes off after the engine has started.
This indicator will come on if the fuel tankfiller cap is not properly tightened. If thisindicator comes on and stays on after refuel-ing, stop the engine and check that the cap isproperly tightened. (Turn the cap clockwiseuntil you hear clicking sounds.)If this indicator does not go off after severalseconds or lights up while driving, have thesystem checked as soon as possible at anauthorized Mitsubishi Motors dealer or arepair facility of your choice.
N00520601323
This light comes on in the event of a malfunc-tion in the charging system or when the igni-
CAUTIONWhen the warning light remains on or doesnot come on, there is the possibility that theparking brake cannot
be operated or
released. Immediately contact the nearestauthorized Mitsubishi
Motors dealer. When
the warning light comes on during driving,immediately stop the vehi
cle in a safe place,
and contact an authorized Mitsubishi Motorsdealer. If you inevitably have to park, parkthe vehicle on level a
nd stable ground, shift
the selector lever in “P” (PARK) positionand place chocks
or blocks.
Engine malfunction indicator (“SERVICE ENGINE SOON” or “Check engine light”)
CAUTIONDriving for a long time
with the engine mal-
function indicator on may cause more dam-age to the emission control system. Thiscould also affect fuel
economy and drivabil-
ity.If this indicator does not come on when theignition switch is turned to the “ON” posi-tion or the operation mode is put in ON, havethe system checked at an authorized Mitsubi-shi Motors dealer or a repair facility of yourchoice.
If the engine malfuncti
on indicator comes on
while the engine is running, avoid driving athigh speeds.During vehicle operation
with the indicator
on, the vehicle may not
accelerate when you
depress the accelerator pedal.When the vehicle is stat
ionary with the indi-
cator on, you must depress the brake pedalmore firmly than usual since the engineidling speed is higher than usual and a vehi-cle with an automatic transaxle or CVT has astronger tendency to creep forward.NOTE
Do not disconnect the ba
ttery cable when the
engine malfunction i
ndicator (“SERVICE
ENGINE SOON” or “Ch
eck engine light”) is
on.The engine electronic
control module stores
critical OBD informati
on (especially exhaust
emission data), which ma
y be lost if the bat-
tery cable is disconne
cted while the engine
malfunction indicator is
on. This will make it
difficult to diagnose th
e cause of future prob-
lems.
Charging system warning light
CAUTION
BK0249100US.book 204 ページ 2017年5月10日 水曜日 午前8時49分
Page 302 of 441

Wiper and washer switch
Features and controls 5-221
5
Can only be used when
the ignition switch or
the operation mode is in ON.If the lever is put in
the “AUTO” position, the
rain sensor (A) will de
tect the extent of rain
(or snow, other moisture
, dust, etc.) and the
wipers will operate automatically.Keep the lever in the “OFF” position if thewindshield is dirty a
nd the weather is dry.
Wiper operation under th
ese conditions can
scratch the windshield and damage the wip-ers.
If your hands get trapped, you could sufferinjuries or the wipers
could malfunction. Be
sure to turn the ignition switch to the “OFF”mode in OFF, or move the lever to the “OFF”
the rain sensor.
Rain sensor
CAUTIONWith the ignition switch or the operationmode in ON and the lever in the “AUTO”
y automatically oper-
ate in the situati
ons described below.
• When cleaning the outside surface of thewindshield, if you touch the rain sensor.• When cleaning the outside surface of thewindshield, if you wipe with a cloth the rainsensor.• When using an automatic car wash.• A physical shock is applied to the wind-shield.• A physical shock is a
pplied to the rain sen-
sor.NOTE
To protect the rubber parts of the wipers, thisoperation of the wipers
does not take place
even if the lever is put in the “AUTO” posi-tion when the vehicle is
stationary and the
ambient temperature is approximately 32 °F(0 °C) or lower.Do not cover the sensor by affixing a stickeror label to the windshield. Also, do not putany water-repellent
coating on the wind-
shield. The rain sensor would not be able todetect the extent of rain, and the wipersmight stop working normally.CAUTION
In the following cases, the rain sensor maybe malfunctioning. Have
the vehicle checked
at an authorized Mitsubishi Motors dealer ora repair facility
of your choice.
• When the wipers operate
at a constant inter-
val despite changes in the extent of rain.• When the wipers do not operate eventhough it is raining.
The wipers may automatically operate whenthings such as insects
or foreign objects are
affixed to the windshield on top of the rainsensor or when the windshield is frozen.Objects affixed to th
e windshield
will stop
the wipers when the wipers cannot removethem. To operate the wipers again, move thelever to the “LO”
or “HI” position.
Also, the wipers may operate automaticallydue to strong direct s
unlight or electromag-
netic wave. To stop the wipers, move thelever to the “OFF” position.Contact an authoriz
ed Mitsubishi Motors
dealer or a repair fa
cility of your choice
when replacing th
e windshield glass.
NOTE
BK0249100US.book 221 ページ 2017年5月10日 水曜日 午前8時49分
Page 315 of 441
HomeLink® Wireless Control System (if so equipped)5-234 Features and controls
5
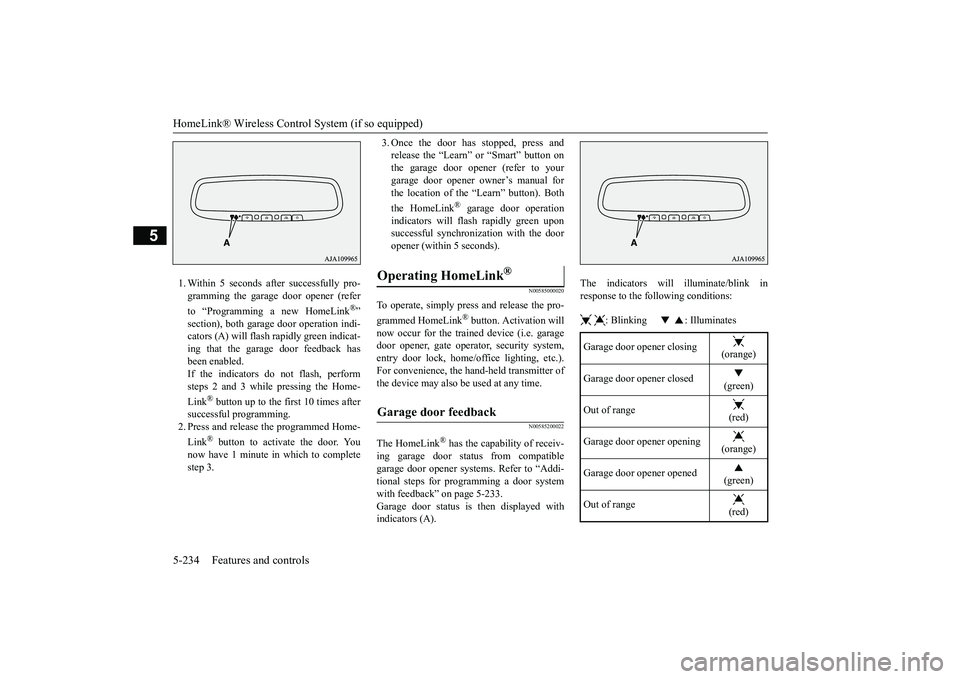
1. Within 5 seconds after successfully pro-gramming the garage door opener (referto “Programming a new HomeLink
®”
section), both garage
door operation indi-
cators (A) will flash
rapidly green indicat-
ing that the garage door feedback hasbeen enabled.If the indicators do not flash, performsteps 2 and 3 while pressing the Home-Link
® button up to the first 10 times after
successful programming.2. Press and release
the programmed Home-
Link
® button to activate the door. You
now have 1 minute in which to completestep 3.
3. Once the door has stopped, press andrelease the “Learn” or “Smart” button onthe garage door opener (refer to yourgarage door opener owner’s manual forthe location of the “Learn” button). Boththe HomeLink
® garage door operation
indicators will fl
ash rapidly green upon
successful synchronization with the dooropener (within 5 seconds).
N00585000020
To operate, simply press and release the pro-grammed HomeLink
® button. Activation will
now occur for the trained device (i.e. garagedoor opener, gate opera
tor, security system,
entry door lock, home/office lighting, etc.).For convenience, the ha
nd-held transmitter of
the device may also be
used at any time.
N00585200022
The HomeLink
® has the capability of receiv-
ing garage door status from compatiblegarage door opener systems. Refer to “Addi-tional steps for programming a door systemwith feedback” on page 5-233.Garage door status is
then displayed with
indicators (A).
The indicators will illuminate/blink inresponse to the following conditions: : Blinking : Illuminates
Operating HomeLink
®
Garage door feedback
Garage door opener closing
(orange)
Garage door opener closed
(green)
Out of range
(red)
Garage door opener opening
(orange)
Garage door opener opened
(green)
Out of range
(red)
BK0249100US.book 234 ページ 2017年5月10日 水曜日 午前8時49分