2018 MERCEDES-BENZ SL ROADSTER clock
[x] Cancel search: clockPage 82 of 322
XTo deactivate:press and hold button :for
about five seconds until a tone sounds.
XTo activate: press and hold button ;for
about five seconds until a tone sounds.
If you press one of the two buttons and do not
hear a tone, the relevant setting has already
been selected.
The vehicle is locked automatically when the
ignition is switched on and the wheels are turn-
ing.
You could therefore lock yourself out if:
Rthe vehicle is being pushed.
Rthe vehicle is being towed.
Rthe vehicle is on a roller dynamometer.
You can also switch the automatic locking func-
tion on and off using the on-board computer
(
Ypage 196).
Power closing
Power closing pulls the doors and trunk lid into
their locks automatically even if they are only
partly closed.
XPower closing feature (doors): push the
door past the first detent position into the
lock.
Power closing will pull the door fully closed.
XTo power close the trunk lid: lightly push
the trunk lid closed.
The power closing function pulls the trunk lid
closed.
Unlocking/locking the driver's door
using the mechanical key
i
If you want to centrally lock the vehicle using
the mechanical key, begin by pressing the
locking button for the interior locking mech-
anism while the driver's door is open. Then
lock the driver's door using the mechanical
key.
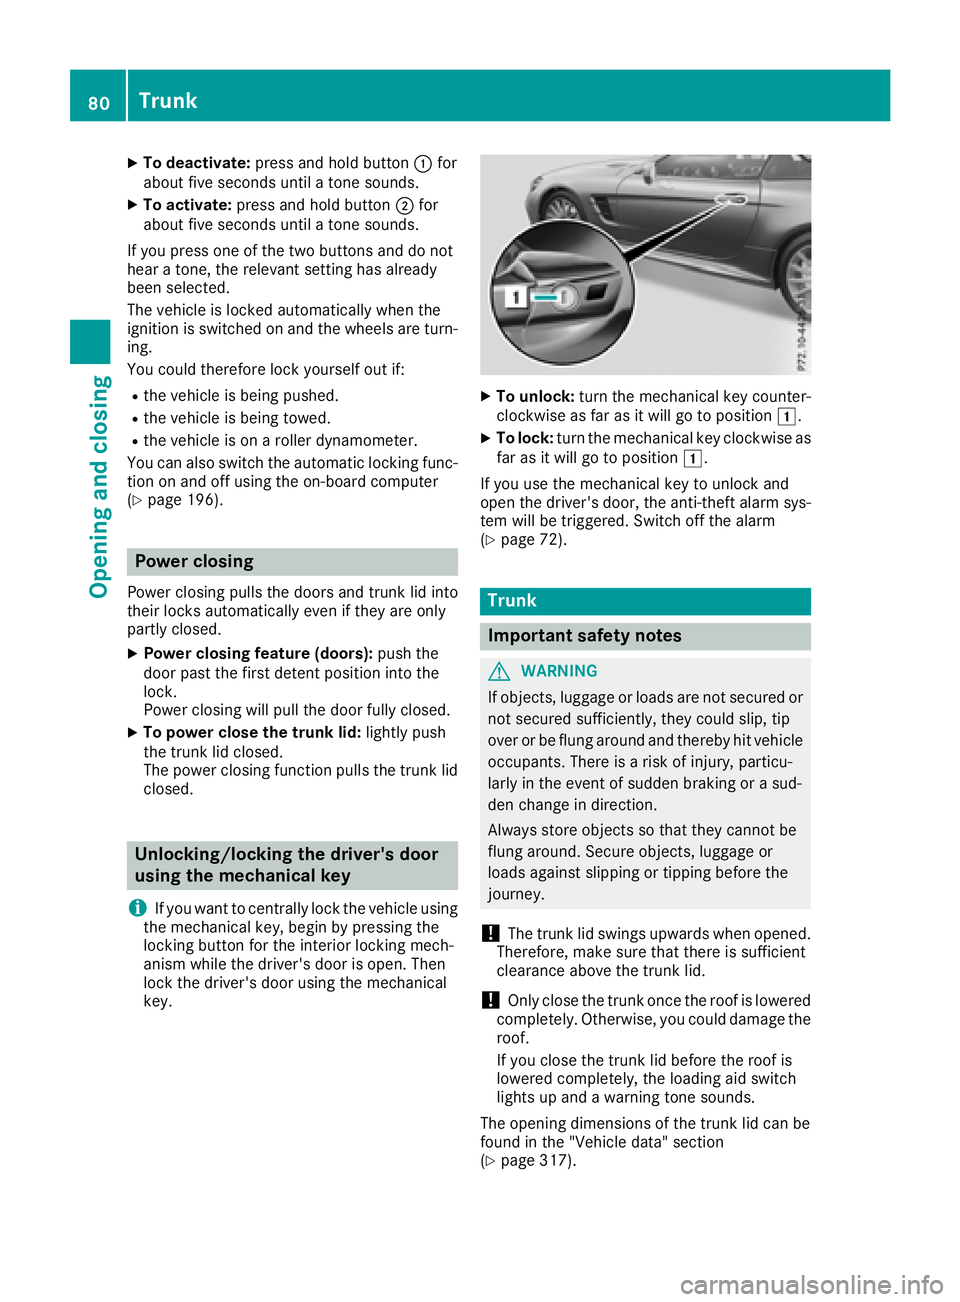
XTo unlock: turn the mechanical key counter-
clockwise as far as it will go to position 1.
XTo lock:turn the mechanical key clockwise as
far as it will go to position 1.
If you use the mechanical key to unlock and
open the driver's door, the anti-theft alarm sys-
tem will be triggered. Switch off the alarm
(
Ypage 72).
Trunk
Important safety notes
GWARNING
If objects, luggage or loads are not secured or
not secured sufficiently, they could slip, tip
over or be flung around and thereby hit vehicle
occupants. There is a risk of injury, particu-
larly in the event of sudden braking or a sud-
den change in direction.
Always store objects so that they cannot be
flung around. Secure objects, luggage or
loads against slipping or tipping before the
journey.
!The trunk lid swings upwards when opened.
Therefore, make sure that there is sufficient
clearance above the trunk lid.
!Only close the trunk once the roof is lowered
completely. Otherwise, you could damage the
roof.
If you close the trunk lid before the roof is
lowered completely, the loading aid switch
lights up and a warning tone sounds.
The opening dimensions of the trunk lid can be
found in the "Vehicle data" section
(
Ypage 317).
80Trunk
Opening and closing
Page 86 of 322
If the trunk lid closing procedure has been stop-
ped:
RMove your foot under the bumper again and
the trunk lid will open.
If the trunk lid opening procedure has been
stopped:
RMove your foot under the bumper again and
the trunk lid will close.
Opening/closing automatically from
inside
Important safety notes
GWARNING
Parts of the body could become trapped dur-
ing automatic closing of the trunk lid. In addi-
tion, people may be standing in the closing
area or may enter the closing area, e.g. chil-
dren, during the closing procedure. There is a
risk of injury.
Make sure that nobody is in the vicinity of the
closing area during the closing process.
Release the remote operating switch imme-
diately if somebody becomes trapped. To re-
open the trunk lid, pull on the remote operat-
ing switch.
GWARNING
The trunk lid can be automatically opened or
closed even if the SmartKey is not in the vehi- cle. If children are left unsupervised in the
vehicle, they could activate the functions.
There is a risk of injury.
When leaving the vehicle, always take the
SmartKey with you and lock the vehicle. Never
leave children unsupervised in the vehicle.
!The trunk lid swings upwards when opened.
Therefore, make sure that there is sufficient
clearance above the trunk lid.
The opening dimensions of the trunk lid can be
found in the "Vehicle data" section
(
Ypage 317).
Opening and closing
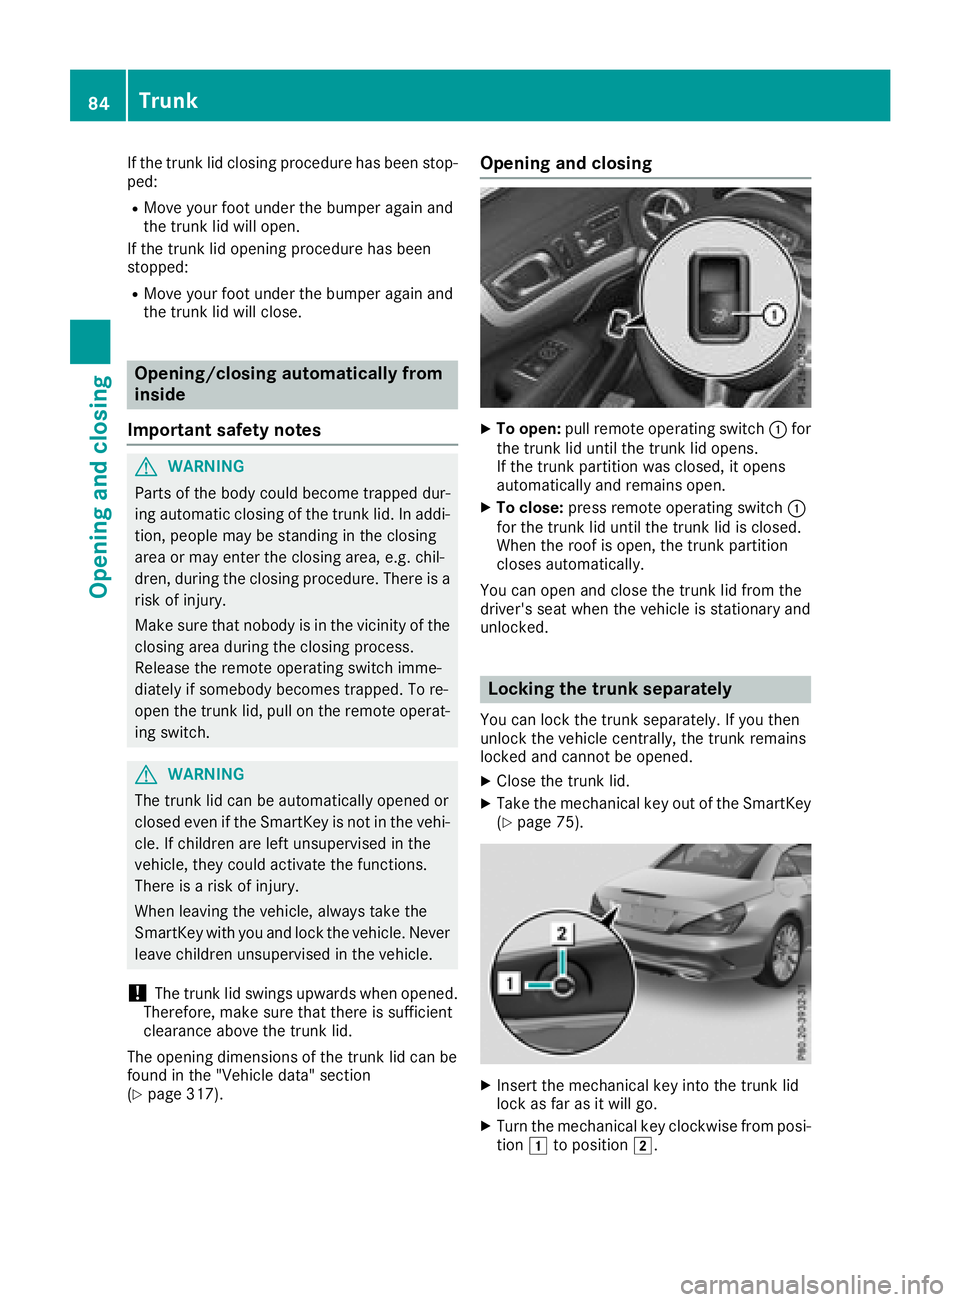
XTo open: pull remote operating switch :for
the trunk lid until the trunk lid opens.
If the trunk partition was closed, it opens
automatically and remains open.
XTo close: press remote operating switch :
for the trunk lid until the trunk lid is closed.
When the roof is open, the trunk partition
closes automatically.
You can open and close the trunk lid from the
driver's seat when the vehicle is stationary and
unlocked.
Locking the trunk separately
You can lock the trunk separately. If you then
unlock the vehicle centrally, the trunk remains
locked and cannot be opened.
XClose the trunk lid.
XTake the mechanical key out of the SmartKey
(Ypage 75).
XInsert the mechanical key into the trunk lid
lock as far as it will go.
XTurn the mechanical key clockwise from posi-
tion 1to position 2.
84Trunk
Opening and closing
Page 87 of 322
XRemove themechanical key.
XInser tth emechanical ke yint oth eSmartKey.
Unlocking the trunk (mechanical key)
!
The trunk lid swings upwards when opened.
Therefore ,mak esur ethat there is sufficien t
clearance abov eth etrunk lid.
If th etrunk canno tbe unlocked wit hth eSmart -
Key or KEYLESS-GO ,use th emechanical key.
If you use th emechanical ke yto unlock and
open th etrunk lid, th eanti-thef talarm system
will be triggered .Switc hoff th ealarm
(
Ypage 72).
XTak eth emechanical ke yout of th eSmartKey
(Ypage 75).
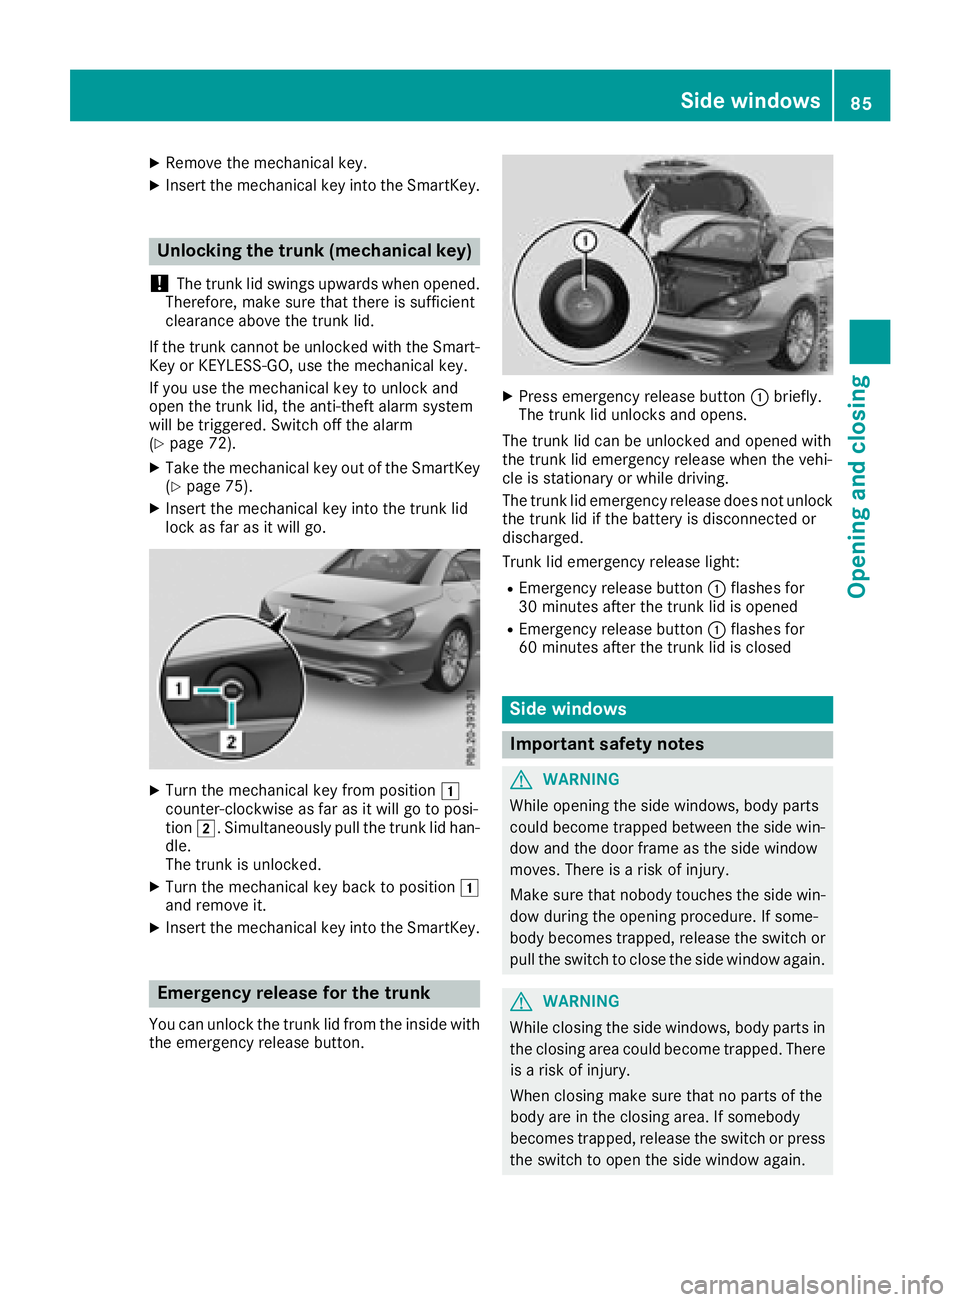
XInser tth emechanical ke yint oth etrunk lid
loc kas far as it will go.
XTurn th emechanical ke yfrom position 1
counter-clockwise as far as it will go to posi-
tion 2.Simultaneously pull th etrunk lid han -
dle.
The trunk is unlocked.
XTurn th emechanical ke ybac kto position 1
and remove it .
XInsertth emechanical ke yint oth eSmartKey.
Emergency release for the trunk
You can unlock th etrunk lid from th einside wit h
th eemergenc yrelease button.
XPress emergenc yrelease butto n: briefly.
The trunk lid unlocks and opens.
The trunk lid can be unlocke dand opened wit h
th etrunk lid emergenc yrelease when th evehi-
cle is stationary or while driving .
The trunk lid emergenc yrelease does no tunloc k
th etrunk lid if th ebattery is disconnected or
discharged.
Trun klid emergenc yrelease light:
REmergency release butto n: flashes for
30 minute safter th etrunk lid is opened
REmergency release butto n: flashes for
60 minute safter th etrunk lid is closed
Side windows
Important safety notes
GWARNIN G
Whil eopening th eside windows ,body part s
could become trapped between th eside win -
dow and th edoor frame as th eside window
moves. There is aris kof injury.
Mak esur ethat nobody touches th eside win -
dow during th eopening procedure .If some-
body become strapped ,release th eswitch or
pull th eswitch to close th eside window again .
GWARNING
Whil eclosin gth eside windows ,body part sin
th eclosin garea could become trapped .There
is aris kof injury.
When closin gmak esur ethat no part sof th e
body are in th eclosin garea. If somebod y
become strapped ,release th eswitch or press
th eswitch to open th eside window again .
Side windows85
Opening and closing
Z
Page 118 of 322
Problems with the "Cooling with air dehumidification" function
ProblemPossible causes/consequences andMSolutions
The indicator lamp in the
¿button flashes
three times or remains
off. The "Cooling with air
dehumidification" func-
tion cannot be switched
on.Cooling with air dehumidification has been deactivated due to a mal-
function.
XVisit a qualified specialist workshop.
Setting climate control to automatic
General notes
In automatic mode, the set temperature is main-
tained automatically at a constant level. The
system automatically regulates the temperature
of the dispensed air, the airflow and the air dis-
tribution.
The automatic mode functions optimally when
the "Cooling with air dehumidification" function
is activated. If necessary, cooling with air dehu-
midification can be deactivated.
If you deactivate the "Cooling with air-dehumid- ification" function, the air inside the vehicle will
not be cooled. The air inside the vehicle will also
not be dehumidified. The windows can fog up
more quickly. Therefore, deactivate the cooling
with air-dehumidification function only briefly.
Automatic control
XTurn the SmartKey to position 2in the igni-
tion lock (Ypage 122).
XSet the desired temperature.
XTo activate: press theÃbutton.
The indicator lamp in the Ãbutton lights
up. Automatic air distribution and airflow are
activated.
iWhen automatic mode is enabled, the cli-
mate mode can be selected (Ypage 116).
XTo switch to manual mode: press the_
button.
or
XPress the IorK button.
The indicator lamp in the Ãbutton goes
out.
Adjusting the climate mode settings
You can select the following climate mode set-
tings in automatic mode:
FOCUS high airflow, slightly cooler setting
MEDIUM medium airflow, standard setting
DIFFUSE low airflow, slightly warmer and draft- free setting
XTurn the SmartKey to position 2in the igni-
tion lock (Ypage 122).
XPress the Ãbutton.
XPress the ñbutton repeatedly until the
desired climate mode appears in the display.
Setting the temperature
Setting the temperature
Different temperatures can be set for the driv-
er's and front-passenger sides.
XTurn the SmartKey to position 2in the igni-
tion lock (Ypage 122).
XTurn control :or; counter-clockwise or
clockwise.
Only change the temperature setting in small
increments. Start at 72 ‡ (22 †).
iIf you turn controls :and ;counter-
clockwise to the lowest temperature setting,
air-recirculation mode may switch on auto-
matically, depending on the outside temper-
ature.
116Operating the climate control systems
Climate control
Page 119 of 322
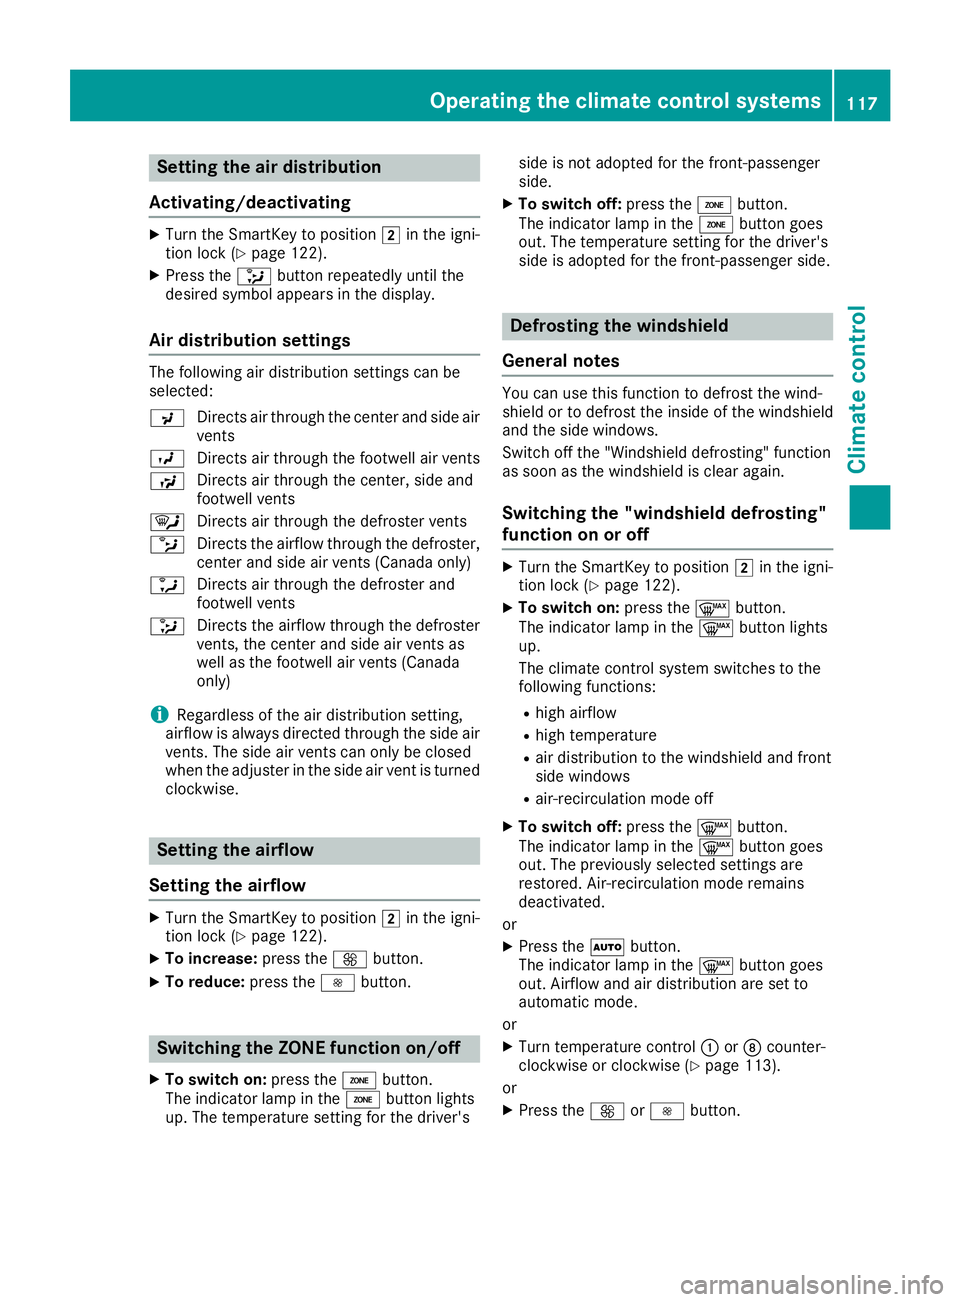
Setting the air distribution
Activating/deactivating
XTurn the SmartKey to position 2in the igni-
tion lock (Ypage 122).
XPress the _button repeatedly until the
desired symbol appears in the display.
Air distribution settings
The following air distribution settings can be
selected:
P Directs air through the center and side air
vents
O Directs air through the footwell air vents
S Directs air through the center, side and
footwell vents
¯ Directs air through the defroster vents
b Directs the airflow through the defroster,
center and side air vents (Canada only)
a Directs air through the defroster and
footwell vents
_ Directs the airflow through the defroster
vents, the center and side air vents as
well as the footwell air vents (Canada
only)
iRegardless of the air distribution setting,
airflow is always directed through the side air
vents. The side air vents can only be closed
when the adjuster in the side air vent is turned clockwise.
Setting the airflow
Setting the airflow
XTurn the SmartKey to position 2in the igni-
tion lock (Ypage 122).
XTo increase: press theKbutton.
XTo reduce: press theIbutton.
Switching the ZONE function on/off
XTo switch on: press theábutton.
The indicator lamp in the ábutton lights
up. The temperature setting for the driver's side is not adopted for the front-passenger
side.
XTo switch off:
press theábutton.
The indicator lamp in the ábutton goes
out. The temperature setting for the driver's
side is adopted for the front-passenger side.
Defrosting the windshield
General notes
You can use this function to defrost the wind-
shield or to defrost the inside of the windshield
and the side windows.
Switch off the "Windshield defrosting" function
as soon as the windshield is clear again.
Switching the "windshield defrosting"
function on or off
XTurn the SmartKey to position 2in the igni-
tion lock (Ypage 122).
XTo switch on: press the¬button.
The indicator lamp in the ¬button lights
up.
The climate control system switches to the
following functions:
Rhigh airflow
Rhigh temperature
Rair distribution to the windshield and front
side windows
Rair-recirculation mode off
XTo switch off: press the¬button.
The indicator lamp in the ¬button goes
out. The previously selected settings are
restored. Air-recirculation mode remains
deactivated.
or
XPress the Ãbutton.
The indicator lamp in the ¬button goes
out. Airflow and air distribution are set to
automatic mode.
or
XTurn temperature control :orD counter-
clockwise or clockwise (Ypage 113).
or
XPress the KorI button.
Operating the climate control systems117
Climate control
Page 122 of 322
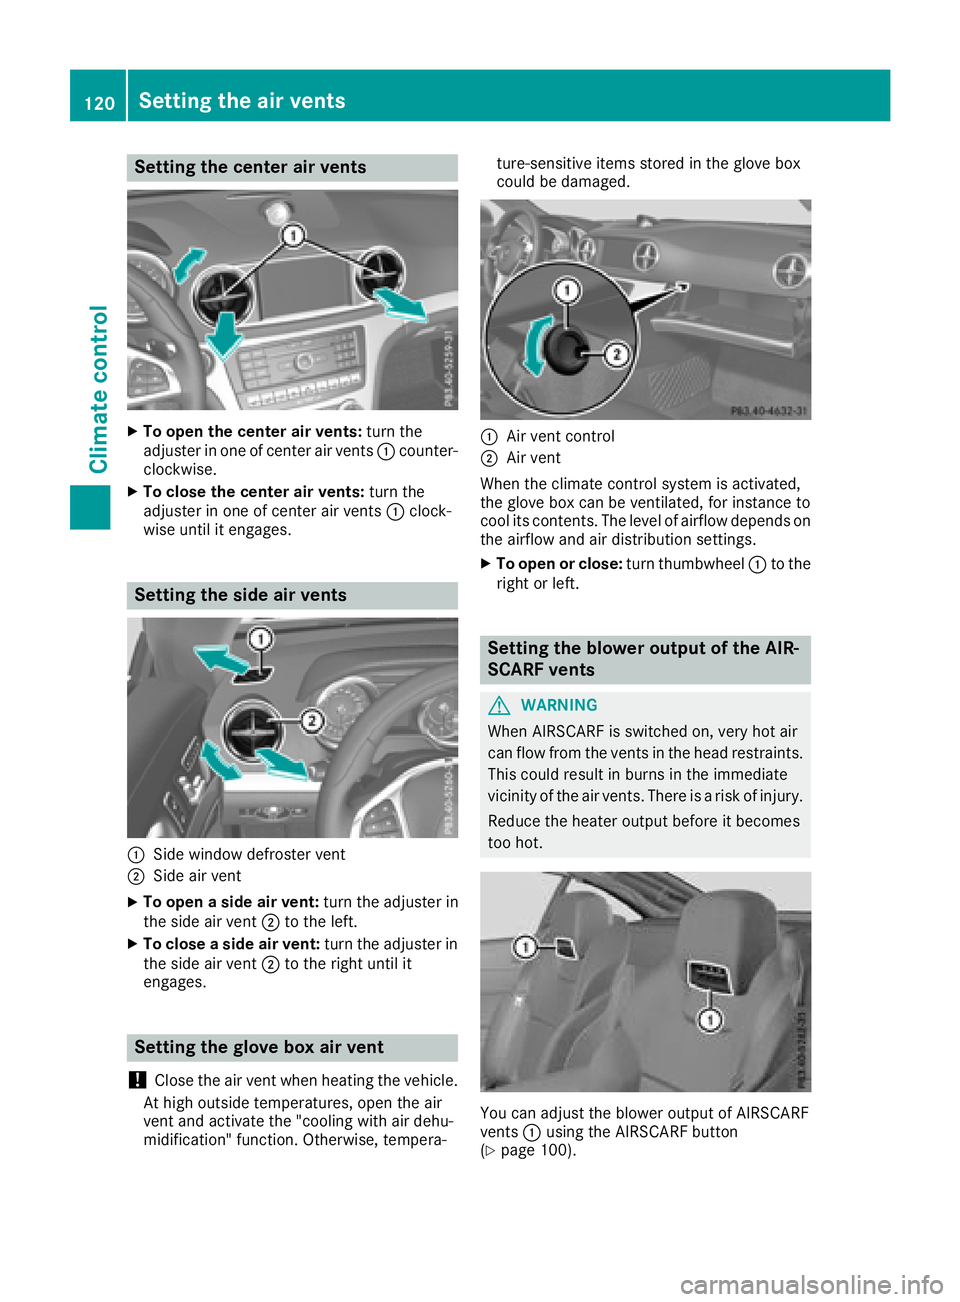
Setting the center air vents
XTo open the center air vents:turn the
adjuster in one of center air vents :counter-
clockwise.
XTo close the center air vents: turn the
adjuster in one of center air vents :clock-
wise until it engages.
Setting the side air vents
:Side window defroster vent
;Side air vent
XTo open a side air vent: turn the adjuster in
the side air vent ;to the left.
XTo close a side air vent: turn the adjuster in
the side air vent ;to the right until it
engages.
Setting the glove box air vent
!
Close the air vent when heating the vehicle.
At high outside temperatures, open the air
vent and activate the "cooling with air dehu-
midification" function. Otherwise, tempera- ture-sensitive items stored in the glove box
could be damaged.
:Air vent control
;Air vent
When the climate control system is activated,
the glove box can be ventilated, for instance to
cool its contents. The level of airflow depends on the airflow and air distribution settings.
XTo open or close: turn thumbwheel:to the
right or left.
Setting the blower output of the AIR-
SCARF vents
GWARNING
When AIRSCARF is switched on, very hot air
can flow from the vents in the head restraints. This could result in burns in the immediate
vicinity of the air vents. There is a risk of injury.
Reduce the heater output before it becomes
too hot.
You can adjust the blower output of AIRSCARF
vents :using the AIRSCARF button
(
Ypage 100).
120Setting the air vents
Climate control
Page 143 of 322
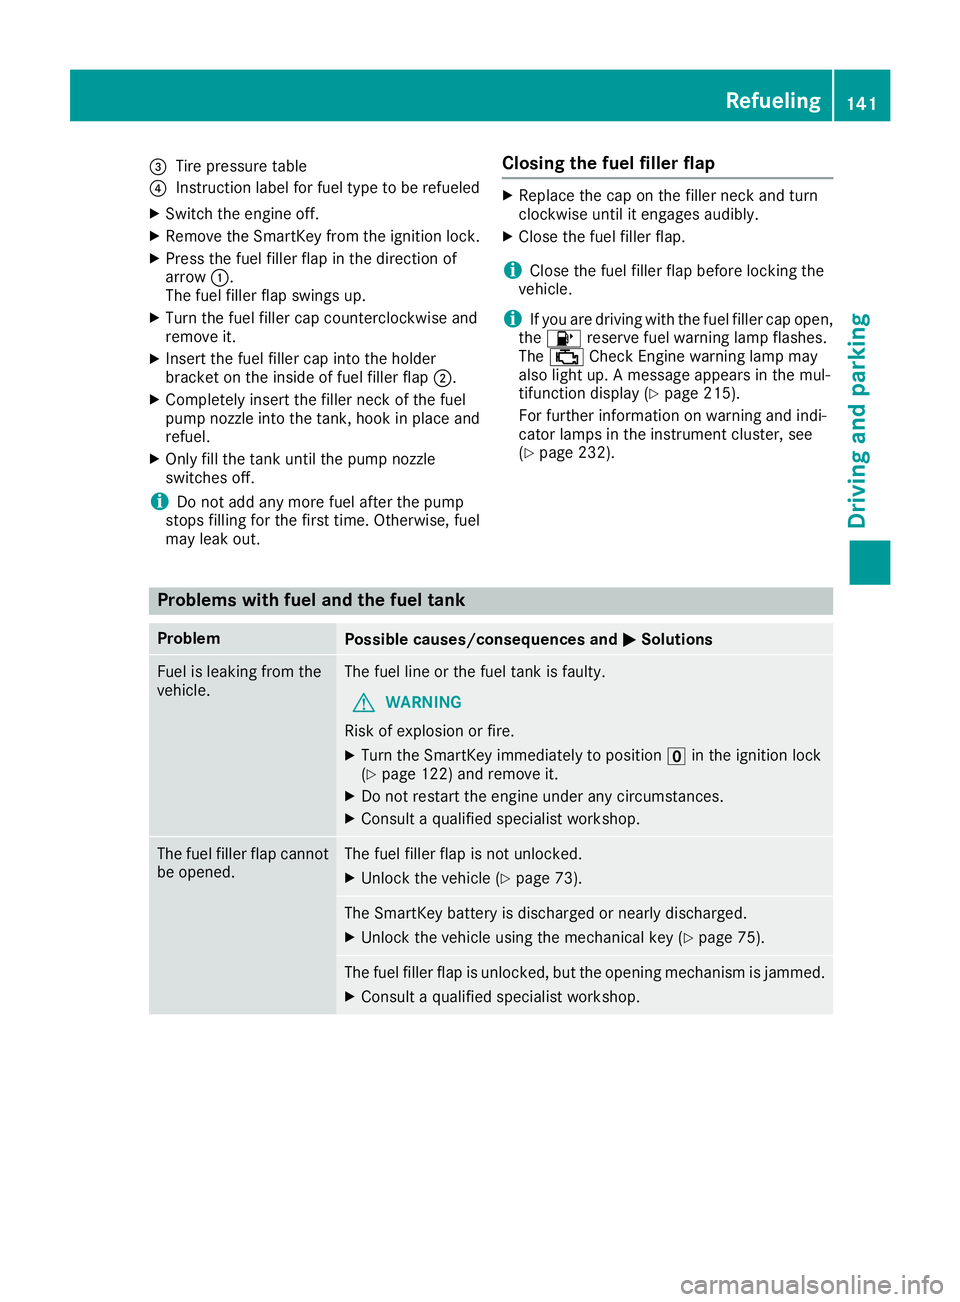
=Tire pressure table
?Instruction label for fuel type to be refueled
XSwitch the engine off.
XRemove the SmartKey from the ignition lock.
XPress the fuel filler flap in the direction of
arrow:.
The fuel filler flap swings up.
XTurn the fuel filler cap counterclockwise and
remove it.
XInsert the fuel filler cap into the holder
bracket on the inside of fuel filler flap ;.
XCompletely insert the filler neck of the fuel
pump nozzle into the tank, hook in place and
refuel.
XOnly fill the tank until the pump nozzle
switches off.
iDo not add any more fuel after the pump
stops filling for the first time. Otherwise, fuel
may leak out.
Closing the fuel filler flap
XReplace the cap on the filler neck and turn
clockwise until it engages audibly.
XClose the fuel filler flap.
iClose the fuel filler flap before locking the
vehicle.
iIf you are driving with the fuel filler cap open,
the 8 reserve fuel warning lamp flashes.
The ; Check Engine warning lamp may
also light up. A message appears in the mul-
tifunction display (
Ypage 215).
For further information on warning and indi-
cator lamps in the instrument cluster, see
(
Ypage 232).
Problems with fuel and the fuel tank
ProblemPossible causes/consequences and MSolutions
Fuel is leaking from the
vehicle.The fuel line or the fuel tank is faulty.
GWARNING
Risk of explosion or fire.
XTurn the SmartKey immediately to position uin the ignition lock
(Ypage 122) and remove it.
XDo not restart the engine under any circumstances.
XConsult a qualified specialist workshop.
The fuel filler flap cannot
be opened.The fuel filler flap is not unlocked.
XUnlock the vehicle (Ypage 73).
The SmartKey battery is discharged or nearly discharged.
XUnlock the vehicle using the mechanical key (Ypage 75).
The fuel filler flap is unlocked, but the opening mechanism is jammed.
XConsult a qualified specialist workshop.
Refueling141
Driving and parking
Z
Page 187 of 322
Important safety notes
GWARNING
If you operate information systems and com-
munication equipmen tintegrate din th evehi-
cle when driving ,you may be distracte dfrom
th etraffic situation .You could also lose con-
trol of th evehicle. Ther eis aris kof an acci-
dent.
Only operate this equipmen twhen th etraffic
situation permits. If you are no tsur ethat this
is possible ,park th evehicl epayin gattention
to traffic condition sand operate th eequip-
men twhen th evehicl eis stationary.
You must observ eth elegal requirements for th e
country in whic hyou are currentl ydriving when
operating th eon-board computer.
GWARNIN G
If th einstrumen tcluste rhas faile dor mal-
functioned, you may no trecognize function
restriction sin systems relevan tto safety. The
operating safet yof your vehicl emay be
impaired .Ther eis aris kof an accident.
Drive on carefully. Hav eth evehicl echecke d
at aqualified specialist workshop immedi-
ately.
The on-board computer only shows message sor
warning sfrom certain systems in th emultifunc-
tion display. You should therefor emak esur e
your vehicl eis operating safely at all times .
If th eoperating safet yof your vehicl eis
impaired ,pull ove ras soo nas it is saf eto do so.
Contac t aqualified specialist workshop.
Fo ran overview, see th einstrumen tpanel illus-
tration (
Ypage 33).
Displays and operation
Instrument cluster lighting
The lighting in th einstrumen tcluster, in th edis-
plays and th econtrol sin th evehicl einterior can
be adjusted usin gth ebrightness control knob.
The brightness control knob is locate don th e
botto mleftof th einstrumen tcluste r
(
Ypage 33).
XTurn th ebrightness control knob clockwise or
counter-clockwise.
If you tur nth eligh tswitch (
Ypage 106) to th e
Ã, TorL position ,th ebrightness
will depend upon th ebrightness of th eambi -
en tlight.
The ligh tsensor in th einstrumen tcluste r
automatically control sth ebrightness of th e
multifunction display. In daylight, th edisplays
in th einstrumen tcluste rare no tilluminated.
Speedometer with segments
The segments in th espeedometer indicat e
whic hspee drange is available.
RCruis econtrol activated (Ypage 149):
The segments ligh tup from th estore dspee d
to th emaximum speed.
RDistanc ePilot DISTRONI Cis activated
(Ypage 151):
On eor two segments in th eset spee drange
ligh tup.
RDistanc ePilot DISTRONI Cdetects avehicl ein
fron tmoving mor eslowly than th estore d
speed:
The segments between th espee dof th evehi-
cle in fron tand th estore dspee dligh tup.
Tachometer
!
Do no tdriv ein th eoverrevving range, as this
could damag eth eengine.
The red ban din th etachometer indicates th e
engine's overrevving range.
The fuel suppl yis interrupted to protect th e
engin ewhen th ered ban dis reached.
Outside temperature display
You should pay special attention to road condi-
tion swhen temperatures are aroun dfreezing
point.
Bea rin min dthat th eoutside temperature dis-
play indicates th etemperature measured and
does no trecord th eroad temperature.
The outside temperature display is in th emulti-
function display (
Ypage 187).
A chang ein th eoutside temperature is shown in
th emultifunction display after adelay.
Displays and operation185
On-board computer and displays
Z