2018 MERCEDES-BENZ SL ROADSTER air condition
[x] Cancel search: air conditionPage 94 of 322
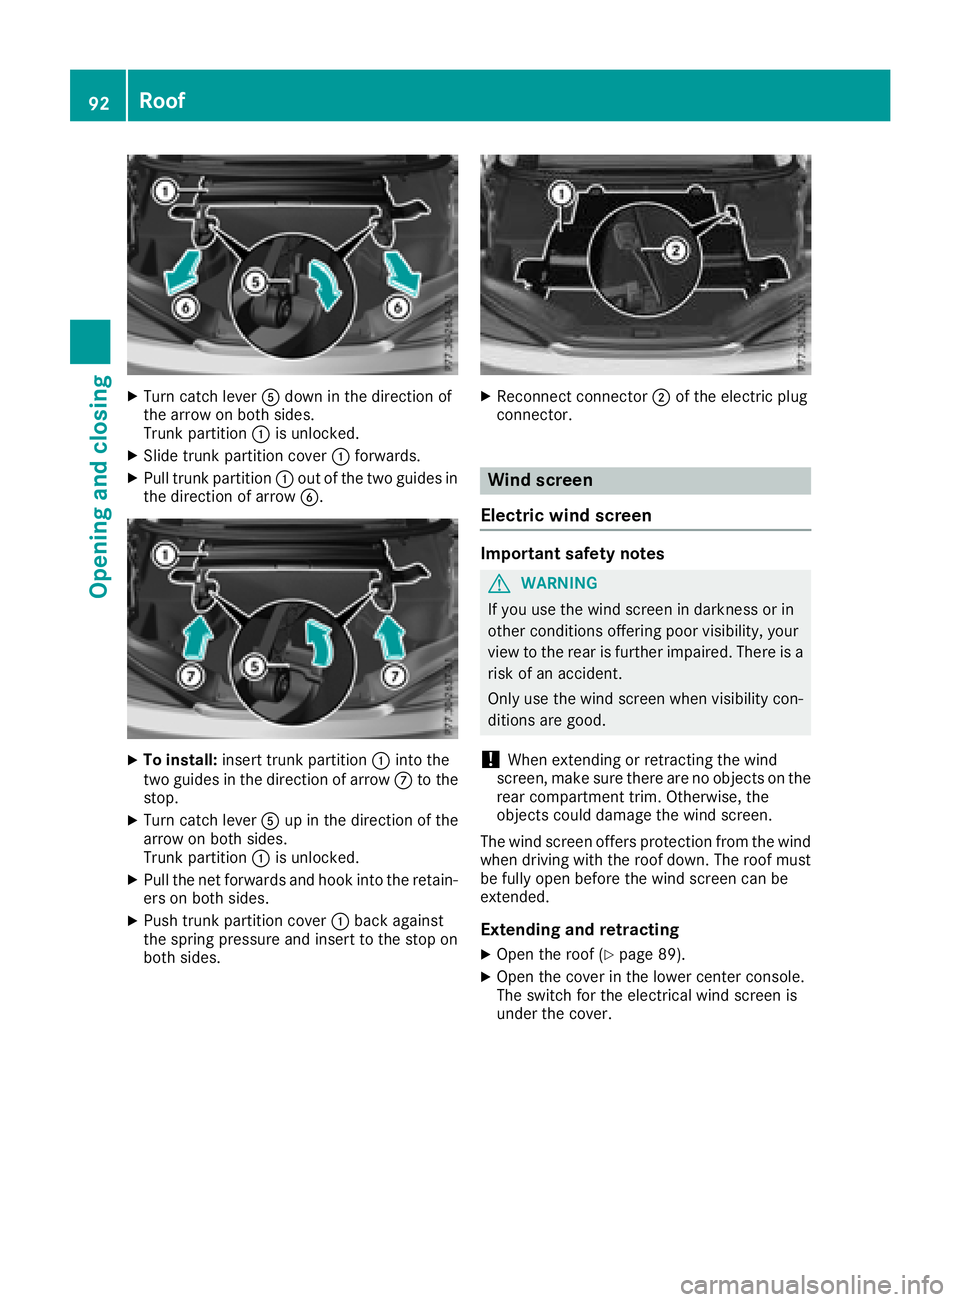
XTurn catch leverAdown in the direction of
the arrow on both sides.
Trunk partition :is unlocked.
XSlide trunk partition cover :forwards.
XPull trunk partition :out of the two guides in
the direction of arrow B.
XTo install:insert trunk partition :into the
two guides in the direction of arrow Cto the
stop.
XTurn catch lever Aup in the direction of the
arrow on both sides.
Trunk partition :is unlocked.
XPull the net forwards and hook into the retain-
ers on both sides.
XPush trunk partition cover :back against
the spring pressure and insert to the stop on
both sides.
XReconnect connector ;of the electric plug
connector.
Wind screen
Electric wind screen
Important safety notes
GWARNING
If you use the wind screen in darkness or in
other conditions offering poor visibility, your
view to the rear is further impaired. There is a
risk of an accident.
Only use the wind screen when visibility con-
ditions are good.
!When extending or retracting the wind
screen, make sure there are no objects on the
rear compartment trim. Otherwise, the
objects could damage the wind screen.
The wind screen offers protection from the wind
when driving with the roof down. The roof must
be fully open before the wind screen can be
extended.
Extending and retracting
XOpen the roof (Ypage 89).
XOpen the cover in the lower center console.
The switch for the electrical wind screen is
under the cover.
92Roof
Opening and closing
Page 97 of 322
Correct driver's seat position
GWARNING
You could lose control of your vehicle if you do the following while driving:
Radjust the driver's seat, head restraint,
steering wheel or mirrors
Rfasten the seat belt
There is a risk of an accident.
Adjust the driver's seat, head restraint, steer-
ing wheel and mirror and fasten your seat belt before starting the engine.
XObserve the safety guidelines on seat adjust-
ment (Ypage 95).
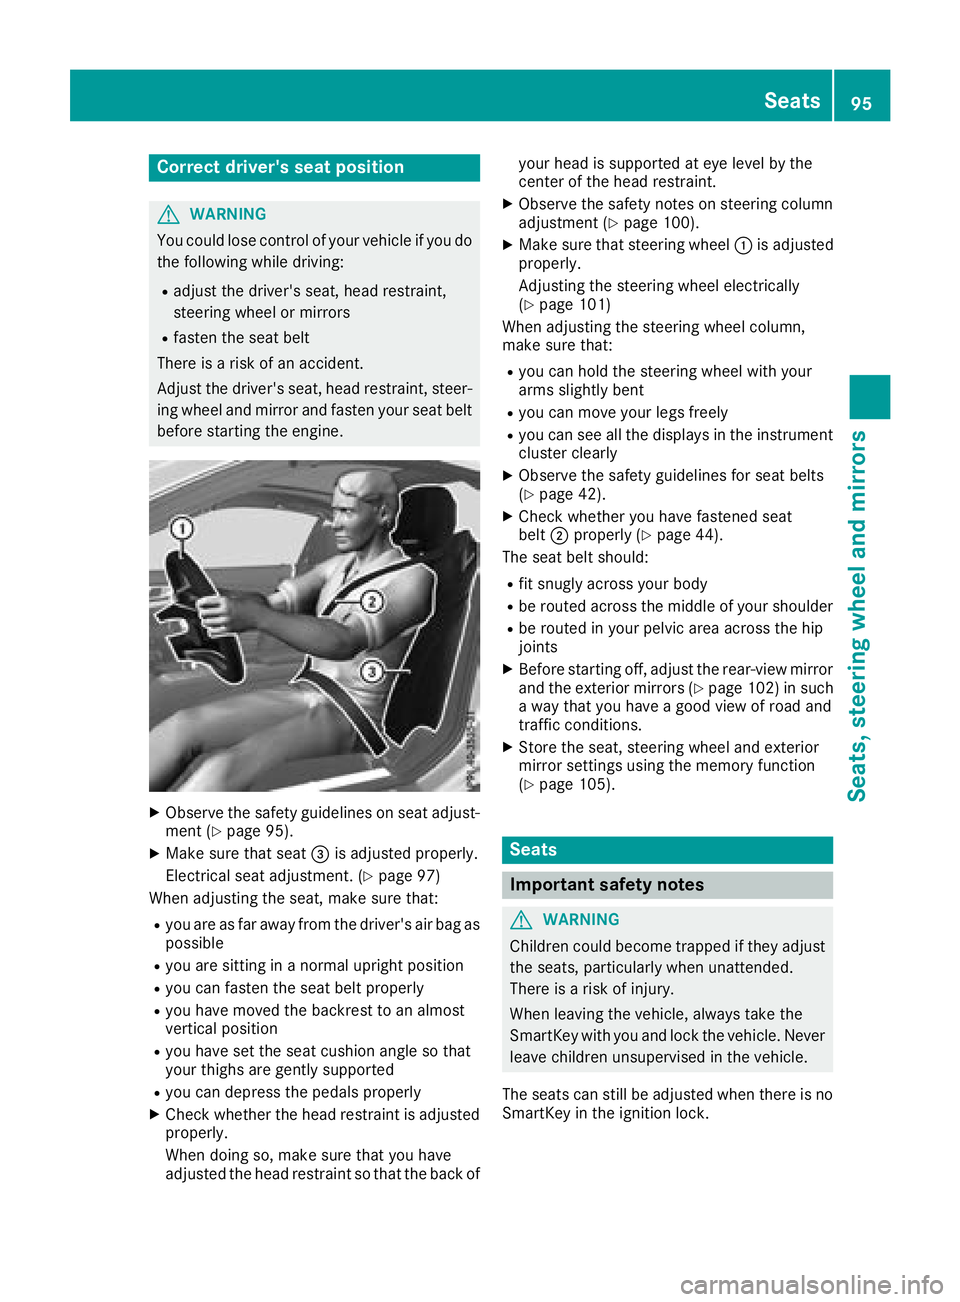
XMake sure that seat =is adjusted properly.
Electrical seat adjustment. (
Ypage 97)
When adjusting the seat, make sure that:
Ryou are as far away from the driver's air bag as
possible
Ryou are sitting in a normal upright position
Ryou can fasten the seat belt properly
Ryou have moved the backrest to an almost
vertical position
Ryou have set the seat cushion angle so that
your thighs are gently supported
Ryou can depress the pedals properly
XCheck whether the head restraint is adjusted
properly.
When doing so, make sure that you have
adjusted the head restraint so that the back of your head is supported at eye level by the
center of the head restraint.
XObserve the safety notes on steering column
adjustment (Ypage 100).
XMake sure that steering wheel
:is adjusted
properly.
Adjusting the steering wheel electrically
(
Ypage 101)
When adjusting the steering wheel column,
make sure that:
Ryou can hold the steering wheel with your
arms slightly bent
Ryou can move your legs freely
Ryou can see all the displays in the instrument cluster clearly
XObserve the safety guidelines for seat belts
(Ypage 42).
XCheck whether you have fastened seat
belt ;properly (Ypage 44).
The seat belt should:
Rfit snugly across your body
Rbe routed across the middle of your shoulder
Rbe routed in your pelvic area across the hip
joints
XBefore starting off, adjust the rear-view mirror
and the exterior mirrors (Ypage 102) in such
a way that you have a good view of road and
traffic conditions.
XStore the seat, steering wheel and exterior
mirror settings using the memory function
(
Ypage 105).
Seats
Important safety notes
GWARNING
Children could become trapped if they adjust
the seats, particularly when unattended.
There is a risk of injury.
When leaving the vehicle, always take the
SmartKey with you and lock the vehicle. Never
leave children unsupervised in the vehicle.
The seats can still be adjusted when there is no
SmartKey in the ignition lock.
Seats95
Seats, steering wheel and mirrors
Z
Page 105 of 322
mirror using button=as long as the indicator
lamp is lit.
XPress button =up, down, to the right or to
the left.
The exterior mirror must be set to a position
that provides you with a good overview of
traffic conditions.
The convex exterior mirrors provide a larger field
of vision.
The exterior mirrors are automatically heated
after starting the vehicle if the rear window
defroster is switched on and the outside tem-
perature is low. Mirror heating lasts up to 10
minutes.
iYou can also heat up the exterior mirrors
manually by switching on the rear window
defroster.
Folding the exterior mirrors in or out
electrically
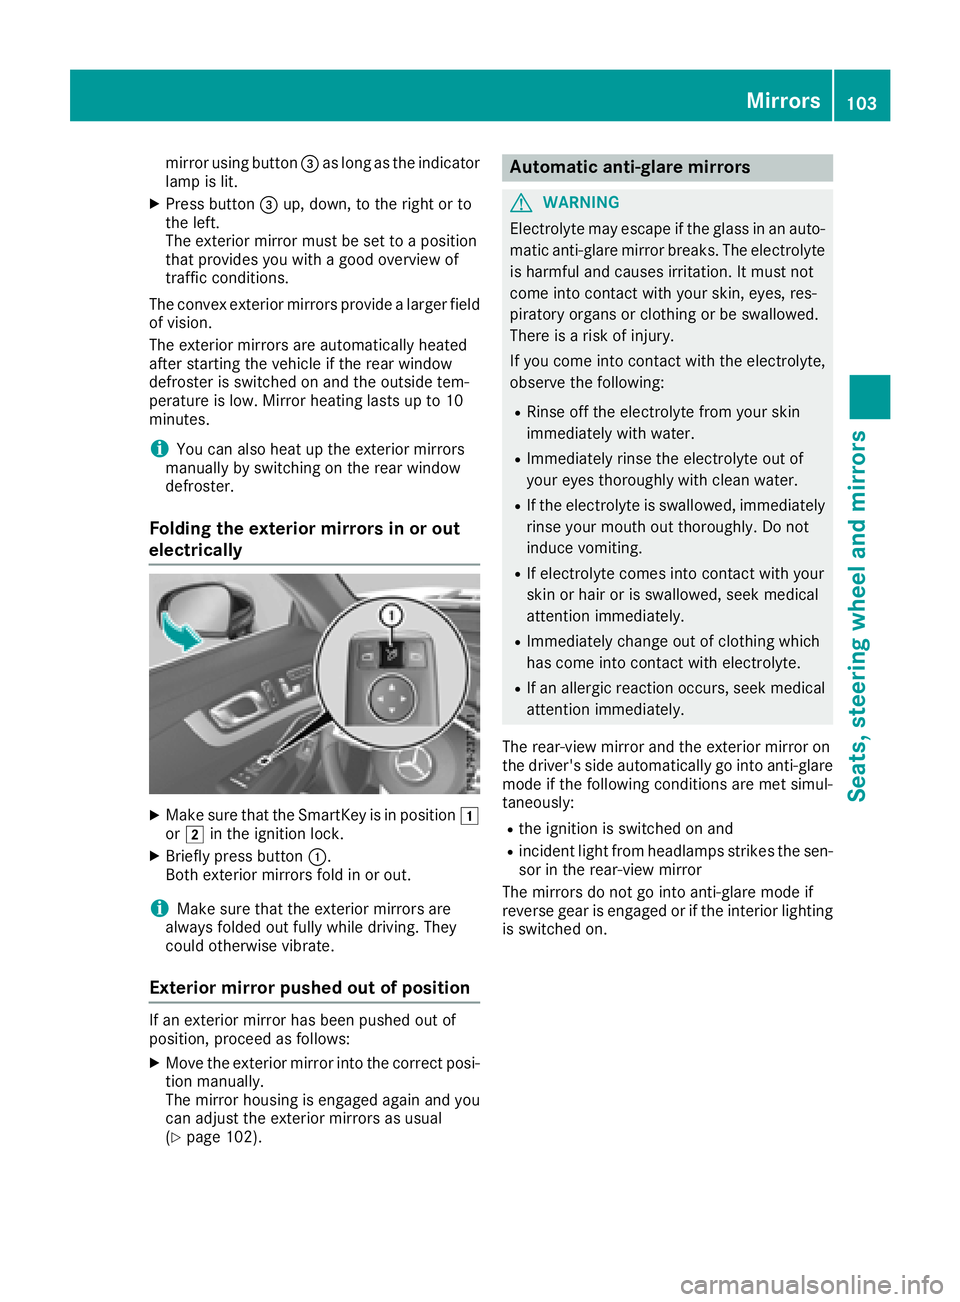
XMake sure that the SmartKey is in position 1
or 2 in the ignition lock.
XBriefly press button :.
Both exterior mirrors fold in or out.
iMake sure that the exterior mirrors are
always folded out fully while driving. They
could otherwise vibrate.
Exterior mirror pushed out of position
If an exterior mirror has been pushed out of
position, proceed as follows:
XMove the exterior mirror into the correct posi-
tion manually.
The mirror housing is engaged again and you
can adjust the exterior mirrors as usual
(
Ypage 102).
Automatic anti-glare mirrors
GWARNING
Electrolyte may escape if the glass in an auto-
matic anti-glare mirror breaks. The electrolyte
is harmful and causes irritation. It must not
come into contact with your skin, eyes, res-
piratory organs or clothing or be swallowed.
There is a risk of injury.
If you come into contact with the electrolyte,
observe the following:
RRinse off the electrolyte from your skin
immediately with water.
RImmediately rinse the electrolyte out of
your eyes thoroughly with clean water.
RIf the electrolyte is swallowed, immediately
rinse your mouth out thoroughly. Do not
induce vomiting.
RIf electrolyte comes into contact with your
skin or hair or is swallowed, seek medical
attention immediately.
RImmediately change out of clothing which
has come into contact with electrolyte.
RIf an allergic reaction occurs, seek medical
attention immediately.
The rear-view mirror and the exterior mirror on
the driver's side automatically go into anti-glare
mode if the following conditions are met simul-
taneously:
Rthe ignition is switched on and
Rincident light from headlamps strikes the sen-
sor in the rear-view mirror
The mirrors do not go into anti-glare mode if
reverse gear is engaged or if the interior lighting
is switched on.
Mirrors103
Seats, steering wheel and mirrors
Z
Page 115 of 322
Overview of climate control systems
General notes
Observe the settings recommended on the fol-
lowing pages. The windows could otherwise fog
up.
To prevent the windows from fogging up:
Rswitch off climate control only briefly
Rswitch on air-recirculation mode only briefly
Rswitch on the cooling with air dehumidifica-
tion function
Rswitch on the defrost windshield function
briefly, if required
Climate control regulates the temperature and
the humidity in the vehicle interior and filters
undesirable substances out of the air. Climate control can only be operated when the
engine is running. Optimum operation is only
achieved with the side windows and roof closed.
iWhen the weather is warm, ventilate the
vehicle for a brief period. This will speed up
the cooling process and the desired vehicle
interior temperature will be reached more
quickly.
iIt is possible that the dehumidification func-
tion of the climate control system may be
activated automatically an hour after the
SmartKey has been removed. The vehicle is
then ventilated for 30 minutes to dry the air-
conditioning system.
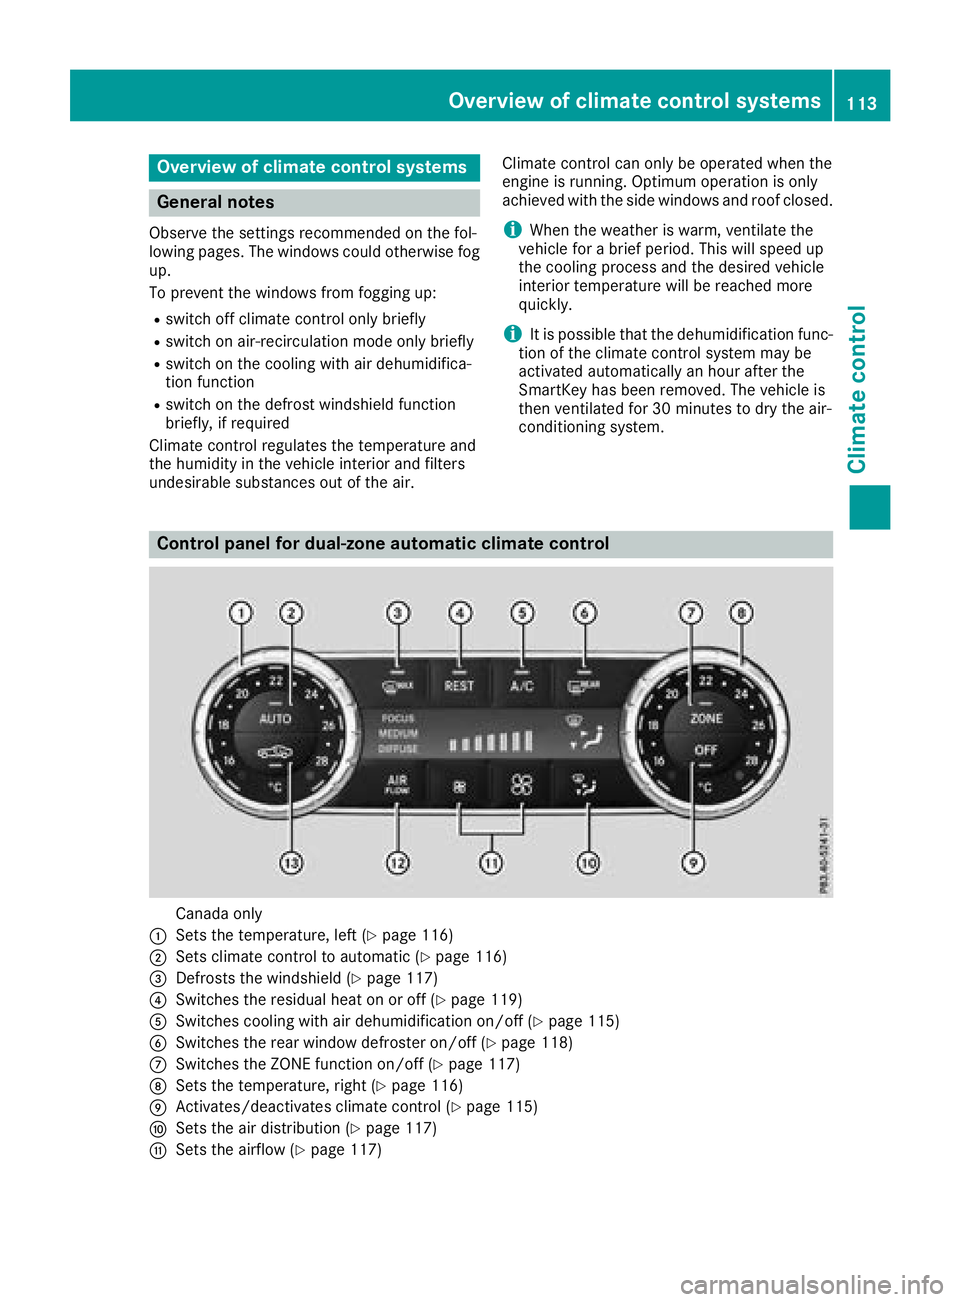
Control panel for dual-zone automatic climate control
Canada only
:Sets the temperature, left (Ypage 116)
;Sets climate control to automatic (Ypage 116)
=Defrosts the windshield (Ypage 117)
?Switches the residual heat on or off (Ypage 119)
ASwitches cooling with air dehumidification on/off (Ypage 115)
BSwitches the rear window defroster on/off (Ypage 118)
CSwitches the ZONE function on/off (Ypage 117)
DSets the temperature, right (Ypage 116)
EActivates/deactivates climate control (Ypage 115)
FSets the air distribution (Ypage 117)
GSets the airflow (Ypage 117)
Overview of climate control systems113
Climate control
Page 127 of 322
iUpshifts take place at higher engine speeds
after a cold start. This helps the catalytic con-
verter to reach its operating temperature
more quickly.
Information on the automatic release of the
electric parking brake (
Ypage 143).
Hill start assist
Hill start assist helps you when pulling away
forward or in reverse on an uphill gradient. It
holds the vehicle for a short time after you have
removed your foot from the brake pedal. This
gives you enough time to move your foot from
the brake pedal to the accelerator pedal and to
depress it before the vehicle begins to roll.
GWARNING
After a short time, hill start assist will no lon-
ger brake your vehicle and it could roll away.
There is a risk of an accident and injury.
Therefore, quickly move your foot from the
brake pedal to the accelerator pedal. Never
leave the vehicle when it is held by hill start
assist.
Hill start assist is not active if:
Ryou are pulling away on a level road or on a
downhill gradient
Rthe transmission is in position i
Rthe electric parking brake is applied
RESP®is malfunctioning
ECO start/stop function
Introduction
The ECO start/stop function switches the
engine off automatically if the vehicle is stopped
under certain conditions.
The engine starts automatically when the driver
wants to pull away again. The ECO start/stop
function thereby helps you to reduce the fuel
consumption and emissions of your vehicle.
Important safety notes
GWARNING
If the engine is switched off automatically and
you exit the vehicle, the engine is restarted
automatically. The vehicle may begin moving.
There is a risk of accident and injury.
If you wish to exit the vehicle, always turn off
the ignition and secure the vehicle against
rolling away.
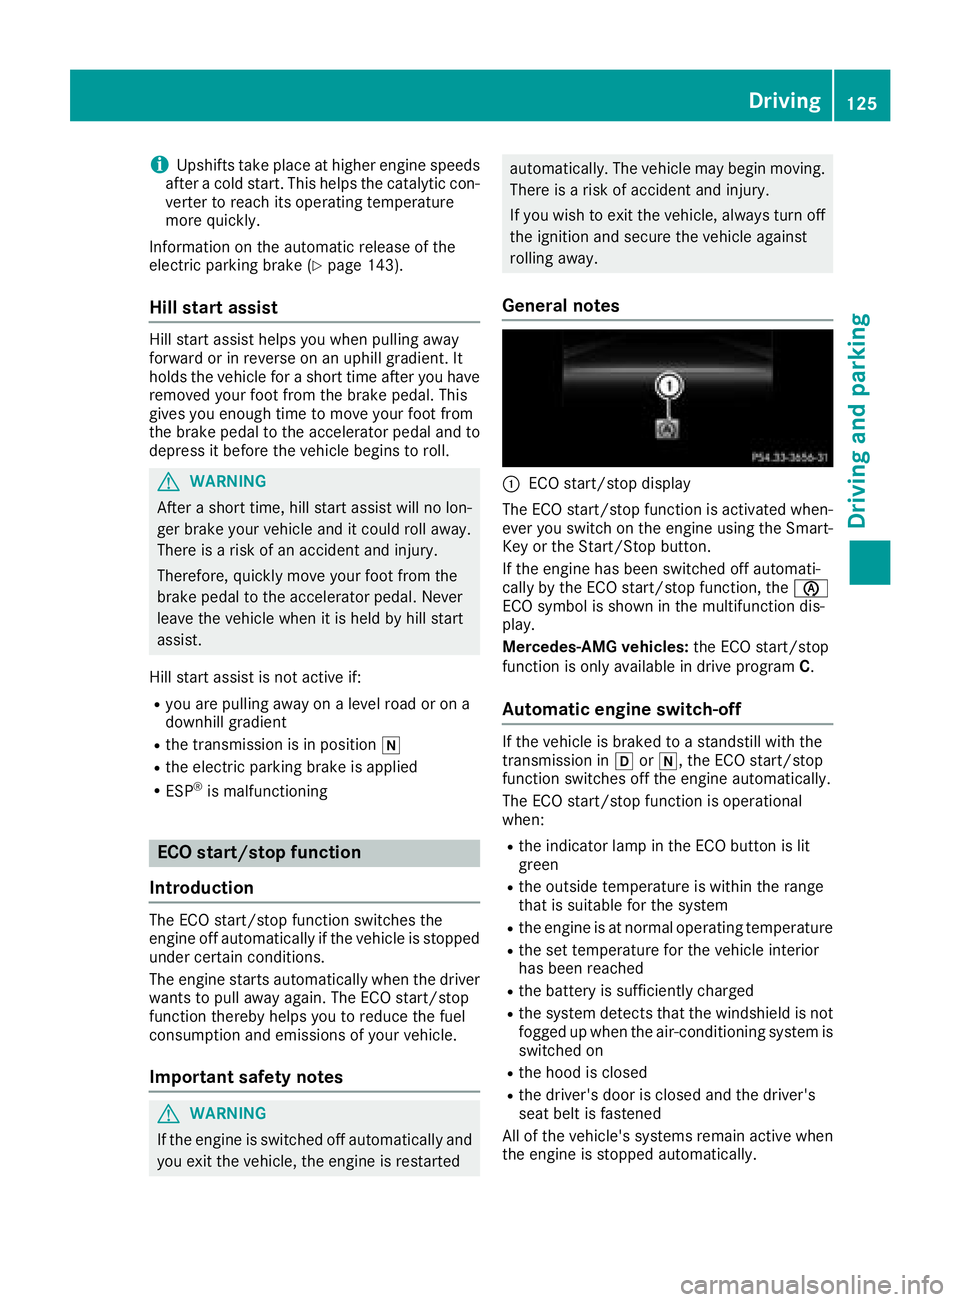
General notes
:ECO start/stop display
The ECO start/stop function is activated when- ever you switch on the engine using the Smart-
Key or the Start/Stop button.
If the engine has been switched off automati-
cally by the ECO start/stop function, the è
ECO symbol is shown in the multifunction dis-
play.
Mercedes-AMG vehicles: the ECO start/stop
function is only available in drive program C.
Automatic engine switch-off
If the vehicle is braked to a standstill with the
transmission inhori, the ECO start/stop
function switches off the engine automatically.
The ECO start/stop function is operational
when:
Rthe indicator lamp in the ECO button is lit
green
Rthe outside temperature is within the range
that is suitable for the system
Rthe engine is at normal operating temperature
Rthe set temperature for the vehicle interior
has been reached
Rthe battery is sufficiently charged
Rthe system detects that the windshield is not
fogged up when the air-conditioning system is switched on
Rthe hood is closed
Rthe driver's door is closed and the driver's
seat belt is fastened
All of the vehicle's systems remain active when
the engine is stopped automatically.
Driving125
Driving and parking
Z
Page 128 of 322
All vehicles (except Mercedes-AMG vehi-
cles):automat icengine switch-off can take
plac e a maximum of four times ina row (initial
stop, then three subsequent stops).
Mercedes-AMG vehicles: the number of con-
secutive automat icengine switch-offs isunlimi-
te d.
The HOLD function can beactivated ifthe
engine has been switched off automatically. It is
then not necessary to continue applying the
brakes during the automat icstop phase. When
you depr ess the accelerator pedal,the engine
starts automatically and the braking effect of
the HOLD function isdeactivate d.
Automatic engine start
The engine starts automatically if:
Ryouswitch off the ECO start /stop function by
pressing the ECO button
Rin transmission position hori, the brake
pedal isreleased and the HOLD function isnot
active
Ryou depr ess the accelerator pedal
Ryou engage reverse gear k
Ryou move the transmission out of position j
Ryouswitch to drive program S+
Ryouswitch to drive program Sor M
(Mercedes-AMG veh icles)
Ryou unfasten your seat beltor open the driv-
er's door
Rthe veh iclestarts to roll
Rthe brake system requires th is
Rthe temperatureinthe veh icleinterior devi-
ates from the set range
Rthe system detects moisture on the wind-
shield when the air-conditioning system is
swit ched on
Rthe battery's condition of charge istoo low
Sh ifting the transmission to position jdoes
not start the engine.
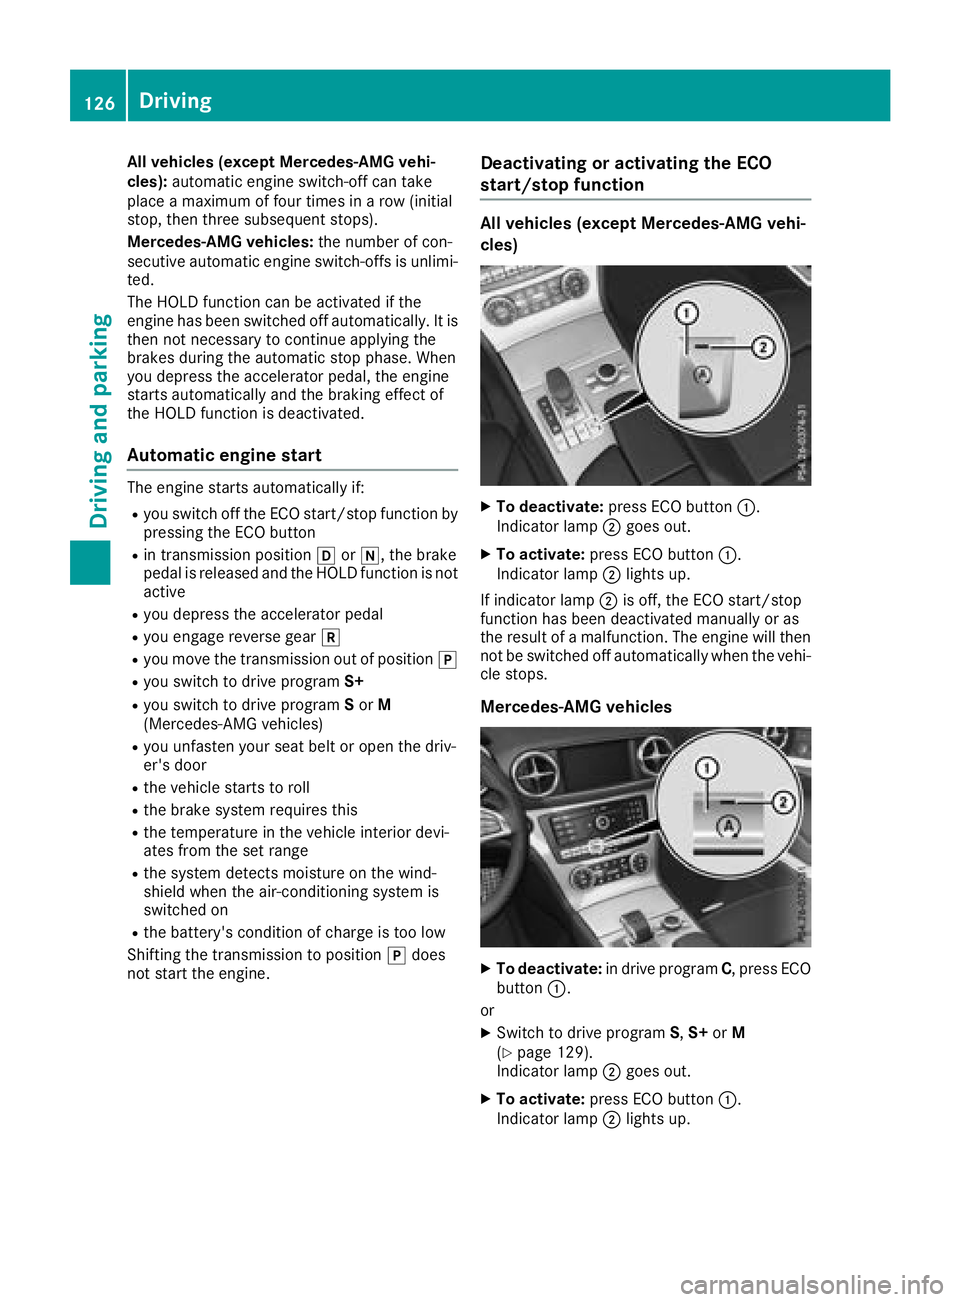
Deactivating or activating the ECO
start/stop function
All vehicles (except Mercedes-AMG vehi-
cles)
XTo deactivate: press ECO button :.
In dicator lamp ;goes out.
XTo activate: press ECO button :.
In dicator lamp ;lights up.
If indicator lamp ;is off, the ECO start/stop
function has been deactivated manually or as
the result of a malfunction. The engine willthen
not be switched off automatically when the vehi-
cle stops.
Mercedes-AMG vehicles
XTo deactivate: indrive program C, press ECO
button :.
or
XSwit ch to drive program S,S+ orM
(Ypage 129).
In dicator lamp ;goes out.
XTo activate: press ECO button :.
Indicator lamp ;lights up.
126Driving
Driving and parking
Page 149 of 322
you to avoid overheating thebrakes and wear -
in g them out excessively.
Whe nmakin guse of th eengin ebrakin g
effect, it is possibl ethat adrive whee lmay no t
tur nfor som etime, e.g. in th ecas eof sud-
denly changin gor slipper yroa dsurfac econ-
ditions. This could caus edamage to th edrive
train .This typ eof damage is no tcovered by
th eMercedes-Ben zwarranty.
Change into alower gear in goo dtime on lon g
and steep downhill gradients .This is especially
important if th evehicl eis laden .
This also applies if you hav eactivated cruise
control or Distanc ePilo tDISTRONIC.
Heavy and light loads
GWARNIN G
If you res tyour foo ton th ebrak epedal while
driving, th ebrakin gsystem can overheat. This
increase sth estopping distanc eand can eve n
caus eth ebrakin gsystem to fail .There is a
ris kof an accident.
Never use th ebrak epedal as afootrest .Never
depress th ebrak epedal and th eaccelerato r
pedal at th esam etime.
!Depressing th ebrak epedal constantl y
result sin excessive and premature wear to
th ebrak epads .
If th ebrakes hav ebeen subjecte dto aheav y
load, do no tstop th evehicl eimmediately, but
drive on for ashort while .This allows th eairflow
to cool th ebrakes mor equickly.
Wet roads
If you hav edriven for alon gtime in heav yrain
without braking, there may be adelaye dreac -
tion from th ebrakes when brakin gfor th efirst
time. This may also occur after th evehicl ehas
been washed or driven through deep water.
You then hav eto depress th ebrak epedal mor e
firmly. Maintai n agreate rdistanc efrom th e
vehicl ein front.
Afte rdrivin gon awet roa dor havin gth evehicl e
washed, brak efirmly while payin gattention to
th etraffic conditions. This will warm up th e
brak ediscs, thereby drying them mor equickl y
and protectin gthem against corrosion.
Limited braking perfor mance onsalt-
treated roads
If you drive on salted roads, alayer of salt resi-
due may for mon th ebrak edisc sand brak e
pads .This can result in asignificantly longer
brakin gdistance.
RIn order to preven tany salt build-up, apply th e
brakes occasionally while payin gattention to
th etraffic conditions.
RCarefull ydepress th ebrak epedal and th e
beginnin gand en dof ajourney.
RMaintai n agreate rdistanc eto th evehicl e
ahead .
Servicing the brakes
!The brak eflui dlevel may be to olow, if:
Rif th ered brak ewarnin glamp lights up in
th einstrumen tcluste rand
Ryou hear awarnin gtone while th eengin eis
running
Observ eadditional warnin gmessage sin th e
multifunction display.
The brak eflui dlevel may be to olow due to
brak epad wear or leakin gbrak elines.
Hav eth ebrak esystem checke dimmediately.
Consult aqualified specialist workshop to
arrang ethis.
!As th eES P®system operate sautomatically,
th eengin eand th eignition mus tbe switched
off (the SmartKey mus tbe in position uor
1 in th eignition loc kor th eStart/Sto pbut -
to nmus tbe in position uor1), if:
Rtheparkin gbrak eis tested usin g abrak e
dynamometer.
Rth evehicl eis towed wit hth efron taxl e
raised.
Braking triggered automatically by ES P
®may
caus esevere damage to th ebrak esystem.
Al lchecks and maintenance wor kon th ebrak e
system mus tbe carrie dout at aqualified spe -
cialist workshop .
Hav ebrak epads installed and brak eflui d
replaced at aqualified specialist workshop .
If th ebrak esystem has only been subjec tto
moderat eloads ,you should test th efunctional-
it y of your brakes at regular intervals.
In forma
tion on BA
S(Brake Assist) (Ypage 60)
and on Brake Assis twit hCross-Traffic Assis t
(
Ypage 61).
Driving tips147
Driving and parking
Z
Page 150 of 322
Mercedes-Benz recommends that you only have
brake pads/linings installed on your vehicle
which have been approved for Mercedes-Benz
vehicles or which correspond to an equivalent
quality standard. Brake pads/linings which have
not been approved for Mercedes-Benz vehicles
or which are not of an equivalent quality could
affect your vehicle's operating safety.
Mercedes-Benz recommends that you only use
brake fluid that has been specially approved for
your vehicle by Mercedes-Benz, or which corre-
sponds to an equivalent quality standard. Brake
fluid which has not been approved for
Mercedes-Benz vehicles or which is not of an
equivalent quality could affect your vehicle's
operating safety.
High-performance and ceramic brake
system (Mercedes-AMG vehicles)
The AMG brake systems are designed for heavy
loads. This may lead to noise when braking. This will depend on:
RSpeed
RBraking force
RAmbient conditions, e.g. temperature and
humidity
The wear of individual components of the brake
system, such as the brake pads/linings or brake
discs, depends on the individual driving style
and operating conditions.
For this reason, it is impossible to state a mile-
age that will be valid under all circumstances. An aggressive driving style will lead to high wear.
You can obtain more information on this from a
qualified specialist workshop.
New and replaced brake pads and discs only
reach their optimum braking effect after several
hundred kilometers of driving. Compensate for
this by applying greater force to the brake pedal.
Keep this in mind, and adapt your driving and
braking accordingly during this break-in period.
Excessive heavy braking results in correspond-
ingly high brake wear. Observe the brake system
warning lamp in the instrument cluster and note
any brake status messages in the multifunction
display. Especially for high performance driving,it is important to maintain and have the brake
system checked regularly.
Driving on wet roads
Hydroplaning
If water has accumulated to a certain depth on
the road surface, there is a danger of hydro-
planing occurring.
For this reason, in the event of heavy rain or in
conditions in which hydroplaning may occur,
you must drive in the following manner:
Rlower your speed
Ravoid ruts
Ravoid sudden steering movements
Rbrake carefully
Driving on flooded roads
!Do not drive through flooded areas. Check
the depth of any water before driving through it. Drive slowly through standing water. Oth-
erwise, water could enter the vehicle interior
or engine compartment. It can then damage
the engine's or automatic transmission's
electronic components. It can also be sucked
in by the engine's air intake connection and
cause engine damage.
Winter driving
GWARNING
If you shift down on a slippery road surface in an attempt to increase the engine's braking
effect, the drive wheels could lose their grip.
There is an increased danger of skidding and
accidents.
Do not shift down for additional engine brak-
ing on a slippery road surface.
GDANGER
If the exhaust pipe is blocked or adequate
ventilation is not possible, poisonous gases
such as carbon monoxide (CO) may enter the vehicle. This is the case, e.g. if the vehicle
becomes trapped in snow. There is a risk of
fatal injury.
If you leave the engine or the auxiliary heating
running, make sure the exhaust pipe and area
around the vehicle are clear of snow. To
ensure an adequate supply of fresh air, open a
148Driving tips
Driving and parking